Unicorns and Rainbows

Hi Everyone! Need a little cheer?  Well it’s all unicorns and rainbows here today!  I pieced together Lori’s new Rectangle Pop Up Card Unicorn (SVG, Silhouette) for a friend’s birthday, and I think it’s one of the cutest little cards I’ve ever made.  Take a peek…


Doesn’t that just make you smile?  Lori’s Rectangle Pop Up Card Tutorial on YouTube is easy to follow, you’ll be piecing these cards together in no time! This card also fold flat for mailing, and fits into a 6″ square envelope with plenty of space to account for the thickness of the layers.

So if you know of someone who could use some rainbows, I highly recommend sending them one of these cards!  That’s it for me today, thanks for stopping by to peek!

BLOG | INSTAGRAM

Unicorn Impossible Birthday Card

Hello everybody, Marcia here today. I have a ton of family birthdays coming up. Since we are still not gathering until more of us can get vaccinated, I wanted to get some birthday cards made to get off in the mail. This Unicorn Impossible Birthday Card (SVGSilhouette) caught my eye for my niece’s daughter. She is seriously into unicorns right now. I created this with a rainbow selection of glitter cardstock and used a pink cardstock base.

These are fun interactive cards. When you twist them the center pops up, yet they fold flat for mailing. You can use the birthday sentiment that comes with the card or create your own sentiment.  For an assembly tutorial, see Lori’s YouTube Channel here.

There are lots of impossible cards in Lori’s shop. Send one to someone you know who could use a little pick me up right now. Thanks so much for stopping by.

~Marcia

March 2021 Kit of the Month

We have a brand new special for the entire month of March! You can get this Free Kit of the Month with any $20 purchase (Purchase must be in one transaction.) Simply add the 2021 March Kit of the Month to your shopping cart along with ANY $20.00+ purchase from the SVG Shop and this file is yours FREE. Be sure to use Coupon Code: MAR21KOTM (case sensitive) at checkout. This offer is good through March 31, 2021.

(Your cart must reach at least $27.95 before the coupon will be applied and then $7.95 will be subtracted from your total at checkout. The files will be available for immediate download after you pay for your order by visiting MY ACCOUNT>COMPLETED ORDERS>ORDER DETAILS inside of your account. Only one discount code per order allowed.)

(These downloads include SVG files that may be used with Cricut Explore, Silhouette (Designer Edition upgrade required), Eclips, Brother Scan and Cut, and any other software that will open SVG files.)

Thanks for visiting the blog today! Please let us know if you need any help with your files. We want to make sure everyone is happy with their purchase. Have a great day!


Gnome Shamrock Box Card Tutorial

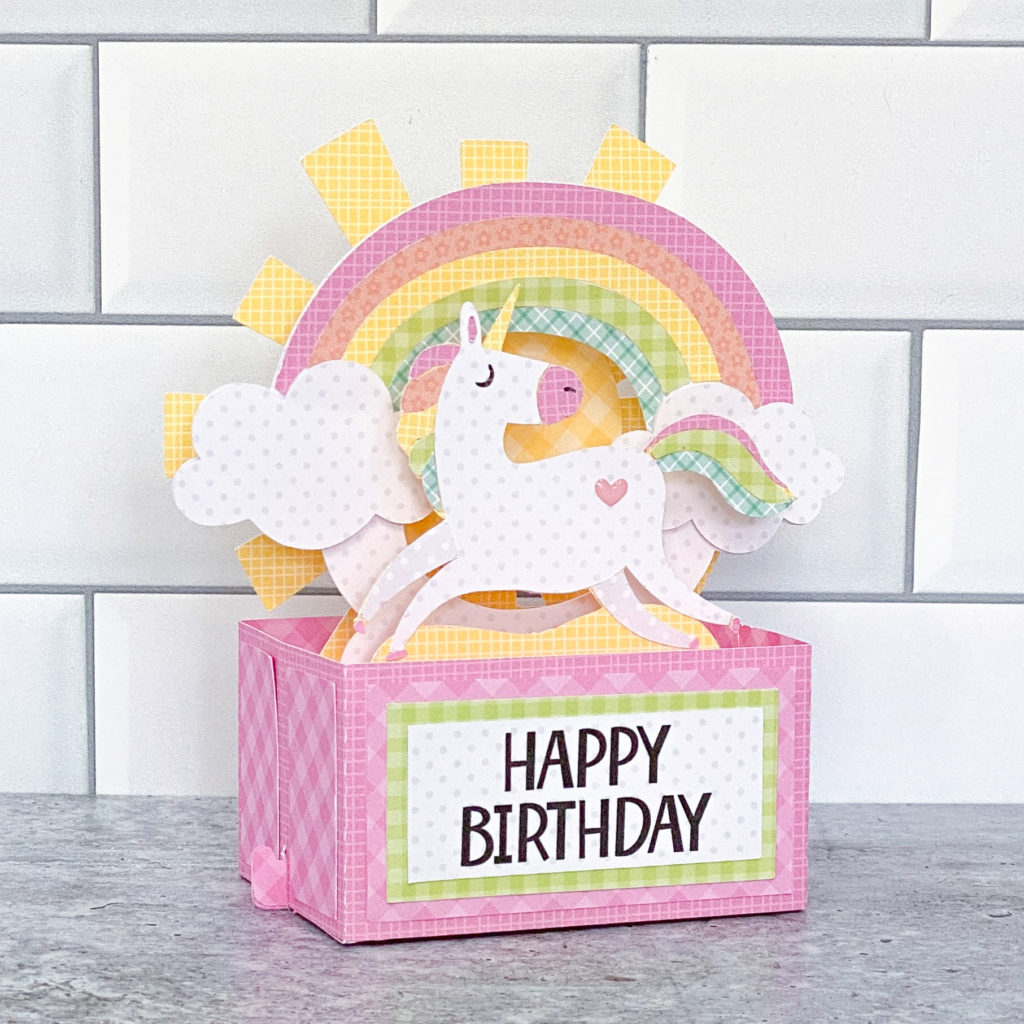
Hi there friends! Today I am showing how I made the Box Card Gnome Shamrock (SVG, Silhouette). I was able to make four of these little guys in no time.

I cut all of the elements out of  80lb cardstock. For the pieces that have grass I had my machine do a second cut before removing the cutting mat from the machine. On a Cricut all you have to do is hit the C button again once the first cut is complete and before you take the cutting mat out of the machine. On Silhouette, you can set a double cut in the Send panel.  Doing the second cut always saves me time. I do not like to weed paper, so frustrating.

Once all my pieces were cut I inked all the edges to add some dimension. I also ran all the small pieces through my sticker maker.

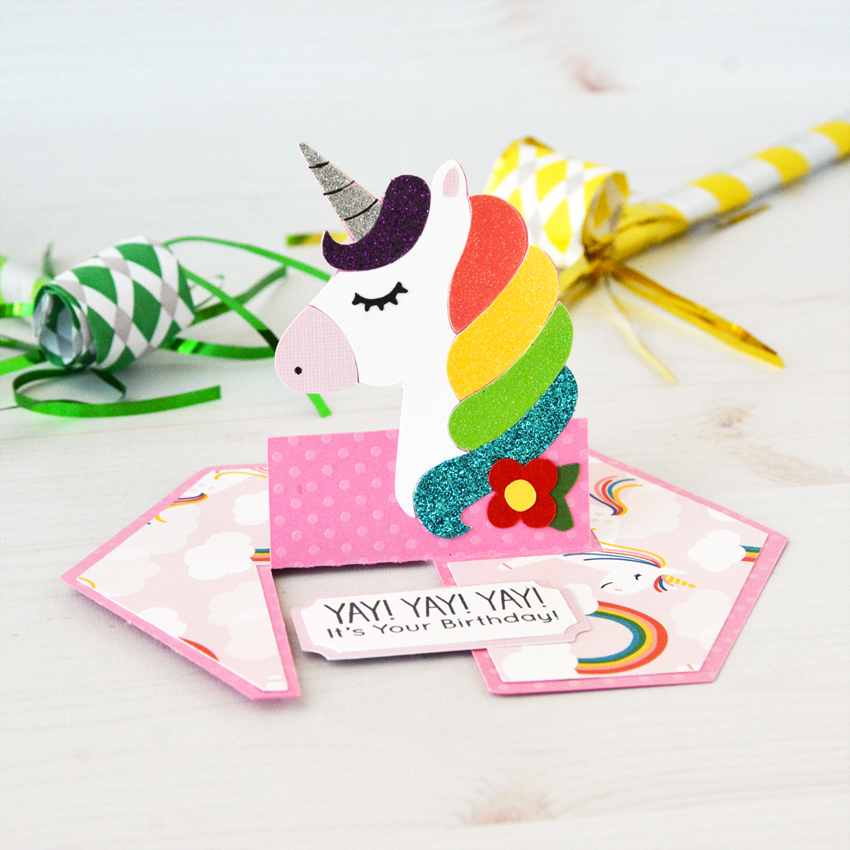
For the gnome insert I glued the hat into place first and worked my way down with the beard, pants, and shoes. Then I added the nose at the center of line where the hat and beard meet. Then I attached one of the small shamrocks and hands. Also don’t forget the little ball at the end of his hat.

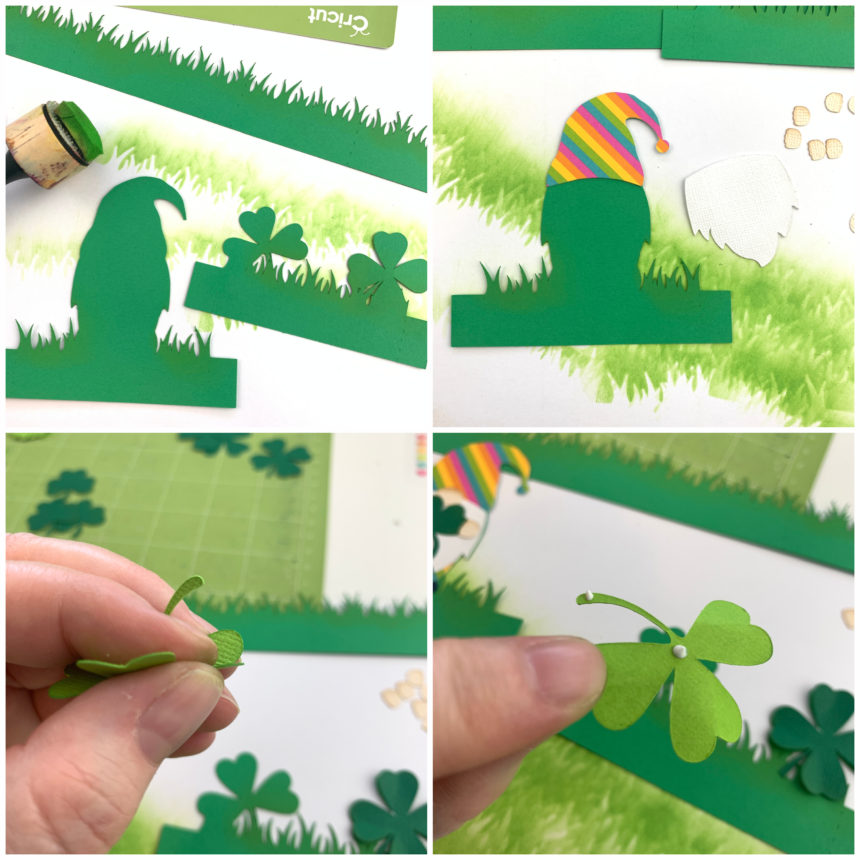
I wanted to give the shamrock insert a little more dimension so I gently folded the petals of the shamrocks then applied glue to just the centers and the very end of the steam and glued into place on the insert.

The long strip of grass is for the box. I folded all of the score lines in a mountain fold. Making sure all of my inking was on the out side of the box. Then I add glue to the tab and created the box.

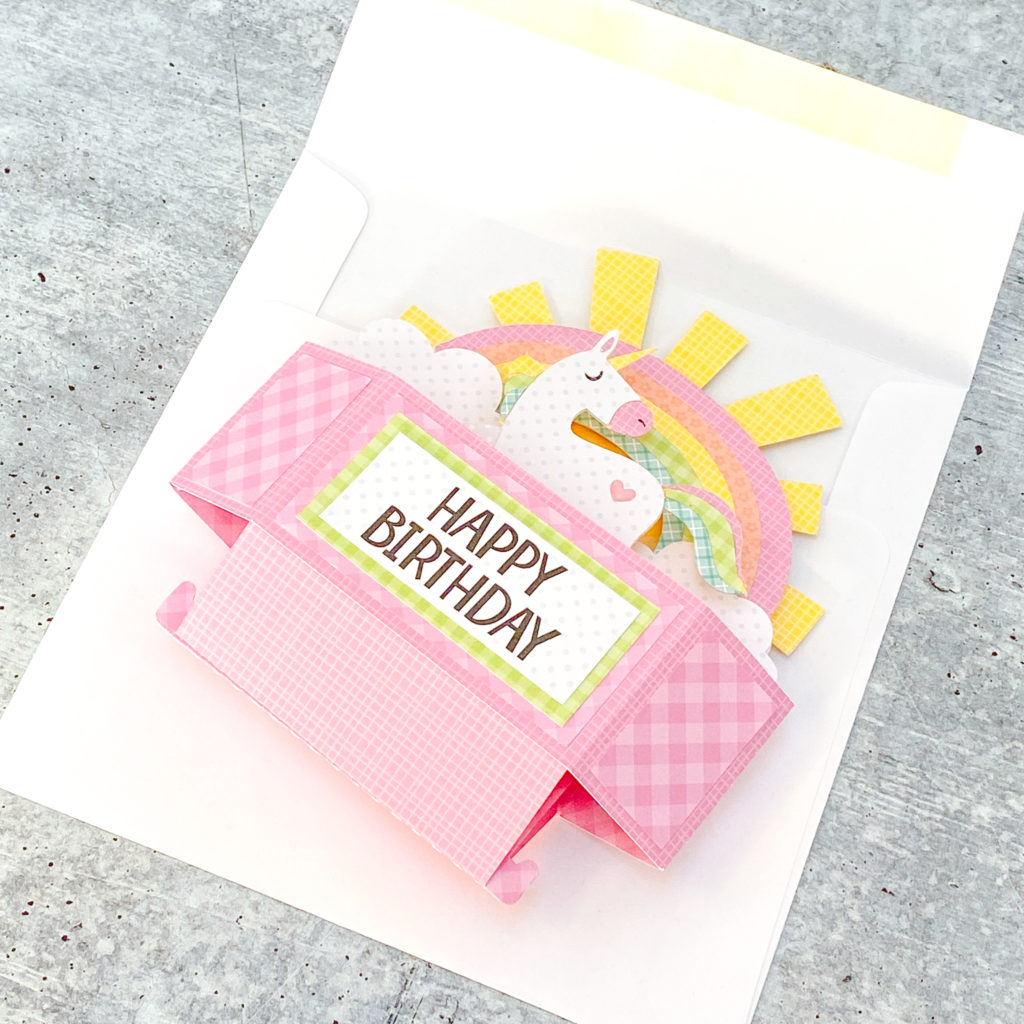
For the inserts both tabs are valley folds. I glued the shamrock insert into place first. I lined up the edge of the tab  against the front and bottom of the box. Then before the glue sets fold the box flat to make sure it will lay flat for mailing.  I then glued in the gnome insert into place by lining up the bottom edge of the tab with the bottom edge of the box at about the center of the box. I also folded the box card flat before the glue set to make sure it would fold flat.

Once the inserts were in place I added the sentiment to the front with the remaining shamrock. Now he’s ready to brighten someone’s day! Thanks for stopping by!

Brandie

New Spring Projects

There are some fabulous new Spring themed projects in the shop this week!  There are some Shaped Box Cards, Rectangle Pop Up Cards, Shaped cards and even a little 3D truck!  Take a peek.

Box Card Truck Front End Easter Bunny (SVG, Silhouette )
Tutorial

A2 Easter Bunny Shaped Card (SVG, Silhouette)


Rectangle Pop Up Card Arbor (SVG, Silhouette)
Tutorial

Box Card Envelope St. Patrick’s Day (SVG, Silhouette)
Box Card Envelope Easter Bunny (SVG, Silhouette)
Tutorial

3D Pickup Truck (SVG, Silhouette )
Tutorial Coming Soon

These projects are perfect to send to friends and family this spring or even to brighten up your own home.  And they are 25% off in my SVG shop this week!

Have a great day!