Tags… not just for gifts anymore!

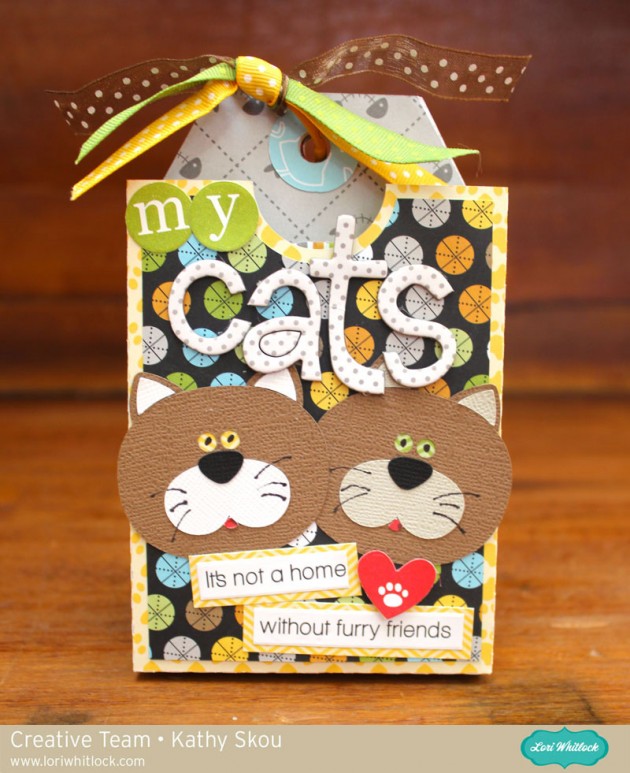
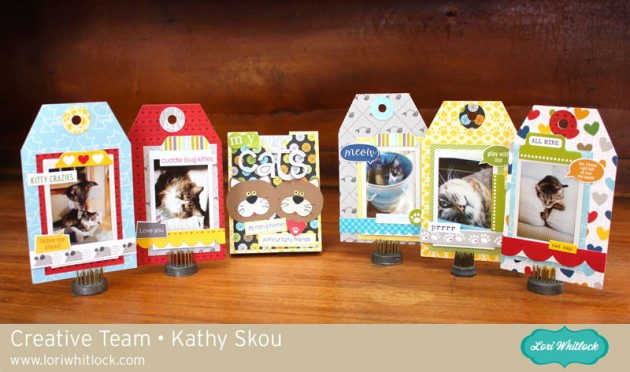
Hi Everyone, it’s Kathy today with a fun, new way to use one of Lori’s files!  As soon as I saw the Gift Tag Set (here in the Silhouette Store) I thought that it would make a fun Mini Album!  The tags are the perfect size for smaller photos including those adorable Instax photos!  Take a peek at what I created….


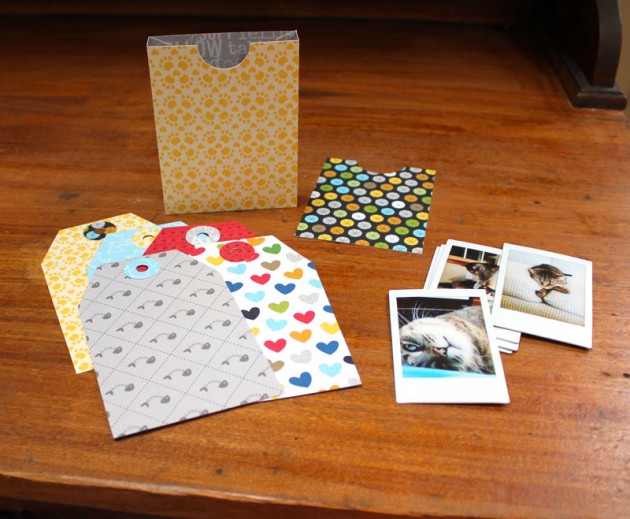
I started by cutting the file for the box and tags and assembling them.  I then printed out some fun Instant pictures of my kitties.

(A little hint when choosing a patterned paper for your box… make sure that the print looks ok upside down!  Otherwise the back of your box will have the pattern going the wrong way!)

To decorate the front of my box, I used pieces from Lori’s Cat Belly Box (here in the Silhouette Store) to make my kitty faces… and added some stickers and alphas from the collection I used.  On to creating my “pages”… I simply added my pictures and some embellishments to each Tag, and gathered them all together with a ring and some ribbon!  It went together so quickly!

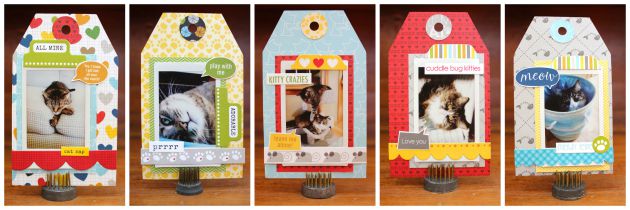
Here are some close-ups of the Tag Pages…

You could make a quick and easy mini using the Gift Tag Set  to showcase some vacation photos or maybe a little brag book for a new mom or grandparent!  It goes together very quickly and the results are so fun!  That’s it for me today, thanks for stopping by!

Permanent Vinyl Tutorial with Kathy

Hi Everyone!  It’s Kathy today with a fun tutorial using Permanent Adhesive Vinyl to customize some wine glasses!  We have some good friends with a pool who gave us an open invitation to swim this summer!   I wanted to give them a little something as a thank you for their generosity.  I found these acrylic wine glasses at HomeGoods and thought they’d be the perfect gift!

It was so simple to add the little fish from Lori’s Island Paradise Set (here in the Silhouette Store).

1.  I started with some Acrylic Wine Glasses (good for the pool area, they don’t shatter!) and some colorful permanent (outdoor) vinyl sheets.

2.  Load your design onto the virtual mat and size it for your object.  I added a rectangle around them to make it easier to remove the unwanted pieces of vinyl from around the design without wasting vinyl.  Change the cut settings to Vinyl. (blade depth of 2)

3.  Place the  vinyl onto the mat and feed it into the Cameo.  You can omit the mat if you’re using a 12″ sheet (choose load media), but I’m used to using my mat when I use smaller pieces of vinyl.

4.  Once the design is out, peel  away the unwanted pieces of the vinyl.

5.  I cut the eyes from white and black vinyl and peeled the back off the vinyl and added them to my fish.  It was easy to do this with simple, little pieces.  I thought it would be easier to add the eye layer before placing the fish on the glass.  For more complex or intricate designs you would want to use transfer tape to add any layers.

6.  Transfer tape makes it easy to place a design on your object.  First cut a piece about the same size as your design.  Peel one edge of the tape from the backing and place the tape on the edge of the vinyl backing.  Peel it off, while pressing it over the design.

7.  Once the back is completely off, rub your scraper over the design to make sure it all sticks to the tape.

8.  Peel the tape off, the design should come with it.  If it doesn’t, press it back down and go over it again with your scraper.

9.  Place the tape with your design over the glass.  Starting from the center of the design, start pressing onto your glass.  Move outward, pressing out any air bubbles.  Once the design is down rub over it with your fingers again to make sure it’s on securely.

10.   Slowly peel the transfer tape off the glass.

I’m really happy with the way they turned out!  It’s such a nice way to personalize a gift!  You could also do monograms!

That’s it for me today!  Thanks so much for stopping by!

Father’s Day Gift Idea

Hi everyone!  Corri here today sharing my take on Lori’s Tall Triangle Sides Box.

I love the look of this fun box!  It’s very easy to put together but has such a unique shape.

I used paper from the Echo Park -Jack and Jill Collection (Jack) and embellished with some stickers from the collection and a piece from the ephemera pack.

This would be a great way to give Dad a gift card or other small gift.

Be sure to visit Lori’s SVG Shop  for more great boxes and gift card holders to make your Father’s Day gift giving easy.

A Printable Heat Transfer Material Tutorial

Hi everyone, Cathy here with you today to share a printable heat transfer material tutorial with you!  I chose some super cute Lori Whitlock files to create an adorable little dress for my grand baby.  First wash your material and dry.  Then measure your your material and decide how big you want your design to be!  My design is about 6 inches wide by 4 inches.  Open up your Silhouette Studio and change your design size to 8 1/2 x 11 and add your design!

Here you can see the basic of the Owl Branch file.

Next change all of your line colors and fill colors.

Next I pulled the design together, just layer all the pieces together.  I also added some of Lori’s flowers and duplicated one of the hearts, making it bigger. These added more color and interest to the bottom of her dress.

After you have your design all set to go, add your registration marks and send through your printer.  As per the directions on the Printable Heat Transfer Material for dark colored fabrics, do not mirror the image, (you do mirror the image of the transfer material for light colored fabrics).

Once your design is printed, you are ready to load your design into the Silhouette.  Make sure to add cut lines just to the edges of your design.  Turn off all the other cut lines, you just want the outside edge.  My blade was set on 4 and my speed was set on 4 also.  Next peel the printed image off the backing and place it printed side up on your project.  Cover your image with a dish towel and with an iron set on cotton setting, press down on the image for 15 to 20 seconds.

I sewed on a couple of buttons for just a bit more fun!  She looks adorable in her Lori Whitlock designed dress!

Thanks for joining us today!  I hope you enjoyed this tutorial!

~Cathy

click on the file pictures below to go to the designs on the Silhouette Store.

Graduation Gift Ideas with Traci

Hello Lori fans!  It’s Traci and I can’t believe that we are already heading into graduation season!  It seems like Christmas and Easter just flew by.  Well if you are scrambling to get together some gifts for graduates like I am, check out these great ideas Lori has in her SVG shop.

Isn’t this box adorable?  It’s very easy to cut and assemble and will be a nice way to give a gift to someone special!  The tassel is just a bunch of Baker’s twine and since it comes in so many colors, you can match the graduate’s school colors.  In addition to being a great gift box, I think this would also be a fun table centerpiece or part of the graduation party decor!

Another little twine tassel finished off this adorable card.  The little pocket inside is perfect for money or a gift card.  What graduate would not want to receive this??

So whether you are giving a boxed gift or a card, Lori has you covered with her cute cutting files!

3d Graduation Cap Box

Graduation Card

That’s it for me today!  I hope you’ll hop over to my blog at Artsy Albums sometime and say hello!