Side Step Card Tutorial with Kathy

Hi Everyone!  It’s Kathy today with a tutorial showing how to assemble the Side Step Card – Birthday Cake.  (available here in the Silhouette Store) This is such a cute card and it’s really pretty easy to put together!  I made this one for my daughter’s birthday.

I started by cutting all of my card pieces.  I used Lori’s Perfect Princess Collection for Echo Park.  It’s such a fun, girly collection with great colors and patterns.  The sentiment piece was created using the print and cut feature of my Silhouette.  If you’re not sure how to use Print and Cut you can refer to this tutorial for Silhouette and this tutorial for Cricut.

The first step is to fold the base piece.  It looks complicated, but it’s really pretty simple.  I recommend starting with the left side of the card, then folding each “step” on the right side one at a time.

Once the card is folded, you can add the decorative strip to the left side of the step card base.

The next step is to assemble the cake pieces.  I find that it is easiest to do this before gluing to the steps in the card.

Once your cake pieces are together, add them to the steps.  The cake pieces should be centered on the steps, and the bottom of the cake pieces should be flush with the “bottom” of the step.  I also added the sentiment strip at this point.

The final step is to piece the balloons together, and add them to the left side of the card.  I attached mine with some foam tape to give them a little dimension.  I also added the number 19 to one of the balloons (it was her 19th birthday) using Lori’s Awesome Font (available here in the Silhouette Store)

That’s it for me today!  Thanks for stopping by to peek!


Dream Big Little One Light Box with Anita

Anita here with a quick tutorial to use some of Lori’s adorable phrase files in a fun and different way.  I used the file called Dream Big Little One 2 which you can find here in Lori’s wonderful shop and here in the Silhouette store.  I used files similar to these to embellish some baby onesies.  When I found this box at a craft store I knew I could make something cute with it.  I used Lori’s brand new Echo Park Collection called Perfect Princess.  It is a very sweet line.

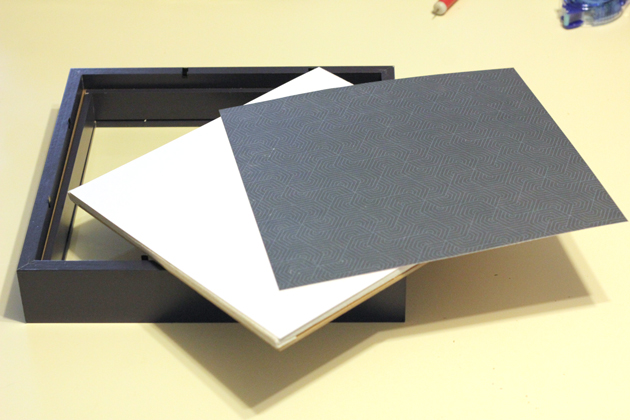
Here are the materials for this project.  I used some fun milk paint which was so soft and pretty, and some Mod Podge at the end to seal my letters, stars and moon onto the project.

Here is a photo of the top of the box.

Here is a photo of the front of the box.  You can see how cute this paper line is.

This is a photo of the top of the box with the light on.  It runs on two AA batteries.

That’s it for me today.  Be sure to check out Lori’s store for this and many other amazing cut files.

Hugs,

Anita

Graduation Box Card Tutorial by Lezlye

Hi Everyone! It’s Lezlye and  I have a video tutorial for you today, working with the Hidden Box Gatefold Card . I kept pretty basic in my design, though it would be fun to experiment with adding texture and maybe some stamping on the panels.


You can see how deep the box is, but for the sake of folding and putting in an envelope I wouldn’t stuff it too full.

The best thing is, you can customize your colors according to the graduate’s school colors. I have included the assembly video below. In the video, I used papers from Echo Park Go See Explore by Lori Whitlock.


And here is my video:

Files Used:

Gatefold Box Card Graduation Lori Whitlock SVG Shop

 Graduation Box Card  Silhouette Store

Have a wonderful day!


Birthday Candle Card Tutorial with Courtney

Hello everyone! This is Courtney Lee from Court’s Crafts here with a tutorial on this super cute Birthday Candle Card that I made for my mom!

Here are the pieces all cut out. I went ahead and had the Cricut write the sentiment on my white layer to save time.


I glued all of the pieces together and popped the flames onto the candle tops.


I popped all of the candles so that they would have some depth.


I decided to use the background stamp that is part of the Perfect Princess collection by Lori Whitlock for Echo Park.


Isn’t it fun? It may be my new favorite background stamp.


I stitched around the edge for some extra character.


I finished it off by adding stickles to the hearts and Glossy Accents to the candles.

I hope you enjoyed my tutorial for today!

Birthday Candle Card in the Lori Whitlock Shop

Birthday Candle Card in the Silhouette Shop

Tri Shutter Card Tutorial with Kathy

Hi Everyone! It’s Kathy today with a tutorial showing how to assemble the new Tri Shutter Cards.  Lori has a couple of new Tri Shutter Cards in the shop including the Tri Shutter Card Birthday  (here in the Silhouette Store) and this card, the Tri Shutter Card Baby ( here in the Silhouette Store).  Take a peek…

This card looks complicated, but it’s really easy to assemble.  I started by picking my papers, and cutting the pieces of the card.

Start by folding the base piece, this takes a little thought, but is not difficult.  Here are a couple of views of the piece once folded.

Next, add the decorative panels to the base piece.

Using the print and cut feature of your cutting machine, create the sentiment piece.  A blank sentiment piece is also included if you prefer to customize it.

Assemble the giraffe piece by layering the pieces onto the white base.  The white base then slips behind the lower section of the card base as shown and is glued in place.

To finish the card, add the BABY to the front piece.  I used some foam tape to pop this up a little.

Another great feature of this card is that it folds flat and fits into a standard A2 envelope!

That’s it for me today, thanks for stopping by to peek!