
Hello there, today I’m sharing a tutorial on this 3D witch hat project. This hat can also be purchased from the Silhouette Design Store here and also as a set in the 3D Halloween Bundle from Lori’s shop.
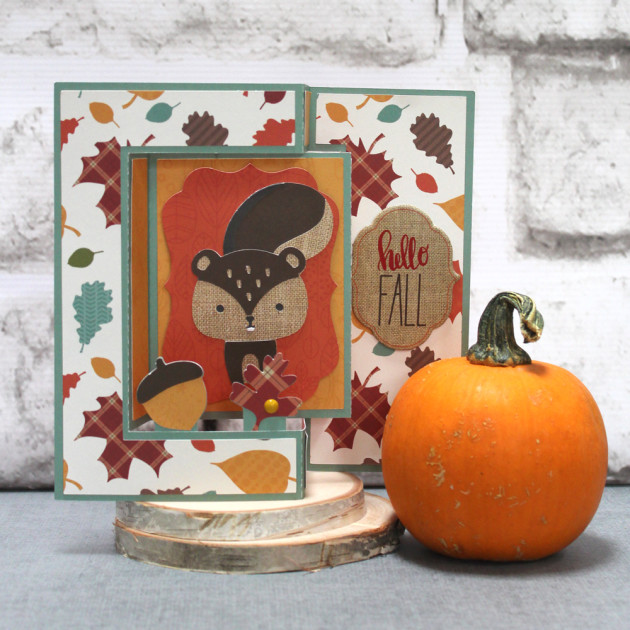
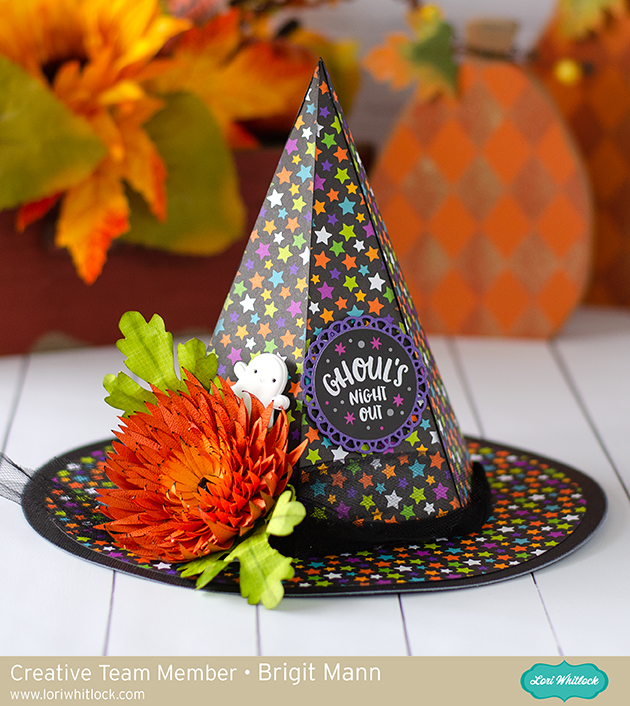 This is such a cute home decor piece to add to your Halloween collection, I really love how it came out.

The first thing I did was add all the pieces onto my mat in Silhouette Studio, this included the 3D Chrysanthemum Flower, (Silhouette Studio chrysanthemum). You will need 6 duplicates of the triangle layer and 2 duplicates of the hat top. I used patterned paper from Doodlebug Design’s Pumpkin Party I did a release compound path on the triangle layer and removed the circles. Tthis way I’d have solid pieces to show off the pretty star paper.
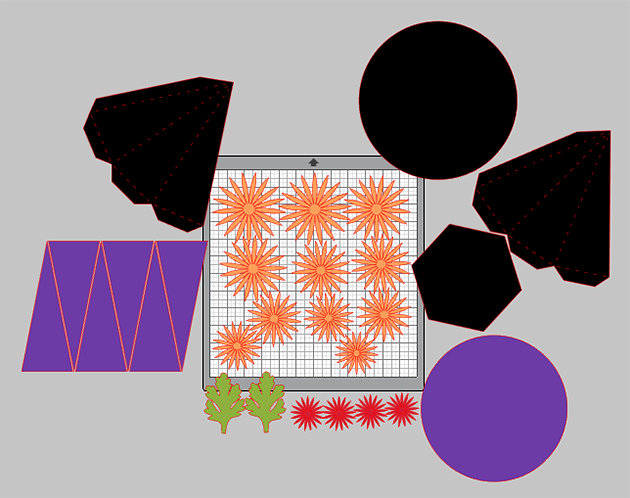
I resized the hat so I could fit one piece of the hat top with the hexagon bottom on one sheet, this saved me a black piece of cardstock, I also sized the flower so the orange color pieces would fit all on one sheet of cardstock.

I cut all my pieces out and inked the edges of the patterned paper, flowers and leaves.

I assembled the top of the hat first, this thing went together perfectly, I love Lori’s files!!
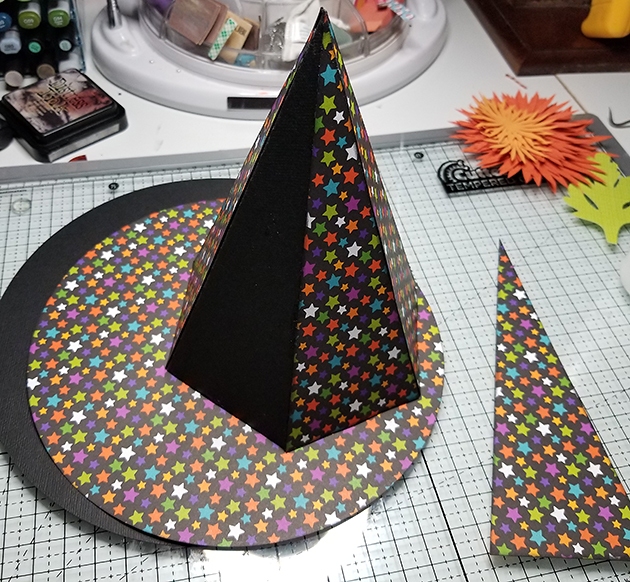
I then added the triangle layers onto the sides and glued down the circle patterned paper to the black circle rim.

For the leaves I bent them by hand and used ink to create some vein lines, I then sprayed them with some water and crinkled them by hand a little.

I used my McGill tool and mat and a paint brush to curve the flower petals up.

I Glued all the petals together and added a black jewel in the center.

To complete the look, I added some black tulle around the hat, glued the flower and leaves to the side and added the ghost clip and ghouls sticker from Doodlebug’s pumpkin party,

 The cards needed to be adjusted for the shaker element. The first thing is to remove the score line. (I was careful not move the remaining images because they are aligned perfectly for slicing.) Once the score line was deleted I selected the white top layer and the second black layer and sliced the images.
 Now that the two layer have been sliced I have two white images and two black images. I deleted the two black images and the original white image.
 I repeated the above steps for the other two cards. I then adjusted the size to be a perfect 5×7. This is now the fronts of my shaker cards.
 I created a new card base for each of the cards. I added a 10×7 rectangle and add a score line down the center. I also cut three additional 5×7 rectangles for the bottom layer of the shaker element.
 For the shaker bits I created some pockets with a fuse tool and plastic page protectors. When I create shaker pockets I like to use a scrap piece of paper to help me fuse in a straight line. I made three pockets 4 3/4×6. I trimmed the excess plastic and added the sequins and star glitter to my pockets then fused the top closed.
 I dry fit my shaker pocket with the front and back 5×7 rectangles then marked where I needed to attach the shaker pocket. I attached the shaker pocket with super sticky double sided tape. Then added two layer of craft foam around the edges of the shaker.
 I also added some black and white bakers twine to finish off my cards.


 Hi Everyone:
 Here is a screen shot of the cut files on my mat. You will need to cut four of the outer box and the inner box as noted in black bold type near the boxes cut files.
 Here are the pieces that you will have once you have cut everything for your project.
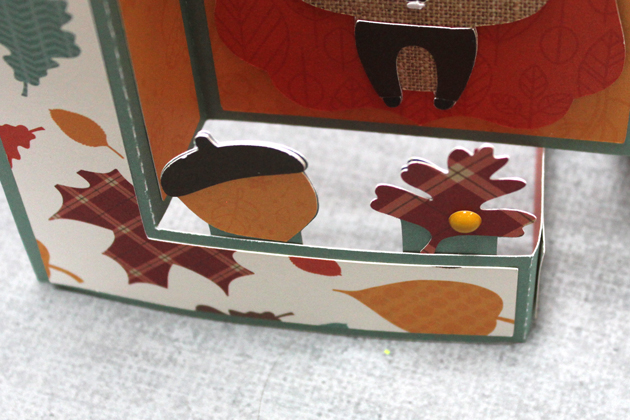
 I always start my projects by folding the score lines as you can see by the photo above.
 For the inner box you are going to want to glue the tabs from the back of the box to the side of the box.
 Next you will glue the back flap into the box.
 Next you will glue down the front flap into the box.
 Lastly, you will glue in to the box the two last flaps and your inner box is done.
 There are flaps along the bottom of the box cut file and you will be gluing the tabbed pieces together and leaving the flaps alone for now.


