Have you seen the Advent Calendar that is available in the Silhouette Store this year? Last year it was only available as part of one of the Black Friday bundles but it was so popular, that Silhouette has made it available as a stand alone project this year! It features a pyramid-shaped shadow box and 25 pre-cut triangular boxes, which fill the shadow box. Its so simple and fun, and now is the perfect time to make one! Normally, it is $39.99 – but between now & October 31, 2018, you can purchase it for just $24.99, using my exclusive code LORI and by clicking HERE.
The Advent Calendar arrives completely blank. Silhouette gives you a download card with a code that you can redeem for a set of cut files to customize your calendar. 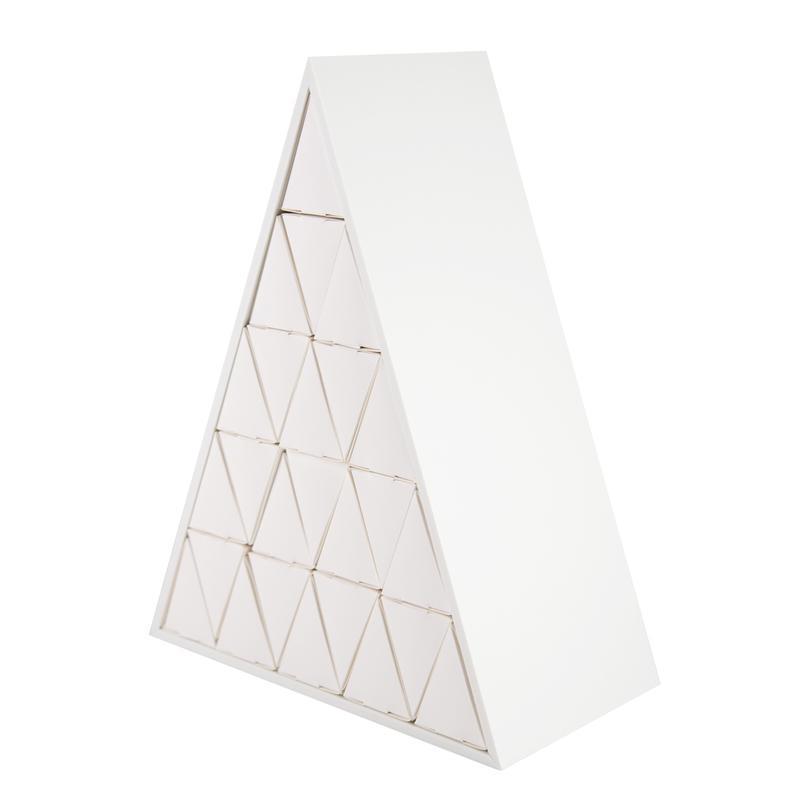 Also, included in those cut files, are 4 Christmas scenes that you can cut and install in layers behind the boxes. After all your boxes are removed, you then reveal a fun layered holiday scene!

To redeem this download card, simply open the Silhouette Design store, click on your name & this screen will appear. Then click on Redeem a Promotional Download Card — and a screen appears where you can enter the 16 digit code that is hiding underneath the silver scratch off area on the card. Once you have entered this code, click on “Apply Card”, and the designs will download to your library. 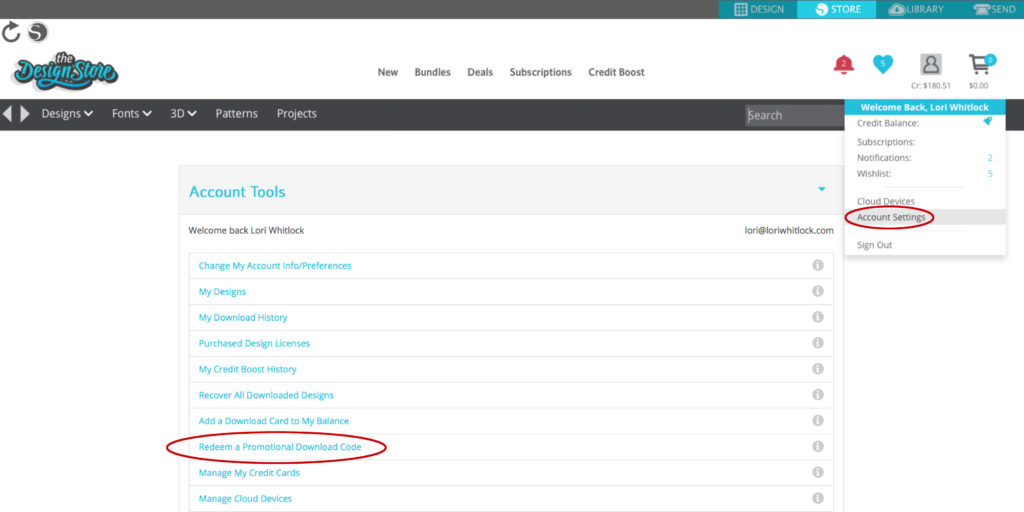
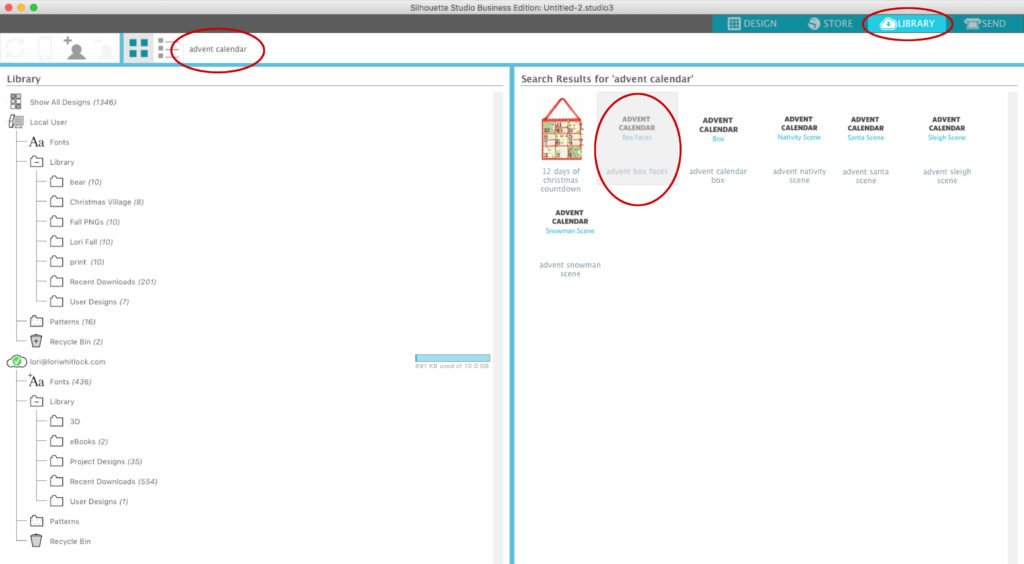
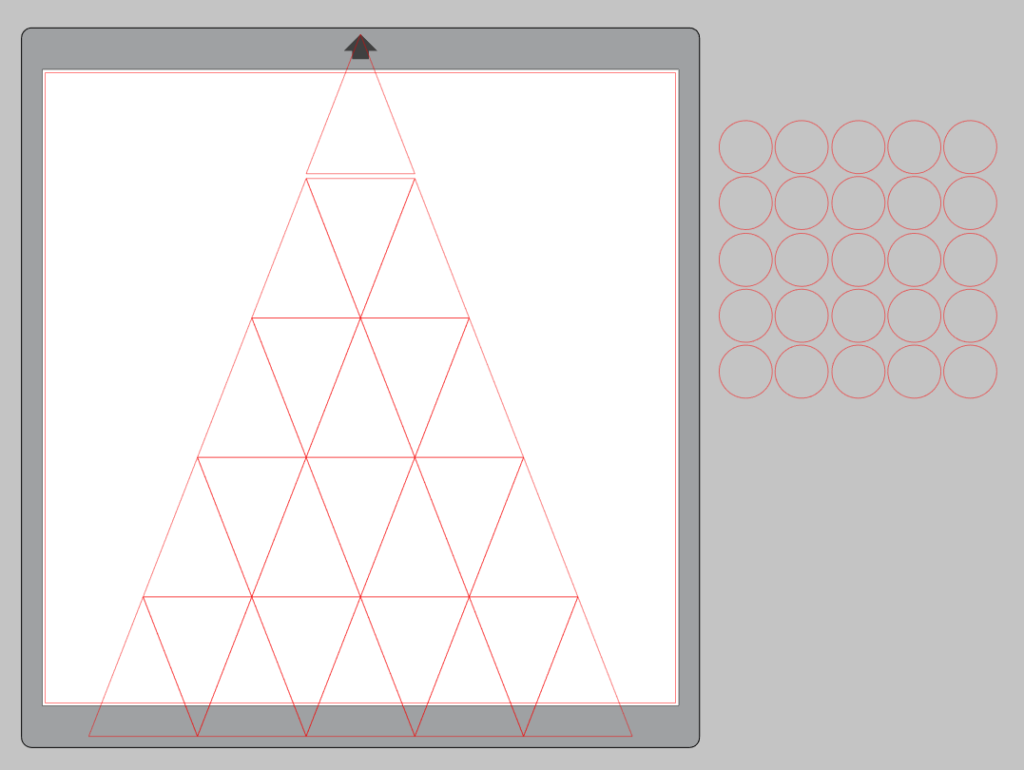
Once you’ve downloaded the files, it’s time to get started customizing your calendar! Here’s how I embellished my calendar…To start, I opened Advent Calendar Box Faces file.
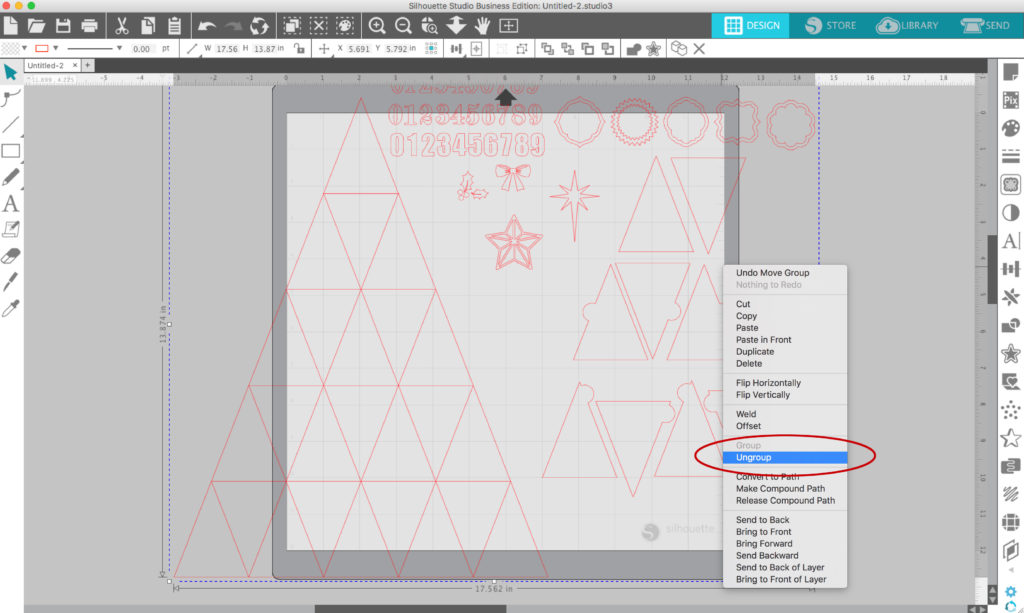
Next, I un-grouped and removed pieces all except the triangles.
I created 1 inch circles using the left tool bar, To do this, select the oval/circle shape. Then hold down the shift key and drag your mouse while holding the left mouse button. When you’ve drawn the circle, release the mouse button first and then release the shift key. You can resize the circle as needed.

I then used replicate tool to create 25 circles
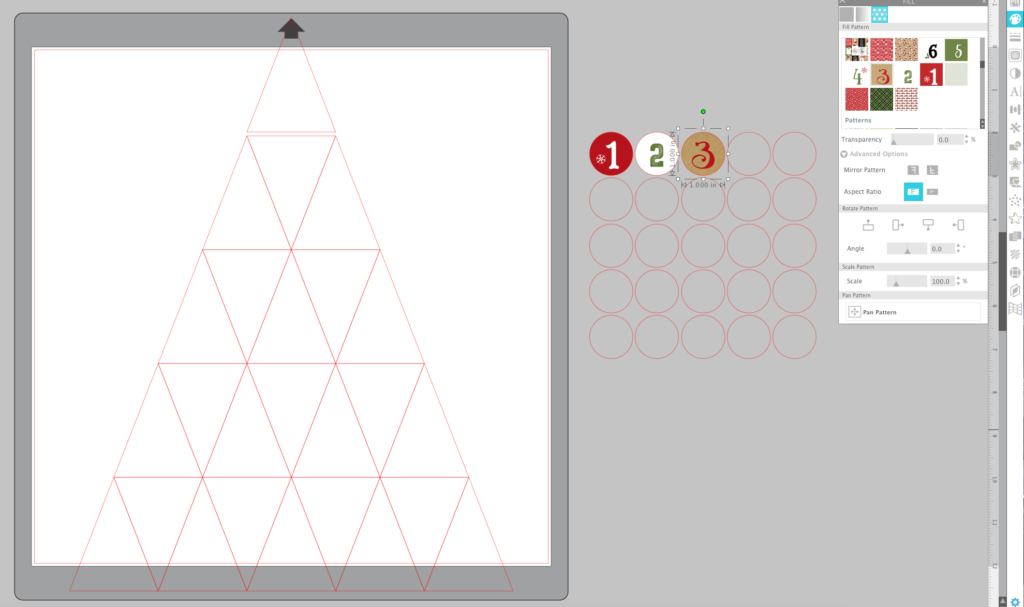
I then added the numbers to my Pattern Fills library and began filling circles with numbers. I’d like to give you the number set for FREE just for reading along this far in the post : ) CLICK HERE to download the number set. (click on the link then the three dots in the corner and click “download”)
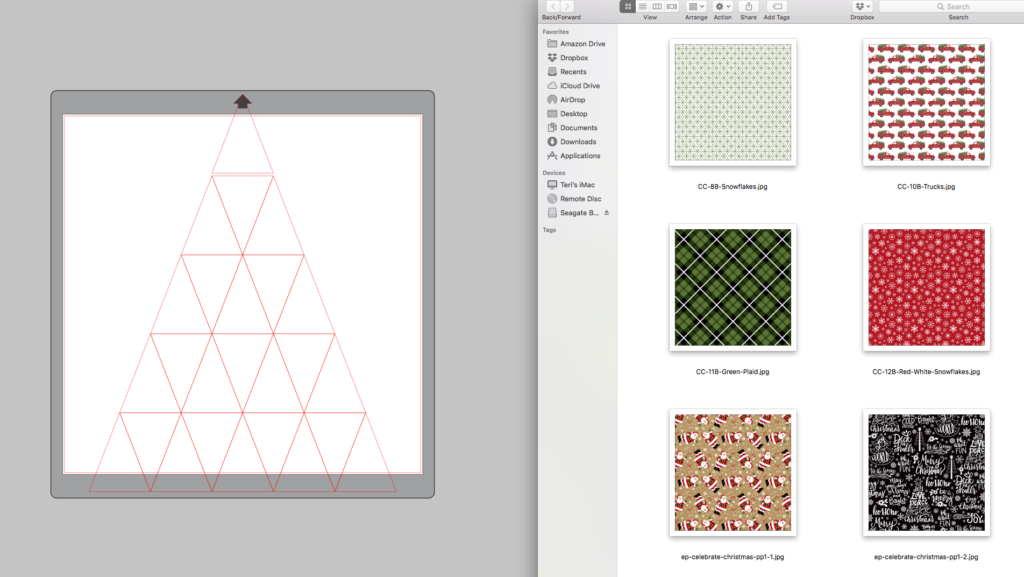
After I was finished with the numbers, I added fills to the triangles to coordinate with the number fills. Did you know you can simply drag and drop pattern into the triangles directly from your computer window? No need to upload them into your pattern library. Of course adding them to your library is great, but dragging them in from your computer window is sure handy and quick! I used the digital version of my Celebrate Christmas Collection.
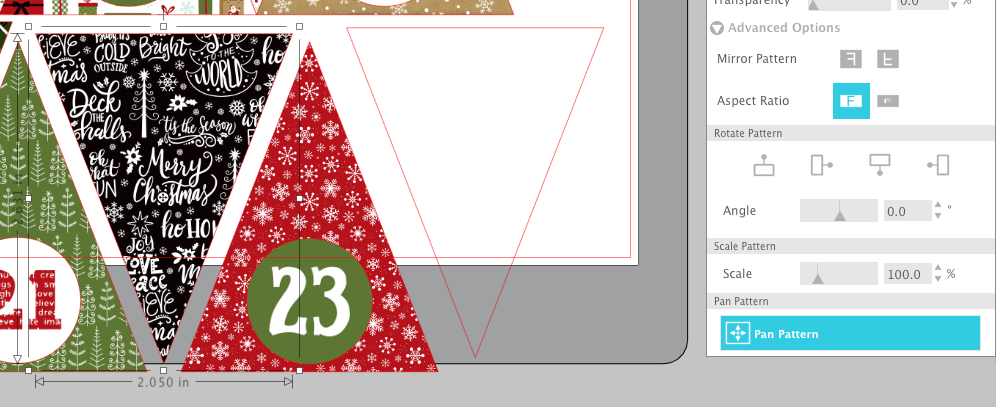
You may choose to use a portion of a pattern fill by using the pan pattern tool in the fill portion of the side panel tool bar. To move the pattern to your desired placement, hold down the black circle with the crossbars and pan the pattern to your desired placement.
After you have filled in the patterns, place your numbers in desired triangles. You can use the align tool to help you center them in each triangle.
Repeat this process until you’ve filled all 25 triangles. When complete, you will want to group each number and triangle. Then, carefully set up your triangles to print and cut. Depending on your printer, this can be done on 8½”x11″ or 12″x12″ sheets.
Basic Print and Cut Instructions:
1.Open the Page Setup Panel and change page size to 8.5×11 (or whatever size paper you’re using with your printer)
2. On the Page Setup Panel, click on the third Tab over. Set registration Marks Style: Type 1 CAMEO (or Portrait if that’s what you’re using)
3. Send the file to your printer and print on white cardstock.
4. Load the sheet of printed cardstock on your CAMEO Mat in the top left corner just as shown on your screen.
5.Click on the Send Tab.
6. Choose your material, Action = Cut, choose your tool.
7. Be sure to select the image on your cutting mat and then choose CUT EDGE.
8. Send. (your machine will read the 3 registration marks with it’s optical eye and then cut the triangles out precisely).
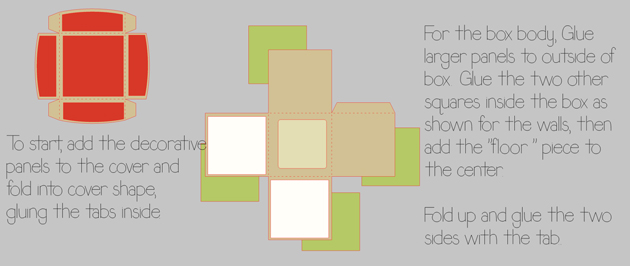
Once you have everything cut out it’s time to assemble. Simply glue the triangles to the front of the boxes. The scene in the back is numbered and has little tabs that insert into the advent calendar base making it easy to put those in place. 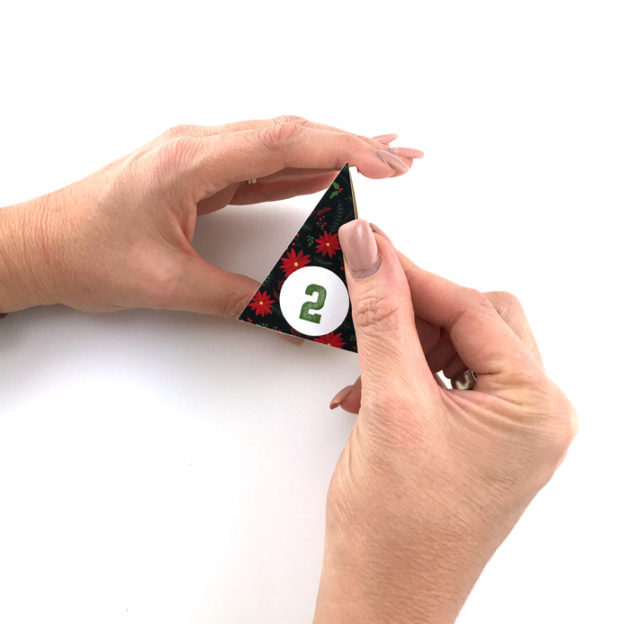
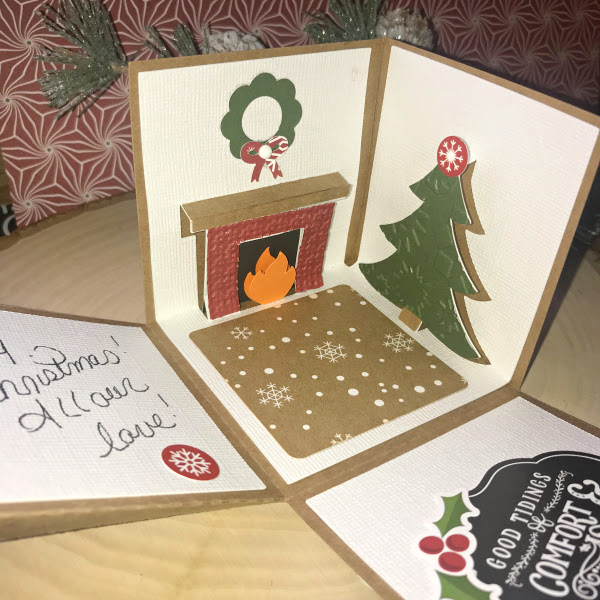
Here’s a finished view of my Advent Calendar! I’m super excited to use it this holiday season!

And, as you remove the boxes each day, it reveals a darling layered shadow box scene.

This advent calendar is such a fun way to celebrate the season! And, it was fun to customize it with print and cut and my Silhouette CAMEO. This calendar is available for just $24.99 through October 31st when you use my exclusive code LORI and by clicking HERE!


 There are a lot of pieces to this file. But I just separate by color and then cut! Easy Peasy!
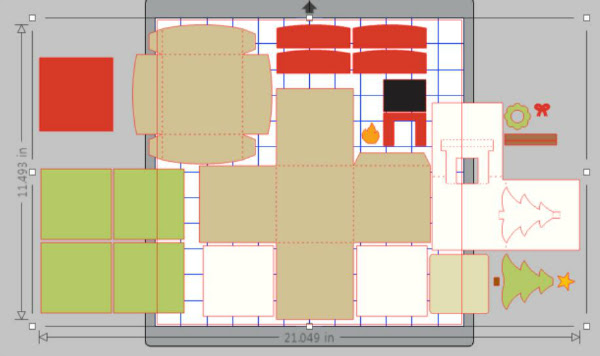
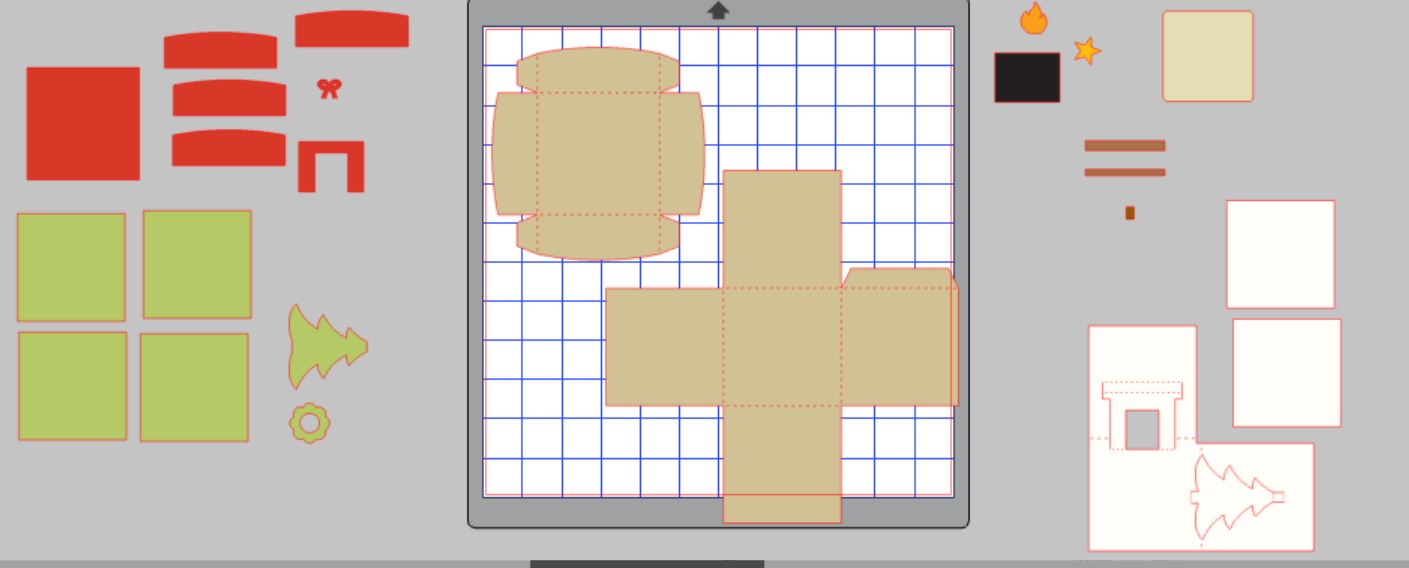
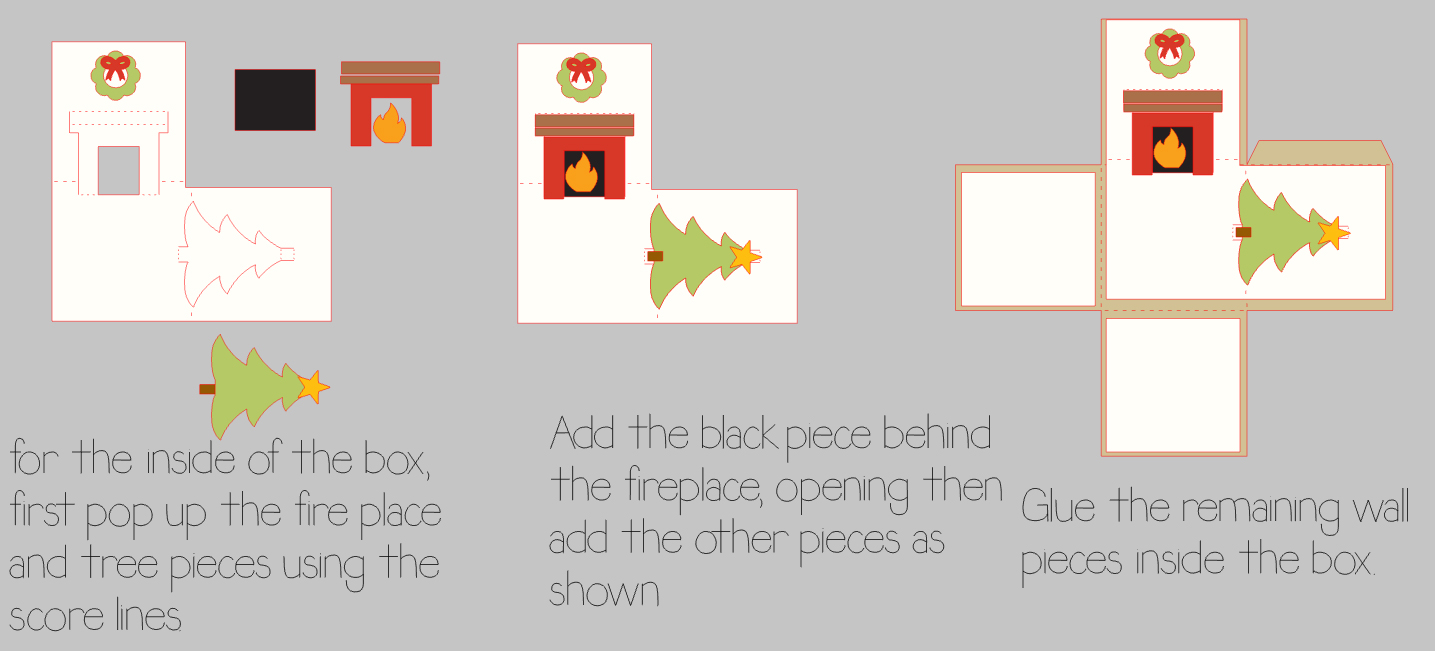
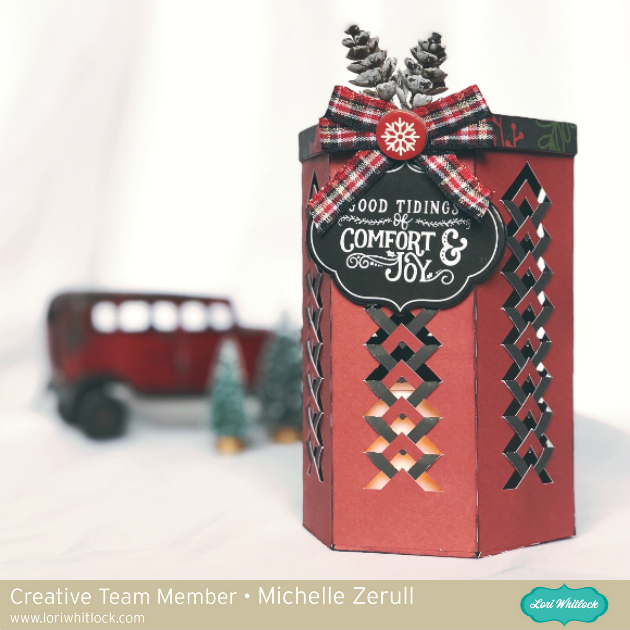 This is such a fun project. The lantern looks difficult, but it’s not. It is an easy project. Let me show you step by step, how to put it together.


