Number Lace for a Birthday Page Tutorial

Hello everyone! Traci here and today, I have a fun 12×12 scrapbook page and simple tutorial to share with you. I wanted to create a layout for a picture of my sweet grandson’s 4th birthday and I found one of Lori’s cutting files that would be perfect for it.


12x12 Birthday Scrapbook Page layout and Tutorial with numbers, a cake, and balloons

I chose her Number Lace Cutting File (SVGSilhouette). Not only did it have a number 4 on it, but I also loved the positive and negative spaces it created in the background.


Lori Whitlock Number lace Cutting File

Here’s how I made this layout … 

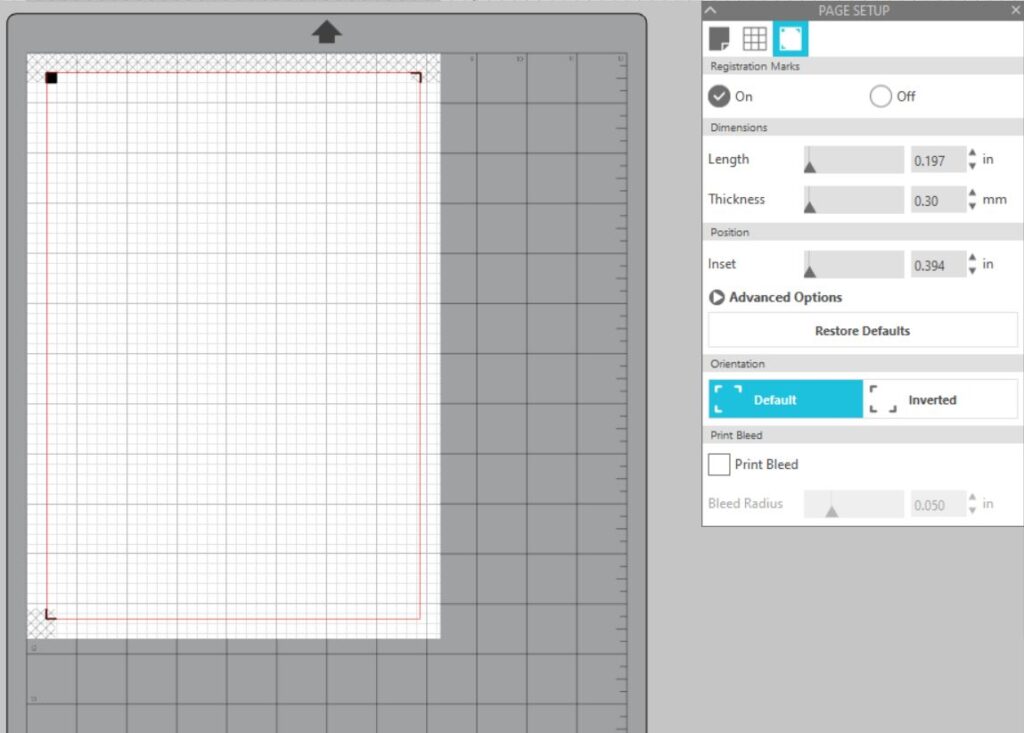
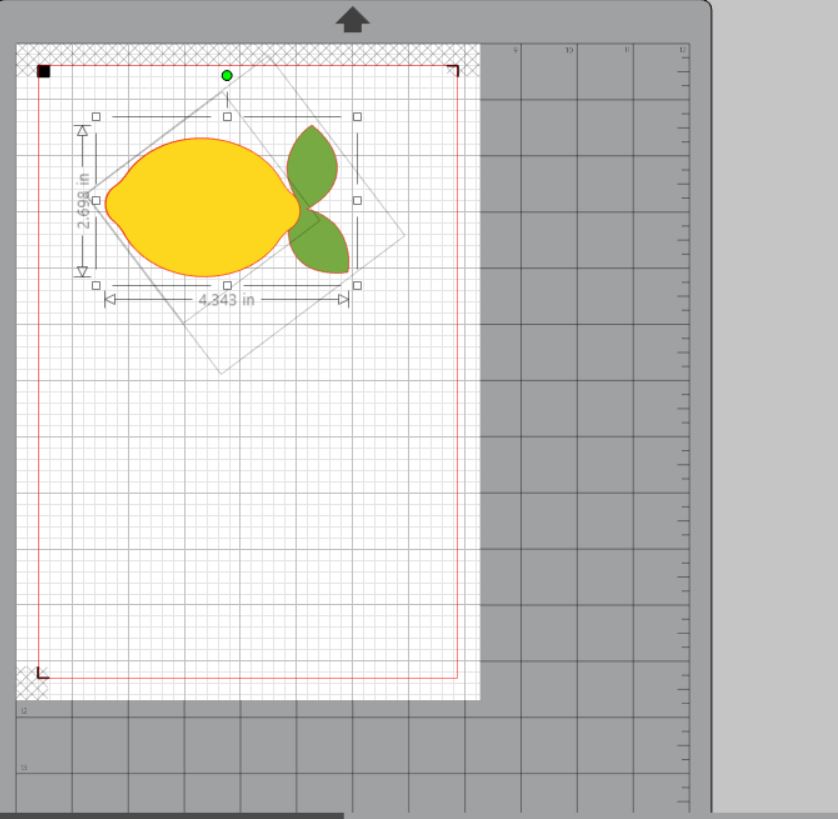
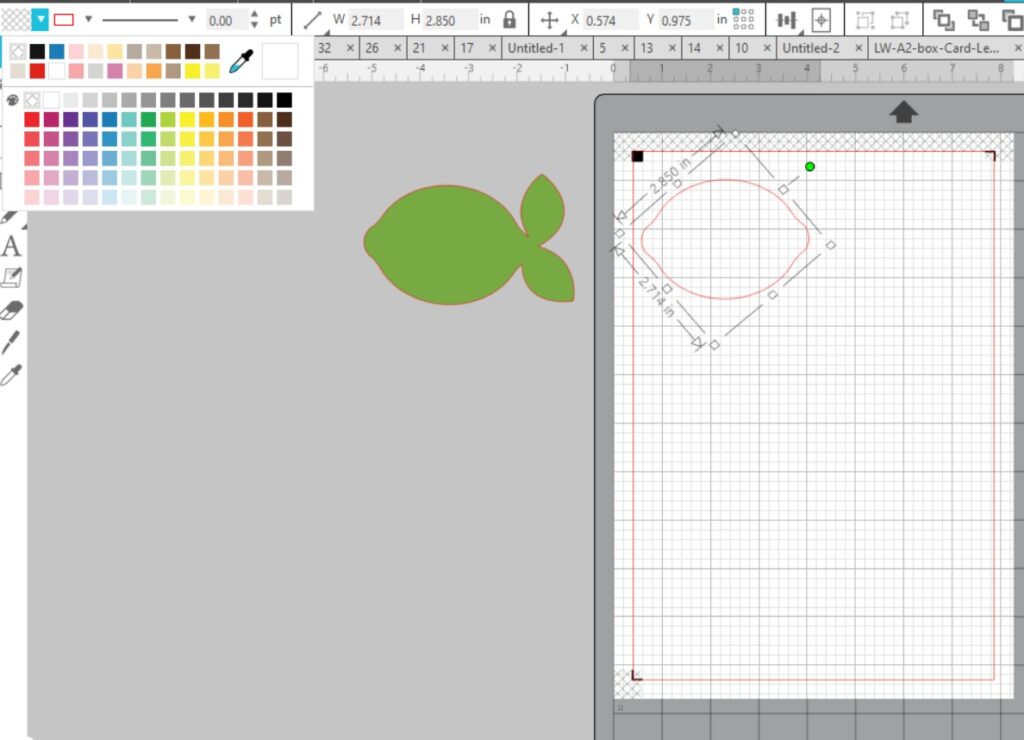
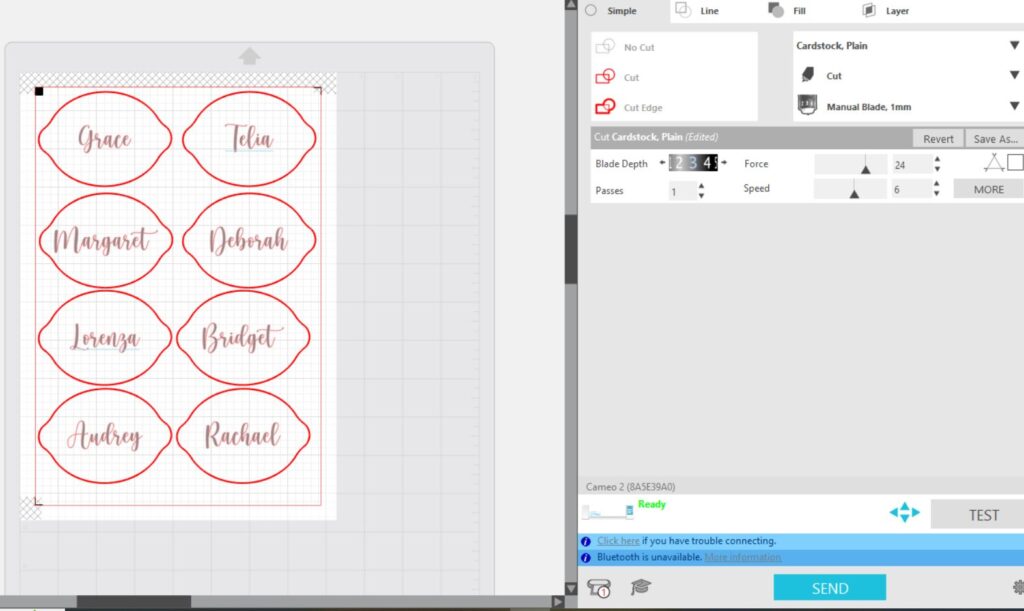
1. I added the cutting file to my mat and resized it to 10.75 x 10.75”.  I cut it out of white card stock and set that aside. 

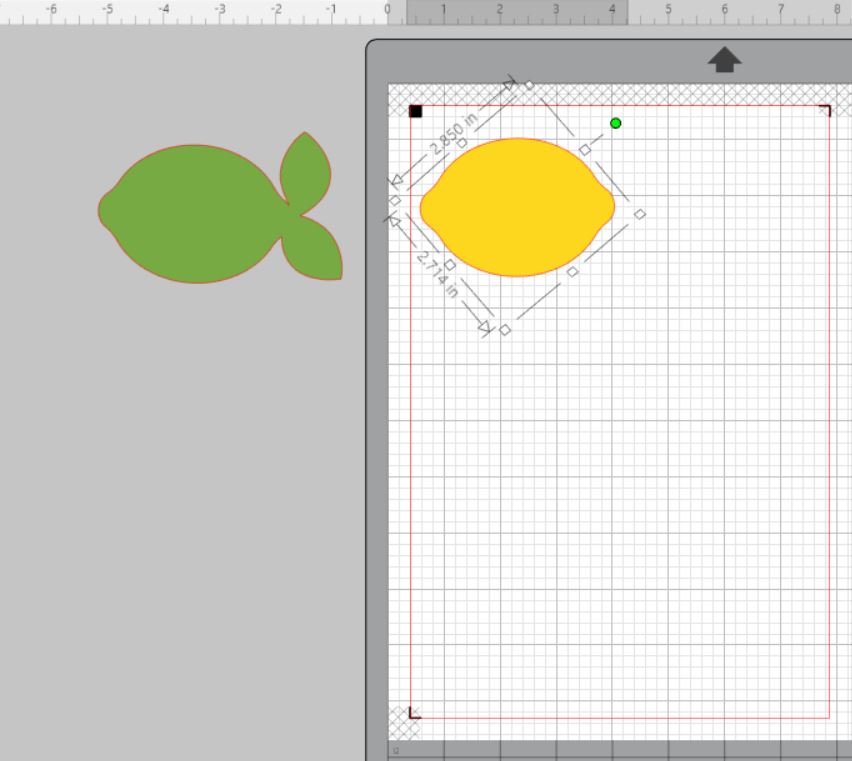
2. Next, I used the knife tool to chop down the background into smaller pieces so that I could focus in on the number 4.  I didn’t want to cut the entire background piece again just to get the 4. 


3. Once I isolated the 4 in the file, I deleted everything else and cut this section out of orange paper.


4. Then I used my scissors to trim the rest of the paper from around the number. 


12x12 Birthday Scrapbook Page Layout and Tutorial with numbers, a cake, and balloons


12x12 Birthday Scrapbook Page Layout and Tutorial with numbers, a cake, and balloons

5. Now that I had the white background and the orange number cut out, it was time to create my layout!


12x12 Birthday Scrapbook Page Layout and Tutorial with numbers, a cake, and balloons

I used the Echo Park, Vroom Collection that was also designed by Lori. I decorated my Race Car Mini Album with it and the colors and patterns were just what I was looking for. 


12x12 Birthday Scrapbook Page Layout made with the Lori Whitlock Number Lace Cutting File

I started with the orange 12×12 pattern called Ready Set Go Stripes as my base and layered the blue Winner Winner print and Ready Racers paper on top. Then, I added the white number lace sheet and I backed each corner with a yellow triangle cut from a solid in the Vroom Collection.


12x12 Birthday Scrapbook Page Layout and Tutorial with numbers, a cake, and balloons

Next, I adhered the orange 4 on top of the white 4 that’s part of the background. I cut some photo mats out of a few other papers from the Vroom Collection and I added my photo.


12x12 Birthday Scrapbook Page with numbers, a cake, and balloons

Then, I finished the layout with lots of fun embellishments. The “Let’s Go” is from the Vroom 12×12 sticker sheet. And the other birthday themed stickers and die cuts are from the Bella Blvd, Birthday Bash Collection. 

I hope this project inspires you to create something wonderful with Lori’s Number Lace Cutting File (SVGSilhouette). Until next time, happy scrapping! 😊


Blog * Shop * Facebook * Instagram * Pinterest

Big Box Card Basket Strawberries

Hello crafty friends, Noelene here today & I want to share with you a tutorial for the berry sweet Big Box Card Basket Strawberries (SVGSilhouette), from Lori Whitlock!
As most of you know, Strawberry projects are my favourite, so I couldn’t wait to make this card.
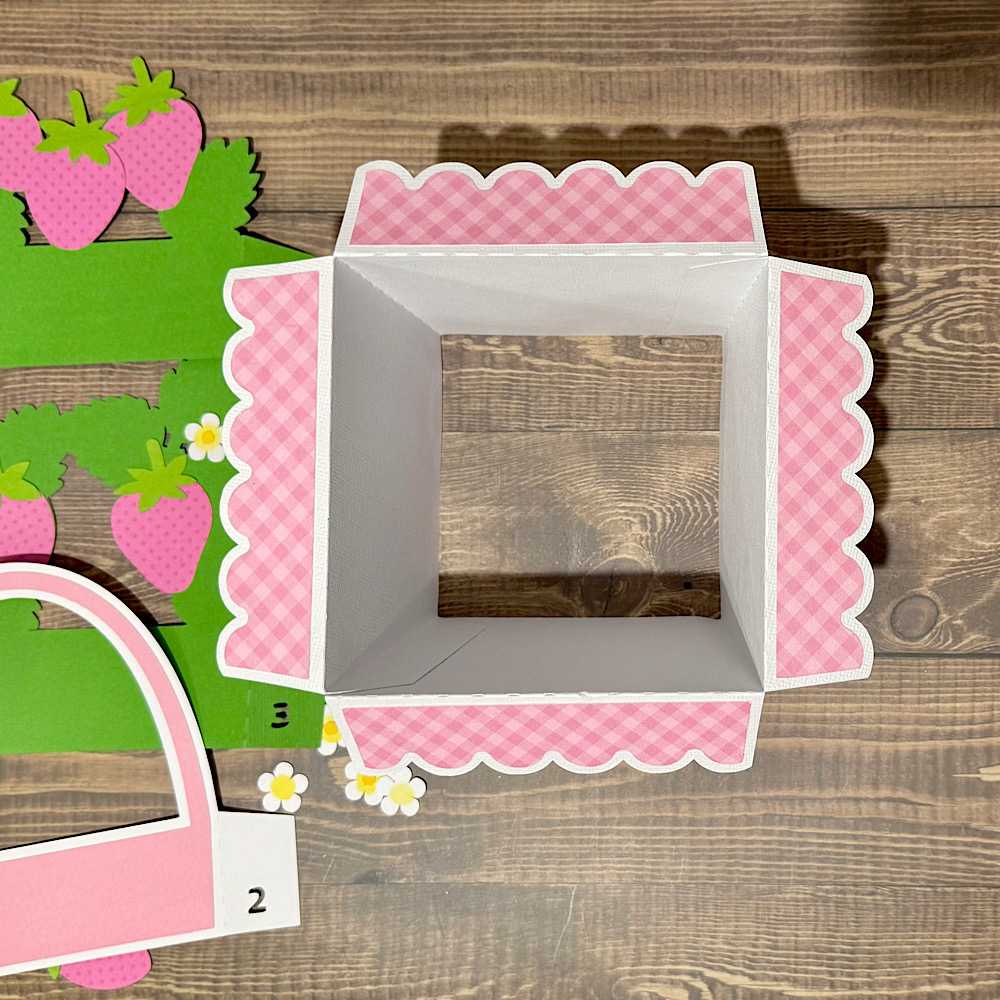
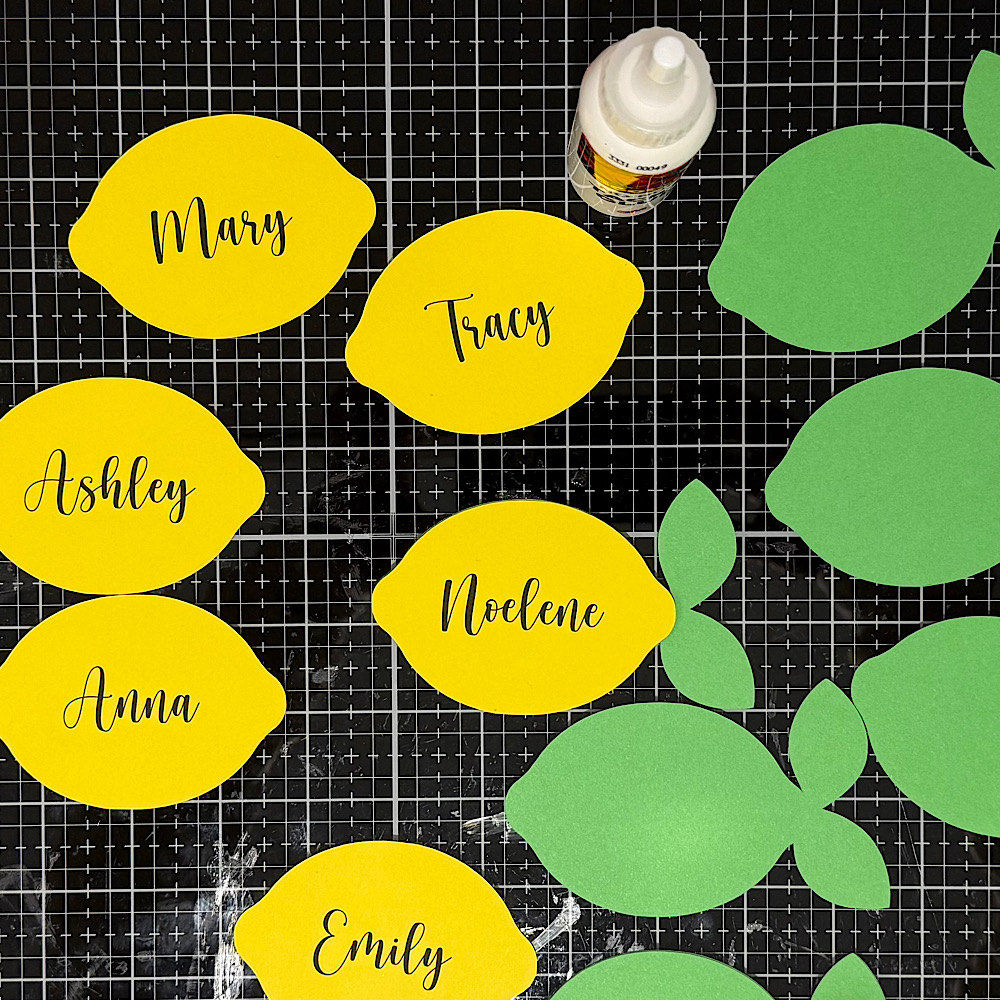
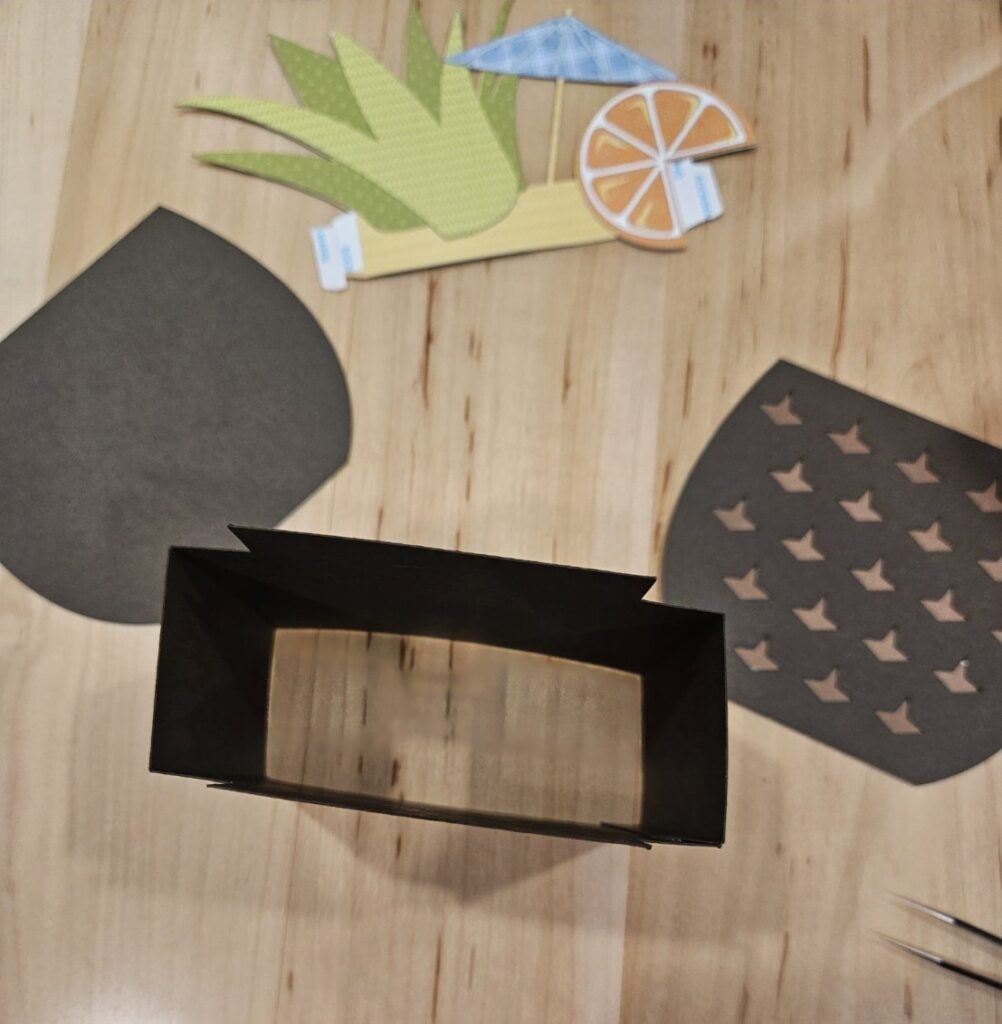
First step was to cut out all my pieces.
Next step is to layer & glue all your pieces, making sure to match correctly all the strawberry leaves to the green background panel before you glue. You will need to fold down the basket flaps then adhere the scalloped panels on the folded side down. The file comes with 2 flowers but as you will see, I cut some extra flowers to use as embellishments. I also inked the centres of my white flowers with some distress oxide before I glued down the circle centres or added the enamel dots. There are also some extra strawberries in the file, you can cut these if you wish for the strawberries to be seen from the back as well as the front. Note: make sure you flip the large strawberries horizontally if you wish to add these to the back of the card, remember you are doing the reverse side.
Now it’s time to put your box card together & assemble the basket. Start by folding down all the scored lines. Now glue the tabs on the inside of the box. I find the best way to do this is by folding the box flat to get the tabs nice & straight along the edge.
Next is to adhere the inside panels inside the box. These are numbered 1, 2 & 3. I started out by glueing number 2 first in the centre as I found this helped me space them evenly. Flatten your project as the glue dries each time to make sure the tabs adhere.
To finish off I adhered the strawberry onto the front using pop dots and embellished with some of the extra flowers. I also tied a bow onto the basket handle.
Hope you like my Big Box Card Basket Strawberries! This file can also be found in the Big Box Card Basket Bundle (SVG), which includes Big Box Card Basket Big Box Card Basket Flowers (SVG), Big Box Card Crafty (SVG), Big Box Card Basket Lemonade (SVG) & Big Box Card Basket Sunflowers, (SVG)
For more inspiration, check out my Instagram!
Thanks for stopping by!
Hugs
Noelene 🙂

Lemon Place Cards Tutorial

Hello crafty friends, Noelene here today! Recently I hosted my daughter’s Bridal Shower. She chose an Amalfi theme, so I decided to create some name place cards for seating using one of the lemons from the box card Lemonade from Lori Whitlock (SVG) (Silhouette). Now this can be done with any shaped file of your choosing. I had never used print & cut in a shaped file before, so I am going to share with you today how I went about doing so.
1. First step was to open a new page in silhouette program. Open page setup panel – Design Area Setup  -Media size A4 – Registration Marks On – Dimensions & position – slide the bars all the way to the left. This makes the printable area larger & saves paper.
2. Now open the box card file & copy & paste one of the lemons onto the page you created.
3. Enlarge the lemon to the desired size. I have enlarged mine that the yellow part of the lemon measures approx 3.5″. Now ungroup and move the green background to the side.
4. Next click on the lemon & change the colour to no colour in the colour tab.
5. Open the font panel & choose your font & size & type name. I have chosen Hello Honey.
6. Now click on the name & change the font colour to the colour of your choosing. Today I am using black.
7. We want to center the text onto the lemon. Open transform panel & drag your cursor over the whole lemon making sure you pick up the text as well then click center.
8. Then we want to click over the whole image & copy & paste until we have enough to fit onto the printable page area.
9. Then click onto the text of each of the remainder of lemons idividually to change the name. Don’t forget to center the text on each lemon after typing.
10. Once done load your yellow cardstock in printer & press print. In the print preview you will only see the text not the lemons. If you see the lemons then you didn’t change the colour to no colour in previous step 4. Now place your a4 printed paper onto your cutting mat & making sure you have chosen cut edge, cut your printed paper on your Silhouette machine.
If you need more just change the names & don’t forget you still have to center your font on each lemon.
Once all lemons have been print & cut turn off your registration marks. Move your lemons aside then drag the green back panel of the lemon onto your page & copy & paste enough to fill the page or desired amount. Now cut these.
Last step is to glue all your panels together & your done!
For more inspiration, check out my Instagram!
Thanks for stopping by!
Hugs
Noelene 🙂

Box Card Pineapple Drink Tutorial

Good morning!! Today is National Refreshment Day. This beverage holiday toasts those moments of ice, cold refreshment. So what a better time to send one of these cute pineapple drink cards?!  Today I will walk you thought the assembly. First cut allyour pieces and lay them out.

First I assembled the fruit and added score tape to the tabs. My paper is from Echo Park’s Little Things Mean A Lot collection.

Next is the base, add score tape to the tab like in the photo below.

Make your box by folding where the perforations are and adhering your score tape to the inside of the neighboring flap.

Add your dark brown piece to the light brown piece and then add both the back and front to the box making sure the small portion is on the bottom like below.

Once you have your front and back attached, fold the perforated tabs and line the top of the inset up with the top of the pineapple and adhere to the sides with your score tape.

Add the second insert and get ready to mail your refreshment!

Thanks for stopping by and happy crafting!

A “Chickens” Mini Cookbook

 Hi everyone!  I have a fun little mini album to share with you today.  I created it with Lori’s new Echo Park Chickens collection.  I used every element of this collection, from the 12×12 paper pack, the frames n tags, the ephemera, enamel dots, matching cardstock and the 6×6 pad.  How blessed I am to have all this at my fingertips to create with.


I started by choosing four patterned papers to create envelopes.  I used this envelope, Nesting Window Card Envelope in Lori’s Shop.  I cut them and assembled, just ATG tape was used to adhere.
I then took all four and used my Cinch binding machine to create the little book with a spiral binding.
After I had my pages bound I then used this fun elements sheet to make 4 mini cards to go inside the envelopes. I cut my card stock 8.5 x 4. 25 inches and scored in the middle to make the little cards.
Simple little cards, my plan is to add my daughter’s favorite chicken dish recipes to these.  Hand written is the goal.
Next, I cut four library pockets and I just adhered these with ATG adhesive as well.
Next, four tags cut from an elements page to go inside my four pockets.  Again, I will add more hand written recipes.
I adhered the library pockets onto the back of the envelopes as you can see in the following photos.


This is a darling collection and just so perfect for creating a cookbook.


Thank you for stopping by!