For the last couple of years, I have helped make or prepare birthday gifts for the ladies at my church. Last year I featured a tag from Lori Whitlock. Two years ago, I made a postcard for the gifts. I am so excited about this year’s gift. We are giving the cutest tumblers personalized with an initial. I am using a Circle Flourish Monogram for the tumblers, and I am using a sticker from the Birthday Stickers (svg, silhouette) for the the little card tag.


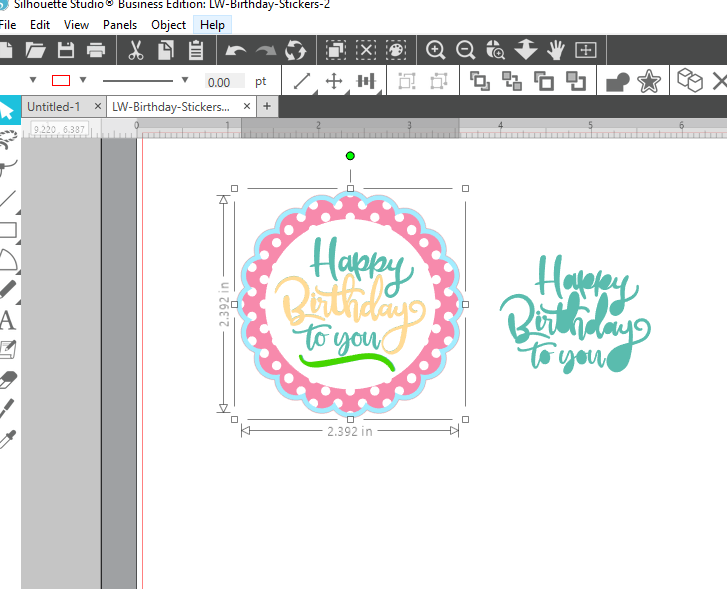
To alter this sticker, I’m going to give you a few tips. In Cricut Design Space you will first upload and open the Sticker File. Upload as an image.

Ungroup the stickers. I deleted all the stickers I am not using from the canvas.

Now ungroup again. Select each layer and adjust color as you would like. I wanted to also have the Happy Birthday to you be different colors.

Now select Happy Birthday and duplicate twice. Select one of the duplicated Happy Birthday, and Contour.

On this one, I am hiding all the words except for Birthday.

Select the other Happy Birthday. On this one I hid everything except for the flourish at the bottom.

Recolor these Happy Birthday layers by choosing a color that is next to the Line type box. Now line up all those Happy Birthday words.

Select all your layers, and click Flatten. This will make it the Print and Cut file. Now you can print and cut on paper or sticker paper.
In Silhouette Studio Software, you will ungroup the stickers, ungroup the Happy Birthday Sticker, then Release Compound Path on the Happy Birthday Words. Re color as needed, then select and Make Compound Path.

In the Send screen, make sure to select all the sticker parts, and Choose Cut Edge. Now it’s ready for Print and Cut.
I hope everyone likes the gift this year. I think they are so fun.