Hidden Binding Mini Album Apple or Pumpkin?

Happy Halloween! Traci here and today, I’m sharing a pumpkin shaped mini scrapbook that’s great for saving fall photos. I used one of Lori’s super fun cutting files called Hidden Binding Mini Album Apple (SVG, Silhouette). With some orange cardstock and pretty patterns, I turned it into an autumn themed pumpkin!


First, let’s take a look inside then I’ll explain how I made it with a tutorial below.

To create this, I cut the base out of solid cardstock and decorated it with the beautiful Echo Park, I Love Fall Collection designed by Lori. On the cover, I added a pretty 6×6 print (the small size is so cute!), a few enamel dots, an acorn brad, and the pumpkin farm sticker from the 12×12 elements sheet. 


The album has 5 pages (including the covers) and inside, I layered each one with a different pattern paper. Then, I added cute round photo mats using a 3″ scallop punch and a 2.5″ circle punch by Marvy Uchida.


I embellished the pages with stickers from the 12×12 sheet and the sticker book. For the smaller round photo mat on the right side, I used a 2″ scallop punch and a 1.75″ circle punch.


Above, I added a few more stickers, a brad, and on the right … I punched the round “thankful, grateful, blessed” circle out of one of the I Love Fall 4×6 journaling cards. I used the 2.5″ circle punch.


It’s such a pretty little album, right? Now let me show you how simple it is to make!

1. Cut the pieces out – I cut the binding pieces and 10 apple shapes out of apricot cardstock by Bazzill. Then, I cut 10 leaves out of the green I Love Fall paper and 10 stems out of the brown Fall Flowers pattern. 

2. Once those are cut, take the binding piece and fold it along the score lines.


3. You’ll end up with mountains and valleys like in the photo above. Add adhesive inside the valleys. 


4. Press the valley sides together to create the spine of the album.


5. Then, adhere the rectangular cover piece over the flat side of the folds.


6. Gather your page pieces and adhere the leaves and stems to the front of 5 left-side facing pumpkins and 5 right-side facing pumpkins. 

7. Now adhere the pumpkin pages to each of the accordion spine folds. Add one to the front and one to the back of each fold, matching the shapes back-to-back. This creates layered pages that are nice and sturdy.


8. Continue to adhere the rest of the pumpkin pages to each of the folds until the album is complete. Then it’s time to decorate!


When you’re finished, you’ll end up with a fabulous mini album that’s perfect for pictures of autumn, a pumpkin patch, fall leaves, and everyday memories. 

Lori has so many wonderful hidden binding mini album shapes. I’ve made the (haunted) house that’s perfect for Halloween, the flower, telephone, and the tag shape. I love these and they make the cutest gifts. She has even more designs in her shop, so be sure to check those out.

I hope you’ll try this fun project made with Lori’s Hidden Binding Mini Album Apple SVG file. Have a great day!

Blog * Shop * Facebook * Instagram * Pinterest

Shadow Box Card Scene – Fall Fox – Tutorial

Hey everyone!

I’m excited to share my latest creative adventure with you: a fun print and cut project! I know that for many people, the idea of print and cut can seem daunting. But let me assure you, it’s actually a lot easier than it looks!


Files: SILHOUETTE/SVG

When I first started, I was intimidated by the idea of aligning everything perfectly. I thought I’d end up with wonky cuts and wasted materials. However, after diving in, I found it to be incredibly easy!

Cutting the cardstock pieces:
I love to cut as many colors that I can on 1 mat, so I place more than one color on a mat.

Print:
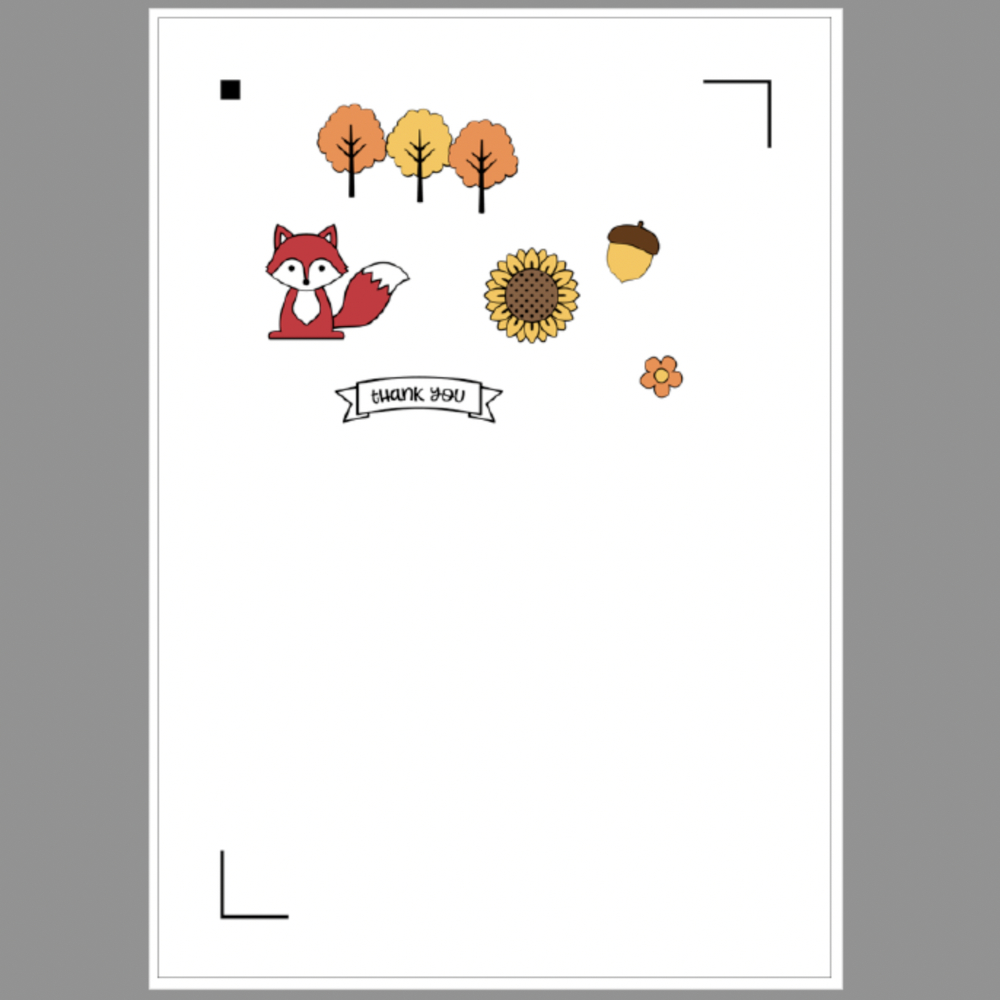
After I sorted the printable items of my design, I printed it out on quality paper. The key here is to ensure your printer settings are correct for the best results. I used semi glossy photo paper.

Cut:
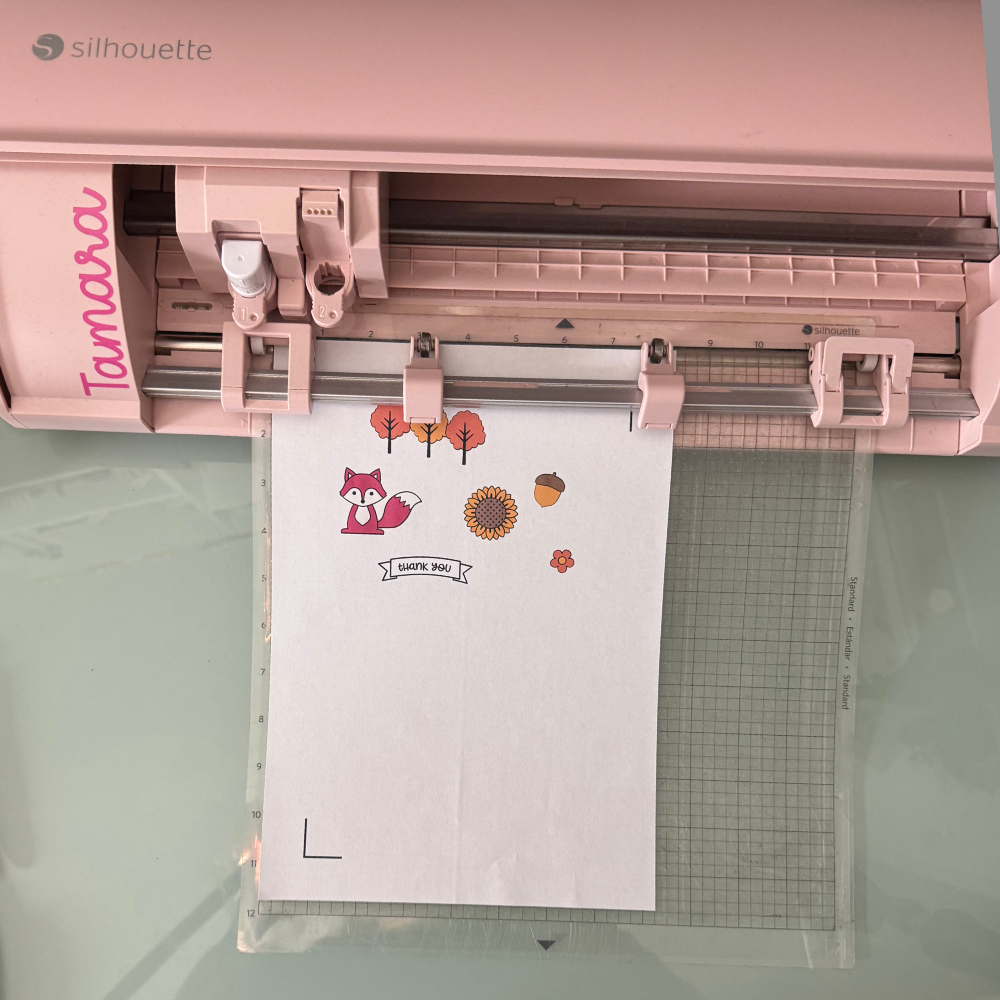
After printing, I loaded the paper into my cutting machine. so my machine could cut the images!

Putting the card together:
The card elements are super easy to piece together, as you can see in the photos below!
  

After you glued these parts together you can start to add the print and cut elements, and decorate the outside panels.

If you’re considering trying a print and cut project, here are a few tips to help you along the way:

Use Quality Materials: Good printer paper and ink can make a huge difference in the final result of the printed images.
Practice: Don’t be discouraged if your first attempt doesn’t go perfectly. Each project is a learning opportunity!

I truly enjoyed my print and cut project, and I can’t wait to make more. Remember, it’s all about having fun and experimenting with your creativity. So, if you’ve been hesitant to try print and cut, I encourage you to jump in! You might just surprise yourself with what you can create. And there are so many cute Print and cut projects in Lori her shop, go take a look!

Happy crafting!  Tamara

Halloween Scene Decor


Welcome to my  Thursday Tutorial !

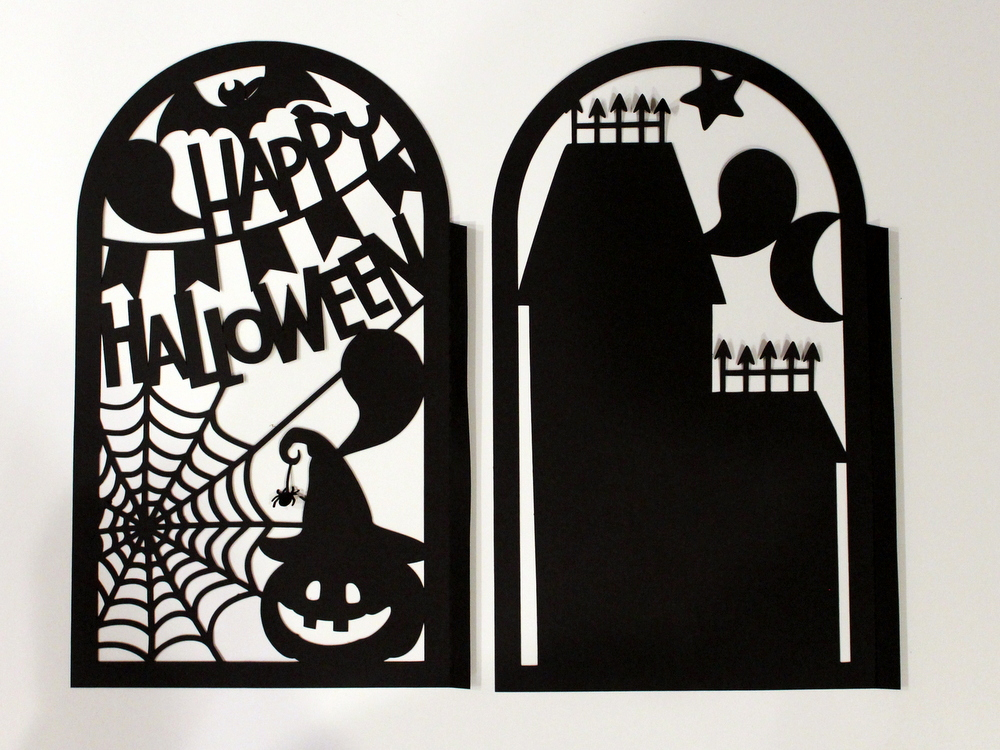
We are so close to Halloween and I’ve always wanted to make this Halloween Scene Decor file (Lori Whitlock Store or Silhouette Store)-so here it is. It’s actually very easy but it is a decor file so it is much bigger than normal creations.


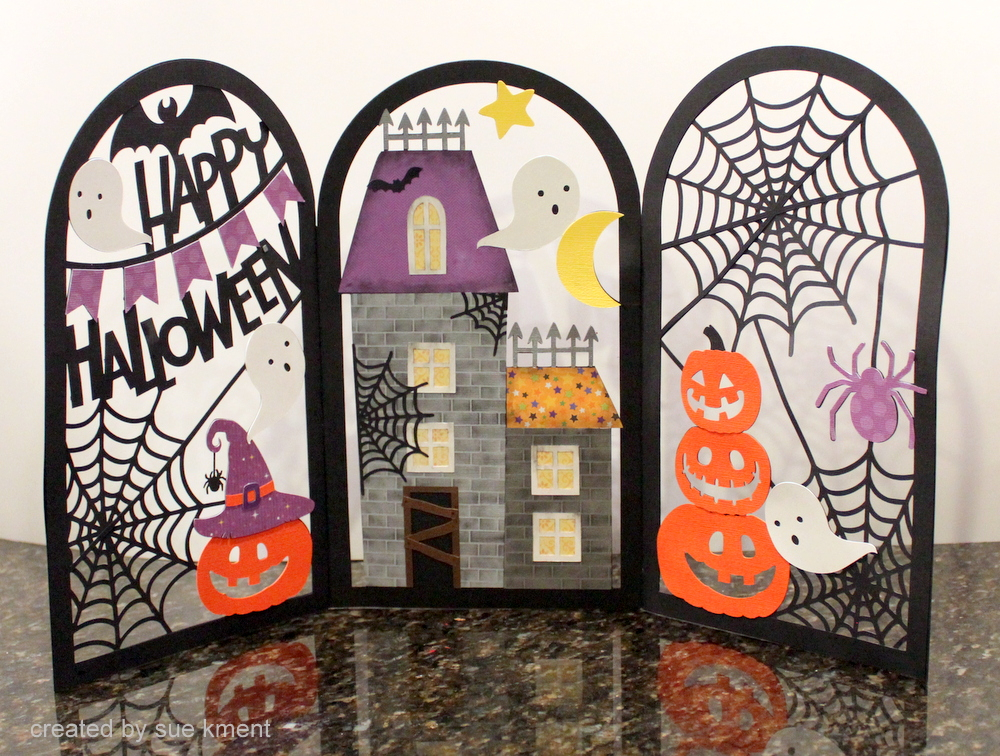
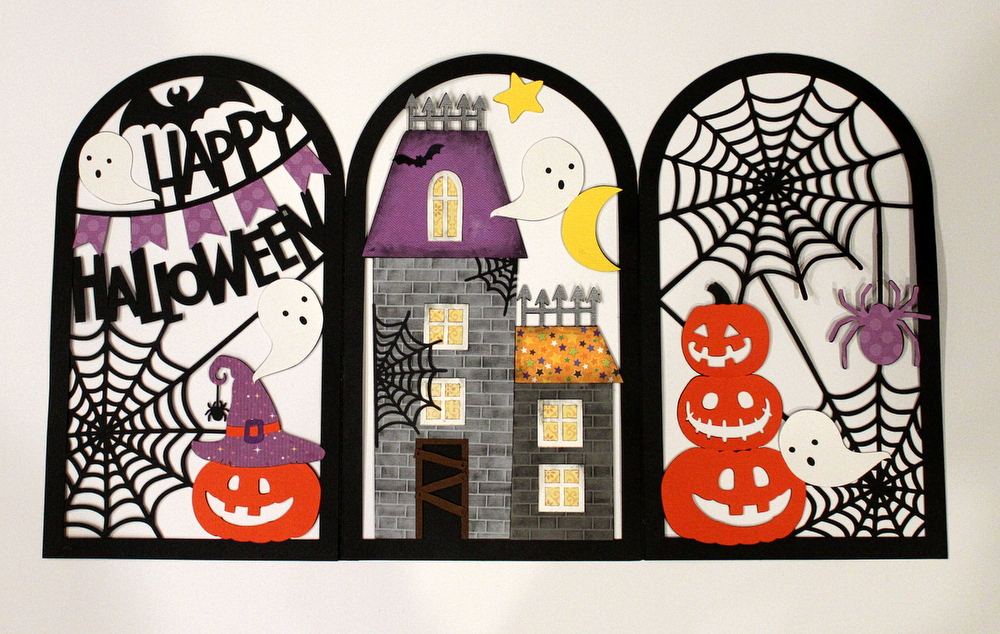
Here it is all done! It’s over 18 inches long and very cool!

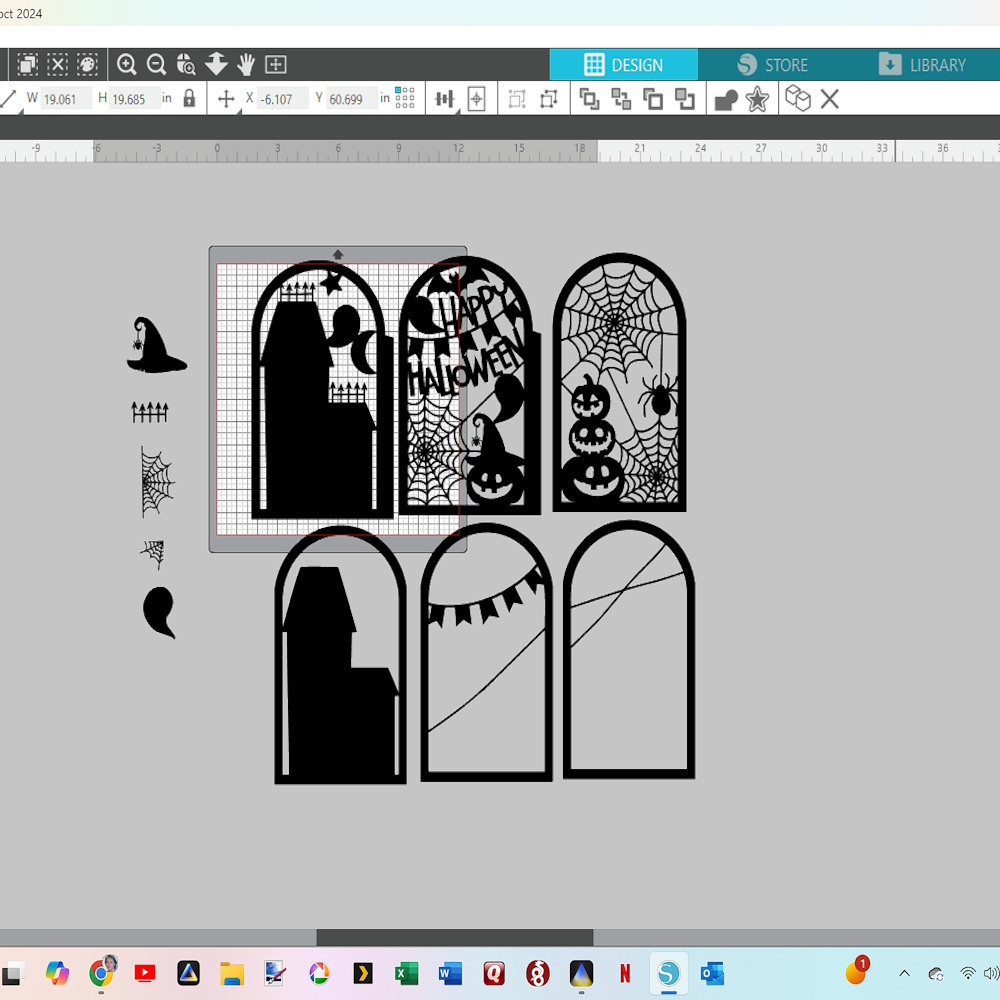
Here you can see the six panels. The bottom three panels are glued on top of the main panels.

You will cut 6 panels with different scenes. They are big–11.5 inches tall and a bit over 6.5 inches wide for each panel. Plan on using 6 pieces of black cardstock with extra left for other projects.  I used Michaels paper  65lb cardstock because it cuts details so well, but it wasn’t really strong enough for this stand up scene. My solution was to cut 3 extra panels for a bit more extra strength. I would suggest using heavier paper and all will be good!

You will glue the three full scene panels together. Two panels have a tab. Glue those together and then add the third panel. I would then glue the other three top panels to the main panels, making sure to line up the elements.

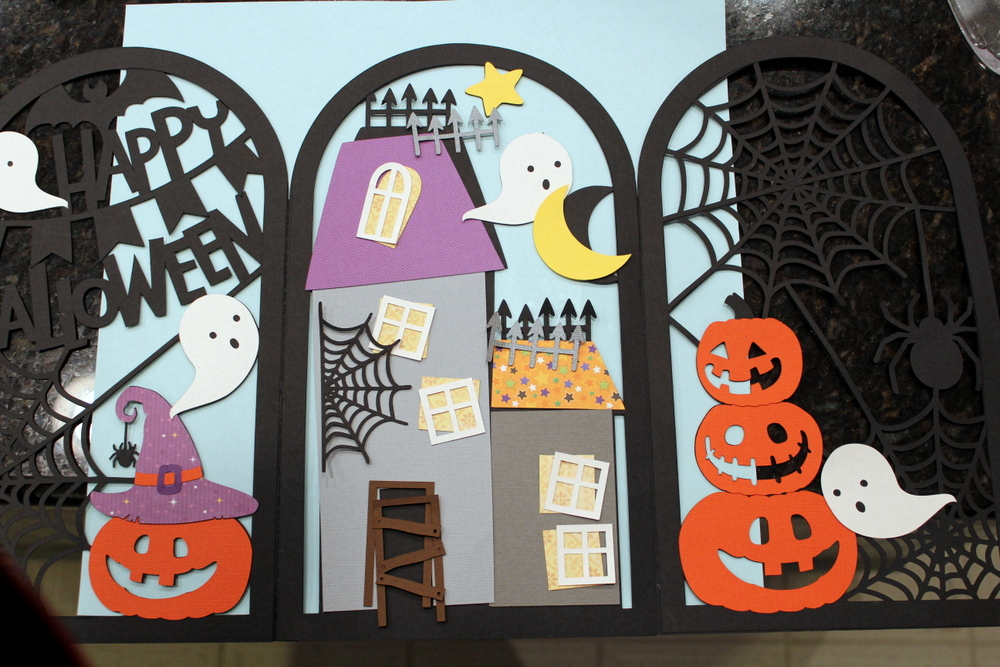
You can cut the top panels different colors but I stuck with all black for the panels and changing up the colors for the paper piecing. You can see all the pieces laying on the glued panels so you can see the placement .

Here you can see where all the pieces should be placed.  I did cut a purple spider for that third panel for a little more color balance. To isolate the spider I made a copy of that panel (in the Silhouette  software hit the Ctrl key and arrow key to make a copy of the selected piece you want) and then I used my knife tool and cut it out of the panel. A little extra trimming with my scissors  after it was cut and I was ready to add it to the panel. My favorite pieces of this file are the little brown door boards. They even have itty bitty nail holes at each end! Such detail!

I also used a brick stencil on my buildings to make them look like haunted castles. Scuffed up the rest of the pieces with black chalk and then glued them on. I found a little black bat on my floor so had to add that LOL!  I have a lot of Halloween things floating around. Ha! I think it would be fun to add velum behind each panel and then add lights behind it…I might still do that!

I’m excited to add this to my Halloween decorations-it will look spooky on my mantel!

Sue

3D Lantern Bats Tutorial

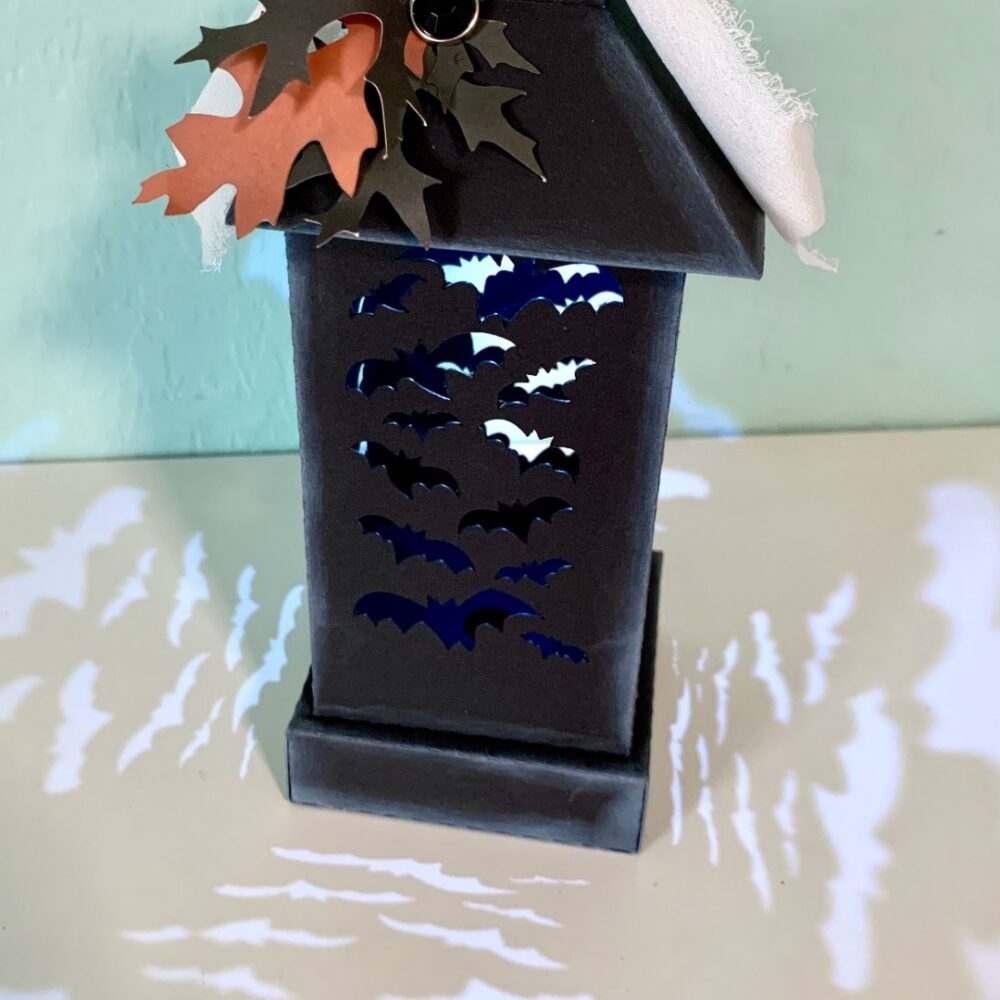
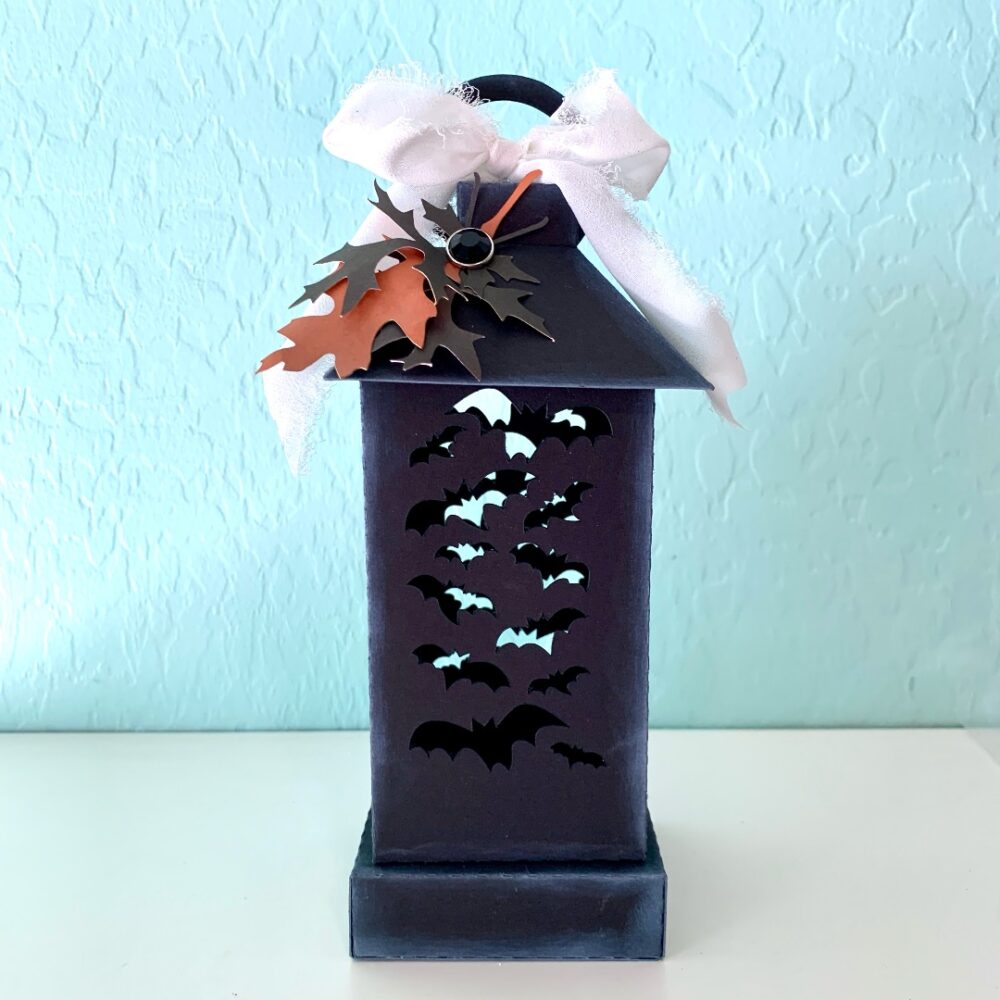
Hi there! Thanks for stopping by today. I am sharing an assembly tutorial for the 3D Lantern Bats (SVGSilhouette) file. This cute lantern has several versions and makes a cute decoration for Halloween. For one lantern you will need two sheets of cardstock. I also used a few scrap pieces of cardstock to make some fall leaves for embellishment.

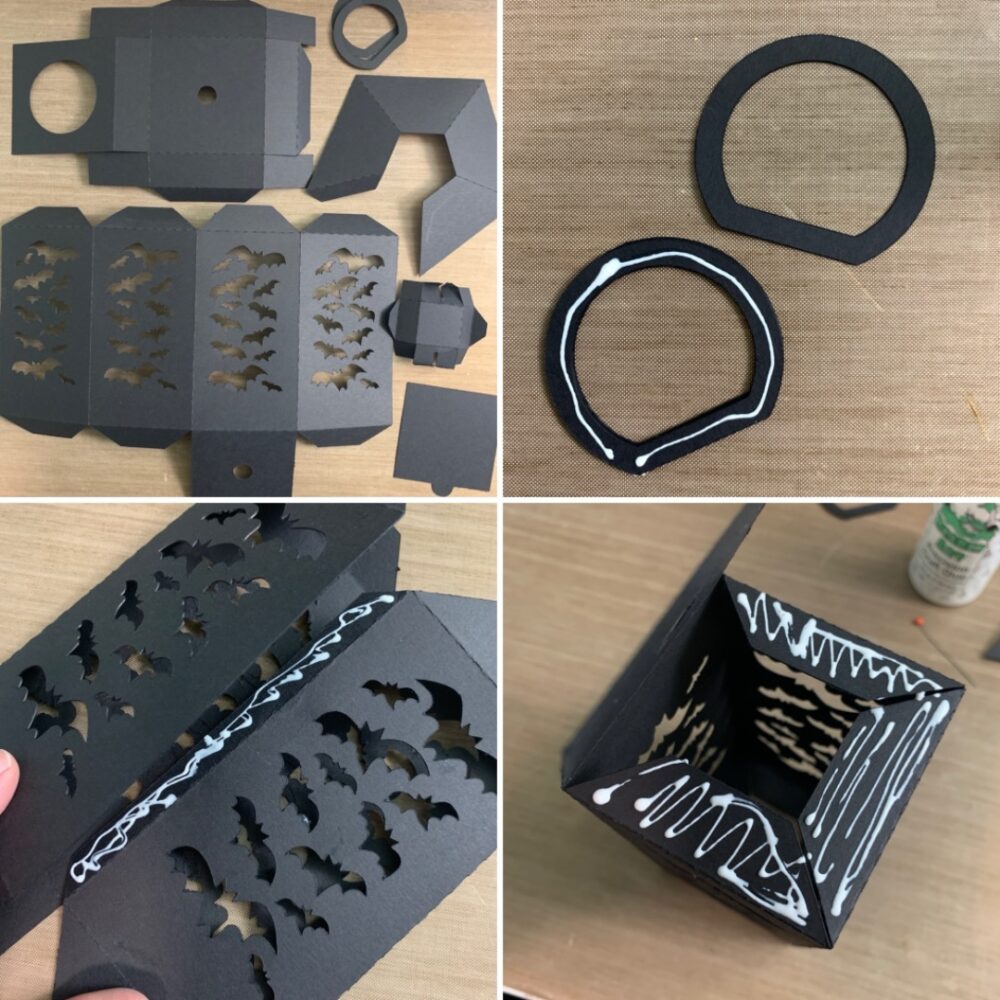
Once all my pieces were cut, I folded all of the score lines as mountain folds. I then glued all of the D ring shapes together. The lantern body is one piece with one long tab, I added glue to the tab and lined up the opposite edge of the lantern body to the tab. After the glue was set, I flipped the lantern over and added a generous amount of glue to all the bottom tab and folded over the base and applied even pressure while the glue set.

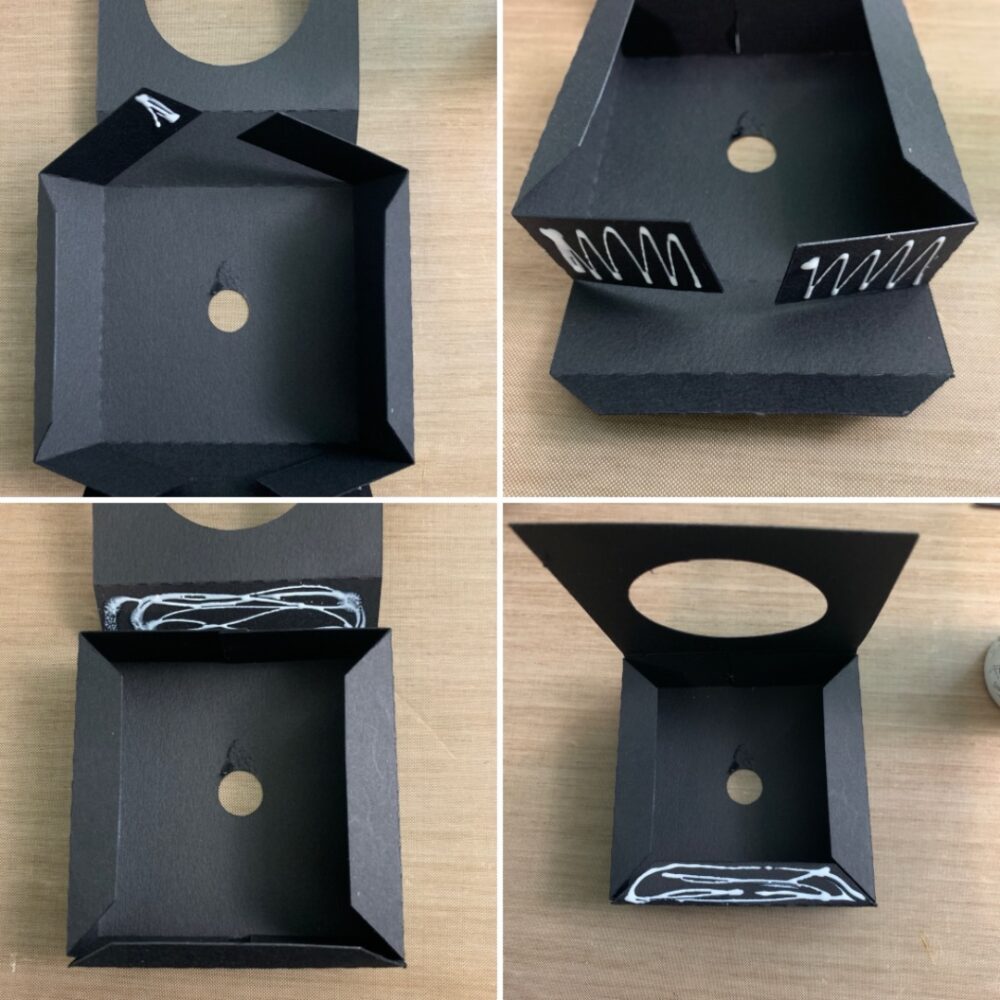
For the base I flipped the base piece over so that the top is on the bottom. I then glued the two longest tabs together. I then added glue to the other long rectangular tabs and folded up the side to secure. Back to the first side I glued I applied glue to the side of the base and held in place. For the flap with the large hole, I only applied glue to the opposite tab. This is to create a sleeve for a battery tea light.

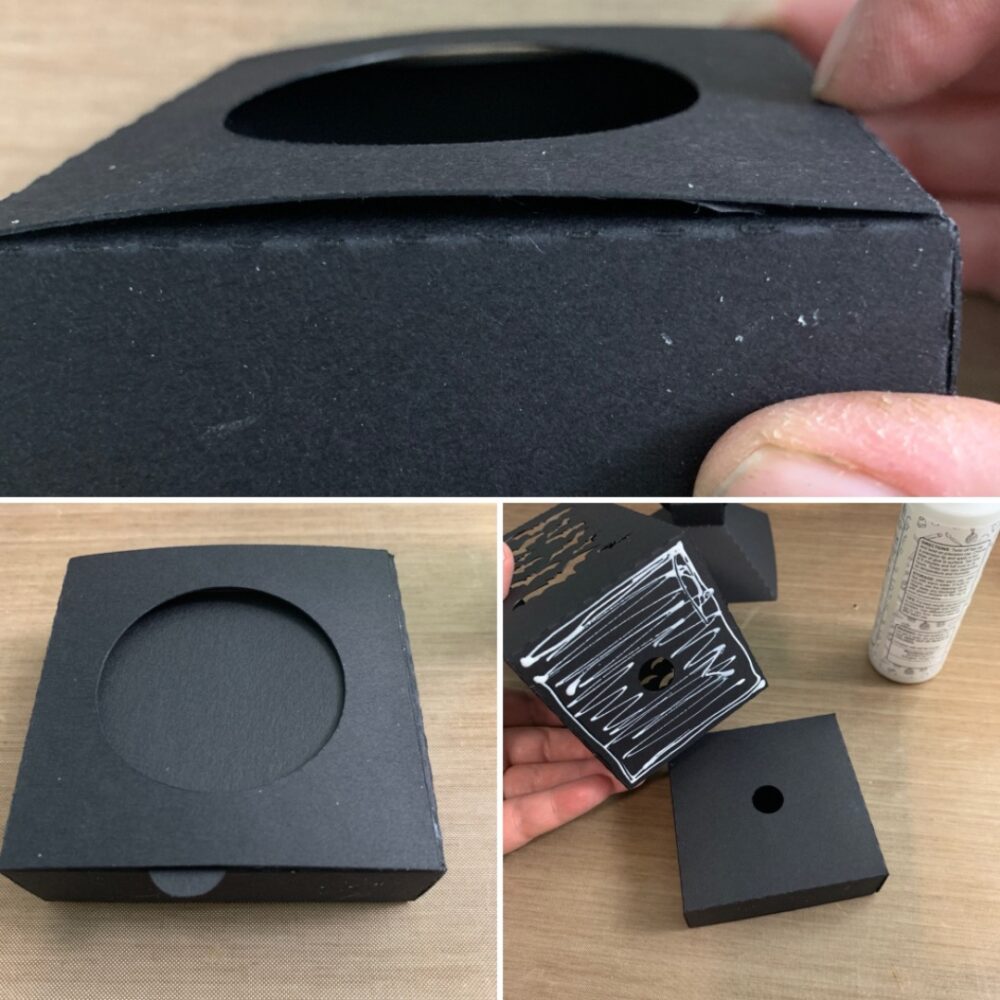
I then slid the square with the small tab through the sleeve to cover the large hole in the bottom. I then flipped the base over and add a generous amount of glue to the bottom of the lantern body and secured the base. I used the two small holes to line up the body to the base.

 
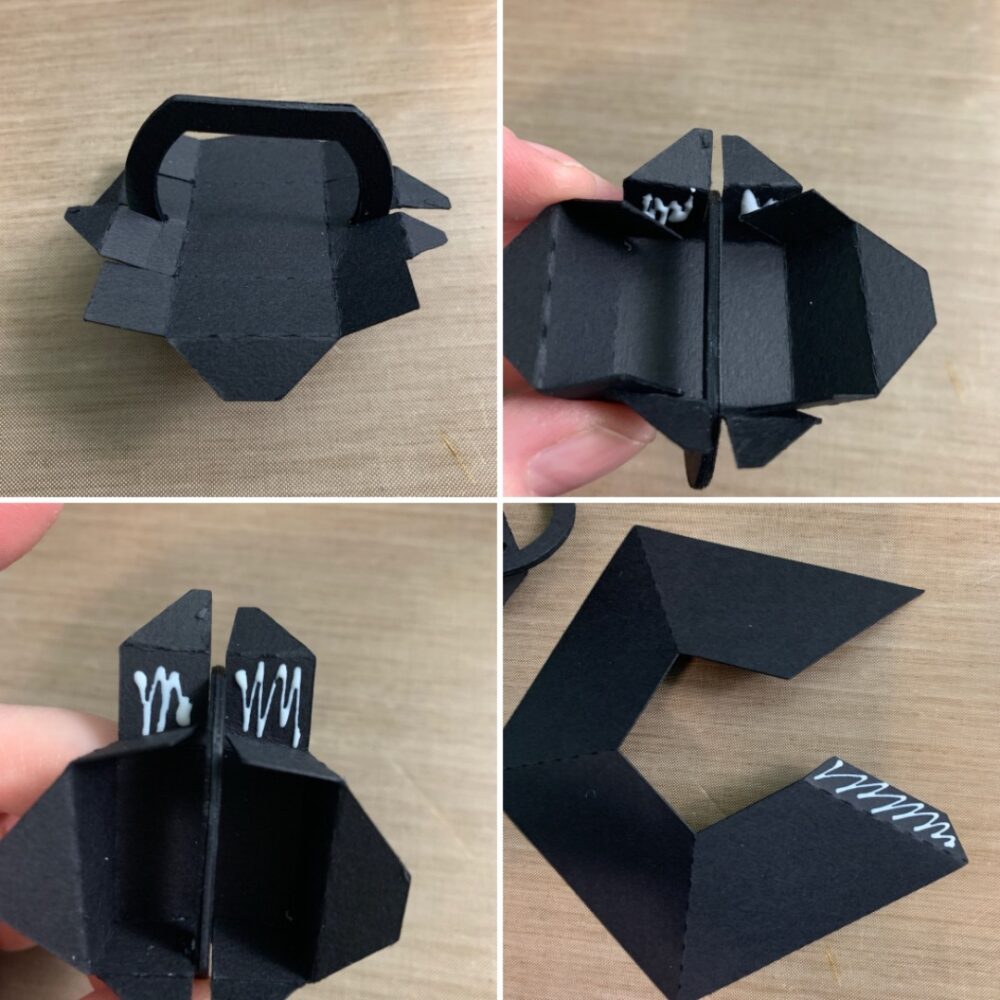
For the top small box for the lid the of the lantern I flipped it over and pushed all of the rectangle shaped tabs back into mountain folds (this helps keep them out of the way while I glue the box together). I added the D ring between the notches. I added glue to the square tabs and held in place while the glue set. I also glued the c shaped piece together by adding glue to just the tab.
Once the small box was dry and set, I pushed all the small tabs through the square in the roof of the lantern and added glue to the small tabs on the inside of the lantern roof. I then added glue to the tabs on the top of the lantern body and held the roof on with even pressure while the glue set.
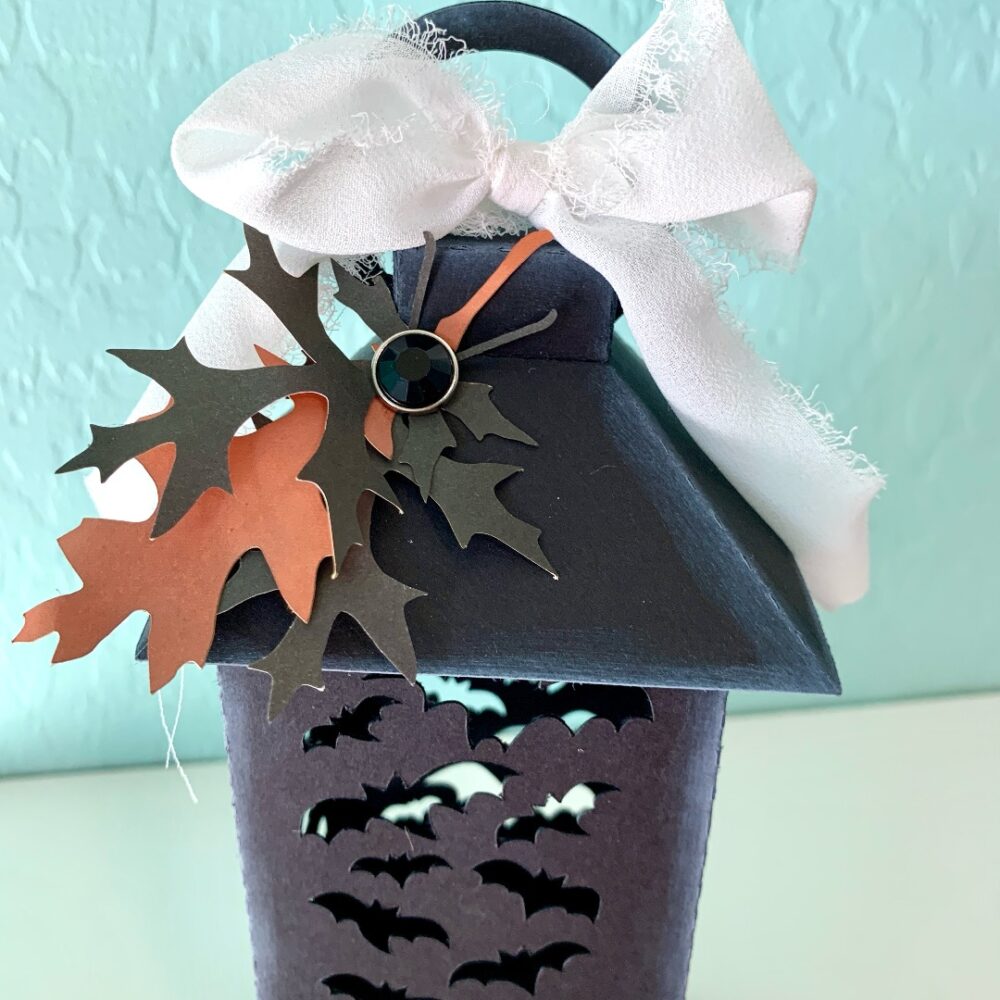
After the lantern was dry, I cut some oak leaves (SVG, Silhouette) and inked the edges of the lantern. I used some chiffon ribbon for a bow and glued on the oak leaves.

I had a little ballon light to my lantern to get the bats to cast on the walls and shelf.

This would be a fun addition to a Halloween table or tiered tray display. Thats all for me today. Thanks again for being here.

Brandie

Baby Bottle Shaped Shaker Card Tutorial

Hello Crafty friends, today I want to share how I made this adorable Baby shaker card!

The file for my project today is the Baby Bottle Shaped Card (SVGSilhouette).
 
I opened my file in Silhouette studio & took the bottle panel of my file, (coloured in white in my pic), & made a copy so that I now have 2. 
 
One will be used to create a frame for my shaker by making an internal offset & the other I will use to cut a sheet of acetate for the shaker window.


I created an internal offset of 0.450 on one of them. You can now put the other, (for the acetate), without the offset to the side. I have slightly enlarged my card so the offset measurements may vary depending on the size of your card. I just kept playing with mine till I got it to the desired size.
 I then copy & pasted this to fill my page. I was able to fit 4 in total. I cut out 12 pieces of this panel. These are to create the frame for your shaker. You only keep the outside frame. The insert is not needed. You will only need to cut 1 frame if you prefer to create the window frame with foam tape. I prefer this way as I find them much sturdier. I then cut out another of the same panel using the printed paper to make the top printed panel. This time keep both the frame & inside cut. Once I cut out all my pieces the first step was to glue the frame together by layering carefully my 12 pieces.
How thick the layer will depend on the type of shaker confetti you use inside. My shaker balls where a little raised & I wanted them to move freely in my card.
Next I glued together my top panels onto the front of my bottle panel & also glued down the shaker frame I created onto the bottom part.
I wanted some embellishments as well as sprinkles in my card, so I adhered some cute stickers on the inside panel first.


Once my stickers were in place I took the panel & glued it inside my frame. This should fit perfectly. Then I added my tiny balls. You can use any sprinkles in your stash. I wanted mine to look like milk inside the bottle that is why I chose the white balls. Next I gave my acetate a light brush of powder on the side I was going to glue down so that it is not static. I then glued the acetate to the frame. I let it dry before the next steps. Acetate takes a little longer to dry & not so instant as paper. Once the acetate was dry I glued on top the printed panel frame. Lastly I glued down my complete bottle panel onto the front of the card frame.
I added a sticker with sentiment on top to finish off!
 
For more inspiration, check out my Instagram!
Thanks for stopping by!
Hugs
Noelene 🙂