Father’s Day Apron Box Card

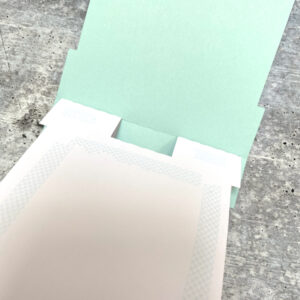
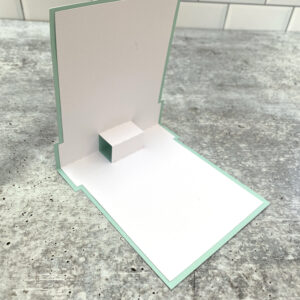
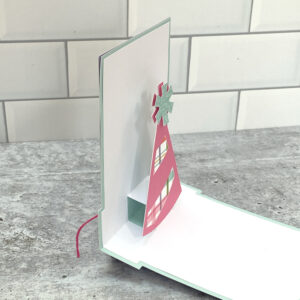
Hello crafty friends and welcome to another Thursday tutorial! Today I want to give a quick little walk through on how to assemble the adorable Apron Box Card Father’s Day card (Lori’s SVG, Silhouette). With Father’s Day right around the corner, this is a great addition to your gift to show your appreciation to Dad! You can’t really tell from pictures but that “Best Dad Ever” piece on the front is a pocket which will hold a gift card to any of Dad’s favorite stores.

So, let’s get started making this awesome box card!

First is to gather your papers and cut out all of the pieces. That lovely red bandana print? That’s from the new collection called Fun On The Farm and I thought it perfect for this card! The sentiment is done using the print and cut feature of your cutting machine.  Lori has quick print and cut tutorials for Cricut (here) and Silhouette (here).

Next step is to adhere all of the extra pieces to the main pieces of the project.

Now fold on all of the perforated lines.

Adhere the pocket to the front of the card. Make sure that you adhere it to the side with the holes at the top of the apron.

Next adhere the box side tab together.

Now you will want to adhere the “tools” piece to the inside of the apron box.  The tabs are glued to the sides of the box.

And lastly, you will want to decorate your box card. I choose to add some black grosgrain ribbon to the top holes of the apron box. Now it’s ready to give to Dad!

Thanks for stopping by today! Hope you enjoyed my small tutorial and give it a go…Dad will love it!

Aimee

Box Card Tractor Tutorial

Anita here with a fun card tutorial to put together Lori’s Box Card Tractor (SVG, Silhouette).  I made this for my grandson and used John Deere type colors as my inspiration.

Here are the pieces that I cut.  Because I wanted my tractor to be yellow and green I cut extra pieces of the inner part of the box card with the seat and the engine and also the end covering pieces.  I then trimmed them to fit and glued them on.

I folded the grey tractor card base on the score lines and glued the tab in place.  I then put the tires together.

This photo shows how I put on the extra piece on the insert that goes in the middle of the card.  To complete the card I slipped the insert into the box shape of the tractor and glued the tabs to the sides.

Here is a photo of the card lying flat all ready to be mailed. It fits into a standard A2 Envelope.

Thanks for looking and have a great day.

Hugs,

Anita
Circle Graduation Hat Box Tutorial

Well finally after 2 years, my daughter’s college is holding an in-person graduation ceremony for the class of 2020!  Here friends are coming in from all over to once again sleep in the dorms and party like it was 2020!  I decided to celebrate by creating a little graduation cap gift box in her school’s colors using the Circle Graduation Hat Box File (SVG, Silhouette).  Take a peek…

This little box is super easy to assemble. I’ve outlined the steps below.  I started by cutting the pieces of the file.  I also created a little tassel using some embroidery thread and a “2020” using Lori’s Varsity Font (Lori’s Shop, Silhouette)

The first thing you want to be aware of is that the 2 sets of circles are different sizes.  The slightly larger circles go with the thinner strip to form the cover.  The smaller circle set goes with the “fatter” strip to make up the bottom of the box.

I started with the smaller two circles and the “fatter” strip to create the box bottom.  First, I curved the strip by running it along the edge of my craft table.  This makes it easier to form a round shape.  I glued the strip into a tube shape, and secured using some scor-tape for a strong hold.  I then folded the tabs towards the center.  I added liquid adhesive to the tabs (inside) then slid one of the smaller circles inside the tube. This helps form a nice circle shape.  To finish the box bottom, I turned the base upside-down and glued the second circle onto the bottom to cover the tabs.

I repeated the same process with the two larger circles and the thinner strip to create the cap box top.

Once the cap was assembled, I layered the two squares, aligning the hole in the center.  I threaded the end of my tassel through the hole and secured to the other side using a piece of washi tape.  I then centered the cover on the mortarboard top as shown and glued.

I finished my hat by gluing the 2020 to the tassel.  Now I just need a little something to fill the box!  If you make one for your grad, be sure to tag Lori on Facebook & Instagram.  We always love to see your creations!  That’s it for me today, thanks for stopping by to peek!

BLOG | INSTAGRAM

Pencil Box with Slip Lid Tutorial

Hi there friends! Today I am sharing a tutorial for the Pencil Box with Slip Lid (SVG, Silhouette). It is teacher appreciation week here and I wanted something cute and homemade to give to my son’s teachers this year. This little box is a good size to fill and also makes a darling décor item.

I cut most of the pieces from cardstock with the exception of the lid piece. I used some pattern paper from the Back to School collection by Echo Park Paper co.  The lid is a little larger than the bottom of the box. All of the score lines are folded the same way. I folded them as mountain folds. I also inked all of the edges of the decorative elements for the pencil.

I started with the base of the box but the top is glued the exact same way. I used a liquid glue and glued all of the tabs so that they are on the inside of the box.

The top and bottom of the box should look like this and fit nicely together.

I dry fit all of the decorative elements first. Once I had everything mapped out I used the same liquid glue and glued everything down.

Then I had to make it fancy. I added a few flowers, enamel dots, and some ink splatters. The yellow flower is the Rolled Flower 25 (SVG, Silhouette) and the red flowers are from the A7 Flower Card (SVG, Silhouette).  Lori has a rolled flower tutorial here.

I tucked a drink card inside as well as little note of thanks and sent it off to school with my son. Thank goodness for teachers!
Thanks for stopping by today!
Brandie


Watering Can Favor Box Tutorial

Hello everyone, I have a quick and easy tutorial to share with you today! This watering can favor box (SVG, Silhouette) makes such a pretty gift and it’s so simple to put together. I just love making little boxes like this and filling them with candies to give to someone special!

I made a mirror left or right copy of the handle and spout so I could glue them together just to make them a little more sturdy and to have the same paper pattern on both sides.

Here are the pieces cut out and score lines all folded. The patterned paper used here is from Echo Park’s Easter Wishes collection, there are some lovely papers in this collection that can be used for non-Easter projects, the cute little tag I used is from the ephemera frames and tags pack of the collection.

I glued the box together and also glued the handle and spout together folding out the tabs so they can be glued on each side of the box. The blue flower is glued down to the yellow piece first then pink and white last and I added the leaves to the back of the flowers and then glued them to the box.

Thanks for stopping by and have a wonderful day!