Christmas Advent Countdown Tutorial

Today, I’m excited to show you a fun **diy** project: a festive Christmas Advent countdown from Lori Whitlock (SVG, Silhouette). You can also find Lori’s original assembly tutorial HERE. This Advent countdown forms a Christmas tree when assembled and includes 25 little boxes that you can add a small treat or toy inside. Join me as I demonstrate **how to make** this adorable Christmas Advent, it’s a wonderful addition to your **Christmas crafts** collection.

Happy crafting!

Holly Jo

Candy Holder Christmas Ornament

Hi there friends! Today I am sharing an assembly tutorial for the new Candy Holder Christmas Ornament Santa (SVG, Silhouette). This ornament comes in several different styles as well. You can find the bundle here. I used the Lindt Lindor chocolate and found that a heavier (85lb) cardstock worked better than a lighter (60lb) one. But these are definitely a great scrap buster project. These cuties would look great tied to a gift as well as hanging on a tree.

After I cut everything out I decided to discard the round cheeks for some pink chalk that I applied with a paint brush. I then assembled the faces of my characters. The front of the Santa also has a belt, a white ruffle for the hat, an additional cover for the top of the hanger and a white ruffle for the bottom of his jacket.

With the front of the characters done I folded the score line into mountain folds. Before tucking the candy into the belly of the ornament, I used some glue dots to secure the wrapper onto the back of the candy. I then added glue to just the top of the inside of the ornament. Creating a little A-Frame shape with the ornament. The chocolate then slides right into the belly of the ornament.

I added a sticker and tied some bakers twine to the top.

These are a cute fun project. Thanks for stopping by today!
Brandie

Shaped Shadow Box Card Polar Bear Tutorial

 Happy Holidays everyone!  I have a quick and easy little shadow box to share with you.  It’s Lori’s Shaped Shadow Box Polar Bear.  This is the sweetest little bear.  I created this with just some card stock and Lori’s new Echo Park Winter Fun collection.  This little shadow box goes together like Lori’s box card envelope cards.  So super duper easy.

You can find the file here in the Silhouette Design Store, also.

First, start with cutting out all your pieces.

Then I put together his little face.
Then add your tree cutout to the back layer.
Flip over the two layer pieces and add double sided adhesive on each piece.
Also, add the blue snow piece to the very back of the box.  Adhere the two pieces together to form your box and then next add the tree layer, then to the village scene.
Then you get the sweetest little shadow box….I just finished it with all the darling elements from the Winter Fun collection.  He’s just adorable!  I can’t wait to make more.
Thanks for joining us today!


Tuck Lid Gift Box Santa Claus and Mrs Claus Tutorial

Hello crafty friends!
 
 Today I am making Lori’s Tuck Lid Gift Box.  You can find the bundle (or singles) at Lori’s store HERE. It also includes a cute reindeer, a snowman, a penguin and a fun little gnome. 
 
You can find them at the Silhouette store HERE as well. 
Here are the pieces of Mrs. Claus. For the Mrs. you place the face on top of the white piece, for Santa the face is placed behind the white beard/hat piece. 
Here are the finished front panels of the Mr. & Mrs.
Time to put together the box now. After folding all the creases in the box, add a bit glue to the side tab and then fold the box in half. It lines up perfectly!
Fold over the bottom tabs and glue to finish the box. Leave to top panel free so you can open and close the gift box.
Glue the front panels on to the box.
 
If you are looking for a fast project for some holiday gifties, I would suggest trying these out!
 
💕Sue Kment

3D Hot Cocoa Mug Santa

Hello crafty friends!

Today I’m excited to share a festive 3D project that is perfect for holiday decorating, gifting, or displaying on a cozy winter tray. I’ll be walking you through how I assembled the adorable 3D Hot Cocoa Mug – Santa file from Lori Whitlock’s shop. It’s a fun and simple project that comes together beautifully with just a few supplies.

Let’s get started!

Supplies Needed

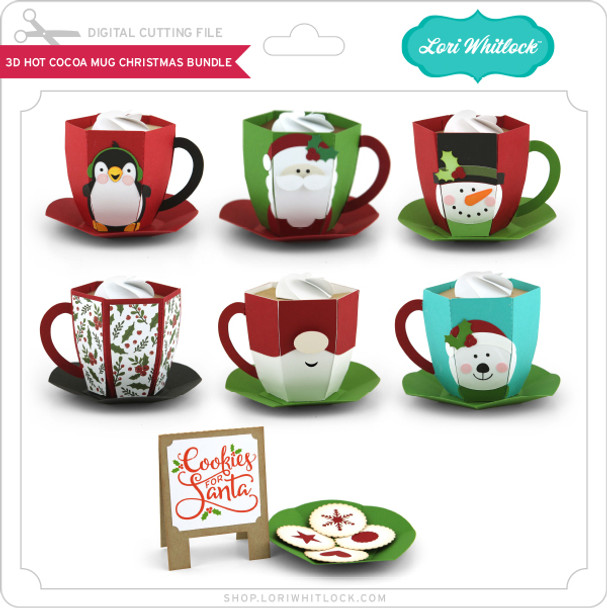
  • 3D Hot Cocoa Mug – Santa SVG file  SVG  / SVG BUNDLE or SILHOUETTE

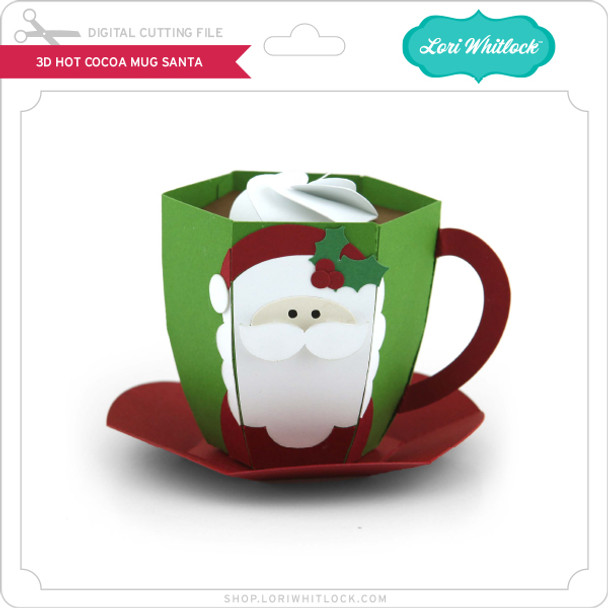
  • Electronic cutting machine (Cricut, Silhouette, Siser etc.)

  • Cardstock in red, white, black, skin tone, and accent colors or design paper.

  • Adhesive (liquid glue or tape runner)

  • Foam tape (optional for dimension)

  • Ink or markers for light shading (optional)

Step 1: Upload & Organize the File

After downloading the SVG from the shop, I uploaded it into my cutting software.
The file comes in clearly labeled pieces, so I grouped by color to make cutting easier:

Step 2: Cut All Cardstock Pieces

I selected cardstock colors that matched the traditional Santa palette:

  • Bright red for the hat, berries and saucer

  • Black for the eyes

  • design paper voor de mug

  • Skin tone for Santa’s face

  • White for beard, moustache, and whipped cream

  • green for the leaves on the hat

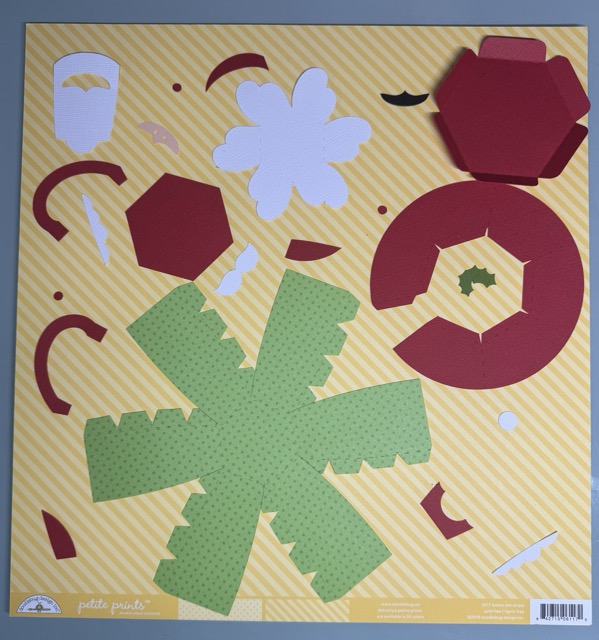
After cutting, I grouped all the small Santa pieces so nothing got lost.

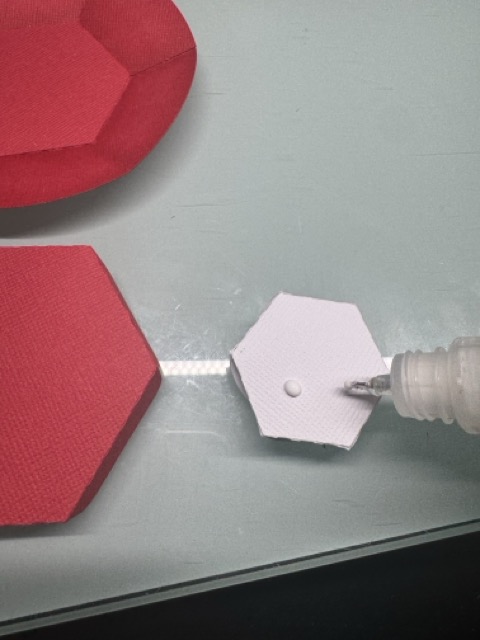
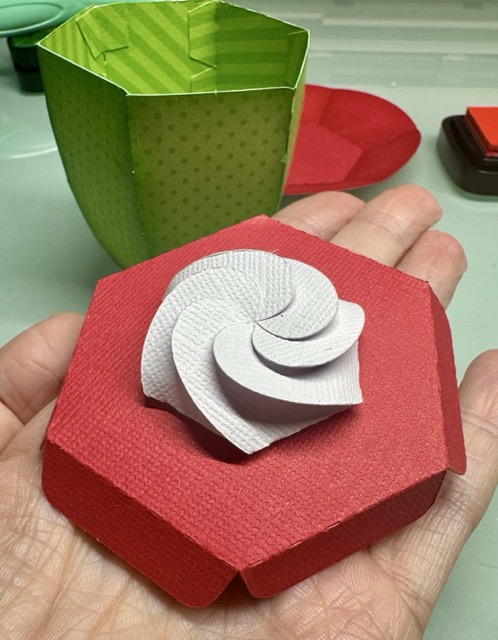
Step 3: Build the Mug Base

The mug structure is made from designpaper.

  1. Fold all score lines to give the cardstock flexibility.

  2. Add ink for shades.

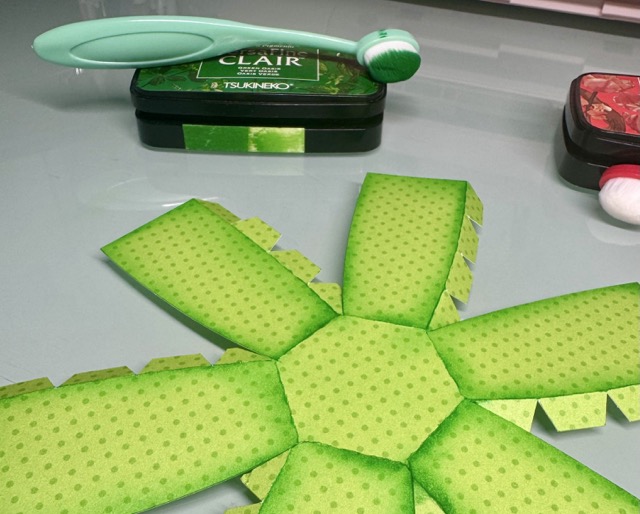
  3. Form the mug into a cylinder shape and the glue tabs together.

  4. Glue together the circular base piece (saucer).

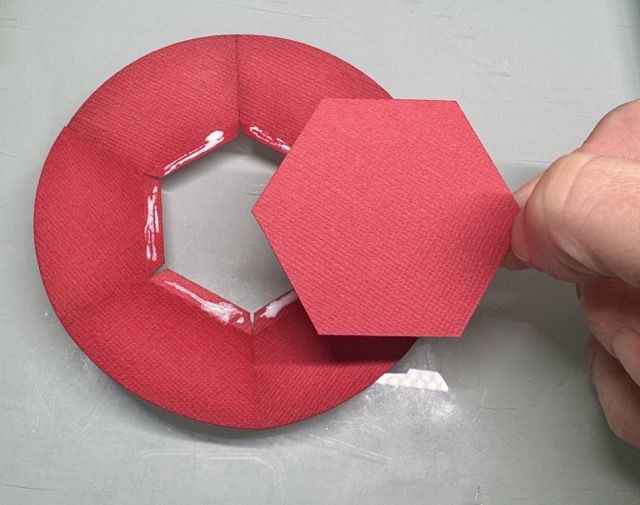
The structure comes together surprisingly easily—just take your time with the curved edges.

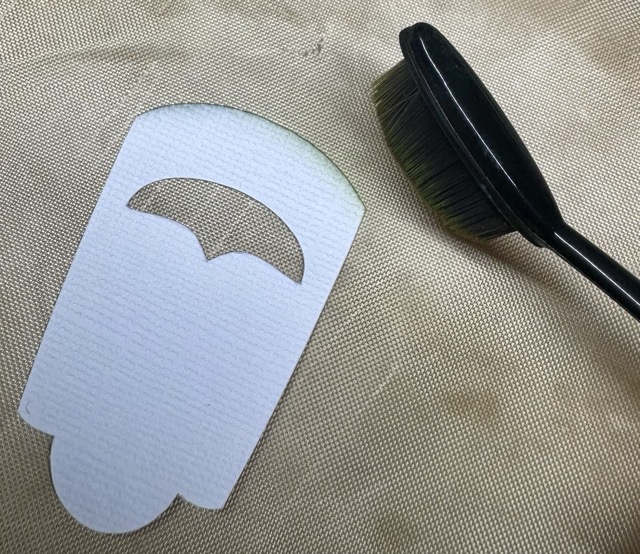
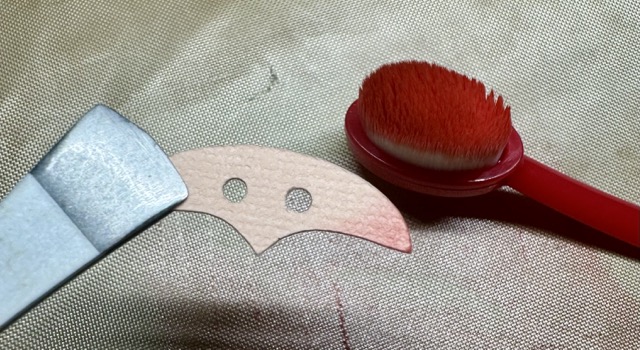
Step 4: Assemble Santa’s Face

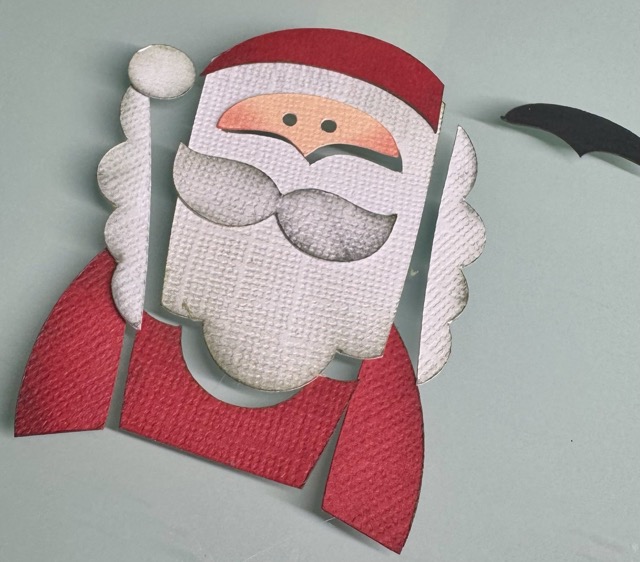
I always start with inking the edges for shade

  1. Glue the face layer with the black piece behind it in the hole in Santa’s beard.

  2. Attach the moustache with foam tape on top.

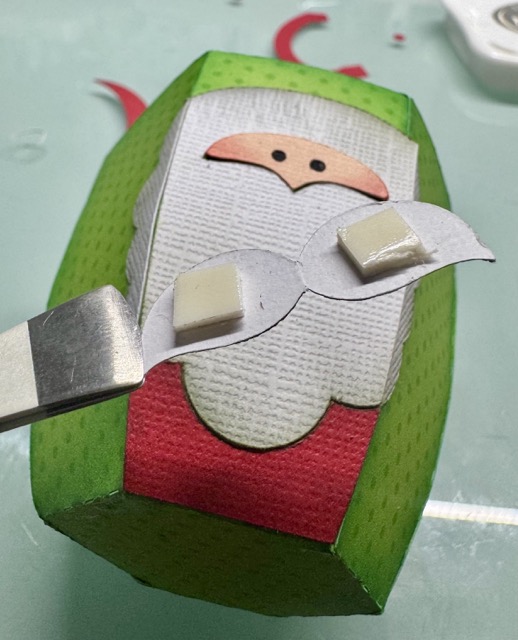
  3. Add the hat and pom-pom.

This layered section gives the mug its adorable Santa look and is best assembled while the pieces are flat.

Step 5: Attach the Handle

The mug handle is made from two layered pieces for stability.

  1. Glue the handle layers together.

  2. Curve it gently with your fingers.

  3. Attach it to the mug.

A good tip is to hold each glued area for a few seconds to help it set firmly.

Step 6: Add the Cocoa & Whipped Cream Top

To create the “hot cocoa” look:

  1. Glue the cocoa layer into the rim of the mug.

  2. Add the whipped cream layer on top.

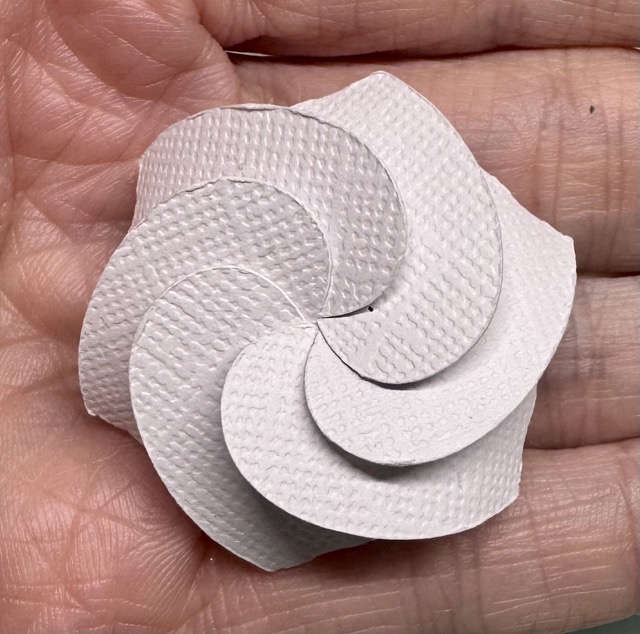
I used glue under the whipped cream to attach it.

Finished Project

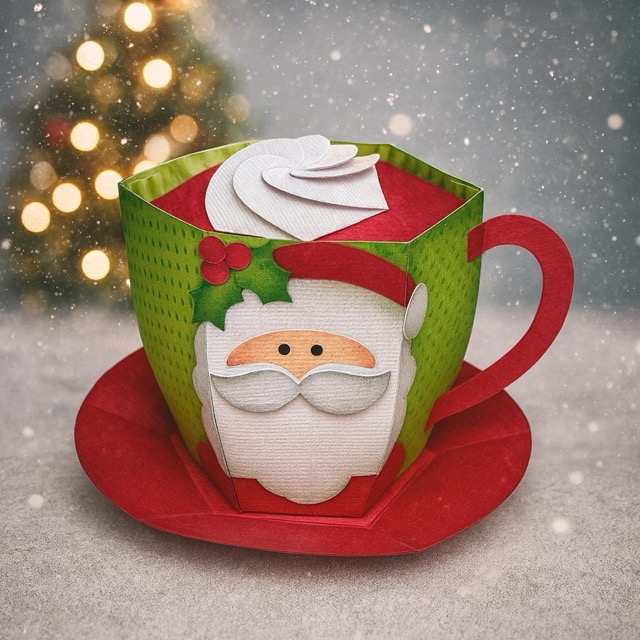
And that’s it! Your whimsical 3D Santa Hot Cocoa Mug is complete. It looks adorable on a Christmas shelf, or you can fill it with wrapped candies or a small LED tealight for a cozy glow.

I am going to add some chocolate inside the mug and gift it to my youngest sons teachers.

I hope this tutorial helps you feel confident assembling your own festive mug. Happy crafting, and be sure to check out Lori’s shop for more holiday 3D projects!

XO Tamara