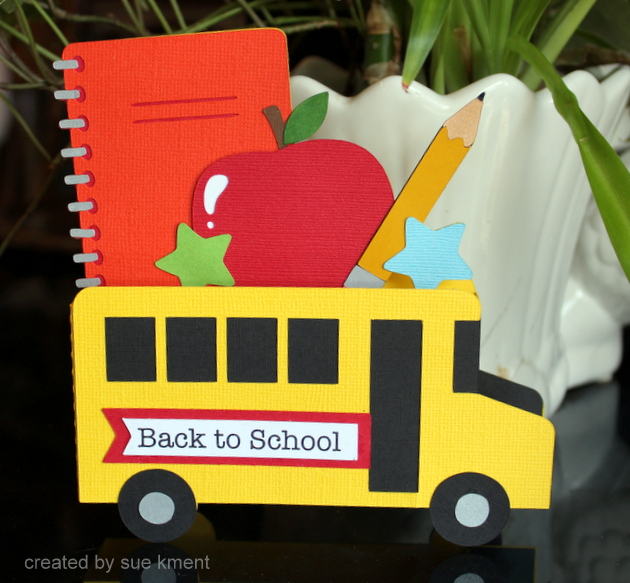
Happy 4th of July! Traci here and I hope you all have a wonderful day celebrating with loved ones. Today, I have a new USA Mini Album to share with you that I created with one of Lori’s amazing cutting files. It captures the spirit of freedom and patriotism and it’s a great place to save your fun holiday photos.
First … let’s take a quick look through the album, then I’ll explain exactly how I made it’s cute cover so you can create one too!
I chose Lori’s cutting file called USA Accordion Fold Card for the cover’s design. I cut it out of white acrylic, but you could easily use white cardstock instead.
I decorated the album with the Echo Park, Stars and Stripes Forever Collection which was also designed by Lori. It’s fabulous! There are American flags, fireworks, stars, flowers, pinwheels, and balloons.
Inside, the album has 12 scrapbook pages (6 double-sided) that include 1 pocket, 2 fold-out pages, and 3 fun interactive flippies.
I used a mix of 12×12 and 6×6 pattern papers throughout the pages.
I added a pocket and some fun die cut pieces from the Ephemera and Frames & Tags.
I love this print with the little red, white, and blue flowers. It’s such a cute pattern for the holiday!
I also added some stickers from the 12×12 Elements sheet. There are lots of great sayings, Uncle Sam’s hat (above), a red pick-up truck, a jar of flowers, cupcakes, and a scallop border.
Isn’t this Stars and Stripes Forever Collection that Lori created great?! I just love it.
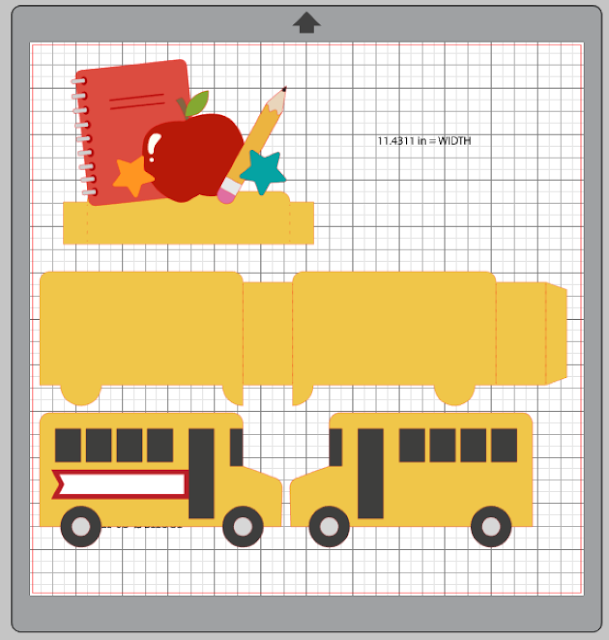
Below is the cutting file I used to create the album’s cover. You can find the file here in Lori’s Shop or here in the Silhouette Online Store.
And, here’s how I made it …
Step 1: Be sure to group both sets of USA letters together before resizing so that the insets will fit into the background after resizing. Once resized, ungroup the 2 sets of USA letters. Then you will need to delete the tiny score lines on the welded USA. To do this, right click and hit Release Compound Path (depending on your software you may need to hit make compound path first). Once you have the tiny score lines highlighted, delete them. Highlight the remaining pieces, right click and hit make compound path to set your welded USA cover correctly.
Step 2: Select both sets of letters, right click, and group them together again.
Step 3: Create a back cover for your album by selecting a rectangle under drawing tools. I sized my back cover to 8” x 5”. Once I had my back cover, I placed it behind my group of USA letters.
Step 4: Since I wanted my welded USA cover to be the same height as my back cover, I highlighted both sets and pulled the bottom curser down to stretch the cover to 5” high.
Step 5: Once I had my front and back covers the same size, I ungrouped the USA sets and cut everything out. Don’t forget to punch binding holes and make as many pages (sized like the back cover) as you want!
Lori has so many great SVG files to play with and I hope you’ll give this USA Accordion Fold Card a try. Have a safe and fun July 4th weekend and happy scrappin’ my friends!
Blog * Shop * Facebook * Instagram * Pinterest


.JPG)
.JPG)
.JPG)
.JPG)


.png)