Daily Freebie + Getting Creative with Name Tags by Traci

First off, if you are here for the freebie grab it here.
Hi everyone!  It’s Traci here with a fun tutorial to share with you.  A few weeks ago, a friend asked me to make some name tags and a guest book for a baby shower she is having for a friend.  The colors for the shower are grey and yellow, and they are using daisies and the chevron pattern for decorations.  Today I’d like to show you how I made her name tags so that next time you are having a party, you can ‘wow’ the guests with your creativity!
I apologize for the photo — it started raining before I could get any decent shots.  I used Silhouette’s white, printable sticker paper for these so that the guests can write their name on the tag and then peel them right off the sheet.
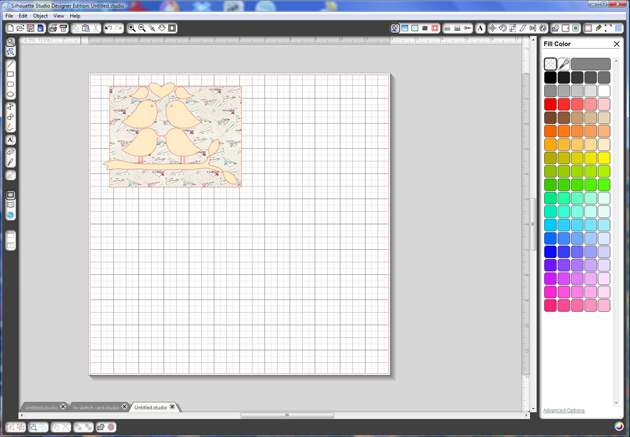
To start, open your Silhouette software, set your mat to 8 1/2 x 11, and click on ‘show registration marks’.  You want to do this because your name tags will be a print and cut, and your paper will probably need to be 8 1/2 x 11 to go through your printer.  Next, find the label shape you want to use and size it appropriately.  Mine are approximately 2×3″.
Since I’m using Lori’s cute bracket labels that have a shadow behind them, I was able to color fill the back shape with grey, and the inside shape with white.  To do this, highlight the individual shape and click on the fill color bucket (1st icon on the top right toolbar).  Do the same to color fill each shape.
 
Now the fun part.  Add some cute details to your name tag that go with the theme of the party or meeting.  Since the baby shower theme was daisies, I chose Lori’s adorable daisy file.
 
I resized and ungrouped the daisy so that I could change the color.  I wanted the daisy to be white, but show up well on the white background so I changed the ‘Line Color’ (6th icon on the top right toolbar) to grey.
 
Now here’s a tip — if I changed the line color and then printed it, the line would not show up well.  Before printing,  I had to change the thickness of the line (7th icon on the top right toolbar).  I changed my grey line around the petals to .75.
I then color filled the center of my flower with yellow, grouped the whole flower (by right-clicking and choosing ‘group’) and moved it into position on my name tag.
The other theme of the baby shower is the popular chevron pattern.  I found one of Lori’s zig zag borders, resized it, and duplicated it a few times to create an extra little accent.
Once my name tag looked the way I wanted, I highlighted the inside shapes and went to the “cut window” and clicked ‘no cut’.  I only wanted to see the red cut line around the outside of the grey label.
I then went to the duplicate icon (the one that looks like a little flower) and duplicated right and below until I had a whole page of cute tags.  Another tip — after printing your name tags, be sure to set the cut settings on your machine appropriately.  Since I was using printable sticker paper, and wanted the page to peel off the mat without leaving the tags behind so I set my blade to a 2.  The tags were cut, but the backing of the sticker paper wasn’t.
Thanks for letting me share these tips with you today!  Have fun creating cute name tags for your next party or event!


Silhouette Tutorial with Mendi: Thickening Delicate Pieces

It’s Mendi here and I’m so excited to be sharing a simple little Silhouette tip with you today.  I don’t know about you, but I’ve found when I’m shrinking cutting files down in size there are many times when the shapes become too thin to cut from cardstock without shredding the design.  To get around this I have found some easy tricks for thickening my fonts and shapes.  This is also a super handy trick for creating a “bold” font when that option is not available in the Silhouette software.  😉
 
To illustrate my tutorial I created this little Birdie Birthday card using several thin shapes and fonts (along with the adorable Echo Park Hello Summer collection) designed by Lori Whitlock.
I have created a video tutorial below sharing how you too can solve this common Silhouette cutting dilemma.
To create my card I used the following shapes available in Lori Whitlock’s shop:
I hope if you’re not already using this trick, you’ll give it a try!  🙂


Silhouette Tutorial: Card Making with Mendi

Hi there!  It’s Mendi here and I’m super excited to be sharing a Silhouette technique that I’ve been having a lot of fun using lately on all sorts of cards and layouts:  Creating journaling and sentiments around the edge of a circle using Silhouette’s print and cut features!

Unfortunately when preparing for today, I realized the hard way that this print and cut technique really works best when using circles that fit within the registration marks so for those of you that have a 12×12 printer, that means your circles can be up to 10.5″ wide and sadly for me (whose wide format printer recently bit the dust) that meant I was limited to a circle 7.2″ wide.  I had planned a layout using a 11.5″ circle but as hard as I was trying to find a way around it, I decided I needed to set that aside for another day and come up with a new project that would be easier to share with all of you.
As an alternative I settled on a fun spinner style birthday card for my nephew which can double as a rainy day activity spinner (or with the addition of numbers can be a great game piece for any game a child can dream up).  I think this would also be darling idea for chores too (although I’m not sure children would agree).  😉
My papers are from Lori’s fun new 6×6 “That’s My Boy” paper pad which she designed for Echo Park.
Without further ado, here’s my video tutorial sharing how I created it:
On a side note, I layered and glued 3 of the black arrows together to give it extra stiffness and make it easier to flick for spinning.  I also enlarged the center holes a bit and made sure to not tighten my brad too much so that it can still spin freely.
To complete my card and tie my theme together,  I decided to run the back of my card through my printer for a quick sentiment (using temporary adhesive on a piece of printer paper).
For my project I used the following cutting files available in Lori’s shop:
I have a link to another example using this same technique at my blog today.  I hope you’ll give it a try!  🙂

Silhouette has some great deals starting today running through the end of the month:

  • 1 CAMEO, 1 stamping starter kit, 1 light hold cutting mat, 1 teal CAMEO dust cover for $269.99 (MSRP $351.96)
  • 1 Portrait, 1 stamping starter kit, 1 light hold cutting mat, 1 grey Portrait dust cover for $129.99 (MSRP $229.96)
  • Stamping starter kit 25% off
  • Almost everything at silhouetteamerica.com is 20% OFF! (Excludes Silhouette CAMEO®, Silhouette Portrait®, downloads, download cards, subscriptions, and gift cards.)
  • PLUS: all orders over $25 SHIP FREE (that includes the machine bundles)(Reminder: FREE shipping only applies to the lower 48 states)

To get these prices use code: LORI at checkout and shop through this link: www.silhouetteamerica.com/stamp

Silhouette Tutorial with Christine: Unique Embossing

Today I am going to share a neat little trick that will quickly expand your current embossing folder inventory.  I love the look of embossed paper and there is so much you can do to with them.  But what if you could make your own? Wouldn’t that be fun!  Well with your die cut machine and your Lori Whitlock files, you can do just that.
As you can see in my card and envelope set, I embossed both with a quatrefoil pattern.  That pattern can be found here, 3 Pattern Backgrounds
In the following tutorial, I’ll give you step by step instructions on how you can make your own embossing plate out of plain cardstock. Of course you can also use chipboard but if you don’t have any on hand then it’s just as easy to make it out of cardstock.
First pick your background shape.  Lori has so many beautiful ones in her store to choose from.  Here is the link to 3 Pattern Backgrounds and these 3 Doily Circles would be a lot of fun too!
Open up your Silhouette program and place your file in the top left corner of your mat.  You will need to cut out multiples of the background shape.  I cut out and used 6, but depending on the thickness of your cardstock, you may need to cut out more or less.  I used Stampin Up! cardstock and it’s fairly thick.
Use the replicate tool to duplicate the shape.  Select the first shape, then click Duplicate Right.  Select that shape and click Duplicate Below.  The last step is to click the 3rd shape and click Duplicate Left.  That should place 4 shapes on your mat that are very close to one another.
Cut out your shapes and then adhere them together with adhesive. Make sure that they are lined up correctly.  You really don’t need to use a lot of adhesive, just a little on the sides and top.  I wouldn’t recommend liquid glue unless you made sure it was completely dry because it may ooze out of the sides and ruin your paper.   If you want to use 6 layers like I did, then just recut your file.

Here is what my quatrefoil pattern background looks like cut out and adhered together.  The sandwich for my Big Shot is bottom plate, embossing mat, paper, your embossing plate, then 2 cutting plates.  You may have to change your sandwich, depending on which machine you use, but as long as you have your paper between the embossing rubber mat and the plate you will get good results.

If you start cranking your machine and the sandwich is very difficult to crank through, stop, and remove some of the layers or check to see if your sandwich is too thick.  Don’t keep pushing it as you may break your machine or injure yourself.
I always practice on another piece of paper first to make sure that I have my sandwich right and that I get a good impression.  Looks pretty good to me!
And in my last picture, you can see the embossing on the patterned paper up close.  It gives the card such a beautiful look.  Sometimes its the details that count.
The last thing that I want to mention is how making your own embossing plates out of paper gives you a little more versatility than embossing folders.  If you have a special look in mind and let’s say you want this quatrefoil pattern to only emboss into a circle, then all you have to do is use your Silhouette or manual die cut machine to cut a circle out of your cardstock paper stack and emboss it exactly where you want it.  You can’t do that with the plastic embossing folder.  So now you can really tailor make your embossing plates to suit your needs.
Thanks for stopping by.  I hope you have fun with this neat little trick.
Lori Whitlock supplies used:

And, just a reminder about the Silhouette Promotion that ends TOMORROW! Be sure to pick up a rolling tote at 25% OFF and/or some of the newly released products from CHA this month at 20% OFF. And, of course, if you need a machine it’s a great time to pick one up in a wonderful bundle. Shop here: www.silhouetteamerica.com/tote and be sure to use coupon code: LORI at checkout.

Silhouette Tutorial with Brigit: Using the Sketch Option and Pens In SSDE

Hi everyone Brigit here with a fun tutorial using the sketch option and pens in the designer edition of the Silhouette Studio software.

This is such a fun feature of the software, you really can make some unique projects.

For this card I made internal offsets of the pieces and filled with colors and pattern paper.


I used the love birds file and the kiss me which is from the photo props set, both are from Lori’s shop.


First I started with a 5 1/4″w x 4″h rectangle for my card, I filled that with pattern paper.

I ungrouped the love birds file and place the leaves where I wanted them and then resized to fit inside the card shape.

I made a copy of the birds on the branch, with the knife tool cut the birds and deleted them.  Traci has a nice tutorial here on using the knife tool.


Select all the other pieces, go to the Offset Window and make an internal offset of .050 of all the shapes.  You just want to keep the internal pieces of the birds, leaves and branch, but keep both of the wings.

Before you disregard the birds ungroup and keep the eyes.

When I made the heart bigger the internal offset got too wide so I ended up resizing and doing an internal offset again, you’ll see below.


Select the birds on the branch, leaves and wings, (I ended up going back and adding the wings because I wanted them to have the sketch feature also, that’s why you don’t see them in the picture), go to your Sketch Window, I used the Continuous, no fill because I’m using the color internal offsets as fills.

Resize your heart and tilt so the birds fit inside.

Now you can make an internal offset of the heart, same as the other pieces, .050.

Select the original heart and change that in the Sketch Window to Continuous.


Color all the internal offset pieces whatever color or pattern paper you would like and place them inside the sketched ones, these are not suppose to be exact, you want it to look like a sketch.

For the kiss me, go to the Offset Window and make an Offset of .15.

I filled the offset with pattern paper. 


Resize both pieces so they fit where you want them on your card.

Select the kiss me, go to the Sketch Window and change to Continuous.

Under the Sketch Advanced Options I lowered the width, just so you could see the kiss me a little better.

There are three things you are going to do now, print, sketch and then cut in that order.

With my paper size and registration marks set I print out my project.

The Sketch marks will not print out, those are only to be used with your sketch pens or markers.  So don’t worry when you don’t see them on the print out, they come next.


After it’s printed, under the Cut Window select only the sketch pieces click on the cut.  You don’t want the card and the offset of the kiss me to sketch with the pens.

Put your sketch pens in the silhouette, here are two nice tutorials about sketch pens, Traci’s and Christine’s if you have never used them before.  I actually used a gel pen with another pen holder I have for my card.

Place you paper on the mat and you want to go through the detecting your registration marks.

Change your settings to sketch pens and cut.

Go get a cup of coffee, the continuous sketch takes awhile, but it’s so worth it!

After the sketch is done, put your blade back in again, now under the cut window only cut around the card and around the offset of the kiss me.

Load your mat with paper and go through the process of detecting your registration marks and change your settings to whatever paper you are using and cut.

To finish up the card I glued it onto a 5 1/2″w x 4 1/4″h white card, added some Totally Sky Trendy Twine and a cute little button.

I hope you find this tutorial helpful, thanks for stopping by, you can find me at

http://www.brigitsscraps.com