
Hi everyone! I have a fun little mini album to share with you today. I created it with Lori’s new Echo Park Chickens collection. I used every element of this collection, from the 12×12 paper pack, the frames n tags, the ephemera, enamel dots, matching cardstock and the 6×6 pad. How blessed I am to have all this at my fingertips to create with.

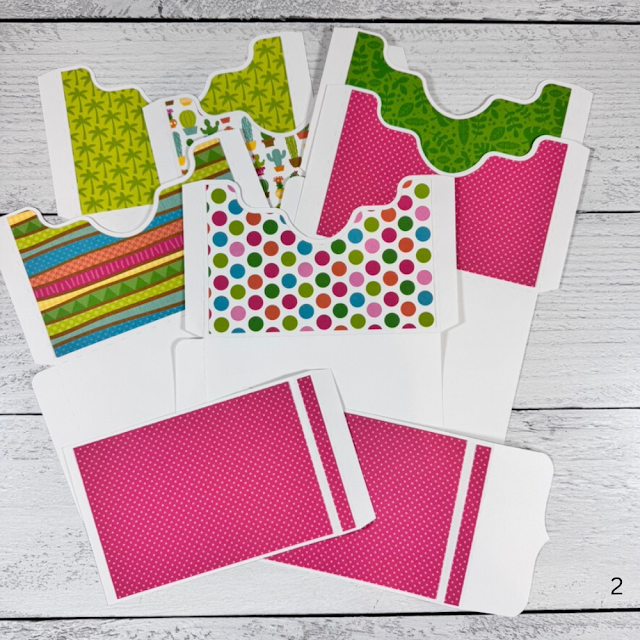
I started by choosing four patterned papers to create envelopes. I used this envelope, Nesting Window Card Envelope in Lori’s Shop. I cut them and assembled, just ATG tape was used to adhere.


I then took all four and used my Cinch binding machine to create the little book with a spiral binding.

After I had my pages bound I then used this fun elements sheet to make 4 mini cards to go inside the envelopes. I cut my card stock 8.5 x 4. 25 inches and scored in the middle to make the little cards.

Simple little cards, my plan is to add my daughter’s favorite chicken dish recipes to these. Hand written is the goal.

Next, I cut four library pockets and I just adhered these with ATG adhesive as well.


Next, four tags cut from an elements page to go inside my four pockets. Again, I will add more hand written recipes.

I adhered the library pockets onto the back of the envelopes as you can see in the following photos.


This is a darling collection and just so perfect for creating a cookbook.

Thank you for stopping by!

.png)
.png)
.png)
.png)
.png)
.png)
.png)
.png)
.png)
.png)
.png)
.png)


