Layout by Traci and Cake Explosion Box by Christine

Traci is on the blog today sharing this beautiful layout with us… Hi everyone! I’m back today to share a sweet layout with you.  This is my darling niece back in 1997 (I’m just a tad behind on my scrapbooking).  She was at such a cute age back then that even though each of these photos wasn’t from the same day or event, I wanted to use them together.  (How cute is that hat)??  Every time I saw Taylor back then, she made me laugh — so Lori’s title was perfect for this layout.  I’ve also been wanting to use one of Lori’s 12×12 backgrounds and I fell in love with the honeycomb pattern.  Using my cameo, I was able to cut the entire 12×12 background out of a sheet of pink pattern paper.  Then, I clipped parts of the inside away, so that the pattern was left on the bottom and up one side.
I also cut a few of the hexagons out of other pattern papers to give the layout some random pops of color.  I cut a hexagon shaped card in half to layer under some embellishments in the top right corner, and I finished up the page with twine around the edge and a few flowers.
Here are the cutting files that I used…thanks for letting me share with you today!
Lori Whitlock Geometric Lace, also available in the Silhouette store as Honeycomb Background Lace
and check out what Christine made today
It just so happens that my day to share on Lori’s blog is also my daughter’s 21st birthday so I thought that it would be fitting to share something birthday related.  This birthday explosion box is new in Lori Whitlock’s store and I had a lot of fun putting it together and adding my own personal touches.

On the top of the box, I added a bow that comes with the Birthday Box file.  Just cut a couple of strips of paper and secure with a brad.  When you lift the top off the box, the sides fall open and the cake inside is revealed.

I made the little 21 myself by typing the numbers out first and ungrouping them.  Then I drew a small rectangle the width of the numbers and welded it to the bottom of the numbers.  This created a little tab that I was able to use to attach it to the top of the box.  If I had thought about it before I cut out the box, I would have put an extra slit in the top of the box like the others have, so that I could just slide the tab in and secure it underneath.  Next time I make this, it will be easier to make it look nice.  Make sure that you can fold the number over, or the lid won’t fit on the box.
I used October Afternoon’s CakeWalk collection to cut out my box and added a few sticker embellishments here and there.
This way a really fun box to create.  I am excited to try it again in different colors.
So, if I may, a big Happy 21 Birthday Wish to my daughter.  I hope this day brings you joy and happiness!
Lori Whitlock Supplies used:

Layout by Mendi and Card Set by Corri

Welcome Mendi and Corri to the blog today with their adorable projects. First up is Mendi.

I’m back today to share another layout using more from the “Perfect Summer” collection Lori designed for Echo Park along with several of her cutting files!

I ended up utilizing a couple 6×6 papers from the coordinating paper pad for my background.  I love how the prints are reduced in size which was perfect for what I had in mind.  For my title I paired Lori’s “adventure” phrase with some Ali Edwards stamps and a fish sticker from the collection.
I also used the smaller prints from the 6×6 pad to cut my flip flops which worked well.  I wanted the water flourish to stand out against the background so I chose to journal on vellum which gave a subtle washed out look to the patterned paper below.  As a finishing touch I added Stickles glitter to the water flourish and openings in my diecut border.
To create my layout I used the following cutting files designed by Lori:
Don’t Bother Me (flip flops)
4 Seasons Layout: Spring (flower for flip flops)
Cute Umbrella (for splashes- Silhouette Store only)
‘Water’ Flourish (Silhouette store only)
‘Big Adventure’ Phrase (Silhouette store only)
3 Borders (Silhouette store only)
Next up we have Corri…

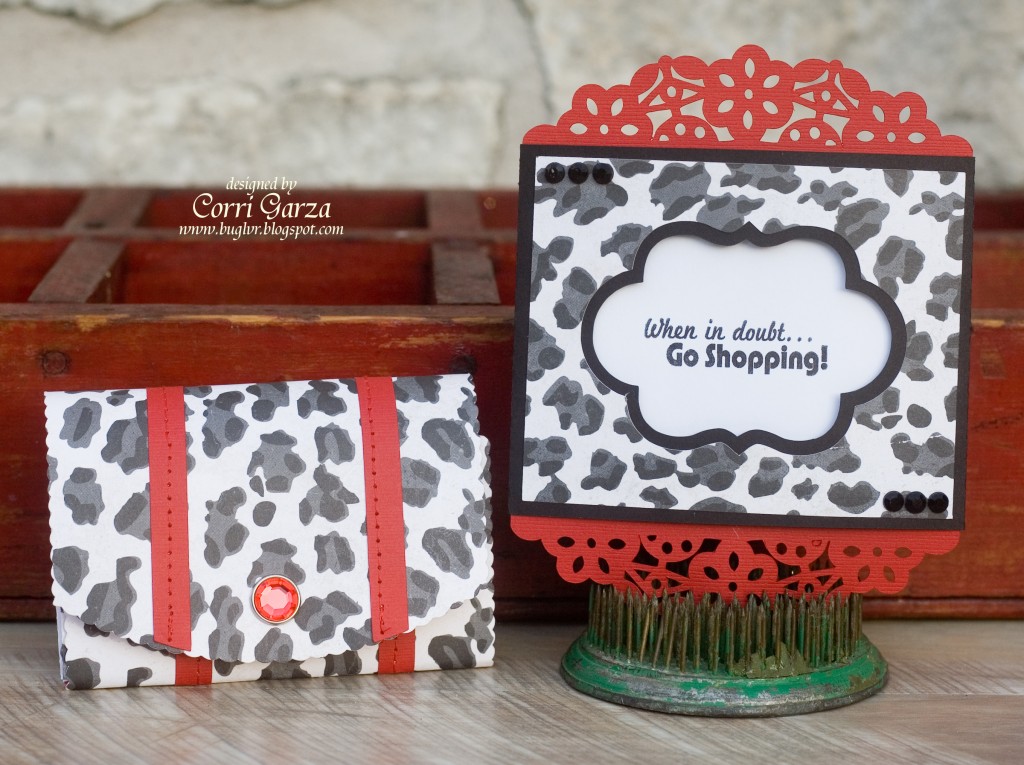
I have a cute gift set to show you today that would be perfect for a friend or a teenage girl.

 I just love Lori’s new Accordion Gift Card Wallet.


The wallet is perfectly sized for a gift card or two and is very durable.  You could easily carry this around in your purse.   I made the Ornate Pull Out Card 2 to match using paper from the Echo Park – Love Story Collection that Lori designed.  This card is so beautiful and looks like you put a lot of work in when it actually goes together very quickly.

Mini Album by Traci and Layout by Mendi

Here we go again, it is already the middle of the month. The best part is that it is Monday, which means our awesome Creative Team is here sharing inspiration with you. First we have an adorable mini album from Traci…
“Today is Always a Happy Day” when you get to create fun projects with Lori’s designs, and I had a lot of fun with this adorable mini album.  This album was created using Lori’s 5×5 album with box.  The pattern comes in two files, one for the box, and one for the album, and the whole project is a snap to put together.
For the base of the box, album pages, and title (which is also one of Lori’s designs and can be found here or at the Silhouette online store) I used heavy white card stock.  I wasn’t sure if it would be sturdy enough for the project, but once I layered all of the other papers and embellishments, it is very durable.
The paper is from the Here & Now collection by Echo Park and the little sun sticker is from  A Perfect Summer line.
The little birds on the branch are an SVG in Lori’s shop called Love Birds.  I chopped one of the little bird’s legs off (poor guy) so that he could sit lower on the branch.
I love how the design of this album has the ribbon/twine holes already punched for you.  I did, however,  use a 1/4″ hole punch to make them a little larger so that my thicker ribbon would slide through easily.
I will have a few more pictures posted over at Artsy Albums today, so please stop by my blog and say hello!
Thanks, and I hope your day is happy!
Traci
Next, is this beautiful layout by Mendi…
Today I turned to the Maggie Holmes collection by Crate Paper and a handful of complimentary cutting files designed by Lori.  I knew I wanted to do something fun with the 12×12 decorative tape sheet from the collection so I cut it into strips, mixing it with other paper strips and adhered them to printer paper.  I then cut my mouse ears out on my Silhouette by welding 3 basic circles together.

I took Lori’s “memories” title from a layout cutting file and paired it with one of her awesome banners which I enlarged to fit over my mouse ears and popped up with foam tape between the layers for some depth.
I also used her scalloped border which I cut twice (once from blue and another without the inside cuts from ivory).  I like to do this to minimize the visual distraction when a patterned paper is layered below my borders.  I finished off my layout with a layered tag to document the basic details of the day.  


To Create my layout I used the following cutting files designed by Lori Whitlock:
Memories Layout (for title)
5 Layered Labels (Silhouette Store only)

Silhouette Tutorial Welding Shapes by Christine

If there is one thing that I love about digital die cuts, it’s that you can have fun manipulating them to make something very different than they might have been intended for.  I took one of Lori’s 4×6 Life Card files and made a mini album from it.  I only used one of the shapes but using the directions that I am going to give you, it will be very possible to make a mini book with different shaped pages.
Here is the file that I used.  Once I had my shape on my mat, I actually resized it to a 3×4 size for a mini, mini album, but you can create it in any size that you would like.
Here are some pictures of my finished mini book.  I used Lori Whitlock’s Here & Now for Echo Park paper and embellishment collection to create my mini book.  I’ll have more up close pictures of my mini on my blog if you want to pop on over there.
So now for the tutorial.  How do you take a 4×6 Life card and make it into this ticket shaped accordion mini album?  Let me show you!
Pick the shape that you want to use.  I picked the ticket stye.  Ungroup the file and delete the shapes that you don’t want to use for this project.  Replicate your shape so that you have a row of three.
Move each shape to the left so that they are just barely overlapping.  You don’t want to go too far because it will distort the shape.  You will know when you weld the shapes together you will know if you put them close enough because the middle lines will disappear.
If you move over too much or not enough, just click the undo button and try again.
Tip:  Hold down the shift key while you are drawing your line, to get a perfect straight line.
This step can be done whether you have the basic or Designer Edition of the Silhouette Software.
Sorry, the above direction should say, Copy one of the perforated lines and paste it on the end of the welded shape where you just erased the line.  Draw a short angled line, select it and mirror left under the replicate feature.
Cut out as many of these groupings to make your mini book long or short.
Try this technique with basic shapes or more complicated shapes.  You never know what you can make until you try.
To create the mats for the individual pages of my mini book, I took one of the original shapes and used the inside offset feature.  Those I cut out separately from matching paper.
I hope you enjoyed the tutorial today.  If you have any questions please feel free to visit my blog and leave your question in the comment section.  Thanks!!
Supplies used:
Here & Now paper and embellishment collection by Lori Whitlock for Echo Park

A Perfect Summer Layout by Mendi + Ice Cream Cone Card by Corri

It’s Mendi here sharing a layout using the super fun “A Perfect Summer” collection which Lori designed for Echo Park!   My jumping off point for my page was the hot air balloon patterned paper from the 6×6 paper pad which I used as a border behind my photo mat.  I originally had tried using the full sized 12×12 sheet, but found that I couldn’t actually see enough of the print so the smaller format really worked well.

I created a little embellishment for one of my squares using Lori’s popular Hot Air Balloon cutting file which I popped up with foam tape for a little added depth.
I also played with her awesome new “Ready Set Go” Title which fit my space perfectly. The title she designed came in one layer, but for fun I cut it out four times from different colored paper, then cut off the extra words from each color and pieced it back together for a bright look.
For my layout I used the following cutting files available in Lori’s shop:
3 Borders (only used outer outline)
Relax Summer is Here (hot air balloon choice #1)
Hot Air Balloon Card (hot air balloon choice #2)
Four Seasons Layout: Summer (hot air balloon choice #3)

Corri here with a fun and quick card using Lori’s new A2 Ice Cream Cone Card.