Riley Blake Blog Tour

Hello! Welcome to my blog! Today I’m posting as part of the Riley Blake Designs Spring Blog Tour!

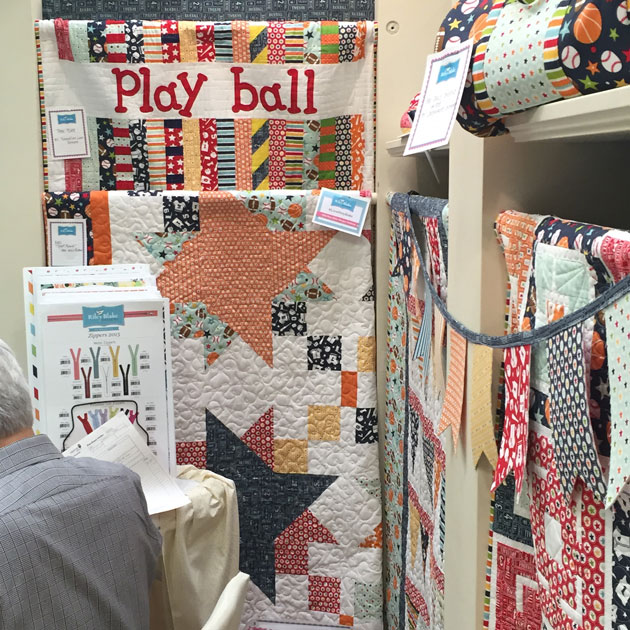
Last week I attended the Spring International Quilt Market in Minneapolis, Minnesota with Riley Blake. It was a wonderful and inspiring weekend. When I go to these events I come home with a million ideas brewing in my head. Here are  a few photos from the event.

My NEW fabric collection that released this month and was shown last week at market is called Play Ball. This line was inspired by a paper collection that I designed for Echo Park called That’s My Boy. This is a perfect fabric collection for a sports enthusiast.

Here are a few projects that the Riley Blake team put together.

My sister, Pam is a wonderful seamstress and helped me put together this adorable banner quilt using this new collection. Thank you, Pam for your help!! You can download the banner quilt pattern from Riley Blake as part of their collection of FREE quilting patterns right HERE.

And, just for visiting the blog today, I’m giving away two FREE patterns to make a 3D baseball and a 3D football. Click HERE for the baseball. Click HERE for the football.

Thanks so much for stopping by my blog!  Watch for my new, Play Ball Collection in your local quilt store of online store this month.

Here’s the schedule for the rest of the Riley Blake blog tour! Enjoy!

5/15 – Where Women Cook
5/18 – Becky Marie Designs
8/18 – Pattern Anthology
5/19 – Carina Gardner
5/21 – Lori Holt
5/21 – Tasha Noel
5/22 – Lori Whitlock
5/22 – Cinderberry Stitches
5/23 – Eleanor Dugan
5/26 – Simple Simon
5/26 – The Quilted Fish
5/28 – Melly & Me
5/28 – Elea Lutz
5/29 – Zoe Pearn
5/29 – Doohikey Designs
5/30 –Samantha Walker
5/30 – Kelly Panacci

Using Glitter Heat Transfer Vinyl with Kathy

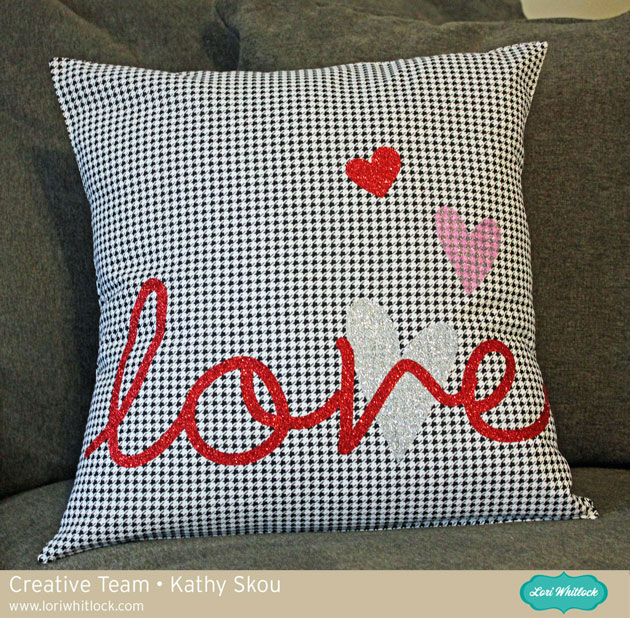
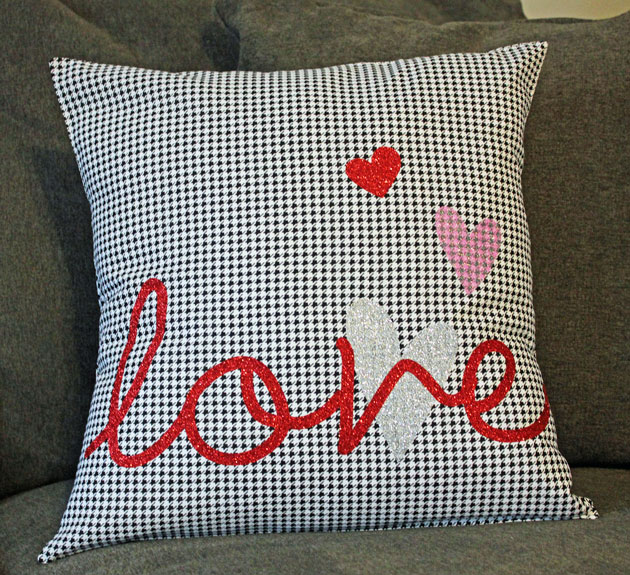
Hi Everyone!  It’s Kathy today with a fun tutorial using the new Silhouette Glitter Heat Transfer Vinyl.  This medium is perfect for making custom t-shirts, and bags but I thought it would be fun to do a pillow for a friend!  Take a peek…
I found a great, easy tutorial to make an envelope pillow cover here on YouTube.  I followed the directions but before I stitched the pillow cover together, I did the following to decorate the front.

 First, I decided on my design and laid it all out in the Silhouette Studio.  I used the word “love” and some hearts from Lori’s Homespun Hearts collection.  When cutting words from heat transfer material, make sure to mirror the image (select Object from the menu, then Mirror) because you cut the back of the transfer material.
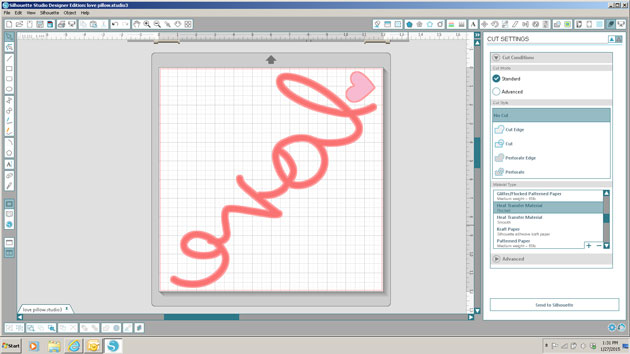
I chose to work with the White Silver, Red and Hot pink Glitter Heat Transfer.
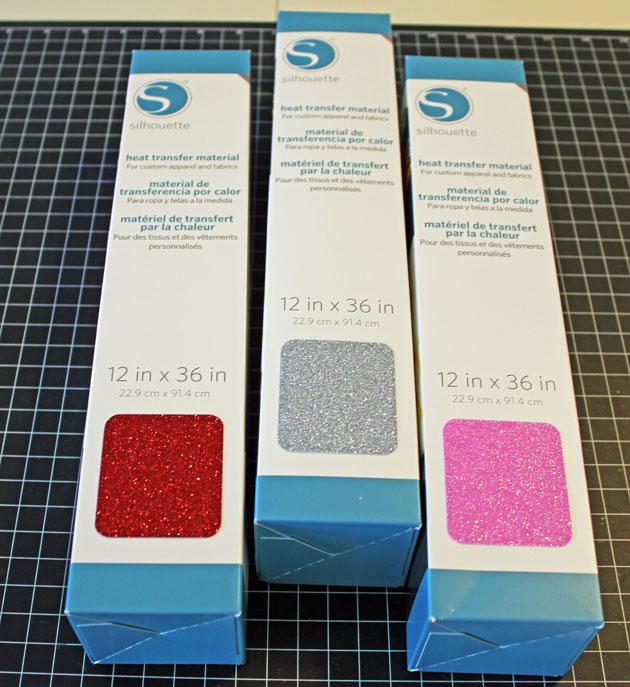
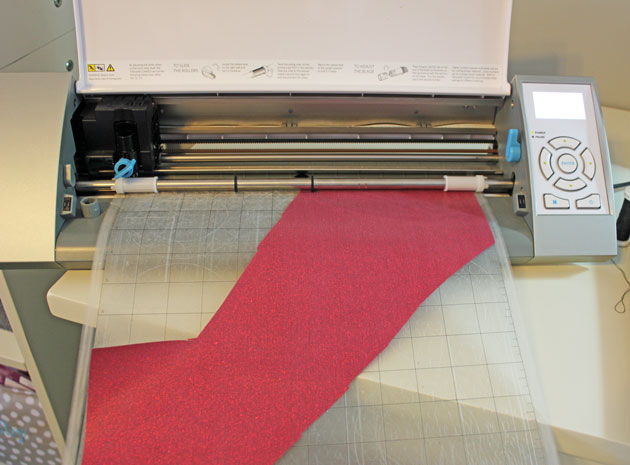
If you like, you can load the Glitter Heat Transfer material directly into your Silhouette without a mat, using the Load Media button.  I chose to use my mat, since I was using smaller pieces of the material.  The load media is great if your cut is larger than 12 x 12.    Change your cut settings to Heat Transfer Material, Flocked. (It’s the same for the Glitter) and your blade to a depth of 3.  Be sure to put your material on your mat shiny side down (you’re cutting the back).
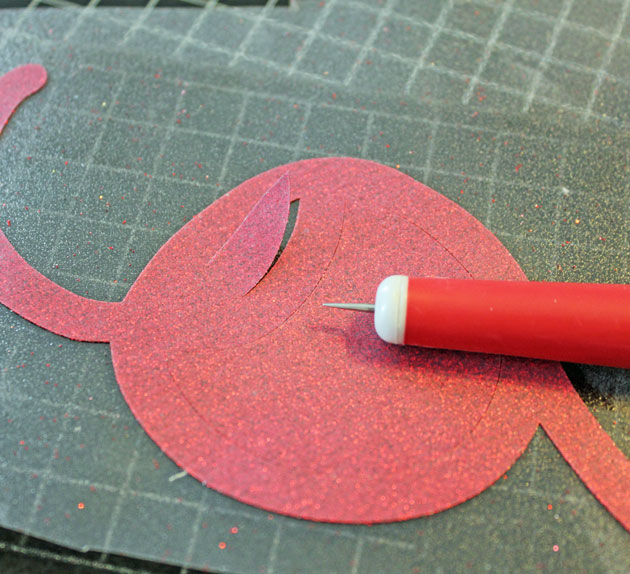
Once you’ve cut your image, you want to peel off the “negative” sections of your material so that only your image remains on the plastic transfer sheet.  If you have small sections that are hard to peel with your fingers, you can use a piercer or hook to snag those sections.  I did this with my letters, putting the image over a piercing mat to make it easier.
Next, I laid all my cut pieces out on the cover fabric to get the perfect placement.
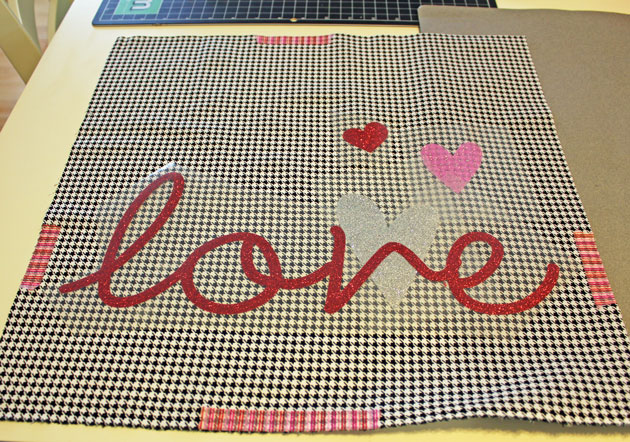
A little trick…to make sure you leave space for your stitching seam allowance ( in my case 1/2 inch), put some 1/2 inch washi tape around the edges.  This way you can see exactly how much space you have!
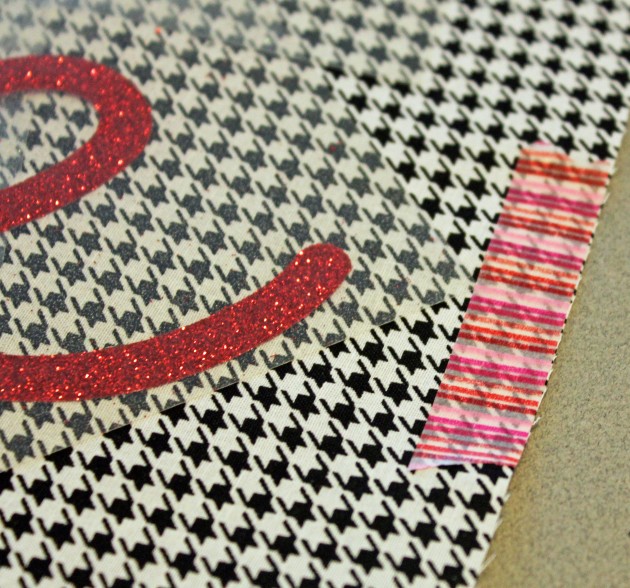
Now for the fun part…Ironing the design to the front of the pillow cover!  I preheated my iron to the cotton setting. (no steam)  Place your design on your fabric.  When layering it is best to do one layer at a time starting with the bottom. (my silver heart for example).    Cover the transfer material with a scrap piece of fabric and iron the design for 45 – 60 seconds.
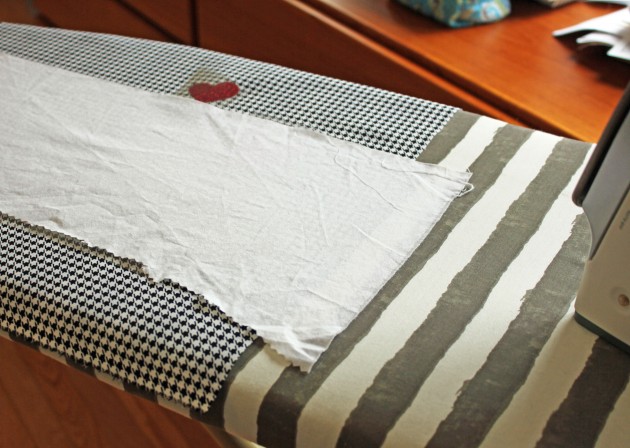
Check to make sure all of your design has transferred to the fabric by carefully lifting the transfer sheet. (it can be hot!!) If it doesn’t peel off easily, place it back down and iron for a bit more time.
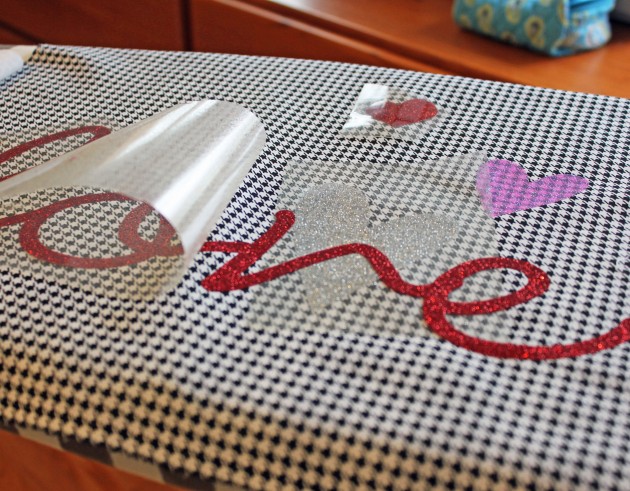
Once your design is all ironed on, you can finish stitching your pillow cover together according to the instructions above.
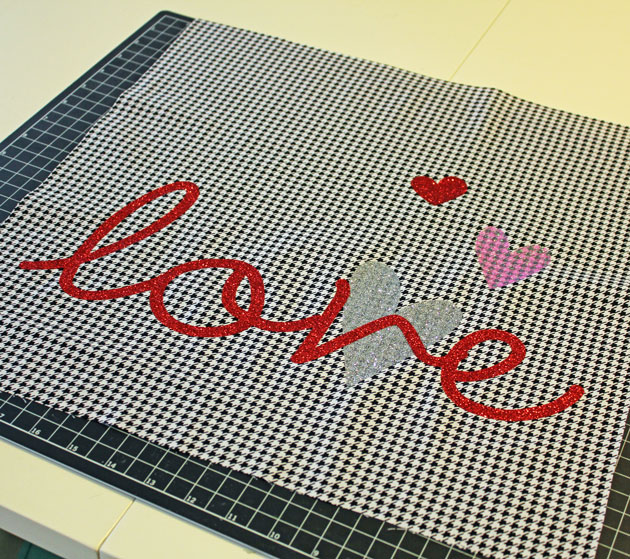
Here is the finished pillow!  It was really easy to make, I don’t sew fabric a lot but it’s really just a series of straight lines!  My friend doesn’t know this is coming her way…I’m wondering if she’ll know it’s for her!!
That’s it for me today!  Thanks for stopping by!

Christmas Gift Link Up with Corri Garza

Hi everyone!  Corri here today with a new link up party for you guys.  Since this time of the year is all about gift giving, I thought it would be fun to have our link party be all about “Gift Ideas.” Lori has recently added so many great gift files to her shop….check out these cute ideas.

Link up your projects using any of Lori’s files for a chance to win a $15 gift card.

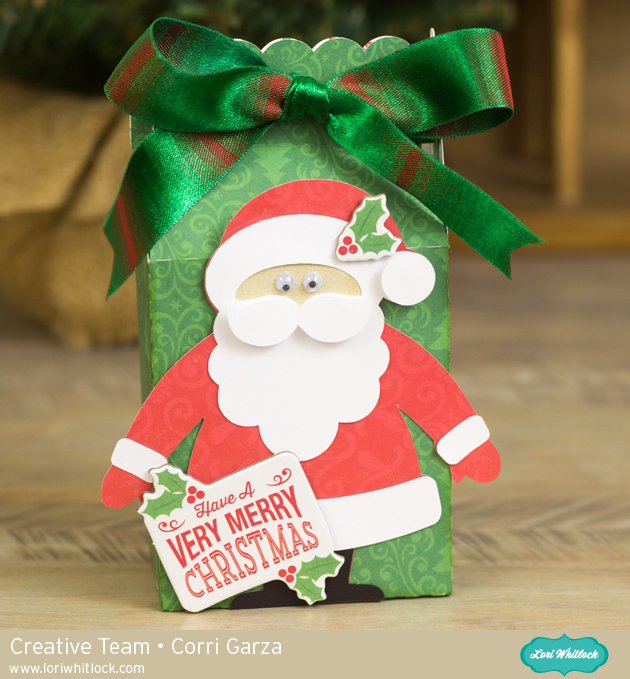
Here’s my project for today.

This box would be so cute filled with candy, a gift card or a small gift.  I used paper from the Christmas Cheer Collection from Echo Park.

We love seeing all your projects…you can also share them on Instagram using the hashtag #loriwhitlock and tag @loriwhitlock.


Riley Blake Blog Tour + Giveaway!

Welcome to my blog! I’m so glad you stopped by for the Riley Blake Blog Tour. For those of you that don’t know me, my name is Lori Whitlock. I’ve been designing for Riley Blake for 3+ years and for the crafting industry for 10+ years. What an amazing opportunity it’s been to work with Riley Blake and see my designs come to life in fabric.  It’s truly been a dream come true for me. I have always been a creative spirit and it’s been such a blessing to be able to turn that creativity into my career.

In addition to fabric, I also design scrapbook paper and accessories, Sizzix dies, stamps, and digital cutting files. So, you’ll often find coordinating designs in other mediums to go along with my fabric collections.

I’d like to introduce you to one of my newest fabric collections called, Fancy Free. It features a beautiful floral, whimsical bicycle pattern, plus yummy dots and stripes. (KEEP READING, THERE’S A GIVEAWAY AT THE END.)

I have a coordinating paper collection to Fancy Free called Summer Bliss.

And, you’ll also find that I have die cutting files to coordinate with Fancy Free…

And, just because I think it’s so fun to see where people create, here’s a little sneak peek into my studio. This is my creative space and I love this room (when it’s clean!).

Above is another one of my favorite fabric collections that I’ve designed for Riley Blake called Simply Sweet.

Be sure to visit all the blogs in the Riley Blake Blog Tour. It’s fun to meet all the designers and see what they’re up to.

Riley Blake Blog Tour line up:
11/6 – The Quilted Fish
11/7 – Bella Blvd.
11/8 – Deena Rutter
11/10 – Lila Tueller
11/11 – Carina Gardner
11/13 –Bee In My Bonnet
11/14 – Fancy Pants Designs
11/15 – My Mind’s Eye
11/17 – Zoe Pearn
11/18 – Sue Daley
11/20 – Kelly Panacci
11/21 – Marin Sutton
11/22 – Lori Whitlock –YOU ARE HERE
11/24 – Melissa Mortenson
11/25 – Melly & Me
11/28 – Scott Jarrard
11/29 – Elea Lutz
12/1 – Sibling Arts Studio

Everybody loves a GIVEAWAY, right? I’ll send one winner a fat quarter bundle from Fancy Free including 6 prints. Enter the GIVEAWAY through the Rafflecoper form below. GOOD LUCK and thank you so much for joining me here on my blog! Be sure to sign up for email updates in the top right column of my blog and follow us on Facebook, Instagram, and Pinterest.
a Rafflecopter giveaway


Last Minutes Valentines Projects by Natalie & Christine

 Are you finishing up last minute touches for Valentines day? Here a couple beautiful projects for you to try…
Well, I have a quick and easy project for you today.  I kind of have this thing for changing out my pillows for the different holidays.  I just have three pillow forms I picked up at Hobby Lobby last fall, and have been making slip covers for every holiday since.  So Valentine’s in no exception, however, I couldn’t find any cute Valentine fabric I liked enough to stare at for a whole month.  So last time I was at Hobby Lobby, I ran across these fabrics, and as much as they are cute, they are not very holidayish (is that even a word?)  So I took it upon my self to fix that.  I grabbed some iron on vinyl from my stash, and a cute file from Lori’s shop, and now the set looks the part.
 
I simply made three pillow cases, but the one that was white I stitched with some red tread to make it a little more fun.  Then I cut out the heart, and ironed it on.  I love quick projects like this, but they look pretty fancy still.
The file I used was from Lori’s shop called 3 hearts and you can find it here.
Next is Christine with this adorable Valentine Heart Shaped Box…
For those who are still trying to think of the perfect gift to give your “somebody special” on Valentine’s Day, I have a fun and easy idea for you.  This beautiful heart shaped box goes together in minutes and is beautiful as well as functional.  

To make the box I used Lori’s Heart Shaped Box cut from her store and then decorated it with one of the new 3D Flowers Sets in her shop.  I used a special trick in my Silhouette program to make the pink of the flower match the box perfectly.  Stop by my blog to find out how I did it.

After the pieces were cut I also added a little Spun Sugar and Worn Lipstick Distress Inks to the curled up edges to create depth.
This picture shows the top and bottom of the box.  I love the pretty scalloped trim on the top of the box.  I added some black satin ribbon because it coordinated so well with Lori’s Love Story paper collection by Echo Park.
And here is where the functional part comes in.  Fill it with a favorite treat, candies, cookies, a handwritten note or anything else you can think of.  Stop by my blog to find out a few tips on using digital paper and the print and cut function to create this hybrid project.
Lori Whitlock Design Supplies used:
Other Supplies:
Love Story Paper Collection by Lori Whitlock for Echo Park Paper
Black Satin Ribbon
Silhouette
Tim Holtz Distress Inks