Flag Day Banner Tutorial With Anita

Hi Everyone:

Happy Flag Day.  Anita here with a banner that you can use for Flag Day as well as for the Fourth of July, Memorial Day and any other day that you want to celebrate our great country.  I used several different cut files of Lori’s to create this banner.

Happy Birthday Banner – 2   SVG,  Silhouette
Layered Pinwheel     SVG,  Silhouette
3D Lori Whitlock Spiral Flower   SVG,  Silhouette
5X7 Box Card 4th of July   SVG , Silhouette
American Flag   SVG,  Silhouette
3D USA Décor Blocks   SVG, Silhouette

I love mix and matching Lori’s cut files to create new projects.  I am going to show you how I prepared the fabric for cutting in my Silhouette machine. 

Here are the supplies that I used for this project.  Terial Magic is a wonderful product that comes in a spray bottle and you can get it on Amazon or at your local quilt shop.  I sprayed the fabric liberally and checked the back side to make sure that it was soaked on both sides.  I hung the pieces on my shower rod  to let them drip to just damp.  I recommend you put something under where you hang the fabric so that it doesn’t make a mess.  It’s sticky, and rubber gloves might have been helpful to use as well.


Here is a photo of the fabric as I was in the process of ironing it.  You can see the bottom left looks still darker and wet and the right part is done and the fabric feels like paper.  I ironed my fabric on a towel to absorb any extra of the Terial Magic Fabric Stabilizer.

You can see how this fabric stands up once it is ironed.

I used the strong grip mat from Cricut and a brayer to make sure that the fabric didn’t move.  You will want to slow down your cutter in addition to choosing fabric as your material to be cut.

I laid out the blocks to see how they would look and switched around the banners and embellishments.

Earlier in the week on Tuesday we had our June blog hop and I have included a photo with the quilt block centerpiece and the banner that I made.  I am going to put this out for the 4th of July.

Hugs,

Anita


Doodlebug Design Cut File Feature: Fun in the Sun

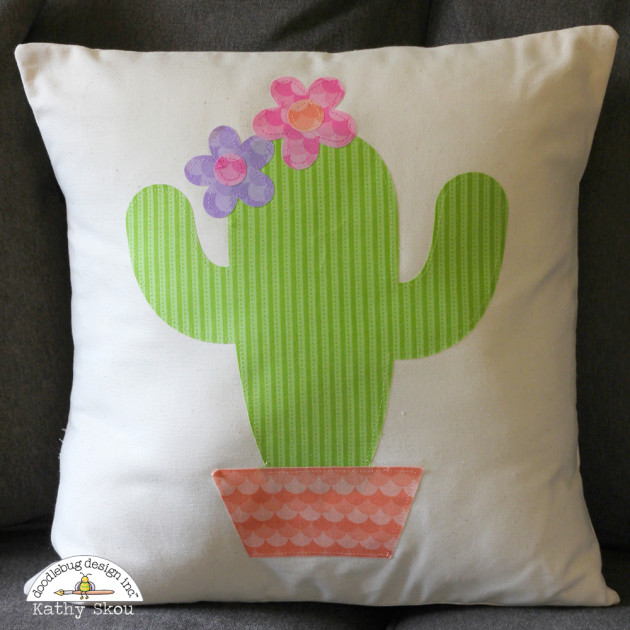
Hi Everyone!  Today I’m showcasing another fabulous project using Doodlebug Design’s cut files!  This fun Cactus throw pillow was created by Kathy Skou for Doodlebug Design.

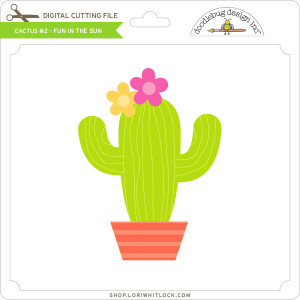
Kathy used the Cactus #2  File  from the Fun in the Sun Collection to make this pillow.

What a fun way to decorate a room!    For more views, see the original post here.   New Doodlebug Design SVG files are being added to the Lori Whitlock SVG Shop on a regular basis, so stop by to see all of the fun SVG files HERE!

Have a great day!


Quilting Weekend Goodie Set

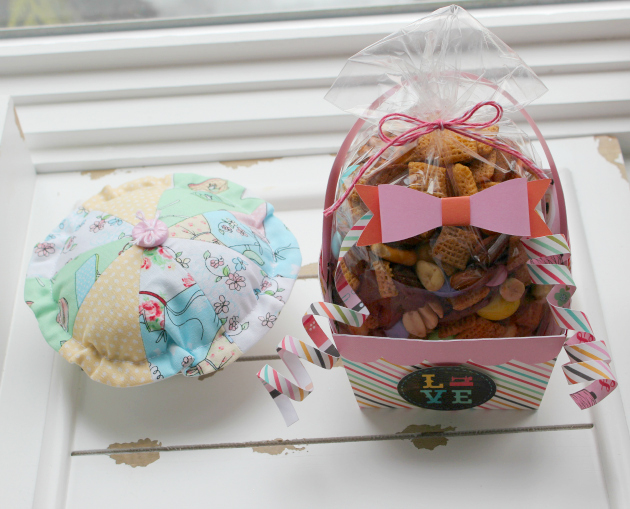
Happy March everyone.  I am so excited to share my project for today.  I love to sew and quilt and am going away for a long weekend with  good friends to quilt.  I made this adorable box of Lori’s using paper and stickers from her Echo Park line called I’d Rather Be Crafting.   The cut file I used for the box is called Basket with Flower and can be found here in Lori’s shop and here in the Silhouette store.  I also used the bow from the Matchbox Drawer Card Bow which is here in Lori’s store and here in the Silhouette store.  To make my curls, I cut 1/4″ pieces of cardstock and wound it around a pen.


I also made pie tin pin cushions to give to my friends along with their spring Chex Mix.

Thanks for looking and enjoy the rest of your day.

Hugs,

Anita

Holiday Dog Bandanas with Anita

Hi:

Anita here with a fun and easy tutorial to make your furry friend a dog bandanna.  My son and daughter-in-law have three dogs and they like to include them in their Christmas photo.  I made some personalized bandannas for my fur grand dogs using some of Lori’s fun fonts and heart cut files.  For Lily and Sully’s bandannas, I used the Wide Marker font at 288.0 pt which can be found here in Lori’s store and here in the Silhouette store.    For Scout’s bandanna I used LW Thick at 288.0 pt which can be found here in Lori’s store and here in the Silhouette store.  The cut file for the hearts is called 4 hearts and can be found here in Lori’s store and here in the Silhouette store.   I found a doggie bandanna pattern on the internet from Sew Caroline and the free pattern is here.

Here are the supplies that I used for Lilly’s bandanna.  You can really use any heat transfer vinyl.

I measured across the part of the bandanna where I wanted to put the letters so that I would have a sense of how wide the name could be and fit nicely.

Lori’s fonts are so easy to find in your Silhouette font library and they start with the letters LW.

I had fun experimenting with some of Lori’s different fonts to see which one I liked the best.


Heat transfer vinyl has a clear plastic sheet which is sticky over the front of the vinyl which allows you to protect the vinyl while ironing it on.  You are going to want to place it with this clear/front side face down on your mat.  You can cut vinyl without a mat but I didn’t want to move my rollers so I put it on a mat.

As you can see from above there are many different types of heat transfer vinyl.  I chose to use a metallic one so that is what I selected in the cut settings.  Notice that the letters are not mirrored on my mat.

Isn’t Silhouette so smart?  They know I am cutting with vinyl and asked me if I wanted to mirror my design.  Given that I was cutting out letters I said to send them mirrored.  I also chose to do two passes as my blade isn’t brand new and I was asking it to cut through three layers.  I could also have mirrored it before sending it to cut.

Wows, my mat is looking well-loved.  Here are the letters cut out and the extra vinyl removed.  Don’t remove the top plastic sheet, you need it on until the letters are ironed down.

Everything is ironed down now.  I used a plastic pressing sheet and did not heat it for the 45-60 seconds as they recommend on the package because my iron runs really hot and I didn’t want to bubble the vinyl. I usually choose a middle point and put the first letter down there and then add the rest one at a time.  I find that things move less that way when ironing.  Apply even pressure, not steam and don’t move your iron back and forth.

I used Velcro circles on each corner point and stitched them down.  I used a seam ripper to gently peel away the top plastic piece, you could also use a pin.   If the vinyl starts to pull up then you might have to reheat it.  Be careful to not overheat it.

Here is Lily’s completed bandanna.

Here are all three bandannas.  Can’t wait to see how the Christmas photo turns out.

Hugs,

Anita


Thanksgiving Napkins with Brandie

Hi Everyone! Brandie here with a tutorial on how I made some pretty napkins using the Split Pumpkin Set  (Silhouette store) and the Darling Script Font (Silhouette store) .

I wanted something to spruce up my Thanksgiving table this year. I’ve never had a fancy table-scape and probably never will, but a girl can dream. With this project I will get a little closer to that goal.

For this project I used 100% cotton napkins, gold glitter heat transfer vinyl, brown glitter heat transfer vinyl, parchment paper, and an iron.

First I added the font to my computer then uploaded the split pumpkin to Cricut Design Space.

I sized the pumpkin to a width of 3.1 inches and a height of 3.4 inches. I then welded the image so that when I send the pumpkin to the mat the top and bottom of the pumpkin will cut stacked on top of the other like in the picture. For each name I adjusted the letter spacing so that the letters touched I then welded the letters together so they will cut as one piece as well.

Since my name is the longest I used it as the guide to size the other names. The height is .72 inches for all of the names and the width vary for each name.

Once I was happy with the sizing I was ready to cut. I turned on the mirror image for both mats, adjusted the images on the mat to give myself a little more room for weeding, and cut the images out of the heat transfer vinyl. When applying the vinyl be sure to put the shinny side down on the cutting mat.

I washed and pressed my napkins. I also dry fit the two images  so that they would be in the bottom center on the napkin.

I always use a piece of parchment paper between the vinyl and iron. Then pressed  the vinyl with as much pressure as I could to get a good adherence. I then flipped the napkin over and pressed the back of the image. I then repeated the steps for the name.

Here they are finished and ready for my Thanksgiving table. Thanks for stopping by!

Brandie