Anita here with a fun St. Patrick’s Day card called Bobble Card Pot of Gold (SVG, Silhouette). I used Mini Action Wobbles Springs to pop up the pot of gold and it wiggles when you pick it up or shake it. Lori has a tutorial on her site for this type of card and links to get the wobbles. I used some of her Echo Park paper collections including Day in the Life No. 2, Pets, and Our Little Princess. Thanks for looking and have a great day.
Hello friends! Marcia here today.I am always in need of birthday cards and thought these fun new slice form pop-up birthday cards were just perfect. This pink girly A2 Sliceform Pop-up Birthday Cake Card (SVG, Silhouette) cut file can be found in Lori’s Store along with many other varieties of these new cards. I used the Echo Park Paper All About A Girl collection. The card front looks like a normal card.
When open, this fabulous cake with balloons pops up!
I loved this card so much that I decided to make one with the Echo Park Paper Birthday Boy collection as well. This is the A2 Sliceform Pop-up Birthday Presents Card (SVG, Silhouette)
The inside has a pop-up stack of birthday presents and balloons.
Stop by the Lori Whitlock YouTube channel for a tutorial with instructions on how to assemble the A2 Sliceform pop-up cards. Don’t worry about how you will mail it, because these awesome cards fold flat and fit in an A2 envelope!
Hi everyone! I have a fun card to share with you today, just a few simple steps and you will have a card that pops up and delights your recipient. There are lots and lots of these pop-up box cards to choose from in Lori’s Shop and in the Silhouette Online Design Store. You can find the card here in Lori’s Shop or here in Silhouette Design Store. You can find the video assembly tutorial HERE.
The first thing that I like to do with Lori’s files is separate everything by color. She colors all of her files and it just makes it just so dang simple. So, I just take a few seconds to ungroup the file and sort my pieces by color for ease of cutting and then it is easier to assemble everything. Once you’ve got it all cut out, we are ready to assemble.
First, start with your red card base and do one peak and one valley fold.
It will look like this.
Next, add your blue panels.
Now it’s time to add the gray road, this is the piece that makes your card pop up. You are going to fold on the two score lines.
You can take a few minutes here to create your embellishments of the bus, apple, and pencil. I just used a glue pen to assemble these smaller detail pieces.
Glue your bus onto the gray road piece.
Now, we are ready to add our road to our card base. Remember, we want this to pop up….so we are only going to put adhesive on the left side and right sides…just like in the picture below. Just those two spots of adhesive.
Now you have your road added, you can see that the pop-up and where we are going to add are to other elements of the pencil and apple. Just fold the tabs on each and add adhesive. Here’s a link to Lori’s video on these pop-up cards on YouTube. Pop Card You Tube
With the adhesive on each tab, you can add both the little pop-ups in just seconds.
And bam, just like that…you have the cutest little bus card. Now I did leave the back-to-school saying out and added a little sun sticker that I had, just because it’s not back-to-school time. Thought my granddaughter might enjoy the little sun!
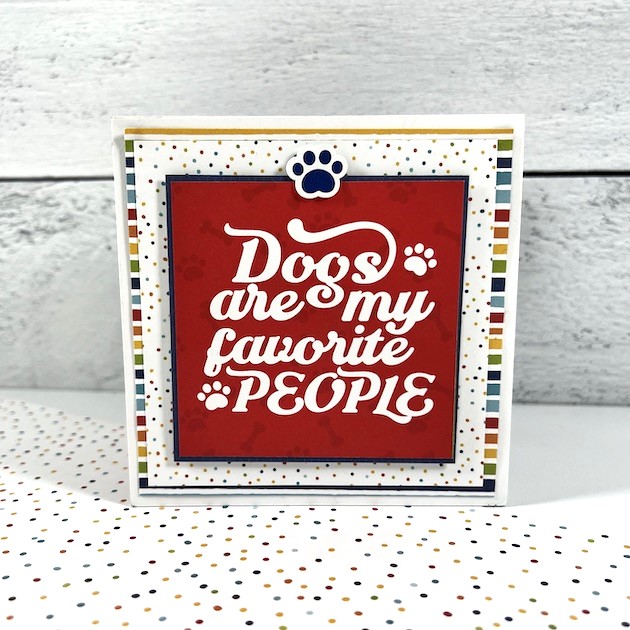
Hello friends! Traci here and today, I’m sharing a tutorial on how to make this fun envelope-style mini album! I love creating small scrapbooks so when I’m looking for a new idea, I know Lori will always have something awesome. For this project, I used her SVG cutting file called Silhouette, 4×4 Accordion Envelope Mini Album
I wanted this to have a dog theme so I chose the super cute Echo Park Pets Collection (also designed by Lori). I used the 6×6 paper pad, both sets of die-cut ephemera, and the 12×12 sticker sheet.
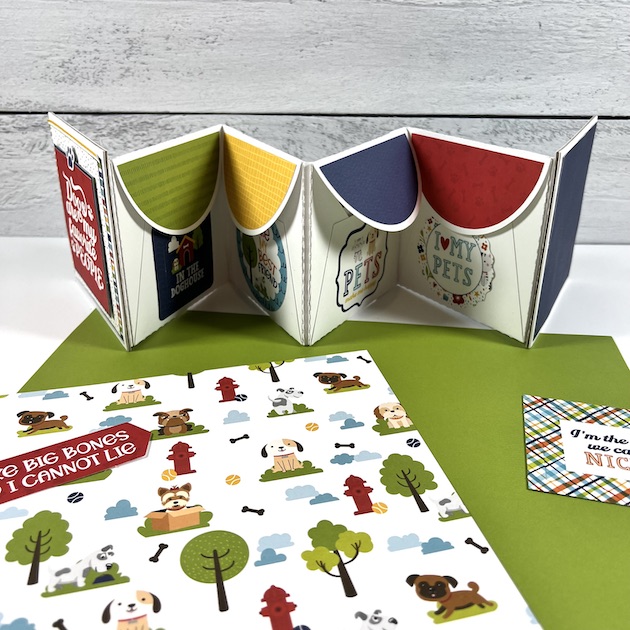
Here’s what this accordion-style mini looks like opened up. On one side there are envelopes where you can store photos and small memorabilia. On the back side, there are mats so you can add more pictures.
Here’s how I made it …
First, I cut out all of the pieces. There are 4 envelopes, 3 hinge pieces, 2 covers, and the pattern papers for embellishing. I used cardstock for everything except the cover pieces. I used chipboard for those.
Now that everything was cut, I created each envelope by folding the 2 sides in and the bottom piece up. I added
double-sided adhesive to the bottom portion to seal everything together, then adhered the colorful embellishment piece to the flap.
Next, I attached the 4 envelopes to each other using the 2.25″ x 4″ hinge pieces to create a row. Be sure to leave about 1/8″ in between the envelopes so that there’s room for the fold.
Now, it’s time to add the cover pieces to the first and last envelopes. Again, leave a little space in between for the pages to bend.
Once all of the album’s base pieces are adhered together … fold it, making sure to alternate the direction of each page to create the accordion shape. Now, it’s time to embellish!
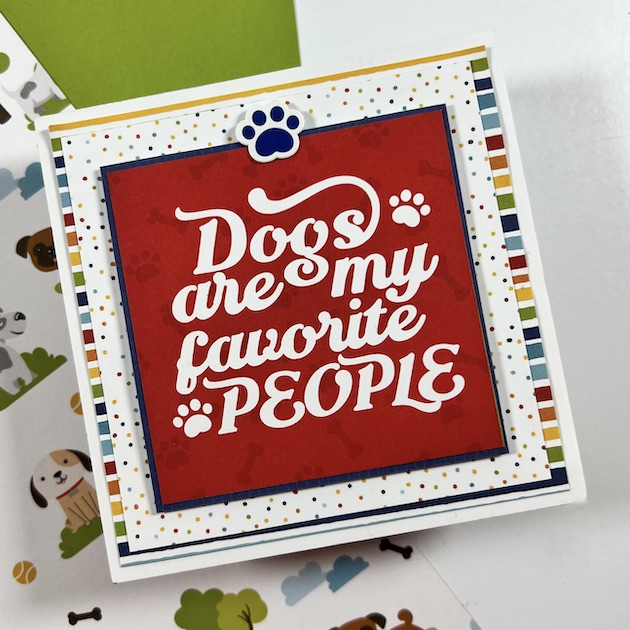
On the cover I layered the stripe, polka dot, navy blue print, and the 3×3 card on
top of each other. These are all from the 6×6 paper pad.
Inside for the envelope pages, I added cute stickers from the 12×12 sticker sheet and die cut
pieces from both packages of ephemera.
For the other side of the envelopes, I created photo mats for lots of cute puppy dog pictures. I added colorful pattern papers and more embellishments.
Lori has a great tutorial that shows you how to put everything together here:
This would make a great mini album for your pet’s photos or a sweet gift for
ANY pet parent. The Echo Park Pets Collection even has options for
cats, birds, hamsters, guinea pigs, lizards, fish, and rabbits!
Thanks for stopping by the blog today. I hope you’ll try this cutting file and wonderful paper line for your next project. Have a great day!
Hello everyone! Marcia here today. I have an A2 card storage box tutorial to share with you today. This A2 Card Envelope Box (SVG, Silhouette) cut file can be found in Lori’s store along with many other varieties of boxes. I used some pretty pattern papers from Lori’s new Day In The Life collection as well as coordinating cardstock from my stash.
Let me show you how easy this box is to put together.
1. Choose your papers and cut out two box bottom pieces and two box top pieces. The cut file contains only one of each so be sure to cut everything twice. Adhere the panels to the cardstock base. Using cardstock for the base pieces will ensure a sturdy box.
2. Working with the bottom of the box first, adhere the two sides of the box together.
3. Turn the box upside-down and adhere the tabs to the box bottom. Then fold the last flap over the bottom and glue it down.
4. Now let’s work on the box top. Adhere the front to the back by gluing the rectangular piece with pattern paper over the same size rectangular piece with no pattern paper. Fold the sides in making sure the side with pattern paper is on the outside, tucking the tabs in. Adhere the sides and then the tabs.
5. Place the last rectangular pattern paper piece on the inside of the lid.
6. There are stamp cut file pieces that you can use to adorn your box making it look like a stamped envelope. I also placed a journal card on the front so I can use that space when gifting my box full of cards to someone. Or if it is just too pretty to give away, to write what kind of cards I have stored inside.
These boxes would be great for storing your Valentines too. Thanks so much for stopping by. Be sure to check out Lori’s Store for more amazing cut files.
~Marcia


.jpg)
.jpg)
.jpg)
.jpg)
.jpg)
.jpg)
.jpg)
.jpg)
.jpg)
.jpg)