Candy Corn Treat Box by Corri

Hi everyone!  I love make treat boxes for my kids friends and teachers.

The new Candy Corn Treat Box is so cute and is the perfect size.

I cut the base of the box from black card stock and the decorative panel pieces from

the Carta Bella – Happy Haunting Collection by Echo Park.

I embellished the box with a small rosette  and used one of the stickers from the collection for my sentiment.

I love how these papers give the box a more elegant look which would make this great for an adult.  You could make it more playful and cute by selecting a more whimsical paper.

Project Life Storage Box by Brigit and Mini Album by Christine

Imagine my surprise when I opened my email to find both designers for today used not only the same paper collection, but the same paper. Both of these stunning projects use Lori’s newest paper line Reflections by Echo Park. Great job ladies. First up is Brigit.

Hi everyone, I have a wonderful project life box from Lori’s shop that stores 4 x 6 photos and 3 x 4 life cards.  This box would make a wonderful gift or use it yourself to keep your project life cards nicely organized.

The pretty paper is from Echo Park’s Reflections designed by Lori.  This is such a gorgeous collection with rich beautiful colors, it’s perfect for Project Life layouts.

The inside of the box has divider sections, I used two 4 x 6 and two 3 x 4 but it fits three 3 x 4 and one 4 x 6 also, I can’t wait to fill this up.

These roses, also from Lori’s shop go together so beautifully, they are all individual petals, I colored mine with distress ink and some glimmer mist.  For the little white flowers I used one from the 5 layering flowers set, duplicating one layer.  The lighter green leaves you can find at the Silhouette online Store and the darker green come with the roses.  The key and tag are from the Reflections 6 x 12  chipboard accents and the pearls are in the decorative brads set that match.  I also used some crochet ribbon and Orangesicle Trendy Twine.

Thanks for stopping by, I hope you’ve enjoyed my project, you can visit me at http://www.brigitsscraps.com.

Thanks Brigit, next we have this adorable mini album by Christine.

One of the first classes I ever taught in scrapbooking was a mini album class. We used paper bags.  Remember those?  Well, whatever materials I use, mini books always hold a special place in my heart.  They’re just so little and cute.  So I am always thrilled when Lori puts another mini album file in the store. The mini album I am showing you today is called the 4×4 Accordion Envelope Mini Album.

Everything you need is right there in the file.  She has even duplicated some of the pieces so you don’t have to.  I got a little stumped on how to put it together, but no worries there.  I knew that I just had to go to her YouTube channel and watch her assembly video.  I love that she makes videos for all of her files that are “some assembly required”!

Here is the inside of the mini album.  I love the many places to insert pictures or notes.  I decorate some of the envelopes with patterned paper from Lori’s new Reflections paper collection and added a fun die cut border as well, called 2 borders.

Another shot of the last couple of envelopes and the end page.  The outside cover, both front and back are attached to the front and end page and are made up of chipboard and patterned paper.  It really gives the mini book a sturdy base and feel.

A closeup of an envelope open revealing a journaling or photo card.
There are so many ways to complete this album.  If you think that this is too short in pages, just remember, all you need to do is cut more pages and you can make it as long as you like.
Lori Whitlock Supplies:
3 borders Silhouette store Id# 11978
Reflections Paper and Embellishment Collection by Lori Whitlock for Echo Park

Cascading Album by Traci and a Layout by Mendi

Today we have 2 fabulous projects to share. Traci has created one of the Cascading Albums and Mendi has an adorable layout.
Happy Monday everyone!
I am glad to be back sharing another project with you today!  If you know me, or have ever been to 
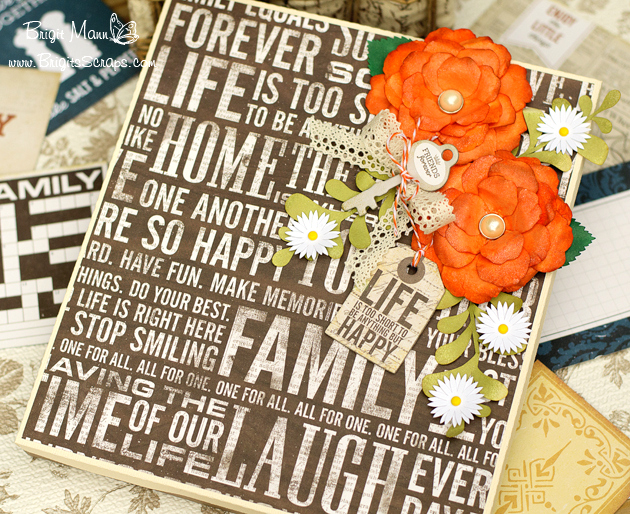
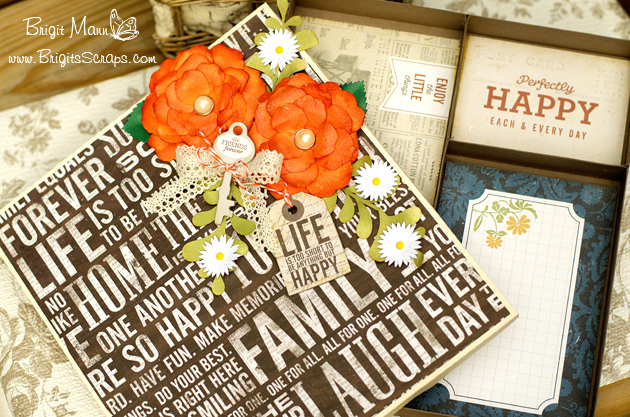
my blog, you know that I’m a huge fan of mini albums.  They are my favorite project and I love the fact that Lori has so many wonderful options in her shop.  So for today’s project, I used one of Lori’s Tiered albums with a bracket edge.  I also used brand new papers and embellishments that Lori designed for Echo Park called Reflections.  Oh my goodness what a fabulous collection!!
For the title of my album, I used Lori’s Family Memories phrase.  This new paper collection is perfect for older family photos or more recent ones — I just love the colors!
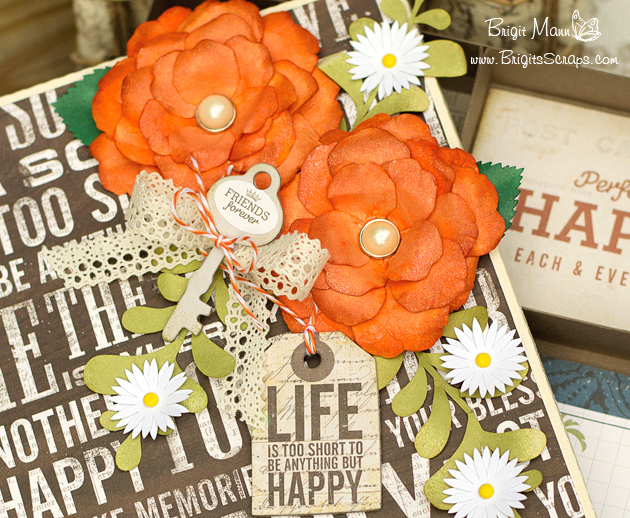
I wanted to add a fold-up card piece to one of the album pages, so I cut out Lori’s Hinges to give the card more interest.  Depending on the size you make your hinges, you can add brads to the holes, or use a little bling like I did 🙂
Finally, to add to the vintage feel of my album, I added a fancy frame.  I just love how the frame looks with some gems added for sparkle!
I have posted additional photos of this album over on my blog today, so I hope you’ll stop by and check them out.
Thanks for letting me share with you!!
Traci
Thanks Traci! Here is Mendi’s beautiful layout!
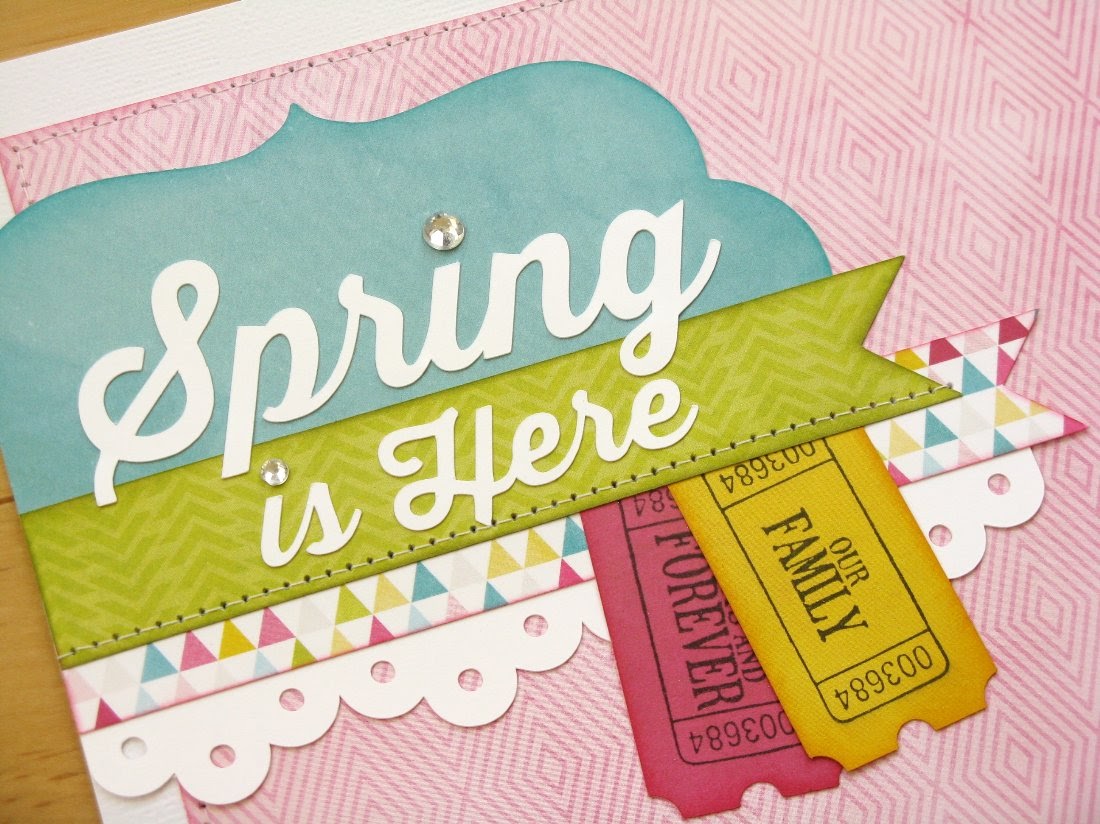
Mendi here today sharing a layout which uses Echo Park’s Here & Now collection (one of my favorite collections of Lori’s) and a number of her fun SVG cutting files.


To form my title block, I layered 5 different cutting files of Lori’s.  I had some old (OLD) Autumn Leaves ticket stamps which I paired with Lori’s ticket shape.  I also mixed things up a bit by removing the shadow from the “Spring Is Here” title and enlarging the word Spring and moving the words to two separate lines to fit on my label.


I created a second grouping to form the second point in my visual triangle using Lori’s layered flower, pennant and a matching sticker from the collection kit.  I added a pearl brad and some foam tape for my flower to add a little interest.


Lori’s tabs with the date was just what I needed to finish my visual triangle (and remind me where to file this one away in the albums when I finally get around to it).  😉

To complete my layout I used the following cutting files designed by Lori:

Mini Album by Traci and Layout by Mendi

Here we go again, it is already the middle of the month. The best part is that it is Monday, which means our awesome Creative Team is here sharing inspiration with you. First we have an adorable mini album from Traci…
“Today is Always a Happy Day” when you get to create fun projects with Lori’s designs, and I had a lot of fun with this adorable mini album.  This album was created using Lori’s 5×5 album with box.  The pattern comes in two files, one for the box, and one for the album, and the whole project is a snap to put together.
For the base of the box, album pages, and title (which is also one of Lori’s designs and can be found here or at the Silhouette online store) I used heavy white card stock.  I wasn’t sure if it would be sturdy enough for the project, but once I layered all of the other papers and embellishments, it is very durable.
The paper is from the Here & Now collection by Echo Park and the little sun sticker is from  A Perfect Summer line.
The little birds on the branch are an SVG in Lori’s shop called Love Birds.  I chopped one of the little bird’s legs off (poor guy) so that he could sit lower on the branch.
I love how the design of this album has the ribbon/twine holes already punched for you.  I did, however,  use a 1/4″ hole punch to make them a little larger so that my thicker ribbon would slide through easily.
I will have a few more pictures posted over at Artsy Albums today, so please stop by my blog and say hello!
Thanks, and I hope your day is happy!
Traci
Next, is this beautiful layout by Mendi…
Today I turned to the Maggie Holmes collection by Crate Paper and a handful of complimentary cutting files designed by Lori.  I knew I wanted to do something fun with the 12×12 decorative tape sheet from the collection so I cut it into strips, mixing it with other paper strips and adhered them to printer paper.  I then cut my mouse ears out on my Silhouette by welding 3 basic circles together.

I took Lori’s “memories” title from a layout cutting file and paired it with one of her awesome banners which I enlarged to fit over my mouse ears and popped up with foam tape between the layers for some depth.
I also used her scalloped border which I cut twice (once from blue and another without the inside cuts from ivory).  I like to do this to minimize the visual distraction when a patterned paper is layered below my borders.  I finished off my layout with a layered tag to document the basic details of the day.  


To Create my layout I used the following cutting files designed by Lori Whitlock:
Memories Layout (for title)
5 Layered Labels (Silhouette Store only)

Penny Sliding Card by Christine

Monday came way too early for me and I was not prepared to show you all the beautiful Creative Team projects. I would like to make it up to you today and share with you this beauty with you. Take it away Christine… Lisa
One of the things that Lori does best is create fun interactive cards and I have found that I love making them!  So today I am going to show you a brand new interactive card in the store called the Penny Slider Card Circle.  I also needed to have a special envelope to put it in because of the weight and height so I also cut out the Sliding Box for it.
 
The card was a lot of fun to make and I can see all kinds of potential for this one.  The directions and tips that Lori gives on her YouTube video are definitely worth watching.  You can see it here.  I used some fun paper, chipboard and sticker gears and brads from Lori’s All About A Boy paper collection for Echo Park.
When you swing the card around the penny makes the little gear more in a circle and around the card at the same time.  Pretty cool, huh?  Here’s a closeup.  I used a Papertrey Ink stamp for the center image.  I loved how the little 3D star embellishment fit right inside the middle.

The slider box is going to see a lot of use in the future.  This box can be used with or without the inside box.  It’s fun to decorate and I love the bracket shape on the front flap.  I created a mat for the flap by using the Internal Offset feature and also enlarged the file to fit my card.  The chipboard gear and sticker ribbon on the front is acting as my closure.  I  attached it to the box with some foam adhesive and then attached the smaller circle and brad on the bottom part of the box, then wrapped a cotton string, up and around both pieces to hold it closed.

Here is a closeup of the card in the sliding part of the box.  You can see how the foam adhesive under the blue circle helps to lift it up so that the pennies can slide underneath it.
I hope you have enjoyed my project today.  Be sure to check out the other slider card,  Penny Slider Card Straight, as well as the some of the other interactive cards in Lori’s shop!

Lori Whitlock Supplies Used:
Other Supplies Used:
All About a Boy Paper Collection and Embellishments by Lori Whitlock for Echo Park
Papertrey Ink 2012 Birthday Tags stamp set
Stampin Up! Ink in Pumpkin Pie
Foam Adhesive from Imaginisce
Cotton string, Joann’s