Father’s Day Gift Idea

Hi everyone!  Corri here today sharing my take on Lori’s Tall Triangle Sides Box.

I love the look of this fun box!  It’s very easy to put together but has such a unique shape.

I used paper from the Echo Park -Jack and Jill Collection (Jack) and embellished with some stickers from the collection and a piece from the ephemera pack.

This would be a great way to give Dad a gift card or other small gift.

Be sure to visit Lori’s SVG Shop  for more great boxes and gift card holders to make your Father’s Day gift giving easy.

A Little Birthday Gift with Kathy

Hi Everyone!  It’s Kathy today with a sweet little birthday card & gift set!  I used two new files from Lori’s Shop, the A2 Sliding Candle Cupcake Card and the 2 Boxes on a letter sized page files.  Combined they make a such a nice gift.  Take a peek:

In the Silhouette Store:  card file, box file

The papers are from Lori’s new I Love Sunshine collection for Echo Park.  The colors are so bright and cheery!  I love how you can put your sentiment on the candle of the card; It slides up from the cupcake.  I used Lori’s Cheerful Sketch font and my Silhouette Sketch Pens to write Happy Birthday.  The box is just the right size  for a small gift.  I put 4 Hershey’s Treasures in mine!  And that little bow is the perfect finishing touch!   That’s it for me today, thanks for stopping by!

Octagon Teapot Tutorial by Corri

Hi everyone!  Corri here today sharing this beautiful new 3D Teapot 2 SVG (Silhouette file HERE) that Lori added this week.  This would make a great gift for Mother’s Day!  You could fill it with your Mom’s favorite tea bags or with a small gift and a gift card.

I used paper from the Lori’s Jack & Jill Collection for Echo Park Paper.  This large floral print is perfect for the teapot.

To assemble the teapot, first cut everything out from the papers of your choice.

If you choose a detailed pattern paper like this for your project, I suggest leaving all the pieces on your mat.  That way the pattern will match up easily as you glue the panels in place.

Next,  apply glue to the glue tabs of the two teapot pieces (white), glue them together and the glue the end tabs together to form a circle.

Now you are ready to start forming the octagon shape.


Apply glue to the glue tabs as show and line them up with the adjacent panel.  It helps to fold the panel with the glue tab out, apply the glue and then line up the panel as closely as possible to the score line.  Be patient on this portion of the assembly.  Wait a few seconds to allow the glue to dry slightly before moving on to the next tab to prevent shifting.

Continue all the way around glueing the tabs in place.  Follow the same steps with the base and lid.

Glue the base in place. Glue the two pieces of the handle together folding taps out and then glue in place.  Fold the spout in half, fold tabs out and glue in place.

Finally, glue the decorative panels in place. So cute!!

Be sure to check out all the new files added to the shop this week.

Diamonds are a Girls Best Friend – Mother’s Day projects by Tya

Hi everyone – it’s Tya here to share with you 2 super fun cut files from Lori Whitlock. I decided with Mother’s Day being just around the corner that I would get a jump start on my gifts – so I wanted to share with you what I did! My mom is very crafty and creative and I tell people I inherited my creative gene from her so I know that she appreciates anything hand made, so finding a card and gift box for her was something I knew I wanted to do. Plus if you will notice a little theme running with my projects with the Diamonds – they are a girls best friend after all right?

This last week Lori put out some amazing new fun fold cards and I was so excited to try the Double Diamond Fold card out. I loved all the different pattern papers from the Echo Park Jill collection by that I got use on this card. Definitely one I will be using again!

I also kept with the diamond theme and used the Necklace Box to hold a little sparkly necklace for my Mom. Darling box that was the perfect size to hold a necklace and some earrings in.

Thanks for stopping by and visiting the blog today! Hopefully I have inspired you to try out one of Lori’s new cards and to make something special for that special lady in your life. Have a great week everyone!

A Lori Whitlock Layout with Print & Cut Feature!

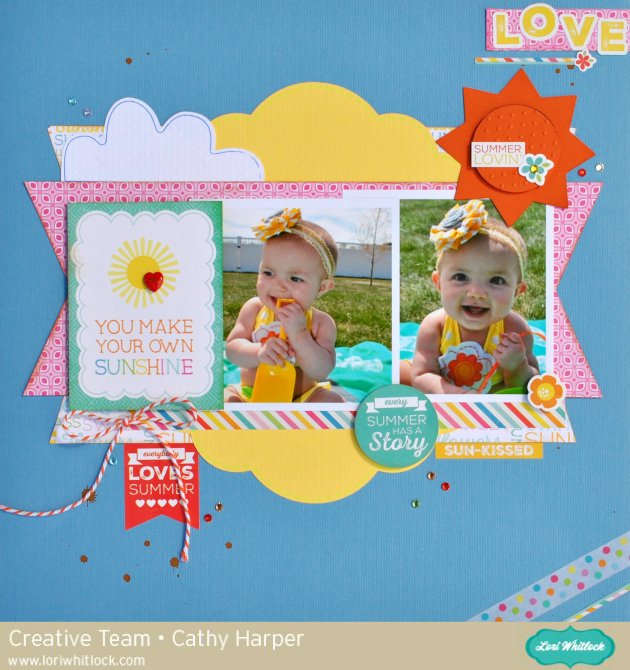
Hi everyone!  Cathy here with you today and I have fast and fun layout using the Sihouette’s print and cut feature.  This layout really went together in just a matter of minutes with this awesome feature!

I used Lori’s Echo Park Summer Bliss collection to create this layout!  First you need to open Lori’s Summer Layout file.  If you click on the images of the files, they will take you directly to Lori’s shop to purchase!

Next, choose your papers and size the files to fit a 12×12 page.  Once you have the scalloped piece sized right, the other layers will be a perfect fit.

I swapped out the original sun and used Lori’s sun shaker box.  I kept it the same size as the one in the kit.

Now onto the print and cut  feature!  First, I cut my paper down to 81/2 by 11 so that I could run in through my printer.  So make sure to change your paper size and add registration marks.  Then add the pieces that you want to print and cut!

Then change your line and fill colors on all of your letters!

Make sure you select “no cut” on all of the outline images, like the note paper and banners before your send in through your printer.  They should be a thin red line instead of a thick red line.  Now send it through your printer.  Here I add the “You Always Radiate Sunshine” quote.

Next, reload it into your Silhouette and this time turn off the cut lines on you quotes and letters!

And tun on the cut lines around the note paper and the banners again, thick red lines.  Send it through your Silhouette and you now have the prefect print and cut embellishments.  Easy Peasy and it takes no time at all!

Thanks for joining us today…I hope you try out the print and cut feature with some of Lori’s files!