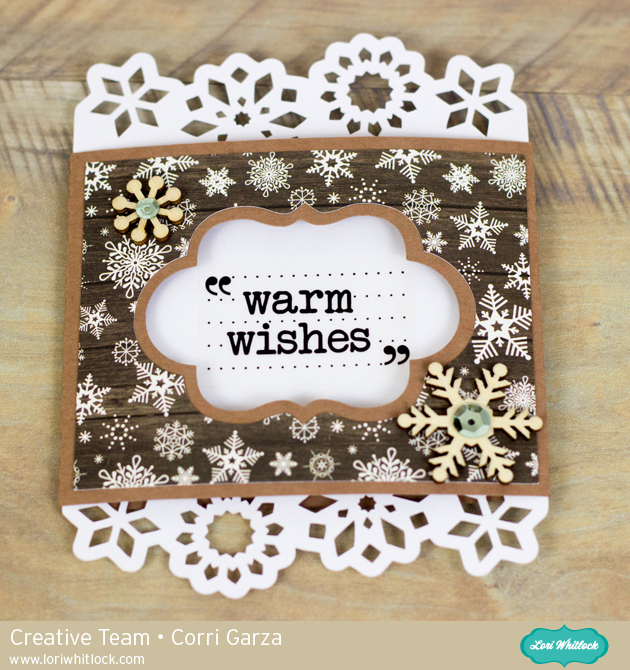
Hi everyone! Corri here today sharing one of Lori’s new Ornate Pull Out Cards. These cards are all beautiful with their die cut borders but are very easy to put together.
I used paper from the Story of Christmas Collection from Echo Park. I used a clear sticker for my sentiment and added a couple of wood veneer snowflakes to finish it off. Check out all the new pull out cards in the shop!
First, off, let’s announce the winner of the Link Up last month! Sue Kment, you just won the $15 gift voucher to the SVG Shop please email us at info@loriwhitlock.com to claim your prize. Congrats Sue and thanks to everyone for adding your projects to the Link Up. We have a new link up starting today led by Tya Smith.
Hi everyone! It’s Tya up on the blog today! Hopefully you all had a wonderful October with all the Halloween festivities and fun that goes along with that! We are officially in November – one of my favorite months! Not only is it my birthday month, but I just love Thanksgiving! What a wonderful time it is to meet with friends and family and take time to reflect on all we are thankful for. I decided for my link up we will focus on giving thanks! Whether that is a festive Thanksgiving project or simply a beautiful thank you card to someone special – you decide!
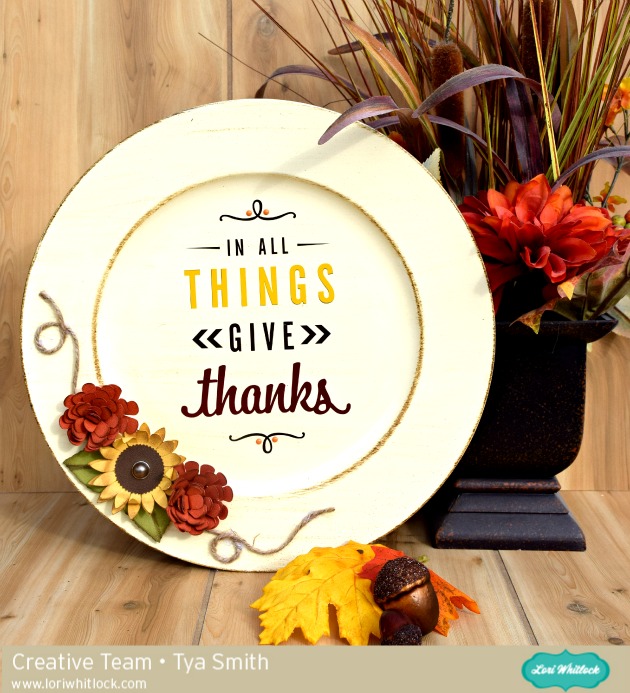
For my project this month, I decided to add to my Thanksgiving decor and do a charger plate with one of Lori’s beautiful sayings on it. Here is the project-
Lori has a few other great sayings in her shop that would be wonderful to use on a charger plate. Check some of them out over on her Shop. I added a few enamel dots from the Story of Fall enamel dot set to the flourish part of the saying for an added pop.
I added a couple of lovely 3 dimensional flowers to my plate. I used this flower and this flower. The Sunflower has a brad from the Story of Fall Collection Decorative Brad set in the middle.To finish off the plate, I added a thin twine rope with some hot glue to the plate.
That’s all there is to it ! This would make a great hostess gift if you are going to someone’s home for dinner, or just do as I did and add it to your own home decor.
We would love to see your “Giving Thanks” themed projects. Just link up your project using any of Lori’s files for your chance to win!
Link up your GIVING THANKS themed projects using any of Lori Whitlock’s cutting files for a chance to WIN a $15 gift voucher to the Lori Whitlock Shop.
Hi everyone! It’s Kathy today with a tutorial on how to use the Cut by Color Feature in the Silhouette Studio. If you’re not familiar, this feature allows you to select different cutting conditions for each line color on your design mat. This is super handy when working with the Silhouette Sketch Pens and shapes. I used this feature to create the leaves on these fun Thanksgiving Place cards.
Papers Used: The Story of Fall from Echo Park
I started by loading the leaf place card from Lori’s Thanksgiving Place Cards set (here in the Silhouette Store). I moved the leaf part of the design onto my mat.
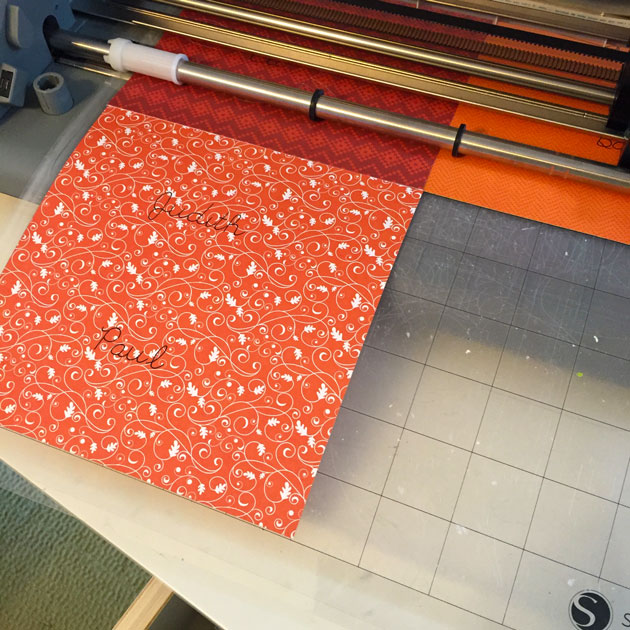
Next, I loaded my sketch font and typed the names I wanted in my cards. I changed the color of the lines that made up my names by opening up the Line Color Window and clicking on a different color (the color does not matter as long as it is different from the color marking the leaf shape)
This is what my mat looked like when I was done adding all of the names.
Once I was happy with my design, I clicked on the Cut Settings button, then the Adjust Cut Settings button on the bottom. First thing I did was change the Cut Mode from Standard to Advanced (1). Next I clicked on Line Color under Cut Order (2). This brought up a grid with the two line colors in my design. I started with the first color, in my case black or the color of my names. I clicked on this (3), set the Material type to Silhouette Sketch Pen (4). I then right clicked on the highlighted line color and chose add pause. This is very important. It stops the Cameo after it has written out the names using the sketch pen so that you can swap back to the cutting blade before it proceeds to cut the leaf shape.
Next, I clicked on the Red line color (1). Since the Red line is my outside cut line, and I don’t want to cut the name, I clicked on the center square button (2) until it showed just the outline. This tells the Cameo to only cut the outline, not anything inside. Finally I set my Material type to Patterned Paper(3).
Once these steps were done, I loaded my black Silhouette Sketch Pen in the housing, inserted my mat and chose Send To Silhouette. First the Cameo wrote all of the names. It then paused. I swapped the Sketch Pen for the cutting blade, then hit Resume cutting. The Cameo went on to cut the leaf shapes around the names.
Here’s a close-up of one of my Place Cards…
I love using my sketch pens and this makes it so much easier to use them with fun shapes! I hope you find this helpful! That’s it for me today, thanks for stopping by to peek!
Susan Browning, you are the winner of the link up from last month! Please email me to claim your $15 gift voucher to my online SVG shop. Just so you all know, there is a new link up below so be sure to join in the fun for your chance to win this month.
Hi everybody! Cathy with you today and I have a new Link Up for you guys to play along with and win! Fall has arrived and it is my favorite time of year. I decided that this Link Up should be all about “Fall”.
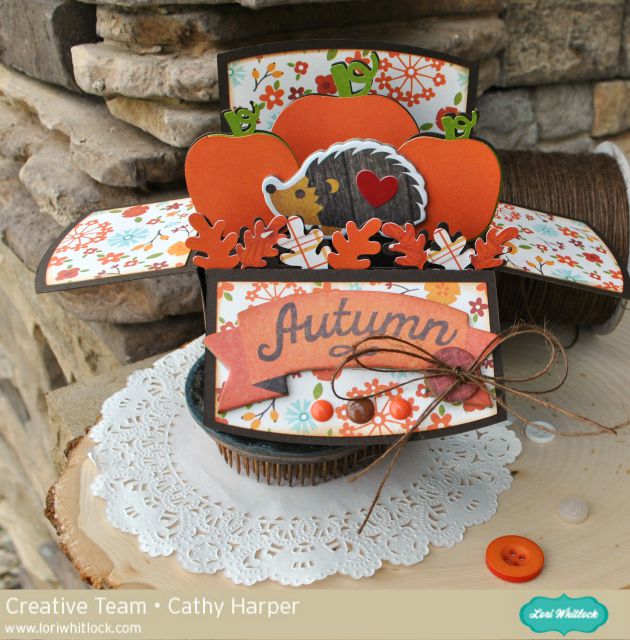
I used Lori’s new Echo Park Collection, The Story of Fall to create her Fall Pumpkin A2 Box Card. These box cards are so much fun for someone to receive plus they fold flat into an A2 envelope for easy mailing. Lori has a ton of box cards in her shop, you could create one for every holiday and almost any occasion. The Story of Fall has the perfect colors and patterns for this adorable box and a tucked in that adorable little hedgehog from The Story of Fall’s chipboard set along with the Autumn banner and button!
We would love to see your “Fall” themed projects. Just link up your project using any of Lori’s files for your chance to win!
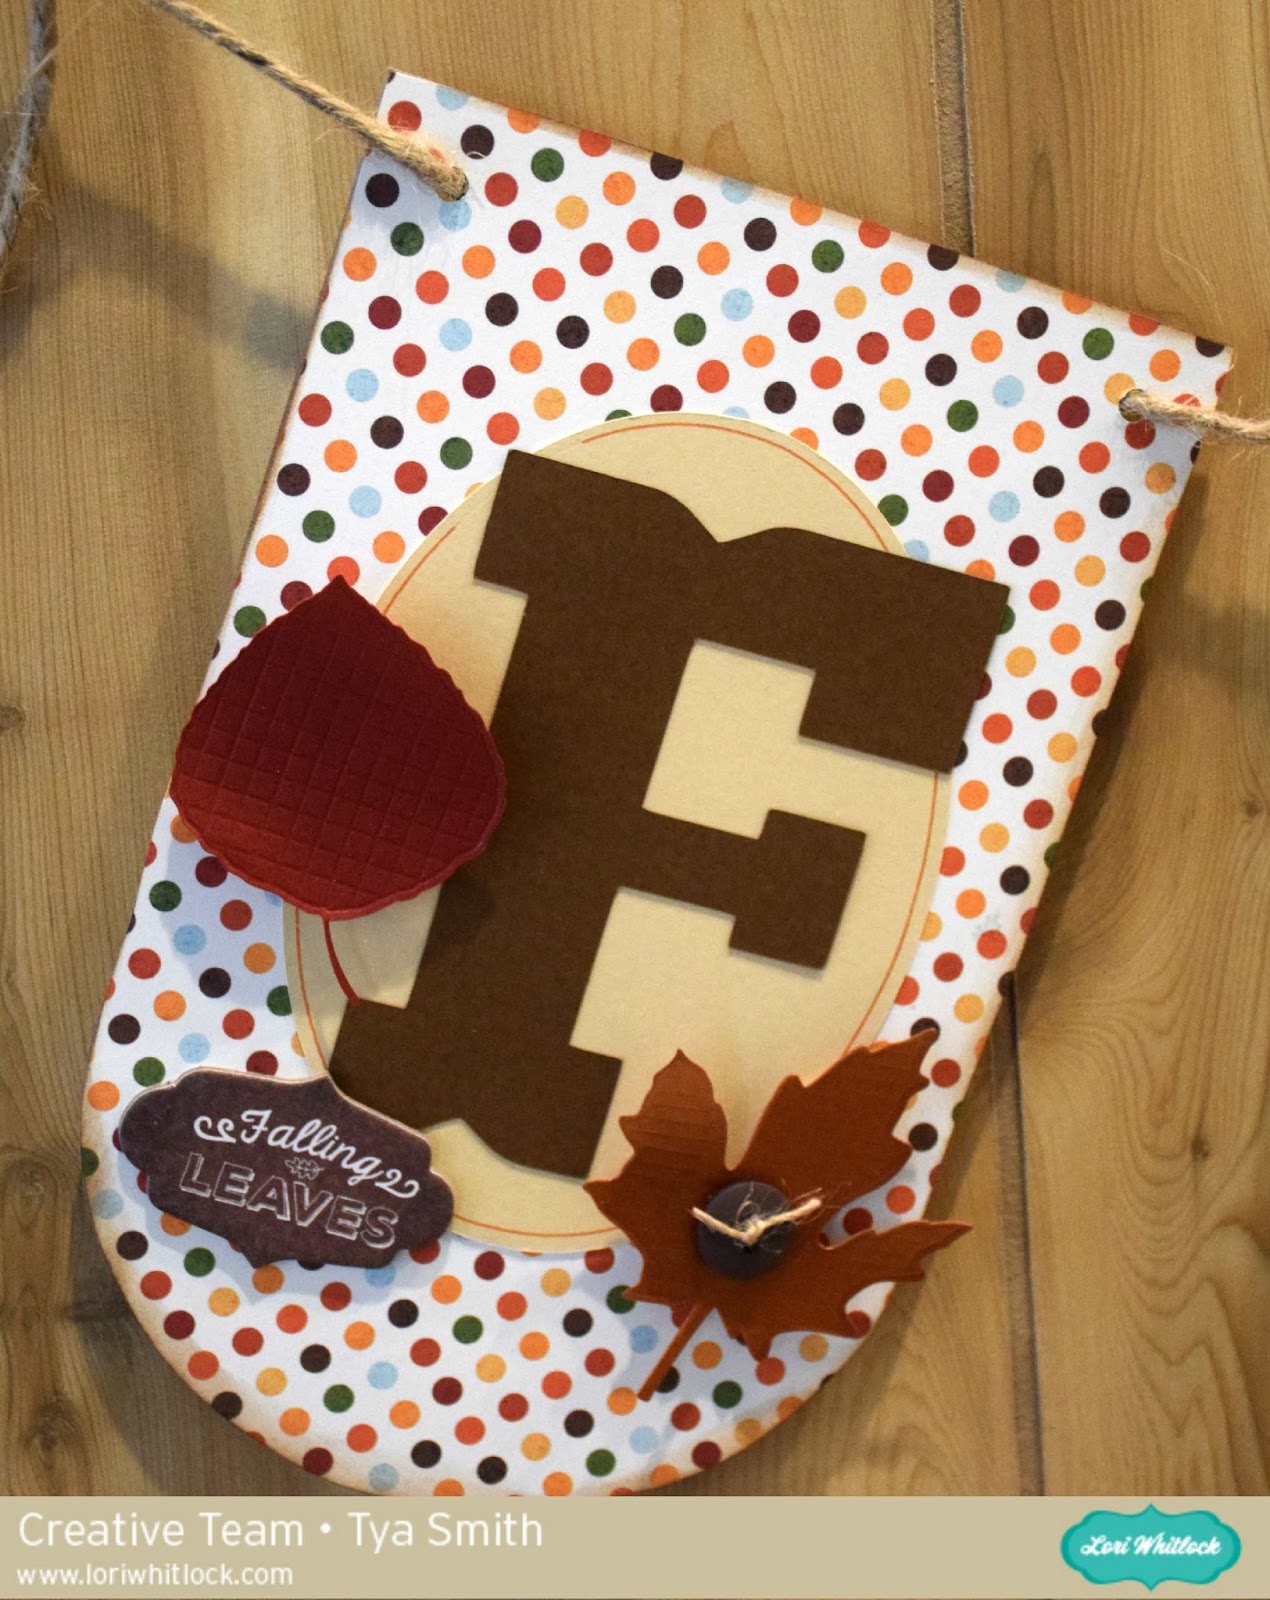
Hello Lori Whitlock friends! It’s Tya here up on the blog today. To officially welcome Fall to our home, I decided that a cute banner was just what my mantle needed! So I decided to use the adorable Story of Fall line to make this fun and festive project. Let me show you what I did!
So I found a banner base that I liked and cut 4 of them out on my Silhouette. The file I used didn’t have 2 holes punched in it to string the twine through , so I just made a couple and placed them on the top two corners of the base. I then covered the bases with a few fun pattern papers from the Story of Fall Collection.
I then cut out 4 ovals and used my Silhouette Sketch Pens to draw an orange border on the ovals. Then I used the darling LW Homemade font and cut out the letters F A L L out of brown cardstock and added them to the top of the cream ovals. I then cut out a few leaves.
If you notice on the leaves, there is a pattern embossed on them. I was able to get my hands on the new Silhouette Curio machine and had a great time using the embossing tool with the Curio to get the patterns on the leaves. I found some really beautiful shimmery specialty paper that took the embossing wonderfully!
I added some chipboard elements from the Story of Fall collection to the banner shapes.
I also added some buttons and twine to the leaves for some added texture.
That’s all there is too it! I had alot of fun with this project and hopefully have inspired you to make this fun banner to get the fall season underway in your home too! Happy Crafting!
Files used:
-6 Banner Shape ( I added 2 holes instead of one) (Silhouette Store)