Grid Pop Up Card Valentine Cactus

Hi friends! Today I am sharing this darling Grid Pop Up Card Valentine Cactus Card (SVG, Silhouette). I love using bright, happy colors for my Valentines, and this design really shines with its warm, cheerful palette. It is such a fun way to spread a little love.

Thanks for stopping by, and I hope this card adds a little extra joy to your Valentine’s crafting.

Brandie

January 2026 Creative Team Blog Hop

Can you believe January is already here! A brand-new year brings a fresh wave of creativity, and our Creative Team has truly kicked things off in style. From cozy winter projects to clever handmade creations, they’ve put together an inspiring collection to spark your creativity as we begin the year. Be sure to hop along to each blog and see all the beautiful ideas they’re sharing!

Lori Whitlock <<<(you are here)

❄️ January Blog Hop Sale is Here! ❄️

From January 13–17, enjoy 30% OFF all digital files at Lori’s SVG Shop — including commercial licenses! Use code JAN2026 (case-sensitive) at checkout and treat yourself to fresh designs for the new year.  SHOP HERE.

As a thank-you for hopping along with us, we’ve got something special to share. For today only, you can download the Valentine Card Hugs SVG file absolutely FREE! Just add it to your cart and complete checkout—no codes, no catches, just a fun little treat from us to you.

🎉 New This Week!
This brand-new Valentine Bag Bundle just launched this week, and I had so much fun designing it! I hope you love using these bags as much as I loved making them. They’re perfect for treats and small gifts, and each design is unique, easy to assemble, and fun to customize. Even better—during the blog hop you can grab this new bundle on sale 30% OFF using the code JAN2026. It’s a perfect time to start creating something special for Valentine’s Day! 💕

***CLICK HERE TO GO TO THE SHOP***

How about a giveaway? You’re in luck! Enter our giveaway below, and we’ll announce the winner on the entry form right here on this blog post. Keep an eye on your inbox—you might be the lucky winner!

Be sure to visit the CT member blogs listed at the top of this post! Thanks so much for stopping by. Wishing you a wonderful and crafty day!

~Lori

2026 Sticky Note Calendar

Sticky Note Calendar-2026

Pattern Fill Set Summer Splash

3 Valentine Gnomes (Silhouette)


Pictured above are the pieces I used for this project. 
3 pieces for the calendar holder cut file, some Lori Whitlock pattern fill paper  and some paper inserts (3×3.25 inches) I made for the holder since I didn’t have a sticky notepad. I cut the pieces and stamped some inspirational sentiments on each sheet. You will get 12 full sheets and 4 partial pieces that still work! I cut 2 sets of these.
 
Opening the calendar  in Silhouette it imports to cut all the print, so you have to highlight and choose cut edge to cut them out properly. You also have to enlarge the print and cut length just a wee bit to allow for cutting all the calendar pages. I used regular printer paper for this part. 
This is what it looks like when the Silhouette software is set to cut edge. Stack and staple them together after cutting them out.

I added the stamped inserts and the little peeking gnome (you could use anything really) on the back for a bit of fun and I was all done! 
 
I hope you enjoyed this quick little project. It is a great addition to your desk and will keep you on track for 2026!
 

3D Lantern Belly Snowman

Hi there friends and happy Winter! Did you all survive the holiday? Ready for the next one? I’m not. We are planning a low-key New Years, cozy home party with an early bedtime! Ha!

Today I am sharing the 3D Lantern Belly Snowman (SVG, Silhouette). This cutie is a darling winter decor piece and so easy to assemble. I used papers and a sticker from the Winter Fun collection by Echo Park Paper Co. I also added a battery powered light to the inside of the snowman.

Thanks for stopping by today! I hope you have a fantastic rest of 2025 and get to do something you love.
Brandie

3D Hot Cocoa Mug with Cookies for Santa

Merry Christmas Crafty Friends!🎅 Noelene here today!
Did you make sure you left some cocoa & cookies for Santa?
Today I am popping in for a quick tutorial to show you how I made this cute 3D Hot Cocoa Mug (SVGSilhouette) & Cookies for Santa (SVGSilhouette), from Lori Whitlock.
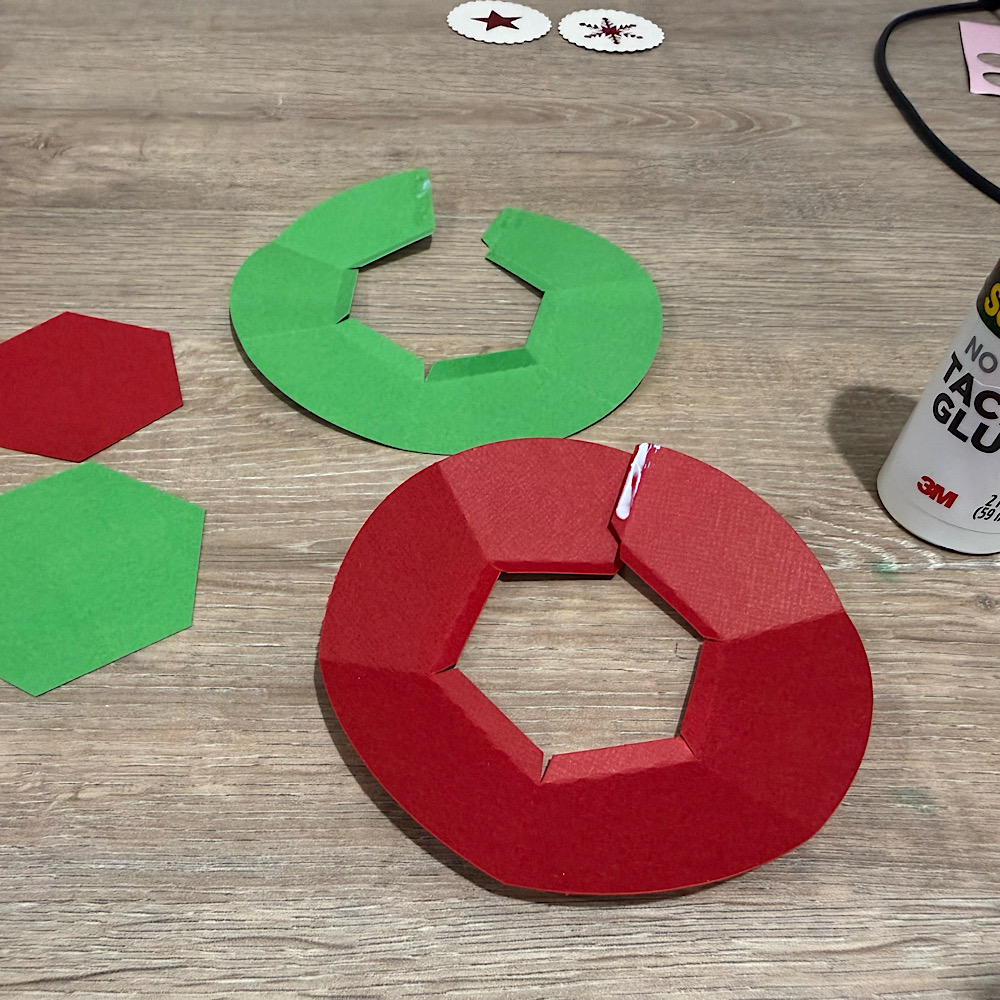
First cut out all your pieces & glue your panels on.
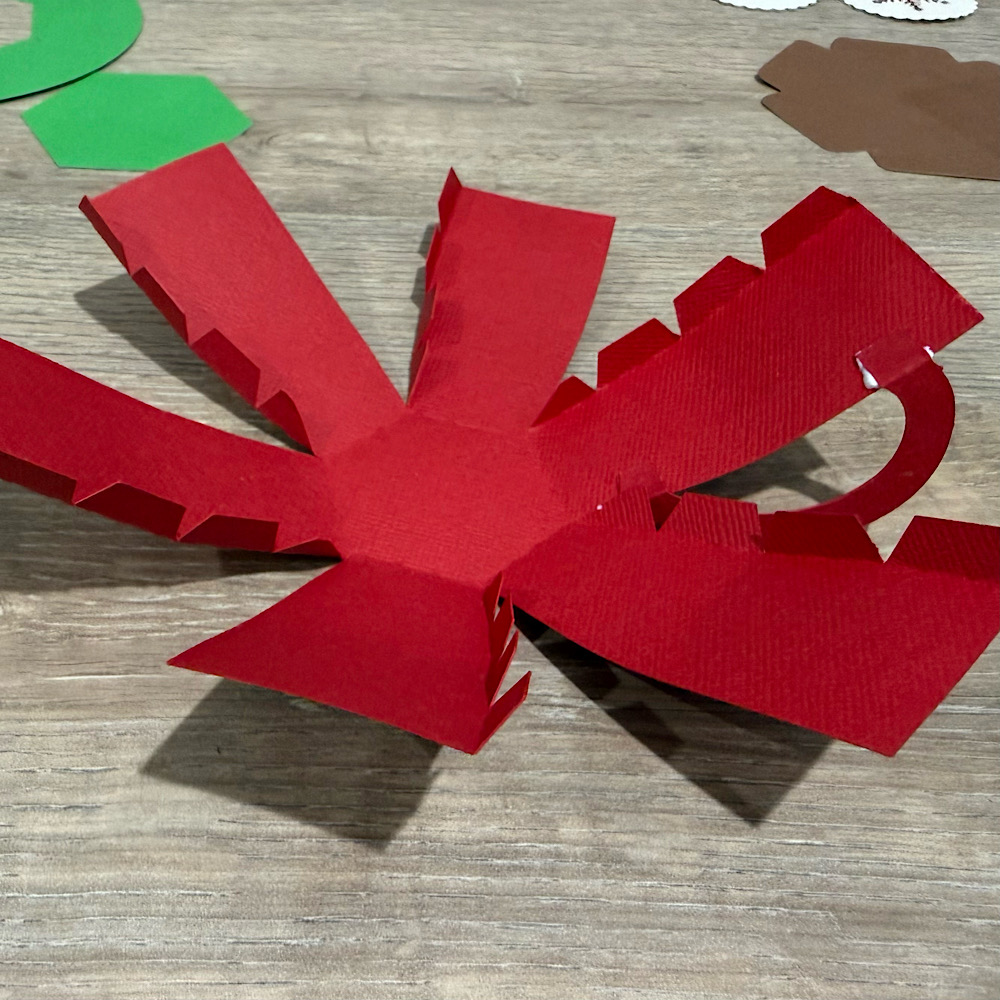
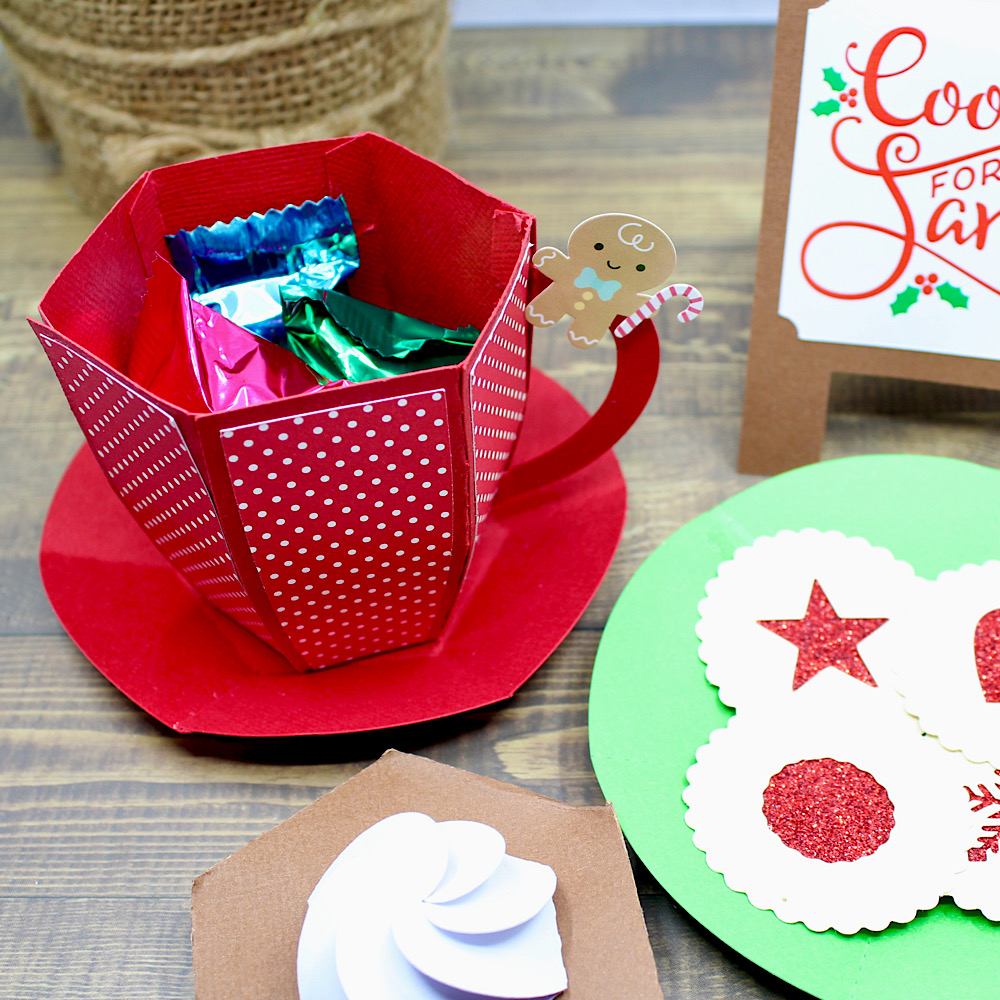
Next glue the 2 handle pieces together then glue the handle tab to the inside of a mug panel.
Now valley fold all your mug tabs & start glueing each piece one by one. It helps to slightly bow the panels inward before you start glueing.
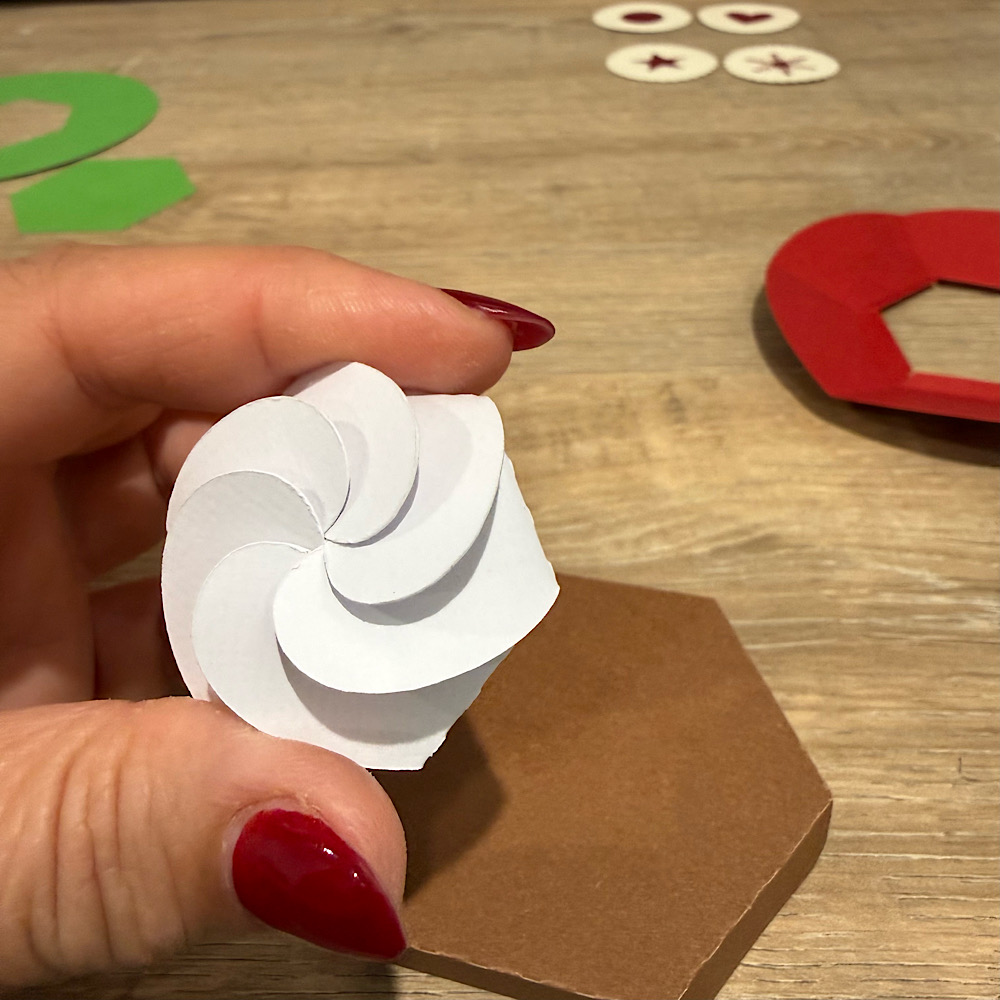
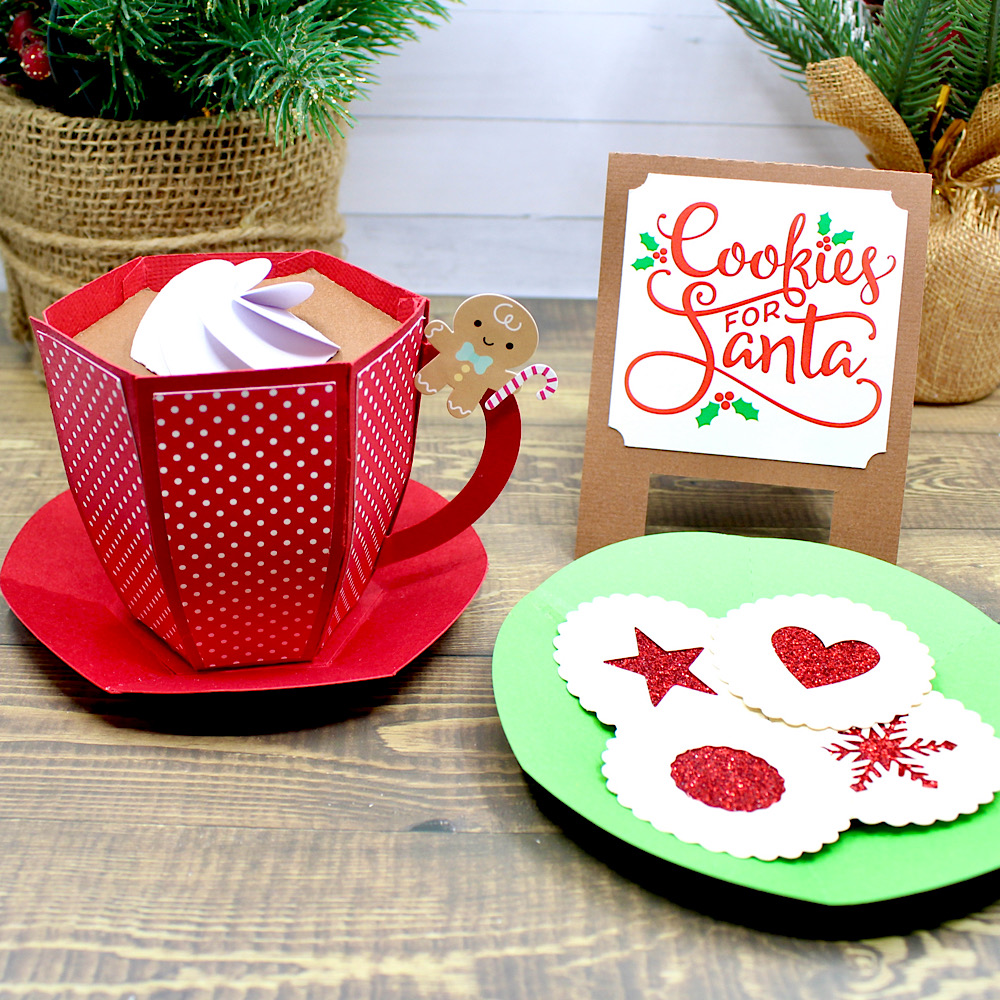
Now fold the tabs down for your cocoa lid. Next take the white froth piece & fold inwards each panel. Then gently one by one overlap each panel till they sit in place, but do not push down all the way. Now glue the froth onto the cocoa lid. The lid sits on top so you can put some treats inside the mug.
To make your saucer & plate, valley fold your scored plates & glue the end tab on the base.
Then, take the hexagon piece & glue it down onto the bottom center.
Then on one of the plates, stick down your biscuits. I used foam tabs to create a bit of dimension. Now, mountain fold your cookies sign & you’re done!
They make the cutest little gift with treats inside! Or even a prop for your Elf on the Shelf!
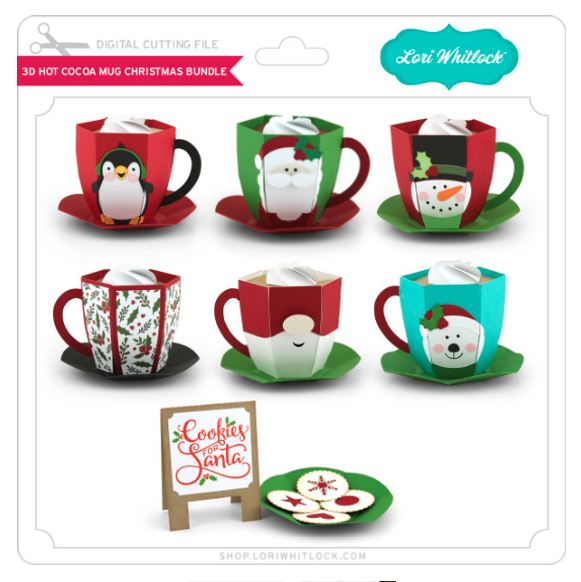
Don’t forget to check out all the other 3D Mugs, which include 3D Hot Cocoa Mug Penguin (SVGSilhouette), 3D Hot Cocoa Mug Santa (SVGSilhouette), 3D Hot Cocoa Mug Snowman (SVGSilhouette), 3D Hot Cocoa Mug Gnome (SVGSilhouette), 3D Hot Cocoa Mug Polar Bear (SVGSilhouette). They can also be found in a Bundle, which includes all the 6 3D Mugs & the Cookies for Santa, (SVG).
For more inspiration, check out my Instagram!
🌟Wishing you & all your loved ones a Blessed Merry Christmas & a Safe & Happy New Year!🌟
Thanks for stopping by!
Hugs
Noelene 🙂