Bunny and Chick Favor Boxes by Aimee

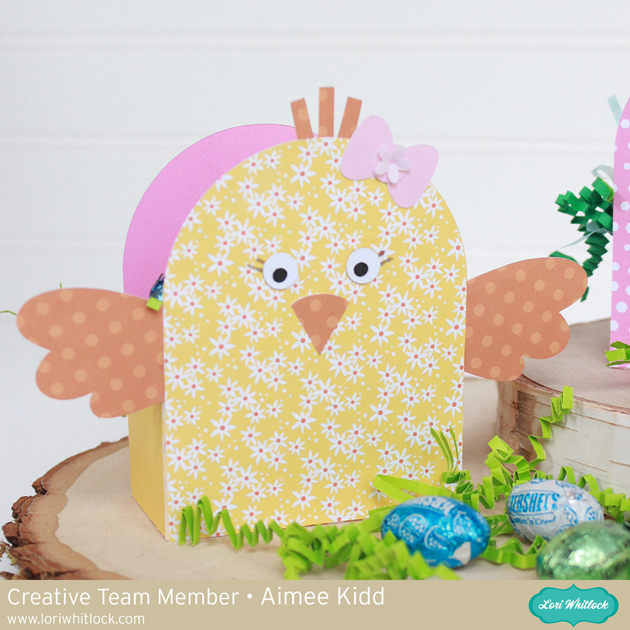
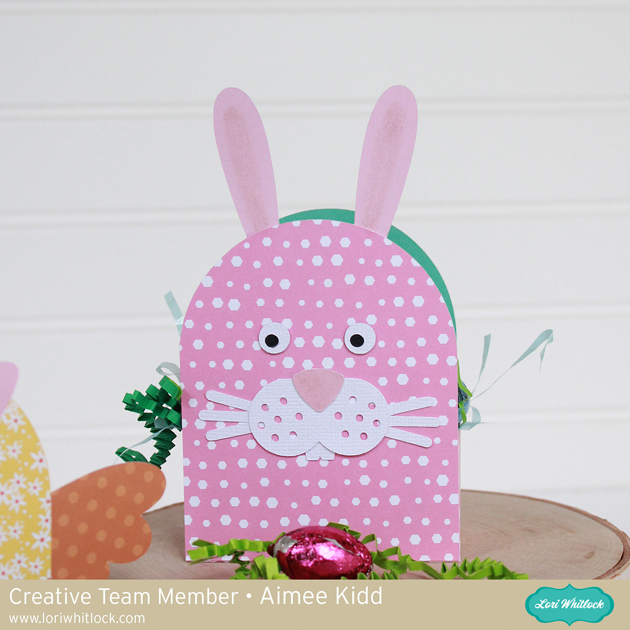
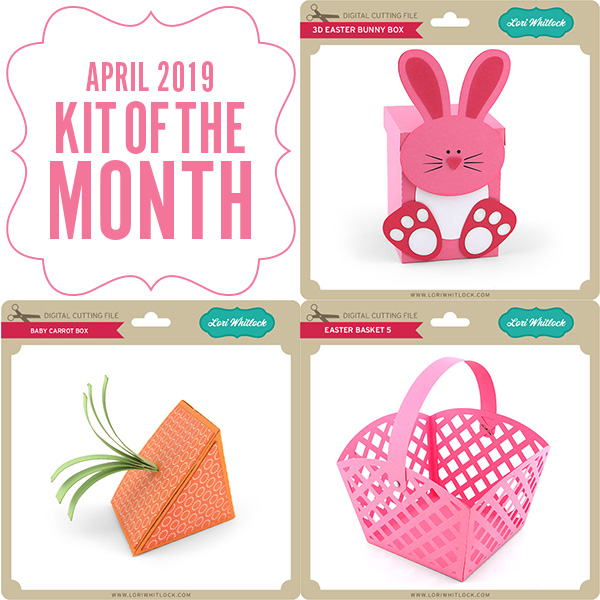
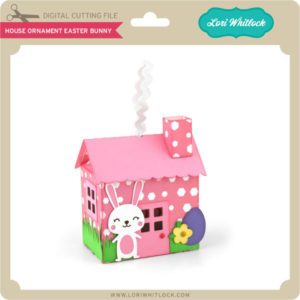
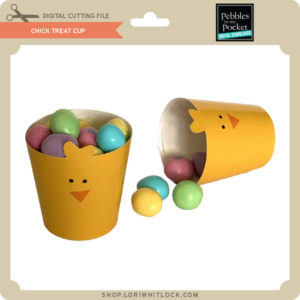
Hello crafty friends! Aimee here with you today to show you these adorable little animal favor boxes.  Lori has 9 new animal favor boxes in the store and I couldn’t resist making a couple of them. With Easter coming up I chose the Chick (SilhouetteSVG) and Bunny (SilhouetteSVG) ones. I used Lori’s new Easter Wishes papers for these little cuties!

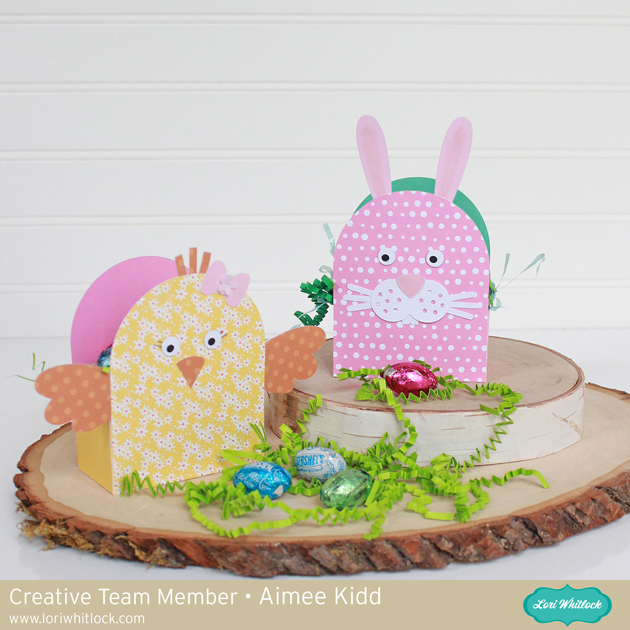
For both of the boxes, I wanted a patterned paper on the front but didn’t want the b-side of the paper to show through on the inside back piece of the box so I cut the boxes out of cardstock and assembled the box. Then while I was in Silhouette Designer Edition, I used the cut tool to slice off all of the box except the front panel. The I cut the front panel from patterned paper and then adhered all of my pieces and decorated it and then proceeded to adhere it to the front of my box.

Since the chick favor box already had a bow, I thought I would complete her girly looks by drawing in some eyelashes with a thin grey marker.

For my bunny box, I didn’t do much to him. I added some shimmer pen to the inside of his ears and all over his nose.

That’s all from me today! I hope you love these sweet little animal favor boxes as much as I do and will give it a try! There 9 of these little guys so there are so many choices as to what kind of animal you want for your project!

Thanks for stopping by today!

Aimee

2019 April Kit of the Month

We have a brand new special for the entire month of April ! You can get this Free Kit of the Month with any $20 purchase (Purchase must be in one transaction.) Simply add the 2019 April Kit of the Month to your shopping cart along with ANY $20.00+ purchase from the SVG Shop and this file is yours FREE. Be sure to use Coupon Code: APR19KOTM (case sensitive) at checkout. This offer is good through April 30, 2019.


(Your cart must reach at least $27.95 before the coupon will be applied and then $7.95 will be subtracted from your total at checkout. The files will be available for immediate download after you pay for your order by visiting MY ACCOUNT>COMPLETED ORDERS>ORDER DETAILS inside of your account. Only one discount code per order allowed.)

Thanks for visiting the blog today! Please let us know if you need any help with your files. We want to make sure everyone is happy with their purchase. Have a great day!

Pop Out Birthday Card with Ashley

Hi Everyone, Today I’m sharing the new Pop Out Birthday card. Such a fun card to send and easy to assemble!

Image 1

You can find this card in Lori’s shop and in the Silhouette Store.  

When you open this file in Cricut Design Space, there are a few steps to take before you cut.

1. Ungroup the file.

2. Optional: I changed out the dashed cut lines to score lines.  To do this, select the score line which is grouped in Shapes. Align the score line with the dashed cut line and resize as necessary.  Repeat for all the score lines on the white layer.

3. Group the 3 score lines  you created and delete the original dashed cut lines.

4. Select the score lines and the white card and then select Attach.

5. Repeat the processwith the blue card–replace dashed cut line with Score Line, Attach the the Score line with the blue card.

6. Now you are ready to cut.

You don’t have to replace the dashed lines if you are not using a Cricut Scoring wheel or scoring tool.  The dashed lines will be cut instead of scored.  But you will still need to attach the dashed lines to the appropriate layer.

Once you’ve cut the two card pieces, simply adhere the pop out portion of the card to the base, careful not to glue under the pop out section.  Then decorate the front.

  I used paper from Lori’s Spring Fling Collection with Echo Park.  Have a great day!

Using the We R Memory Keepers Foil Quill with your Cutting Machine

Have you seen the new We R Memory Keepers Foil Quill™?  I had the opportunity to see it demonstrated first hand at Creativation in January. It was one of the cool new tools that I was impressed with at the show. This innovative tool turns your electronic cutting machine into a foiling machine! It works with Silhouette, Cricut, Scan N Cut, and eclips machines. The Foil Quill comes in standard, bold, or fine tip. There are also 20 different foil color options and you can foil many surfaces including card-stock and even leather!

You can foil cards, scrapbook layouts, home decor and jewelry!  The possibilities are endless.

I received a Foil Quill from We R Memory Keepers to test out!  I created a fun foiled wedding card using it and some of the sketch files from my SVG Sketch Wedding Bundle (in the Silhouette store: Sketch Wedding Couple and Our Wedding Day)  You can see my review and the wedding card tutorial HERE on my YouTube Channel.

I love that the Foil Quill allows me to use the cutting machines that I already own in a fun new way. Also, note that each set comes with adapters for Silhouette, Cricut, Scan N Cut, and eclipse machines. It really is a fun tool to work with, and it adds such a nice touch to your projects.  The Foil Quill is quite a popular tool that is selling out fast. It is currently for purchase HERE. Go check it out!

Have a great day!