Birthday Gum Ball Card

Have you ever seen a design that immediately made the creative side of your brain start sparking?  That happened to me the minute I saw Lori’s cute birthday gumball machine (SVG, Silhouette) and I thought — shaker card! For some reason, the thought of buttons flying around in the middle of this card just made me happy!  So here’s a quick tutorial on what I did … 


First, I cut out all of the pieces as they were in Lori’s file.  Then, I used the shape tool to create an oval.  I hovered the oval over the gumball machine to get the right size, and then I did an offset of the oval to create a frame.  


Once I had my frame shape, I cut it out 5 times from white card stock, and once from the light blue dot paper (Echo Park, First Responders, Emergency Vehicles paper).  The 5 layers of white card stock ovals will give the frame thickness and dimension so that the buttons can move freely underneath.


I layered the five card stock ovals, added small foam adhesive as shown, and traced the shape onto a piece of clear acetate.  Clearly, you don’t need to be accurate about this because you’re going to use scissors to cut inside the lines in order for your acetate to sit within the border of the oval frame.  I used a thin line of liquid glue to adhere the acetate to the top of my white oval frame.
I adhered the light blue dot oval over the acetate and then adhered everything together.  I layered the folded white card base, then the plain white template placed the buttons on the template, then added the oval over the template/buttons.  Finally, I added the red top and bottom pieces (also paper from the Echo Park First Responders collection) with more foam tape and finished the card with the sentiment and remaining cut file pieces.  The stripe is just a piece of scrap cut to 1/4″ thick to add along the bottom if desired.


Inside, the finishing touch was a cute little phrase that comes with the cutting file.


Thanks for stopping by Lori’s blog today! I hope this card will inspire you to think outside the box and create something fun with Lori’s wonderful cutting files!  Until next time, happy crafting my friends!

NEW Fabulous Birthday Card Bundle Video Released!

Hello my crafty friends! Today I released a YouTube video showing off the new Fabulous Birthday Card Bundle. If you’re on the blog scroll to the bottom of this post to view it. If you’re reading this from an email, simply click HERE. Also, below are some quick snips of my favorites and they are also some of the top customer favorites, too. I really hope you get to make some of these fabulous cards! You will also find these new cards in the silhouette design store.


Have a wonderful day!


Lori


NEW Fabulous Birthday Card Bundle!

I am always looking for a fun and easy birthday card to put together for a friend or family member, so this week I designed a new bundle of 10 birthday cards. It’s called the FABULOUS BIRTHDAY CARD BUNDLE I am working on a video today that will show them off and help with assembly. The video will be posted later today. I’ll send out a link tomorrow morning. Take a peek at how much fun they are….


Have a great day!


Lori

Bobble Card Pot of Gold

Anita here with a fun St. Patrick’s Day card called Bobble Card Pot of Gold (SVGSilhouette).  I used Mini Action Wobbles Springs to pop up the pot of gold and it wiggles when you pick it up or shake it.  Lori has a tutorial on her site for this type of card and links to get the wobbles.  I used some of her Echo Park paper collections including Day in the Life No. 2, Pets, and Our Little Princess. Thanks for looking and have a great day.

Hugs,

Anita

5×7 Grid Pop Up Card Tutorial


Hi there friends! Today I’m sharing a tutorial for the new 5×7 Grid Pop Up Cards. I am using the 5×7 Grid Pop Up Card Butterfly (SVGSilhouette). These cards have the pop-up wow factor of a box card but are much easier to make and they fold flat for mailing! These cards are also great scrap busters I didn’t need to cut into a new 12×12 sheet paper for any of the pieces.
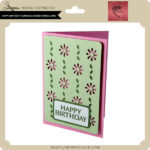
Once I had everything cut out of 80lb cardstock I inked the edges of the treetops, flowers, and butterfly. This file also has a print and cut sentiment that is glued onto the back of the treetop (not pictured).

I then assembled the insets. For the small flower pieces, I used my sticker maker. When I glued the butterfly together, I only added glue to the center body portion to give the wings a little more dimension.

Now to assemble the card. There are three green base pieces two smaller and one large. Each one has three slits cut into them. The smaller bases are for the outside and the large one goes in the middle.

Starting with the trees slide each base into the slits at the bottom of the tree panel. The bottom edge of the tree panel and the bases should be level and touching the table. Now add the butterfly panel and the flower panel the same way.


To fold flat just push the base over to one side. The bases do not need to come apart to fold flat.
This card is fun and easy to make, and Lori has lots of versions. Definity go check them out! Thanks for stopping by!
Brandie