Slider Window Card – Assembly Tutorial

Hi everyone!  Corri here today sharing a quick assembly tutuorial for the new Slider Window cards.

I used the Story of Fall Collection from Echo Park to make the turkey version of this card.  The card has a tab that you pull to reveal your sentiment.  They are so fun!

Here’s how to put them together.  When you cut out the card you will have these pieces.

The first step is assemble your turkey.  Next apply the mat (orange layer) to the card base (brown layer).

Next, apply your sentiment panel to the front of the card.  Use the window panel (wood grain) to line it up before gluing in place.

Apply adhesive to the outer edges of the window panel and glue down.  You don’t want adhesive too close to the window so your slider (floral piece) can slide freely up and down.

Finally, side the slider all the way down into the window, covering your sentiment area.  The window panel has a perforated edge on the bottom, fold that up and apply a strip of adhesive to the back side.  Press down firmly to adhere that strip only to the slider panel. When you pull up on the tab, you will have a pop up area to attach your turkey to.

Such a fun interactive card!  Anyone would love to receive this!

Be sure to check out all the fabulous new files that Lori recently added to the store.

A2 Pop Dot Cards Tutorial

Hi everyone!  Corri here today sharing a quick assembly tutorial for the new pop dot cards that Lori will soon be adding to her shop.  These cards are so fun to put together and look really cool!  I love the dimensional look of these.

When you cut out your card you will end up with these pieces.

To asseble the card, first glue the orange layer behind the gray layer. Next, apply the black layer to the gray layer with foam dots.  Using more foam dots, apply the purple layer to the front of the card.

The finished look is really cool!  Lots of dimension and layers.

Be sure to check out the SVG Shop for these fun new cards.

Give Thanks Card with Kathy

Hi Everyone!  It’s Kathy today with a fun Thanksgiving card I created using a couple of Lori’s files…take a peek…

I love Lori’s card bases because you can use them for any type of card… just change the papers and embellishments to suit your needs and you can use them for Birthday, Holidays, Get Well, you name it!  For this card, I used the 5 x 7 Shutter Card (here in Silhouette Store), then added the Thanksgiving Turkey (here in the Silhouette Store).  It came together quickly and I love how it turned out!  That’s it for me today, thanks for stopping by to peek!

Summer Fun Cards with Cathy

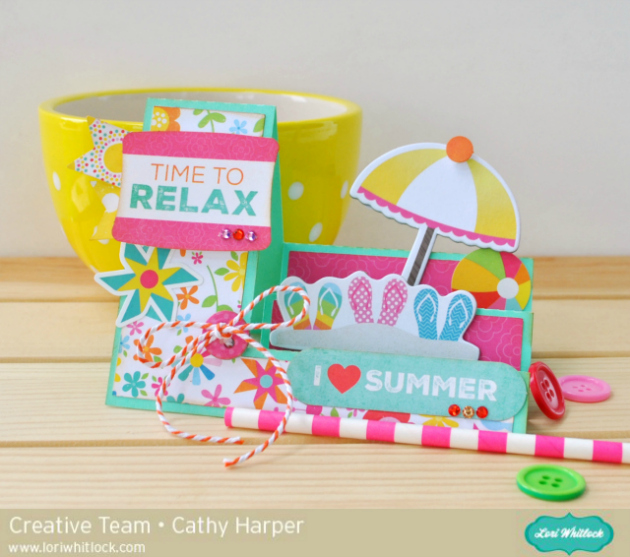
Hi everyone!  Cathy here with you today and I have a couple of fun summer shaped cards to share with you.  Both cards feature Lori’s Echo Park I Love Sunshine collection!  I love this collection, so many fun colors and patterns with super cute chipboard!  The ephemera pack is so fun, so many elements to create with.

I first created this side step card.  So easy to create and just a little bit of fun to brighten someone’s day.  This card fits easily into an A2 envelope with it’s clever folds.  I just added papers, chipboard and ephemera pieces from the I Love Sunshine collection!  After, I created this card…I saw that there were a bunch of new designs from Lori on the Silhouette Design Store, so I had to make just one more.

How cute it the A2 Shaped Sun Card?  So easy, I just added a couple of stickers and embossed some card stock for the center of the sun. Again, all of these goodies including that fun polka dot washi tape is from Lori’s Echo Park I Love Sunshine collection.  There are a bunch of new cards in Lori’s Shop and in the Silhouette Design Store.

Thanks so much for joining us today.  I hope you have a bright sunshine filled day!

~Cathy

Side Step Card

A2 Sun Shaped Card

Father’s Day Work Bench Pop Up Card with Mendi

Hello there!  It’s Mendi here today with a Father’s Day card using Lori’s adorable Work Bench Pop Up Card cutting file.
Lori’s card design focuses on the inside of this card so I wanted to show you how I embellished the front.  I decided to enlarge a few of the tools found on the inside and pair them with a banner from Lori’s Journaling Shapes 2 set and a custom sentiment using her Friendly Font.
While this card is adorable all on it’s own, I wanted to find a way to dress it up and make it my own so I decided to stamp the workbench with a woodgrain background stamp and to add a fun checkerboard floor by cutting extra 1/2″ black squares on my Silhouette.  I finished off my card with a sentiment stamp from Lawn Fawn’s Happy Everything set.
Let’s face it… Making cards for men can be tough, but Lori has a number of fun, interactive cards that are perfect for Father’s Day.  You can find this card along with many other good choices in her shop HERE.
Thanks for dropping by today!