Precious Baby Fox Bobble Head Card

Happy Monday, Friends! Creative Team Member, Mitsyana Wright, here! And I have some sweet inspiration to start off the new week. I had a baby shower this past weekend and I created the little cutie to give to the mama to be.

For this adorable card, I used Lori Whitlock’s Bobble Head Card Fox file.  I saw this little guy and automatically fell in love with him!

Image 1

You can find this card HERE in Lori’s SVG Shop…

Or HERE in the Silhouette Store.

Since my friend is expecting a girl, I decided to turn this cute little guy into a cute little girl by hand drawing on eyelashes and added pink chalk for blushed cheeks.

I used  Echo Park’s Sweet Baby Girl 6×6 Paper Pad and Sweet Baby Girl Frames & Tags Ephemera. The colors, patterns, and sentiments were absolutely perfect!! And as you can see pulled everything together to make an uber adorable baby shower card!

I hope you enjoyed this projects and it gives you a wonderful start to your week!!

Happy Crafting, Everyone!!

~Mitsyana

How to Make a Shaped Card with Kathy

Happy April Everyone!  It’s Kathy today with a tutorial showing how to make a shaped card from a one-dimensional file using my Silhouette.  I make a lot of these cards, and always get asked how I do them, so I decided it was time to write it all out!  For my card, I started with Lori’s new Cute Dog File (SVG, Silhouette)  I thought it would make a sweet card!

Start by loading the file into Silhouette.  I then  sized it so it was 6″ wide.  ( I wanted my card to be able to fit into a 6.5″ square envelope when done)

Next, select the image by clicking on it, and then select the offset button. (the button that looks like a star with a line around it)  The default offset is .125, which was fine for my project, click apply.  This will create a shape around your original shape which is slightly larger.

Move the original file off of your mat, and copy the offset shape two more times.

Click on one of the copies, right mouse click and select flip vertically.

Move the flipped shape down so that it overlaps the other offset shape.  Where they intersect will eventually be where the card folds.  Select both the “top and bottom” shapes, click on the transform button then click on the left justify button.  This will make sure your card sides are properly aligned.

Once the pieces are aligned, make sure they are still both selected, right mouse click and select weld.  This will make them one solid piece.

To add a score line, select the line tool, and draw a line in the center of the intersect.  Change the line to a dashed line.

Lastly, select the line and the card base, right mouse click and select group.

After I created the file, I cut all the pieces.  I assembled the dog shape, then layered it on the single offset piece.  This is then layered onto the folded base.

What you end up with is a cute puppy-shaped card!  I used Lori’s Sweet Baby Girl collection for Echo Park paper for the card.

That’s it for me today, thanks for stopping by to peek!

Tuesday Freebie and New in Shop

ALL WEEK, this SVG file is FREE with any $1.99 purchase!

We have a FREE file with purchase all this week! Simply add this Flexi Card Happy Birthday file  to your shopping cart along with ANY $1.99+ purchase from the SVG Shop and this file is yours FREE. Be sure to use Coupon Code: HBD2U (case sensitive) at checkout. This offer is good through next Sunday.

(Your cart must reach at least $3.98 before the coupon will be applied and then $1.49 will be subtracted from your total at checkout. The files will be available for immediate download after you pay for your order by visiting MY ACCOUNT>COMPLETED ORDERS>ORDER DETAILS inside of your account. Only one discount code per order allowed.)


In addition, don’t forget about this special ! You can get this Free Kit of the Month with any $20 purchase (Purchase must be in one transaction.) Simply add the 2018 April Kit of the Month to your shopping cart along with ANY $20.00+ purchase from the SVG Shop and this file is yours FREE. Be sure to use Coupon Code: APR18KOTM (case sensitive) at checkout. This offer is good through April 30, 2018!

(Your cart must reach at least $27.95 before the coupon will be applied and then $7.95 will be subtracted from your total at checkout. The files will be available for immediate download after you pay for your order by visiting MY ACCOUNT>COMPLETED ORDERS>ORDER DETAILS inside of your account. Only one discount code per order allowed.)
 
 
Check out our exciting new SVG files releasing this week! And, just like always, the NEW SVG files are ON SALE 25% OFF through the weekend in the SVG Shop! These downloads include SVG files that may be used with Cricut Explore, Silhoeutte (DE upgrade required), Eclips, Brother Scan and Cut, and any other software that will open SVG files. No coupon code necessary, the files are all discounted in the shop! Be sure to go get them while they are on SALE this week. 
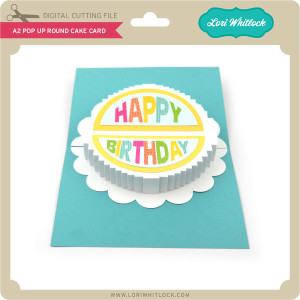
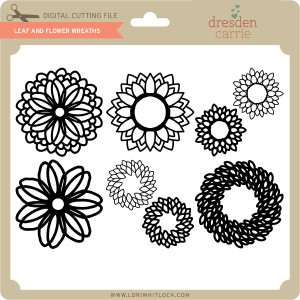
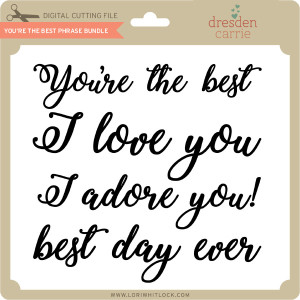
 
This week I have a new Bobble Head Card bundle!  We also have some great new files from Paige Evans and Dresden Carrie!


Thanks for visiting the blog today! Please let us know if you need any help with your files. We want to make sure everyone is happy with their purchase. Have a great week!
Floral Papercut Cards with Brigit

Hello, it’s Brigit here today to share some cards from Lori’s A2 Papercut Card Floral Bundle. You can also get these cards separately from Lori’s shop or at the Silhouette Design Store here, A2 Papercut Card Floral 1A2 Papercut Card Floral 2A2 Papercut Card Floral 3A2 Papercut Card Flower 4.
I used a couple of different textured mats behind each card to give a unique look, but these cards would look great with any kind of background. All the cards were cut out using my Cricut Maker they cut beautifully!  I also added some stamped thank you sentiments to the cards, but they could really be used for multiple purposes.

This first card I used teal cork from a dcwv mat stack with some teal sequins to embellish.

I love burlap and white cardstock together it’s my favorite combo, I added a couple of pearls on each flower.

Here I added some olive corrugate from the dcwv neutrals pack, love the addition of the buttons.

The last one I used some green glitter paper and more buttons, love this sparkly background!

Hope you enjoyed papercut cards, thanks for stopping by and have a wonderful day!!


Flat Front Shutter Card Birthday

Hello Everyone:

Anita here with a fun and easy tutorial for the Flat Front Shutter Card Birthday which you can find here in Lori’s store and here in the Silhouette Design Store.  I used one of Lori’s brand new Echo Park lines called Sweet Baby Girl.  It was perfect for a soft and feminine card.

Here are all the pieces.  There are several that are small so remember to keep track of them.

I put together the pieces of the card and  glued everything down before I started folding.  It is much easier to work on the folds that way.

Your first step is to crease the fold to the right of the cake and you will be folding it so it pops up when lying flat.

I held the card in my left hand and pressed gently down on the middle score line with my left hand and held it in place while I used my right hand to score it across the fold.  You will be creating a valley fold here.  As you can see the folds on the top and bottom of that section just naturally pop up the way that they are supposed to be creating hill folds.

I folded up the right side of the card and used a bone folder to gently strengthen my score marks.  On the smaller pieces you will be scoring through two of the folds.

Here is a view from the top so you can see exactly what it should look like.

Lastly, here is the closed card and as you can see it lays flat and can be popped in an A2 envelope to be sent off to someone sweet.

Thanks for looking and be sure to check out Lori’s shop for more great cards of this type.

Hugs,

Anita