NEW Sliceform Pop Up Cards!

These are no ordinary birthday cards! These delightful creations feature the cutest little birthday icons that spring to life as soon as you open the card, adding a touch of magic to any celebration. Whether it’s a cheerful birthday cake or a playful animal friend, these pop-up designs are sure to bring a smile to the face of anyone lucky enough to receive one. Surprise and delight your friends and family on their special day with these charming and easy-to-make SVG file A2 Sliceform Pop Up Birthday Cards. Check them out…

I hope you all have a beautiful Wednesday!

Lori

Hippo Belly Box Valentine

Hi friends! Today I am sharing a Valentine idea. I love the belly boxes and Lori has several on her site (SVG). I used the Belly Box Hippo (SVG, Silhouette). To make him more of valentine I used pink papers as accents and added some hearts to the feet. I then filled the belly part with some of my little guy’s favorite candy. I love how he turned out. These little boxes are easy to assemble and don’t have to many pieces. Definitely something that can be mass produced if needed.

Thanks for stopping by!

Brandie

Valentine Gift Set SVG Files

Hello crafters! Valentine’s Day is right around the corner and this past Tuesday was National Pie Day, so … I found a little inspiration for today’s project by combining the two! I created a cute cherry-themed card and a pie-shaped gift box using a couple of Lori’s fun cutting files.Valentine's Day Cherry Card & Gift Box Tutorial
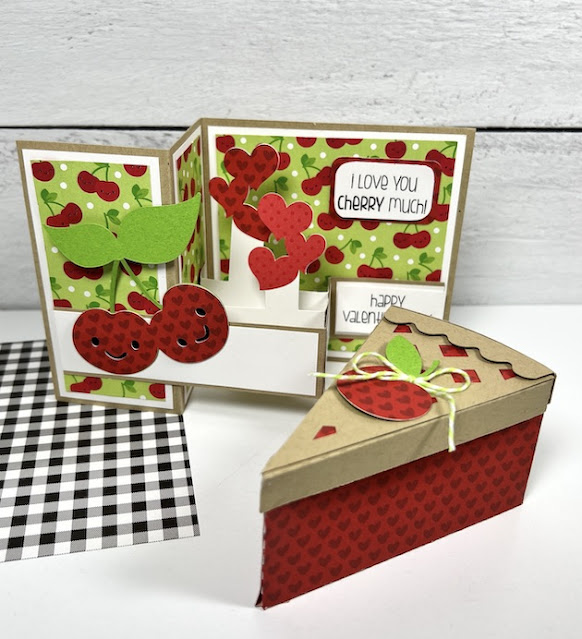
These would make the “sweetest” gift. You could fill the box with candy, a gift certificate, jewelry, a small toy, money, love notes, or clues to a treasure hunt.

First, here’s how I made the pie slice box …

Valentine's Day Cherry Pie Gift Box Tutorial

used the cutting file called 3D Cherry Pie Slice (SVGSilhouette). I cut out all of my pieces and then folded them along the score lines. The small notches on the pieces allow the shapes to bend easily to create the pie’s shape. I chose a red paper with hearts (Bella Blvd’s Bestie Hearts & Ombre in McIntosh).

Valentine's Day Cherry Pie Gift Box Tutorial

I used a liquid glue to adhere the red “cherry” portion of the pie-shaped box together. Then, I added a base inside made out of Bazzill Kraft card stock.

Valentine's Day Cherry Pie Gift Box Tutorial

For the lid, I repeated the process that I did for the base. Then, I layered the red “cherry” filling piece, the kraft lattice piece, and finally … the scalloped crust piece. I used a piece of foam tape under that for some dimension. I added the cute cherry and some lime twine and the box was complete!

Next up, is the cherry card …

Valentine's Day Cherry Themed Card and Pie Gift Box Tutorial

For this one, I used the cutting file called Pop Up Box Card Valentine Cherry (SVGSilhouette). I cut out my pieces and layered all of the pattern pieces before assembling the card. I used Bazzill Kraft card stock, white card stock, and a cherry-patterned paper from Doodlebug’s Bar-B-Cute Collection.

Valentine's Day Cherry Card Tutorial

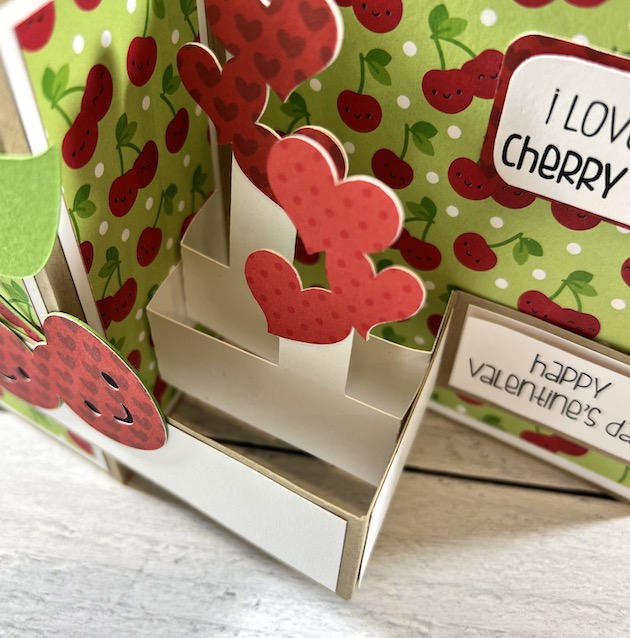
As you can see above … the band of the card attaches to the left and right sides only, leaving the center of the band free of adhesive. This allows the card to fold and pop open easily.

Valentine's Day Cherry Card Tutorial

Next, I glued the two remaining pop-up elements inside the band as shown above. I used a cute red polka dot paper from Doodlebug’s petite print dot & stripe for the hearts.

Valentine's Day Cherry Card & Cherry Pie Gift Box Tutorial

And … they’re done! My cute cherry-themed Valentine’s Day card and Cherry Pie Slice Gift Box are ready for gifting. Well, that was easy! I just love Lori’s cutting files.


Thanks for stopping by. I hope these inspire your next Valentine’s Day craft project. Have a great day!

Blog * Shop * Facebook * Instagram * Pinterest

Pretty NEW Friday $5 Bundle!

This weekend we have the cutest Friday $5 Bundle which includes 5 amazing flower card and tag SVG files for just five bucks. Spring is just around the corner (at least we can all dream about it), so I thought it was time to put out a cheerful floral $5 bundle. These projects are so pretty and will surely make your recipients happy and brighten their day. This deal is only available until Sunday at midnight, so don’t wait! Take a peek…

Be sure to go grab these SVG files while you can. 

** Because Friday $5 Bundles are already heavily discounted they are not eligible for further discounts including monthly, seasonal and flash sales.

Shop Friday $5 Bundle HERE

Thank you for joining us today! Have fun crafting this weekend!!!

~Lori


Box Card Large Valentine Centerpiece Tutorial

Hi! Teri here with a tutorial for the cute Box Card Large Valentine’s Centerpiece (Shop, Silhouette). This piece is simple to put together and turns out adorable.

First, I cut out all of my pieces even a few extra heart banner pieces. Since I’m putting this in a location where all sides will be seen, I wanted the banner to go all the way around the box. I also inked the hearts to give them more depth.

I ensured that all of my hearts would fit in the right spots.

Then I glued the main box portion together.

A little tip that I use for stringing baker’s twine is that I apply a small amount of wet glue to the end of the twine and then twist the twine applying the glue. Then let it dry for a few minutes and this will give you a makeshift needle so you can thread the twine through the small holes of the mini banners. I then glued the end of the twine into the corners of the main box portion.

Then I added the front and back insert pieces folding the glue tabs towards you so that you’ll get the same distance on both sides.

Then add the center insert piece.

All three insert pieces should be evenly spaced.

Thanks for stopping by!

Teri