Diamonds are a Girls Best Friend – Mother’s Day projects by Tya

Hi everyone – it’s Tya here to share with you 2 super fun cut files from Lori Whitlock. I decided with Mother’s Day being just around the corner that I would get a jump start on my gifts – so I wanted to share with you what I did! My mom is very crafty and creative and I tell people I inherited my creative gene from her so I know that she appreciates anything hand made, so finding a card and gift box for her was something I knew I wanted to do. Plus if you will notice a little theme running with my projects with the Diamonds – they are a girls best friend after all right?

This last week Lori put out some amazing new fun fold cards and I was so excited to try the Double Diamond Fold card out. I loved all the different pattern papers from the Echo Park Jill collection by that I got use on this card. Definitely one I will be using again!

I also kept with the diamond theme and used the Necklace Box to hold a little sparkly necklace for my Mom. Darling box that was the perfect size to hold a necklace and some earrings in.

Thanks for stopping by and visiting the blog today! Hopefully I have inspired you to try out one of Lori’s new cards and to make something special for that special lady in your life. Have a great week everyone!

Using Your 6×6 Paper Pad Scraps – Tutorial with Tya

Hi everyone! It’s Tya here to share with you a fun tutorial today. I adore, like really adore 6×6 paper pads. They are the perfect size for card making, but inevitably I am always stuck with oodles of little scraps after I am done with my projects, so today, I wanted to share with you a quick and easy tutorial on how to use up those scraps.


First-  I gathered up my supplies to make my card. I am using the 6×6 paper pad from the Jill collection that Lori designed for Echo Park. I am also using the decorative brads, chipboard stickers and element stickers.

I also used a sheet of kraft cardstock.

Next I opened up the Silhouette. I like to used the grid function when I am dealing with scraps. The Grid is on the far right side of the toolbar. To make it true to size, I do 1 inch spacing and 1 divisions – this basically makes (12)  1 inch squares along the top and sides so it is just like the Silhouette mat.

Now, I find my card shapes and lay them out on the workspace. I try and utilize the mat and lay my shapes out evenly so they will be easy to cut out.  I used the Card 1 shape (Lori Whitlock Shop) or a2 Flower Card (Silhouette Store).


Now this next step, it’s just what I do when I cut scraps, I am sure there is an easier way, but this is what I like to do because it is pretty fool proof. So I take a scrap piece of paper and cut out all my shapes. I like to do either white or kraft because I save these and can use them on another card. So I lay out all my shapes and cut them out.


Here is where those pesky cut marks, like the one below, that we get on our mats come in handy. I take my real papers and basically lay them over the cut marks that were previously made.

Now the shapes are all cut out and we were able to use up some of those little scraps- AND we only had to make ONE cut! This is such a time saver! No having to guess or measure exactly where the papers are, just lay them over the cut marks and you are set!

 Here is the finished card –

Thank you so much for stopping by! I hope I have inspired you to pull out all those scraps and have fun creating beautiful cards! Have a great day!

Bunches of Bunnies – Projects by Tya

Hi Lori Whitlock fans! Its Tya up on the blog today and believe it or not – Easter is right around the corner!  So in honor of this special day – I have rounded up Bunches of Bunnies! Take a peek at 3 of my favorite bunny themed projects from Lori’s cut files! These little treat boxes would be perfect for table favors for Easter brunch or dinner, a cute teacher or friend gift or a fun addition to Easter Baskets!


The first bunny project is this darling Bunny Shaped Box. Every year my Easter basket always had a chocolate bunny in it, and it is a fun tradition that I like to carry on with my own kids. This little guy is the perfect container for any sort of chocolate bunny treat you can find.


My next project is this cute little Purse Bunny that I added an acetate sheet in the window and filled the purse up with jellybeans, but you could add any sort of treat or little prize like some fun lip gloss or even a gift card. I added a fun ribbon handle as well.


And finally, I had to do this darling little Easter Bunny Tic Tac Wrapper. The carrot paper in Lori’s Easter Friends Digital Papers were perfect for my favorite flavor of Tic Tac (orange is the BEST). Add a fun little bow tie to the Tic Tac box for some added whimsey. 🙂


So here are my projects! Hopefully I have inspired you to stop by Lori’s Shop or on the Silhouette Design Store and pick up these adorable Bunches of Bunnies! Have a wonderful Easter holiday – thanks for stopping by!

St. Patrick’s Day Treats with Tya

Before we get started with Tya, I wanted to point out an awesome post today over at Scrapbook & Cards Today blog. Paige Evans has a lovely layout featuring one of my cut files AND it just might include a free file!! Be sure to go take a look and get your free file!

Hi everyone – its Tya here to share with you a fun set of St. Patrick’s Day treats just in time for all your little leprechaun festivities coming up. Lori has a darling new St. Patrick’s Day Digital Collection over on Snap Click Supply that I used to spruce up a simple cupcake and a soda bottle. I used the Print and Cut feature on my Silhouette on both of these projects – it’s one of my favorite things to do with my Silhouette and Lori’s files. Here is what I did-

First off – let’s start with the Cupcake Stand – here is a quick tip for you. As you can see, the original cut file had just a simple scallop edge. I wanted to make the cupcake stand a little more festive , so I went in and found a shamrock from one of my favorite Lori cut files and went in and replaced the circles in the scallop edge with the shamrocks. The wonderful thing about owning a Silhouette is that I can mix and match and customize my cut files to fit a theme or holiday. It was simply a matter of ungrouping the orginal shape, deleting the circles and replacing it with my resized shamrocks instead. Super easy and think of all the different shapes you could substitute – hearts for Valentines Day or stars for the 4th of July – the possibilities are so fun!

Here are a few close ups –

 Check out the cute cupcake wrap and here is a better photo of the shamrocks that I added instead of the scallop circles.

 I did a print and cut of the Kiss Me I’m Irish sentiment and made it into a cupcake topper with the help of  a scallop circle and a some button and twine. Add a green Pixie from Doodlebug Design – and you have a custom made cupcake topper!

Next up I decided to grab a green bottle of Sprite and add a bottle label and a custom sentiment to the label that I made with the beautiful Vintage Font for the Shamrock Soda. I added a polka dot shamrock with an orange button and some twine to finish it off. I also added a scallop border punch to the top and bottom edges of the sentiment.


So that’s all there is to my projects. I love taking basic everyday items like cupcakes and Soda bottles and using my Lori Whitlock shapes to fancy them up and make them fun and festive! Thanks for stopping by!

Digital Shapes and Papers –

St. Patrick’s Day Collection – Snap Click Supply

Shapes used: (All on loriwhitlock.com or Silhouette Design Store unless otherwise noted)

Nested Scalloped Circle

Bottle Label Tag – Flag

LW Vintage Font

5 Clover Shamrocks (Silhouette) Lucky Set (Lori Whitlock.com)

3D Cupcake Stand

Scalloped Cupcake Holder

Cutting Acetate with the Silhouette Tutorial by Tya

Hi friends – today I am here to show you a fun technique using acetate! I am a sucker for cute packaging so when I was pondering about what to do my tutorial on for this month I knew I wanted to share this one with you. I decided to do a couple of colorful St. Patrick’s Day Favors to show off this technique. It just wouldn’t be the same if you couldn’t see the Skittles and Gold Coins that these boxes hold, so when you really want to show off what is inside your packaging or if your treats fit a holiday or a theme like my treats do, acetate is the way to go!  It may seem basic and easy, but it is so fun to use something other than cardstock and pattern paper when using our digital cutting machines.


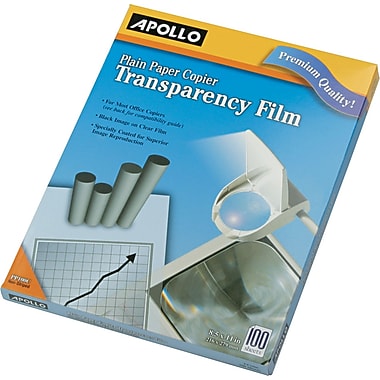
I use this brand of acetate (also know as transparency film) for my projects. It cuts beautifully in my Silhouette machine.  Apollo Transparency Film

Apollo® Plain Paper Copier Transparency Film, Clear, 8 1/2in.(W) x 11in.(H), 100/Box
Here are the steps to my project –
1- Open up Silhouette program.
2- Find the 2 box cut files and place them in the workspace.
When deciding what boxes to use from Lori’s library – I chose to use 2 of my favorite boxes to use with acetate. I love these boxes because they require no gluing – which can be tricky with acetate because a lot of the adhesives show through so these boxes were perfect. I used the Santa Petal box (minus the “santa” parts) and the No Glue Gable Box.I used some of Lori’s darling Hang Tags well.
Links below

3- Since the acetate is fairly thick, I used the textured cardstock settings (Blade Depth 6, Cutting speed 3, Thickness 33. I also checked the Double Cut box to make sure that the cuts are nice and deep and this also helps when you go to fold up the boxes.

So my challenge to you is to go pick up some of this fun medium from your local office supply store and try your hand at this fun technique. Thank you for stopping by!