Camera Treat Cup Card Tutorial with Brigit

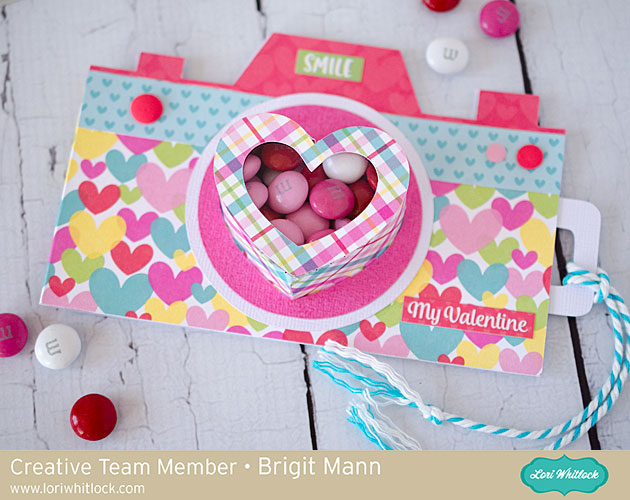
Hello, it’s Brigit here today sharing a Silhouette Studio tutorial on how I made this cute camera treat cup card. It looks like a lot of steps but it’s really super easy to make since it’s just two files put together.

This was such a fun project to make and can be used for any card to add some yummy treats.

I started with the heart shaped box with window from Lori’s shop, you can get it from the Silhouette Design Store here.

I ungrouped and deleted all except these three pieces.

Zooming in real close I aligned these two pieces along the score marks. I wanted one piece instead of two since the heart box will be sized smaller.

Selecting both I replicated and mirrored above and moved the two on the top  a couple of arrow clicks down. Depending on how wide you want the box you can move this as much as you want.

I selected all the pieces, welded and grouped them all together, I then grouped with the heart.

Next, I worked on the camera, I used the one from the travel icons set, you can get it here also from the Silhouette Design Store. I put it together on my mat and resized it to about 5.5″. Two of the pieces I didn’t use so I deleted them.

Now I took the heart box and resized both pieces together so the heart fits inside the circle. I made a duplicate of the heart and ungrouped to just use the bigger layer, this is what I used to make the heart cutout from the camera pieces.

I duplicated the whole camera and did a subtract all, I did this a couple of times deleting what pieces I had already made cutouts from.

As you can see, I ended up with all these pieces. the upper right piece is just a duplicate of the camera with the top cut off, that will go inside the card to hold the slider.

The slider is just a square and two rounded squares welded together. You just have to make sure it covers the heart opening and is smaller than the extra piece that goes inside.

I replicated and mirror left the camera bottom layer with the heart cutout, moved it one arrow click over and welded to create my card base. I did a release to get rid of the heart cutout on the left side which would be the back of the card.

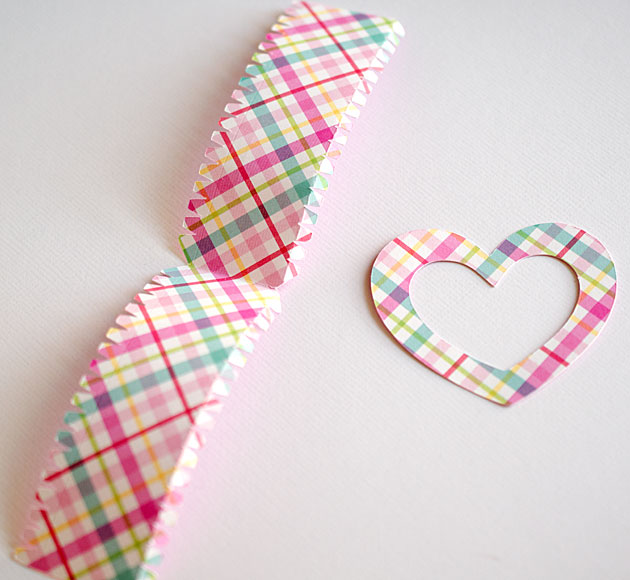
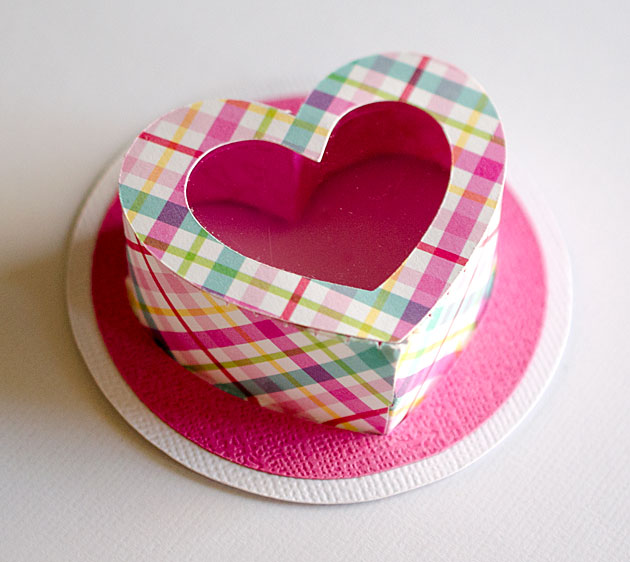
Here’s the box pieces cutout, I molded the side a little and used score tape which made it quick and easy to put together.

The pink and white layers should slide right over and glue to the bottom tabs, just make sure the tabs are going out and not in.

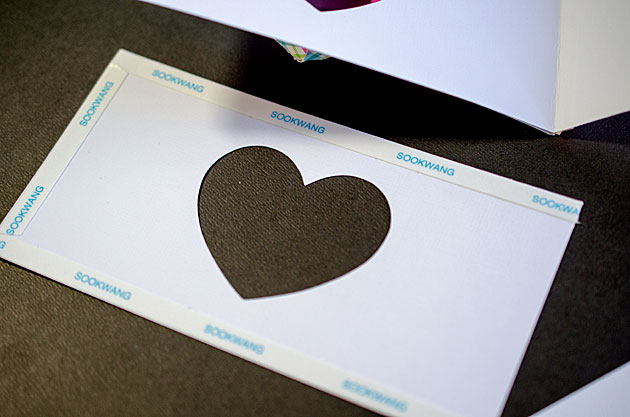
The inside piece for the slider just needs tape around three sides so the slider can move in and out.

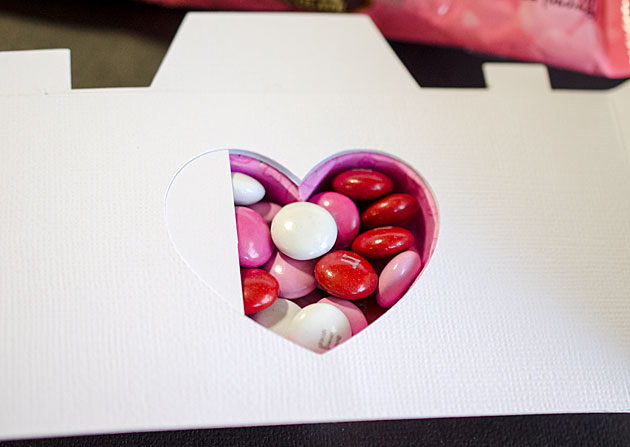
As you can see I filled the cup with m&m’s and pushed the slider in.

Here’s a closer look at the card, it’s a little front heavy so it doesn’t stand very well with the candy inside but it’s super cute. Paper used is Doodlebug’s Cream & Sugar.
Hope you enjoyed this tutorial, thanks for stopping by and have a wonderful day!!

Sneak Peek with Kathy

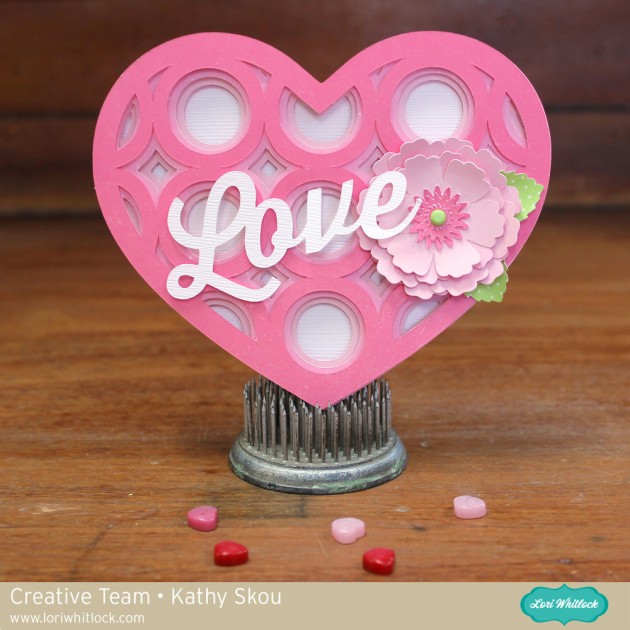
Hi Everyone!  It’s Kathy today with a sneak peek of a new card that will be available tomorrow!  It’s another of the Stacking Base Cards, this one Valentine-themed.  Take a peek…

This is the Heart Shaped Card Stacking Card Base.  I assembled the card using some of the solid papers from the Celebrate Easter and Happiness is Homemade Collections from Echo Park Paper.  I embellished it with the LOVE word from the Mason Jar Bouquet Box Card (here in Silhouette) and the 3D Flower 17 (here in Silhouette.) I just love how you can customize the bases to suit almost any occasion!  You could use this one for Valentine’s Day, a wedding or just Love!   The Heart Shaped Stacking Base Card Base will be available this week in the Lori Whitlock SVG shop and The Silhouette Store!  That’s it for me today, thanks for stopping by to peek!

Treat Box by Corri and a Layout by Amanda

Two of our creative team members are here today sharing some great projects with us. Corri has a lovely treat box to share… 

Hi everyone!  Lori Whitlock recently added some new files for Valentine’s Day!   I knew right away I wanted to cut this love scottie dogs file.  So adorable!  The file has two little scottie dogs facing each other but I decided to use one of them on my treat bag. 

I used the heart from the file and cut it at three different sizes.  I added some glitter to the hearts and the color for a little sparkle.   I cut the Heart Handle Tote from this pretty pattern paper from Echo Park – Love Story Collection.

Thanks so much!
Corri

Next up we have Amanda. She has created this beautiful layout.

Vintage borders
11 hearts
Love you more
Arrow Spinners
Love Story collection by Echo Park


Digital Goodies by Heather and Lisa

Today at Jessica Sprague Lori has a new kit available, Valentine Brushes. This kit will be on sale at Jessica Sprague through the weekend, so be sure and grab it while it is on sale. These brushes are great for both Valentine projects as well as a way to showcase things you love, like Heather did.  She created this beautiful layout. Heather said …

I wanted to use the Valentine Brushes in an unexpected way, so I used them to scrap about my favorite season… Spring. There’s just something about Spring that makes me happy. Warmer weather, brighter colors, and let’s not forget the fabulous flowers! It’s no wonder that Spring makes me smile. 
Go check out her blog here for more information. 
Lisa also created an adorable project using these brushes.  I love what these 2 have done. Lisa says…

I created a pocket card filled with heart shaped confetti using Lori’s new Valentine brushes and her Kiss Me papers and elements. Come see my blog for tips on how to recreate this project for a Valentine’s Day card or your Valentine Project Life layout.


Valentine Goodies by Christine and Natalie

I want to share with you some adorable Valentines projects. I LOVE these and want to make some of my own.  Christine says
Looking through the Valentine section in Lori’s store, I was immediately drawn to this Valentine card set.  Just as they are, they are beautiful cards, but I also saw what a little bling and extras could do to make them sparkle.
Here is a sneak peek of each card.  I used the pattern paper Love Story by Lori Whitlock for Echo Park and added glitter cardstock, gems, and ribbon.
Christine has GREAT tutorials and instructions on her Blog about these cards, so be sure to hop over and check it out.   
Next I have Natalie’s project to share with you. She used the Heart Pocket. It will be in the shop by the end of the day, but can be found in the Silhouette store now. Natalie has more pictures and info on her blog so be sure on check it out, until then, Natalie says…
Happy Tuesday everyone!  I have a little project for you today that will sweeten anyones day!  On Valentines Day, we always like to make a special dinner for the kids.  We make chocolate waffles with raspberry syrup.  It’s something my kids look forward to every year.  And lets face it, who doesn’t love breakfast for dinner?   
I made these little pockets last year for our Valentines dinner, which I slipped a little note to tell them all the reasons I loved them.  But this year, I am going to put them out early so I can fill them with notes all  month long.  After I made them, I tied them to the backs of their chairs a the table.  They made my table look so festive, and how fun is it to get love notes every day!
Echo Parks Be Mine collection found here
Lori’s heart pocket file found here
added some bakers twine to tie them to the chair
Ladies, thank you for sharing your talents with us. These are beautiful!