Mini Vertical Mailbox Tutorial with Brandie

Hi there! Today I am sharing another cute Valentine’s Day project. This little mailbox is a perfect size for a tiered tray or a small space that needs a little holiday decor. It can also be filled with treats to give to a special someone.

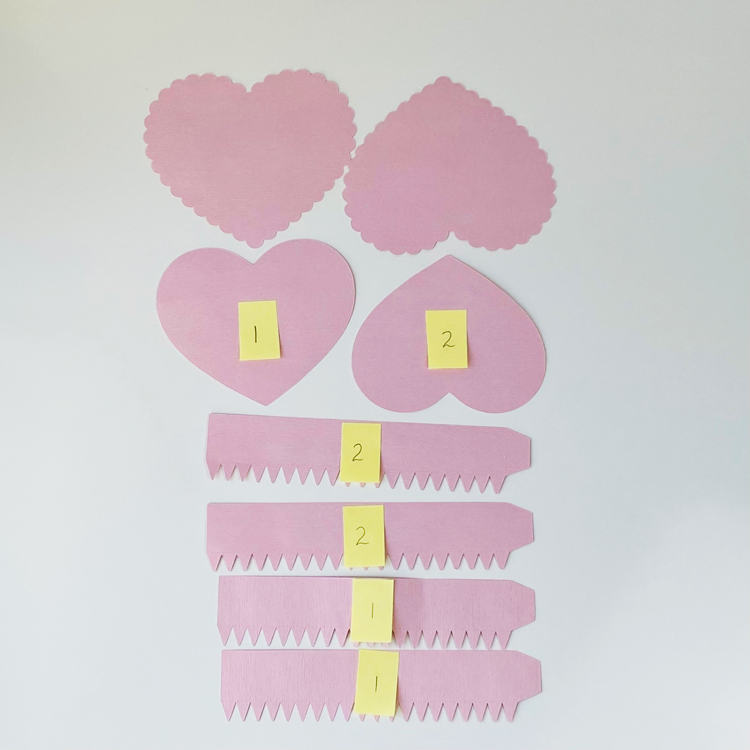
The file is the Mini Vertical Mailbox (SVGSilhouette). I cut everything out of 80lb cardstock. All of the score lines are mountain folds except for the front door.

I started with the bottom and glued the tabs to the longest piece while lining the bottom edge up with the score line on the tab. I then glued the sides of the mailbox to the bottom, again using the score lines and edge of the tab to line everything up.
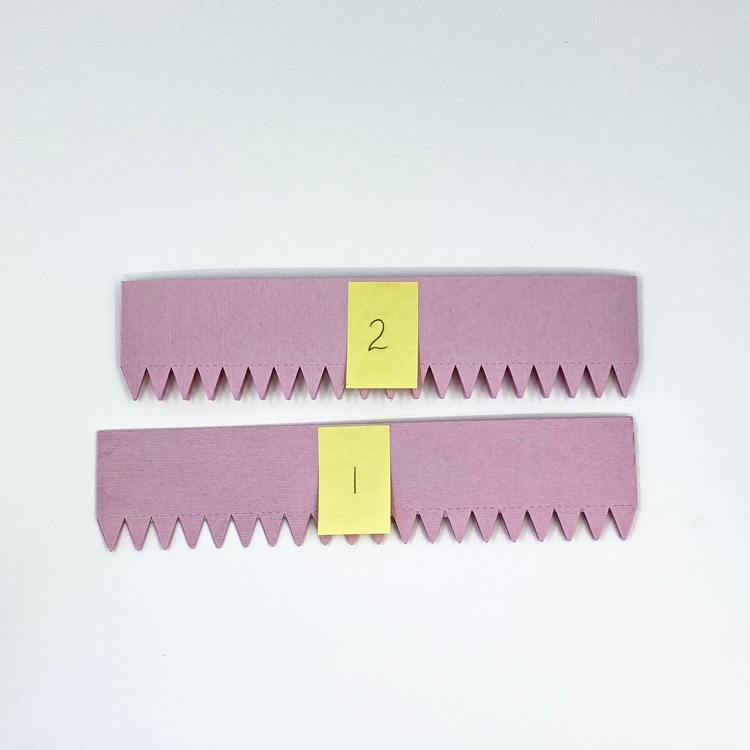
This part can be a little tricky but go slow and really secure the sides before moving to the arches of the mailbox. I applied the glue to the front straight sides first and made sure they were secure.
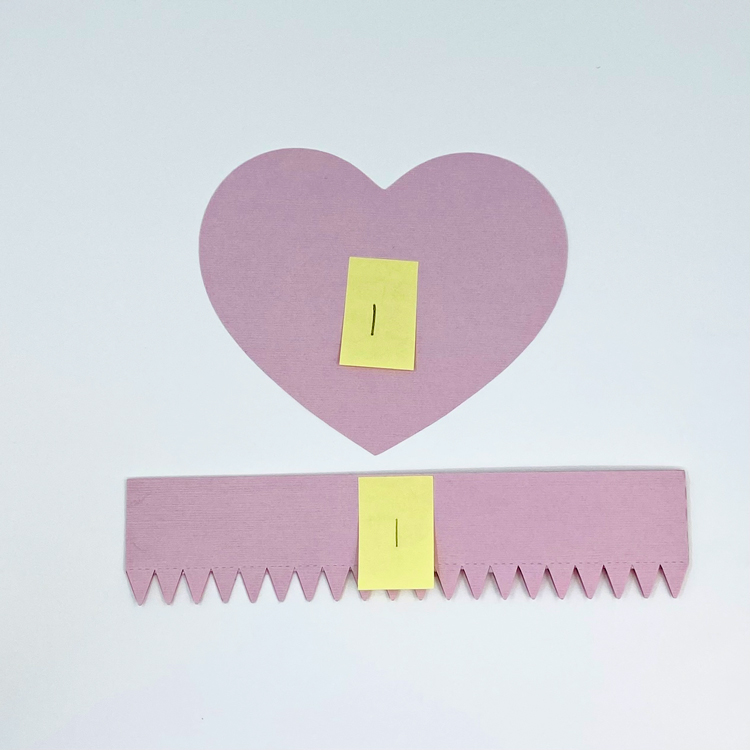
As I moved along to the arches, I applied glue to a few of the small tabs at a time and made sure they were dry before moving around the arch. I glued each side separately. Then when the arches were dry, I applied glue to the three remaining tabs, lined them up then flipped the mailbox onto its back, and pressed the tabs down from the inside through the front door.
I then glued the pattern papers on the sides and front door and assembled the little envelope. I then glued the red trim strips of paper to the edges of the mailbox.  I glued the largest heart to the front door and added a floral sticker. I also glued the little envelope to the front of the mailbox.
Now, this little mailbox is ready to be displayed with my other holiday decor. Thanks for stopping by today friends!
Brandie

Valentine’s Day Box Card with Traci

Hi guys! Traci here and today I have a really cute Valentine’s Day project to share with you! I made a card using one of Lori’s fun cutting files called Box Card Shopping Bag Valentine Dog (SVG, Silhouette). It’s a gift bag with a sweet dog, flowers, and hearts popping out the top. I changed up the colors so the pup looks like my son’s little furball, Tarot. I love the way it turned out and I love this file!

Valentine's Day 3D Puppy Dog Card with Hearts & Flowers

This adorable box card can sit out on a desk, shelf, counter, or side table for display during the holiday. 

Valentine's Day 3D Puppy Dog Card with Hearts & Flowers

This 3 dimensional box card can be folded flat and added to an envelope for mailing, or … saved and stored as a thoughtful memento.

Valentine's Day 3D Puppy Dog Card with Hearts & Flowers

There is a little space in between the layers to slide a love note, a fun photo, a gift card, or money. There’s no bottom to the card, so you would need to add a little tape to keep it in place.

Here is what the cutting file looks like. You can make your dog any color you like!

Such a fun and simple project to create for someone you love. Valentine’s Day is right around the corner … time to get crafty with another one of Lori Whitlock’s wonderful cutting files!

Valentine Sticker Tutorial for Cricut Design Space

Today I’m sharing a tutorial for stickers in Cricut Design Space.  Lori has many sticker files in her shop.  I’m showcasing the Valentine Cute Stickers (SVGSilhouette).

Valentine Cute Stickers

To begin, download and upzip your sticker file to your computer.

Open Design Space.

Click on upload on the Canvas screen.

Upload the file under the Image tab.

Then open the file onto your canvas.

The file comes in at this size.  Notice the 7.07″ x 9.94″ size.


Make sure your file is selected and select Flatten.


At this point, you will notice a warning exclamation mark.


This is because of the size of the project.

Select the stickers and resize them until it is smaller than 6.75″ x 9.25″.

This is what the stickers look like on the make screen.  Select Continue.

I like to select printer settings on the Use System Dialogue screen.  Select that option. Select print settings and paper settings for your printer.  And print.

Now it’s time to cut.  I’m using the Cricut Explore 2.  If you have Cricut Sticker paper, making sure to select Custom on the dial and select Sticker Paper for the material.

I have some Avery Project Sticker paper.  It isn’t as thick as the Cricut Sticker paper.  My first sheet of stickers cut all the way through the paper with the Sticker Paper material selection.  So I selected Iron on to get the kiss cut for my second sheet.

This is the kiss cut.

These are my first stickers.

If you want smaller stickers, resize your project to the desired size.

Here I duplicated the sticker sheet and resized it smaller.  Select both sheets and select attach.  This will cut the stickers on one page rather than separating the 2 smaller sheets on 2 pages.

Now you are ready to cut all sorts of stickers.  Pick some up during the sale this week.

Ashley


Valentine Heart Candy Box

Hello crafty friends! Aimee here with you today and I have a tutorial on making these adorable Scallop Heart Candy Boxes (Lori’s SVG Shop, Silhouette). These would be perfect for a grand/son or grand/daughter! I used the new Birthday Girl Collection and the Birthday Boy Collection to make these more kid friendly. I used the panda and the dog from the sticker sheet from each collection because who doesn’t love an adorable animal wishing you a Happy Valentine’s Day?!?!

Alright, let’s get into this tutorial. First off, I want to point out that you will need to match up the correct heart to the correct side pieces. Heart piece 1 and side pieces 1 will be the top piece of the box and the heart piece 2 and side pieces 2 will be the bottom part of the box. This is very important as they are different sizes.

Now choose your papers and cut out all of the parts to this file and be sure to somehow label the hearts and side pieces. I used sticky notes to mark mine. Side note…looking at my picture below I think I mislabeled the side pieces. The longer side pieces will match up the heart 1.

Next you will want to adhere the 2 side pieces of each together. Put adhesive on the each of the tabs and adhere them together to form an oval.

Once the sides are dry…match up the pieces.

To make this part easier, use your fingers to shape the side pieces to match the heart shape. Then bend all of the triangle pieces down to the heart shape and adhere together. Do this for the top and bottom pieces of the box.

Here is a look at the box pieces when they are completely adhered together.

Now you will need to adhere the scalloped pieces to each of the top and bottom pieces of the box.

And then comes the fun part of decorating the front! For the red/dog heart I used the pieces that come with the file and for the pink/panda I made an extra larger heart to double up on the front panel. It’s not necessary but I thought it would be cute.


That’s all from me today. I hope you give this cute box a try! It’s very fun to make and decorate!

Thanks for stopping by!

Aimee

Valentine Gift Box Card

Hello there, I have a cute box card to share with you today called Box Card Valentine Gift (SVG, Silhouette). Lori makes these cards so simple to put together, people really enjoy receiving them and I love making them. I also used two of the Valentine Cute Stickers (SVG, Silhouette) that I print and cut, I just replaced the envelope and added the Happy Valentine’s Day sentiment.

Thanks for stopping by and have a wonderful day!