Are you ready for Mother’s Day next weekend? When I saw this adorable project by Brigit, I was inspired and hope you are too. Brigit says…
I first saw the 3 Little Flower Pots set from Lori’s store I wanted to make it right away, it’s so adorable. I paired it with the Tree Shaped Card for a cute little unique gift set, perfect for Mother’s Day or just to give someone special!

The digital paper and elements are from Lori’s Sweet Memories Collection, I didn’t want a traditional green tree so the flower pattern was just what I was looking for. Everything was printed and cutout on my Silhouette Cameo.

The 3D flower I downloaded from the Silhouette Online Store and the leaves are from the 3D Flower Set 8. I used utee (ultra thick embossing enamel), on some Limeade Trendy Twine for the stem so it would stand straight, I really love how these turned out. I also used some Tickled Pink Trendy Twine on the planter box with a cute little button.

For the faux stitching I added an internal offset to the tree top and trunk and changed the lines to dashes, it’s a fun way to add stitching. The tag is attached with some Tickled Teal Trendy Twine.
Thanks for stopping by, if you make this set I would love to see, you can post on Lori’s facebook page here, or add a link or on my blog post here. To check out Brigits blog you can go here.
Next we have an awesome mini album by Traci! Both of these projects took my breath away! Way to go ladies!
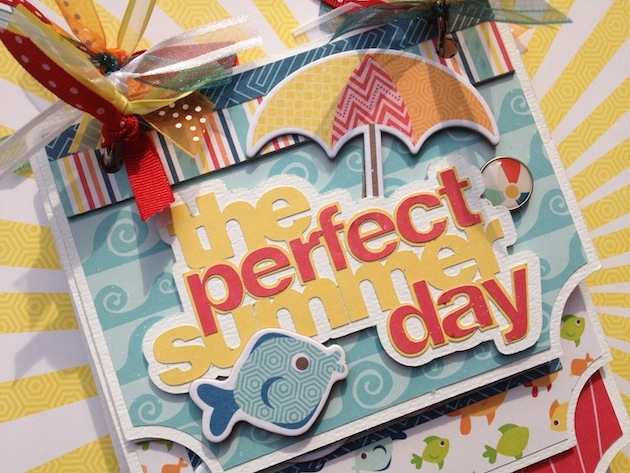
Traci says… “Spring has arrived here in Georgia, but before we know it, these warm days will turn into the hot days of summer! Since I’m a little behind on scrapping last summer’s photos, I decided to make a quick mini album to get a little caught up. This fun cascading album is one of my favorite new digital cutting files from Lori. She has several of these cute albums, and they all have different edges. You can use the same edge throughout the mini, or mix the edges up for even more fun!
The title is also one of Lori’s designs — I love how I can pull both up on my computer and size the title to fit the album perfectly!
For the first and second pages, I used several pieces from the chipboard sheet. I also layered one of the adorable brads on the camera to give the page a little shine.
What would summer be without the sun? When I saw this chevron edge circle it reminded me of a sun and I thought it would be a cute spot for a round photo.
I always love pockets and tags in my mini albums, so this adorable library pocket was perfect for tucking in a journaling card.
I have a few more photos posted over on my blog at Artsy Albums so I invite you to stop by and say hi!
Here is a list of products that I used in this mini:
Digital Cutting Files:
Lori Whitlock Library Pocket with Tab
Lori Whitlock 12 Months
Paper and Embellishments:
White card stock, Bazzill
Ribbon, American Crafts

Just a reminder that through tomorrow, May 7, you can get 30% OFF in
Lori’s SVG SHOP.
Enter code SALE30 at checkout.
Lori’s Digital Scrapbooking files at
Jessica Sprague are 30% OFF. No coupon code needed.


