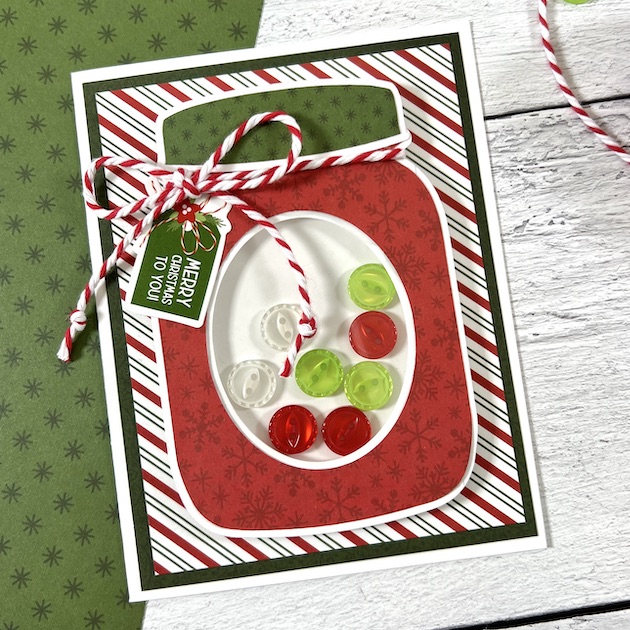
Christmas Shaker Card Tutorial

Hello everyone and Happy National Button Day! Traci here and yep … there’s actually a day that celebrates these little fasteners. I wanted to incorporate them into my project and I knew Lori would have something wonderful. I found a cutting file for an embellishment called Shaker Mason Jar and I turned it into a cute holiday card. Here’s a quick tutorial on how I made it …

For supplies, I used the Shaker Mason Jar cutting file (SVG, Silhouette) and Echo Park’s beautiful holiday collection called Magic of Christmas (also designed by Lori). I used the 6×6 paper, the 12×12 sticker sheet, white card stock, buttons and twine.

To create the A2 size card, I cut out a piece of white card stock measuring 8.5”x 5.5” and scored it at 4.25”.  

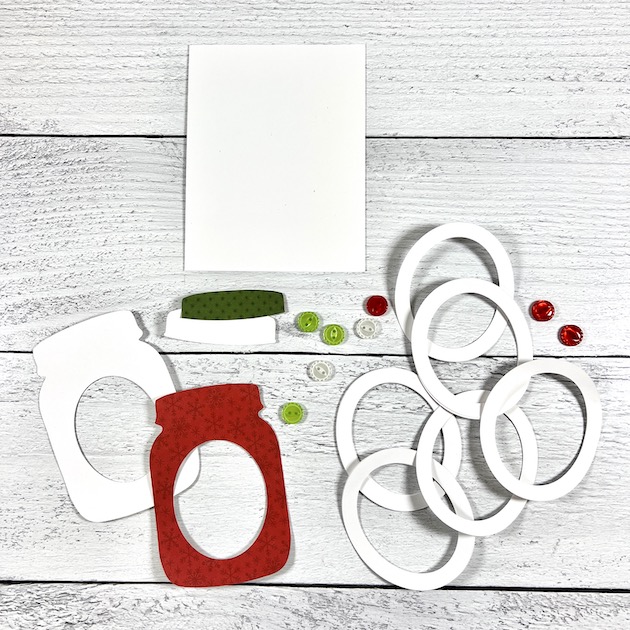
Then using the file and my Silhouette Cameo machine, I cut out all the other pieces. I chose the red snowflake print called Poinsettias & Pine for the jar and the green dot from the 3×4 journaling cards for the lid.

To make the shaker part, I cut out the ovals and glued them together until I had enough to make a frame thick enough to allow my buttons to move around.

I sandwiched a piece of 2.5” x 3.25” clear acetate in between my white jar base and the red inset piece I cut from the 6×6 paper.

I glued the oval frame to the back of the jar pieces, added my buttons, then glued the solid white oval piece on top to keep the buttons in.

Next, I took my white card base and layered 2 sheets of 6×6 paper in dark green and stripe on top and added the jar shaped shaker. I wrapped the lid with chunky red twine and included a cute sentiment sticker to finish it off. It’s the perfect card for someone special and I just love it! 

Thanks for stopping by and I hope you’ll visit Lori’s shop for more amazing craft ideas!


Blog * Facebook * Instagram * Pinterest

Fall Heart Scrapbooking Layout

Hello friends! Traci here and I’m excited to share a new 12×12 autumn inspired scrapbook page that I made using one of Lori’s super fun cutting files. This layout would be beautiful in an album or framed for pretty seasonal décor!

I used the Fall Heart cutting file (SVG, Silhouette) and Doodlebug’s Pumpkin Spice paper collection. As it is, this file makes such a pretty piece of artwork. But I added a sweet photo to show how it could also be used to highlight a favorite memory.

To make this … I cut out and arranged the larger pieces first, then filled in with the smaller leaves. Next, I added some glitter enamel dots and hearts in between for a little sparkle and shine. I love all the detailed cut outs of acorns, apples, pumpkins, leaves, and berries. Gorgeous!

To finish the page, I created a coordinating mat, added my photo and a few die cut words. It was easy and so much fun! This would be also be great for photos of a hike through nature, the pumpkin patch, a fall vacation, or Thanksgiving Day.

Thanks for stopping by and I hope you’ll visit Lori’s shop for more amazing craft ideas!
Blog * Facebook * Instagram * Pinterest

Window Flip Pumpkin Card

Hey guys! Traci here and I’m happy to be sharing a pretty card that I just made for fall. I chose one of Lori’s cutting files called Window Flip Card Pumpkin and I love how it props up for display. It’s 4.25″x5.5″ and it would be great for someone to welcome in the new season, as a thank you, a get well soon, or to let them know you’re thinking of them.

I started with white card stock for the base, then chose some fall colored papers from Echo Park’s Fun On The Farm 6×6 paper pad. I love the smaller sized prints for this project. I used a 12×12 orange solid from Echo Park’s Easter Wishes Collection and a 12×12 yellow solid (flower) from the Fun on the Farm Collection.

Here’s what it looks like opened up. If you’ll look closely, I added a glitter enamel dot to the yellow flower and some sprinkles for the berries on the branches. Such pretty little details.

The pumpkin card inside flips up to create an easel effect. Perfect for sitting out for display on your desk, an accent table in your home, or on a shelf as a little fall décor.

There is a simple tutorial for assembling the card here, but I took some close up pictures of the flip detail and copied some of Kathy’s original instructions below.

 
Start with the piece with the 3 score lines.  Fold all the score lines in the same direction.  Add adhesive to one end section.  Fold the whole piece in half… adhesive on the outside.  Attach this piece to the bottom half of the open card base.  It should be centered, and the piece with the adhesive should be facing down and closest to the fold in the card.  Once this is in place, add a strip of adhesive on the section closest to the card fold. 

Fold the card closed and press so that the top of the card is firmly attached to the folded section.  Now, when you open the card, you will have a squared tube inside the card.  Next, fold the small tab along the score line.  Cover the smaller side of the tab with adhesive.

Adhere this small piece to the top of the squared tube, centering it.  You want the remaining tab to be sticking up furthest away from the fold. 
 

Adhere the pumpkin panel to the adhesive on the white tab and add foam tape as shown in the photo below.

How fun!  I love this card and can’t wait to give it to someone this season.  You can find this cutting file in Lori’s SVG shop here, or in the Silhouette Design store hereThanks for stopping by! 

Blog * Facebook * Instagram * Pinterest

Calculator Card

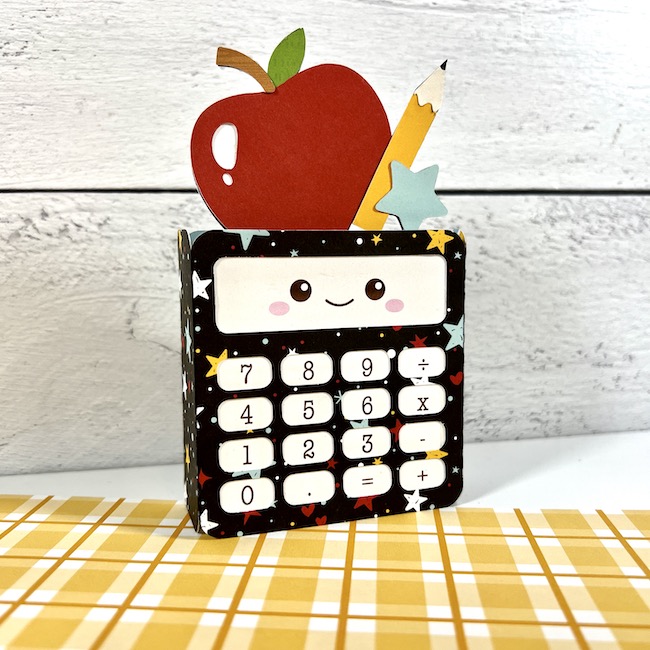
Hello friends! Today, I’m excited to share a fun project that I made with one of Lori Whitlock’s amazing cutting files called Box Card Calculator School. I was inspired by the back to school season and I thought this calculator shaped card was just so cute. Check out it’s little face. I love it!

Calculator Box Greeting Card with Apple, Pencil, & Star

For the base of the calculator, I used an adorable star paper called Balloons from Echo Park’s, A Magical Place collection (designed by Lori Whitlock). For the apple, pencil, and the star I chose some of the solid papers
from Echo Park’s, Fun On The Farm Collection (also designed by Lori).

The box has space in between the layers where you could hide a small note, a gift card, or money but since there’s no bottom to the card, you would need to add a little tape.

This would be a fun surprise to hide in a student’s back pack or lunch box on their first day. It would also be perfect for a teacher or … a co-worker that’s great with numbers. What a nice way to brighten their day.

The card folds flat so it can be placed in an A2 envelope, sent through the mail or stored as a memento. For help with assembly, see this shaped box card tutorial.  Lori has so many awesome cutting files. I hope you’ll give this one a try! You can find this file in SVG format in Lori Whitlock’s shop here and in the Silhouette Store here

Blog * Facebook * Instagram * Pinterest

Wallet Mini Album

Hey there! If you follow me, then you know I love making mini albums. All shapes, all sizes, all themes … love, love, love. So for my project today, I made a mini using one of Lori’s cutting files that’s in the shape of an adorable little wallet. This is so cute and interactive, soooo yeah … it’s right up my alley! I’ve added a video over on my blog – so be sure to check it out. 💗

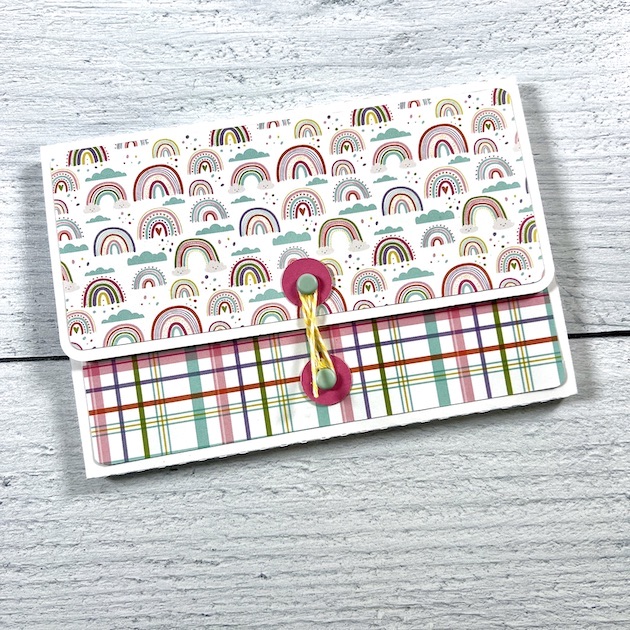
Wallet Shaped Mini Album w/ rainbows
I chose the Echo Park, All About A Girl Collection, also designed by Lori. The pattern papers in this collection are so pretty and girly with flowers, rainbows, plaids, and bows. And to create the little closure, I added 2 brads and some yellow twine.
Wallet Shaped Mini Album w/fold out pages and pockets
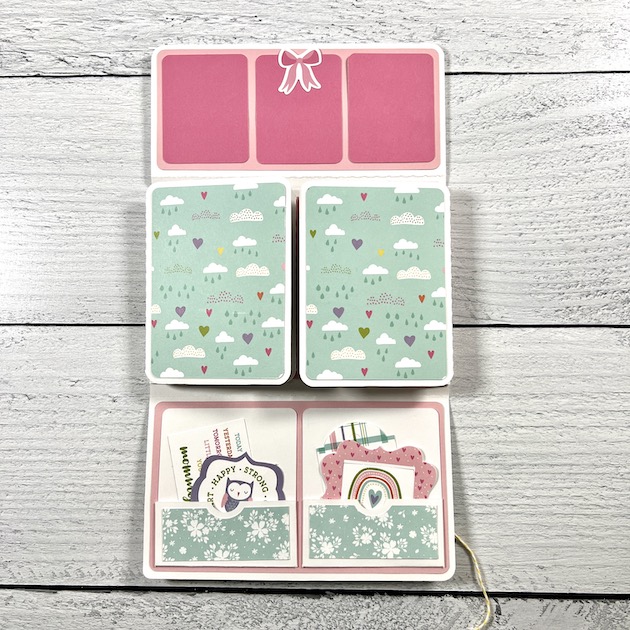
The wallet is a tri-fold and once it’s opened you’ll see it has 3 sections. The top part has space for 3 small photos and the middle section has two fold-out pages that open up to either side.
Scrapbook Mini Album w/fold out pages and pockets

Look how cute these are with the girly prints! Each side holds 6 photos on the front and back.

Wallet shaped Scrapbook Mini Album w/fold out pages and pockets

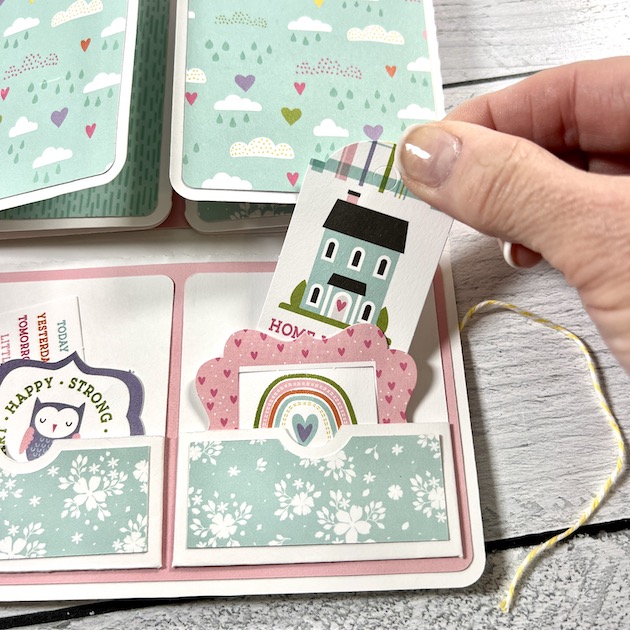
You can add a larger photo or 2 smaller ones to the center pink photo mat and down below, 2 little pockets! 

Scrapbook Mini Album w/folding pages and pockets

I added pieces from the Ephemera Frames and Tags to each pocket. Cute die cut shapes with fun sayings are perfect for journaling on. Just flip them over and add dates, names, locations or sweet stories about the event or photo.

Lori has so many awesome cutting files to play with and I hope you’ll give this one a try. Have fun!

Wallet Album (SVG)