Happy Easter Mini Album Tutorial

Hello everyone! Traci here and today, I’m sharing a Happy Easter Mini Album I made with two of Lori’s fabulous cutting files and the Echo Park, Our Happy Place Collection. It’s filled with spring colors, flowers, and beautiful prints. This little album is perfect for holiday photos and it makes a sweet handmade gift!


Happy Easter Scrapbook Mini Album with a rabbit, a basket, eggs, and flowers


To create this, I used the A2 Easel Card Easter Bunny Basket File (SVG, Silhouette) for the design on the front cover and the Hidden Binding Mini Album Rectangle (SVG, Silhouette) for the actual book.

Here’s the simple tutorial …

1.  I resized the Hidden Binding Mini Album‘s pieces to create a book that would be 4.75″ wide x 7” tall. I chose this size so that I wouldn’t need to resize
the Easter basket file.

2.  Next, I cut out all of the pieces for both files.

Happy Easter Scrapbook Mini Album Tutorial


3. I assembled the card first. The Basket file comes with a base “grass” background that is shaped to help you know where to layer each of the pieces. I added the pink shape on top of the green base.  

Happy Easter Scrapbook Mini Album Tutorial


Happy Easter Scrapbook Mini Album Tutorial

4. Then, I layered the yellow basket on next.

Happy Easter Scrapbook Mini Album Tutorial
5. I adhered the little eggs in place, tucking them in behind the yellow basket.
Happy Easter Scrapbook Mini Album Tutorial
6. Then, I added the pieces of the bunny’s body.
Happy Easter Scrapbook Mini Album Tutorial

7. How cute! I used some foam tape underneath the feet and tail to give them some dimension.


Happy Easter Scrapbook Mini Album Tutorial

8. You can see in this picture that the pink base helps you know exactly where to adhere the flowers.


Happy Easter Scrapbook Mini Album Tutorial

9. I added some pretty colored enamel dots to the center of the flowers and the bow for a bit of shine.


Happy Easter Scrapbook Mini Album Tutorial

10. Once the card was assembled, it was time to build the album. Above, are the pages
and the binding piece. The binding piece is scored, so I folded along the
score lines to create “mountains” and “valleys”. 


Happy Easter Scrapbook Mini Album Tutorial

11. I added adhesive inside the “valleys” and adhered the sides together.

Happy Easter Scrapbook Mini Album Tutorial

The outside of the binding now looked like this. The cutting file includes a separate piece that will be glued
over these folds to create the album’s spine.

Happy Easter Scrapbook Mini Album Tutorial


12. This is the inside of the binding. To add the pages, I adhered one page piece to the front of the first spine fold and a second one to the back … sandwiching them on the “mountain”.


13. I continued to add the rest of the pages until the book was complete.

Happy Easter Scrapbook Mini Album Tutorial

14.  To decorate the cover, I adhered the Easter basket piece to the front and added my title. 

Happy Easter Scrapbook Mini Album Page with flowers, a scalloped photo mat, and a pretty plaid paper

15. Inside, I embellished the pages with lots of pretty papers, stickers, enamel dots, and photo mats. To see more of the inside pages … hop over to my Artsy Albums blog.

I hope this Happy Easter Mini Album gives you a little holiday and spring inspiration! Whether you love making scrapbooks or greeting cards, you should definitely give these cutting files a try. I love them! 


Blog * Shop * Facebook * Instagram * Pinterest

2×2 Give Thanks Mini Album with Traci

Happy Thanksgiving! Traci here and I hope you all have a wonderful holiday filled with blessings and warm, happy moments. Today, I have a tiny scrapbook to share with you titled Give Thanks that would be so fun for those memories. And, it might be the “miniest” mini album I’ve ever made!

Look how small it is! 💕 I created it with one of Lori’s amazing cutting files called 2×2 Accordion Mini Album (SVG, Silhouette) and the Echo Park, I love Fall Collection also designed by Lori. 

First, let’s look at this little cutie, then I’ll explain exactly how I made it with a tutorial below. 

I just love that it looks like a miniature book. It has an orange and green scalloped spine, pretty pattern papers, and a Give Thanks title sticker on the cover from the 12×12 elements sheet.

Inside, there are 16 little scrapbook pages (8 double-sided). I added some fun shaped journaling spots and photo mats using a 2″ scallop circle punch and a 1.75″ circle punch by Marvy Uchida.

You could use each page in this album for photos, or … mix it up and add embellishments on some of them like I did. Above, I added the Harvest Blessings sticker from the sticker book.

The journaling spots are perfect for adding dates, names, locations, events, or … what you and your family are most grateful for this year. 

This project could be a cute little gift idea for after Thanksgiving. Make them for your guests with pictures from the holiday. Or … create this tiny album with ANY paper collection and it could be a fun Christmas present or stocking stuffer idea!

Now, for some instructions …


1.  I chose my papers and cut out the 8 pages, 2 inside covers, 2 outside covers, and three pieces for the spine. 


2.  Next, I folded the paper on the score lines for each of the pages and positioned them on my table with the 1/2″ tab on the left. 


3.  Then, I adhered each 1/2” tab to the back of the page before it until I had all 8 pages glued together. 


4.  The very first page still has a tab on the left side, so I adhered the inside front cover here. 


5.  The inside back cover has a tab on it, so I adhered this to the last page of the album.


6.  Once all of the pages are attached, I folded them into a little book and added the front and back covers.


7.
Finally, I adhered the 2 scallop accent pieces next to the spine on the
front and back, then used liquid adhesive to fold the orange spine around the
entire left side of the book.


There
is no need to adhere any of the pages back to back or to the spine. They stay nicely in their accordion shape once the spine piece goes on.
Once the book is complete … it’s time to decorate!


I hope you’ll try this fun project made with Lori’s 2×2 Accordion Mini Album cutting file and her fabulous I Love Fall Collection designed for Echo Park.

For a video tutorial of this album, please see Lori’s YouTube video here:


Have a great Thanksgiving and enjoy your day with family and friends! 🍂🦃🧡

Tiered Bracket Mini Album

Hello friends! We’re into the Christmas season so, I thought it would be fun to make a holiday mini album using one of Lori Whitlock’s amazing cutting files called Tiered Album Bracket (SVG, Silhouette). It‘s perfect for your favorite photos from the season, and … it would make a sweet gift idea for someone special.

I love making shaped mini albums and Lori has lots of great cutting files with unique silhouettes to choose from. This one caught my eye with its pretty waterfall pages. To decorate it, I chose Doodlebug’s Gingerbread Kisses Collection.

Now, on to how I made it …

First, the cutting file comes with the base pages and the inset pieces for cutting pattern paper.  One tip when cutting out the patterns … be sure to position your pattern on the cutting mat so that it will be cut in the direction you want!

I love how the patterns cut perfectly sized to allow a nice 1/8″ border of white (or whatever color base you choose). 
I decorated my pages with card stock mats and embellishments and love how the waterfall design let’s some of the fun elements peek through!
The pink page above is an example of what I meant about cutting the correct direction for your paper.  Since I wanted my pink hearts to be right side up, I flipped my cutting file design in the software to “flip vertically”.  You could also just place your paper upside down on your mat 🙂 
Lori has several fun waterfall (tiered) album designs in her shop … curved, flag, pennant, pinking, rounded, tabs, scallop, ticket, and wave shapes!  I love them all!

I hope you’ve been inspired to try one of Lori’s tiered albums!  They would make a cute gift for Christmas, and a fun way to display your holiday (or any day) memories!  Thanks so much for stopping by today!

Blog * Shop * Facebook * Instagram * Pinterest

4 Candy Drawer #1 Dad Sports Tutorial

Hello friends!  Traci back to share a simple gift box project with you!  What dad wouldn’t want to receive this sweet treat box on Father’s Day?  You can find this one here (SVG, Silhouette).

I love how simple this design is and such a fun idea for tiny gifts or candy!


Here are a few tips for assembling this project.  First, use a medium weight card stock for the boxes and the “drawer”… probably less than 100#.  If the card stock is too thick, it might make the drawer a little tight.  I used Bazzill 80# (Jade) and it worked perfectly.  


Tip #2:  If you fold all of the score lines on the little boxes correctly, as in the photo above, you will hide all of the glue tabs and end up with a nice solid base. 


I love how the little boxes are removable!  This way you can use 1,2,3, or all four.  This design is great for a sports loving dad, but Lori has other styles too (SVG), so be sure to check out her other new designs.


Thanks for stopping by the blog today!  Have fun making a handmade gift for a dad in your life! Father’s Day is on Sunday, June 18!  

Blog * Shop * Facebook * Instagram * Pinterest


Honey Jar Mini Album

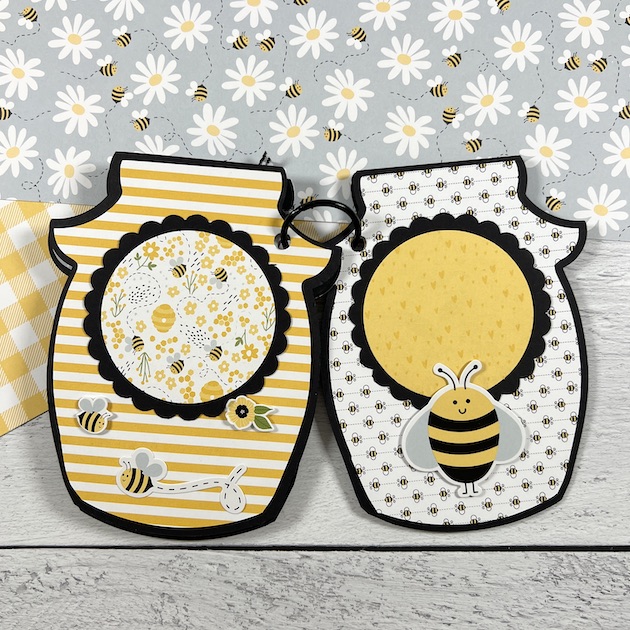
Hello, my friends!  Traci here with a fun take on one of Lori’s brand new shaped cards.  I turned it into a mini album (and if you follow me, you know minis are my thing, LOL!). Lori’s adorable new Honey Jar card (SVG, Silhouette) inspired me to turn the card into pages!  Check it out …


I started with the cutting file base and cut it out 3 times.  Then, instead of folding the pieces along the scoreline for a card, I cut the 2 halves of the card in half along the scoreline and created 6 pages (I actually only used 5 for my album).  


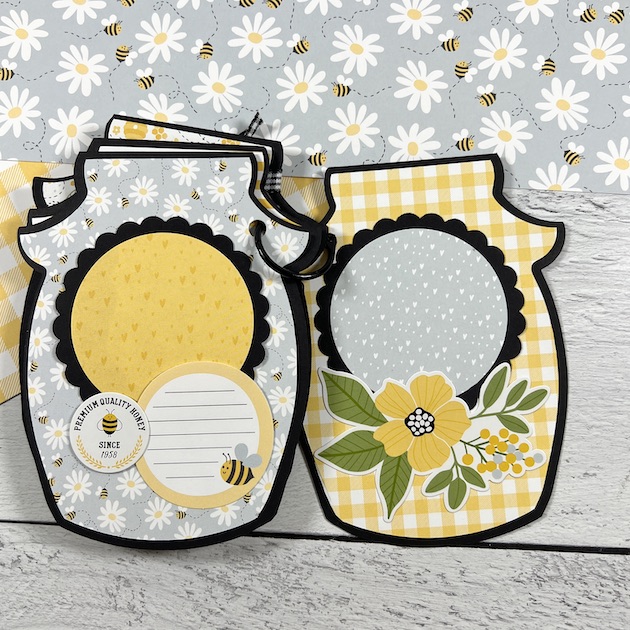
Once I cut the black base pages, I created an internal offset in my Silhouette software and cut out 10 cute patterns from Lori’s new Bee Happy 6×6 paper pad (Echo Park).  I love how all of the patterns look layered together when the album is fanned out 🙂


Lori’s Nested Scallop circles (SVG, Silhouette) make great photo mats!  I just punched a 2.5″ round circle for the patterns inside.


Along with the cute scallop mats, I also used stickers and die cuts from Lori’s new Bee Happy collection.  I did trim off the small flowers in the lower left hand of the jar.  


I hope you like my take on Lori’s adorable Honey Jar card!  Please visit my blog over at Artsy Albums sometime to say hello!  Until next time, happy crafting!!