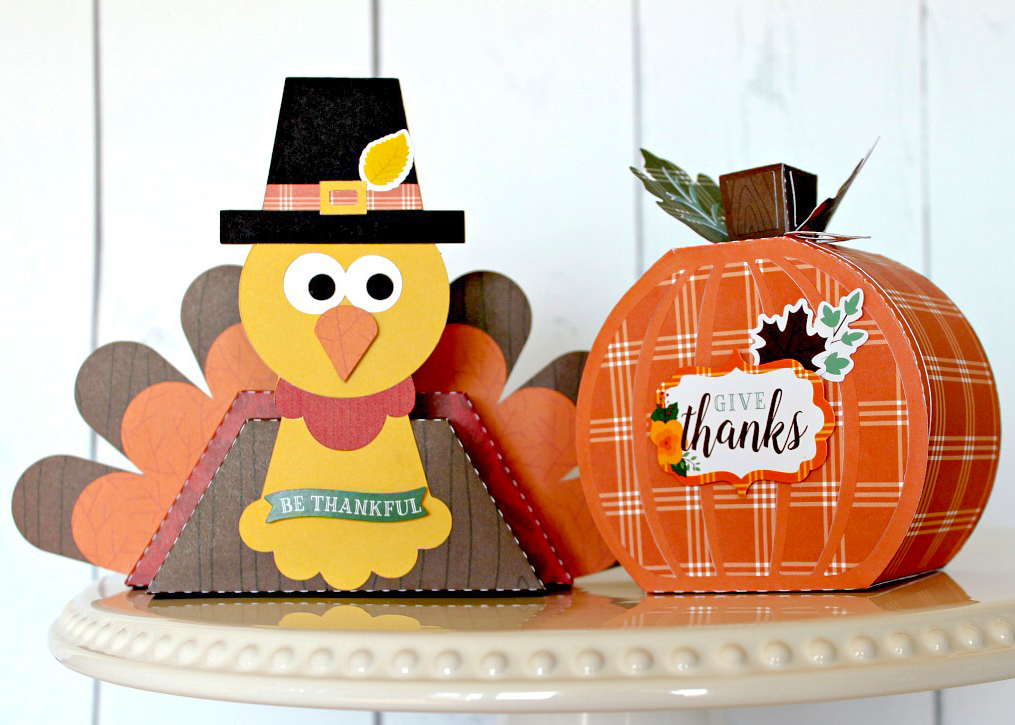
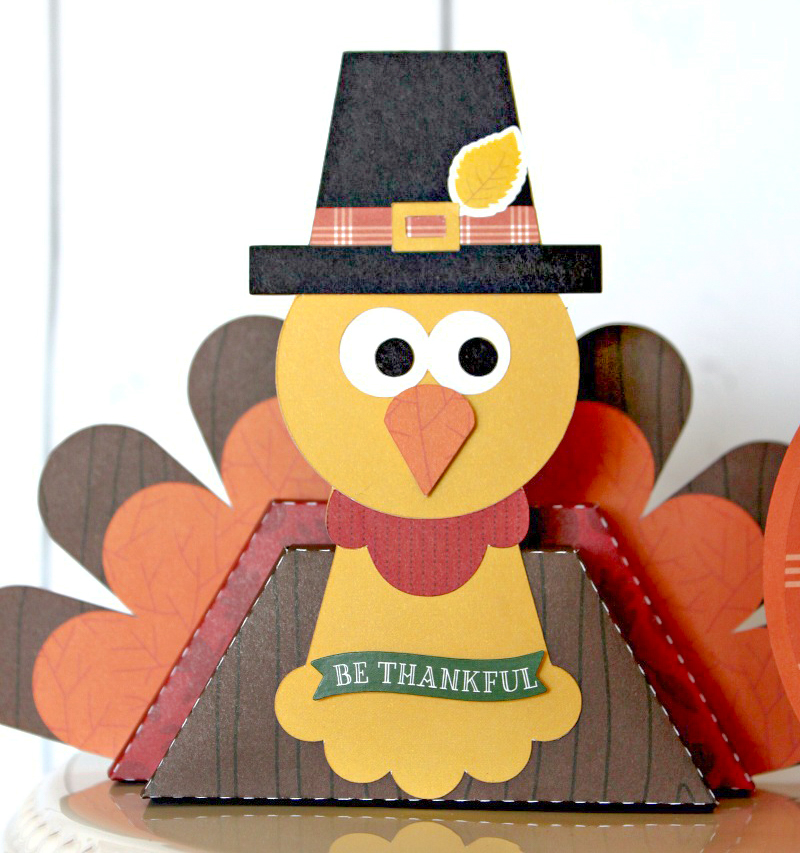
Hello crafty friends! Aimee here with a tutorial on this sweet little 3D Turkey 2 (Lori’s Shop, Silhouette). Is he not the cutest?!?! I made 2 of these guys…meet Tom Turkey and Timmy Turkey. I will be proudly displaying them on my dining room table this Thanksgiving!

Today I have a tutorial all set up if you are planning on making this little guy or guys for your Thanksgiving table. First thing is picking out the papers and fire up your paper cutting machine.
Cut out all of your pieces and get ready to assemble.

Adhere all of the box together but NOT THE TOP PIECE.

The wings are next. Turn the box where the lid faces you, slide the wing tabs into the slits in the box and adhere the tabs to the inside.

Adhere together all of the pieces for the head. I used some pop dots on the back side of the hat for some dimension. Also, I used some black enamel dots for the eyes. Then fold on the perforated neck line backwards.

Next thing to do is slip the head tab into the slit in the top of the box and adhere it to the inside of the box. Then adhere the top of the box to the rest of it.

Now your turkey should look like this…

I also used some pop dots on the feet to make it look like they are somewhat sticking out.

Glue the tail to the back of the box and your Tom Turkey is complete and ready to adorn your Thanksgiving table!!

And we are done! I made a “baby” turkey too by downsizing the original file. Like I said, are they just the cutest?!?! I know they aren’t the traditional colors but I really love the warm green tones against the orange!
Thanks for stopping by today! Wishing everyone a Thanksgiving full of love and thankfulness!
Aimee