Print n Cut Teacher Cards Tutorial with Brigit

Hello there, here’s a quick tutorial on how I print n cut these Teacher thank you sentiments for cards in Cricut Design Space.

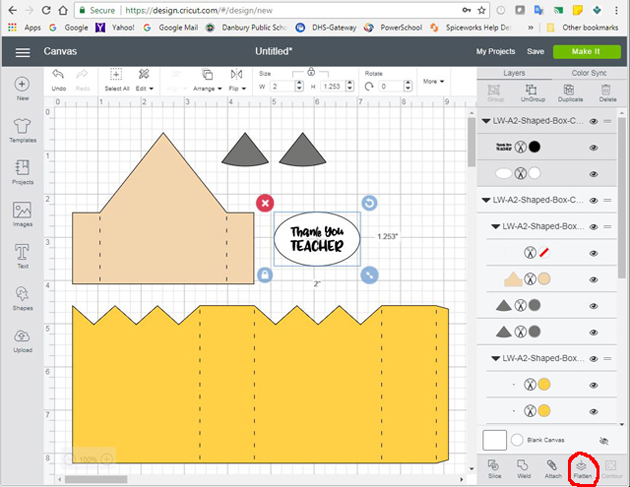
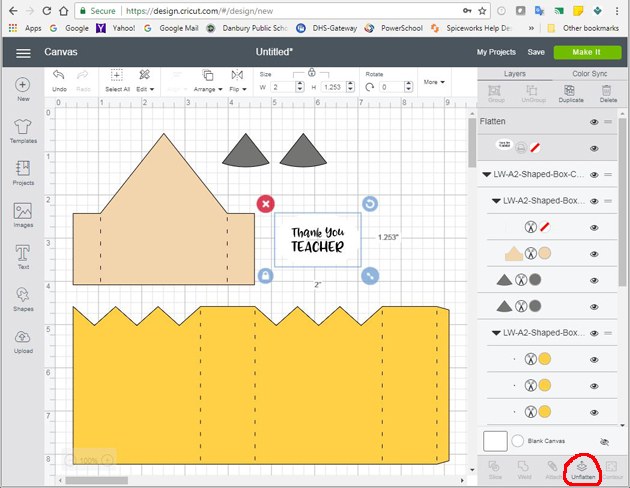
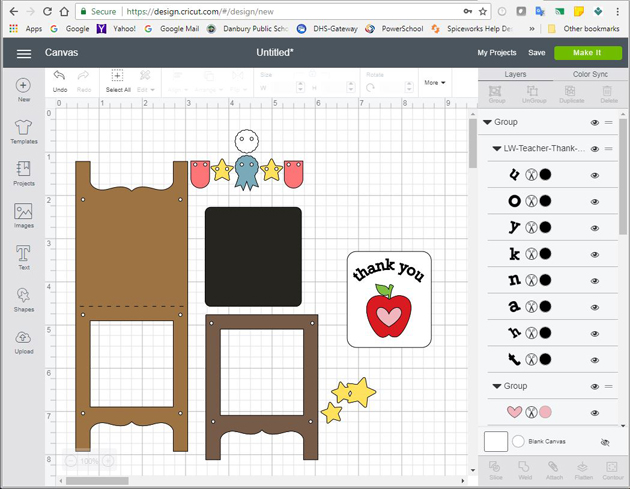
For the A2 shaped box card pencil I ungrouped the whole project, selected the thank you teacher and flatten it.

When it’s unflatten the outlines are gone, but it will still cut out just the oval.

When you make it, you will send to printer first and then place on mat to cut.

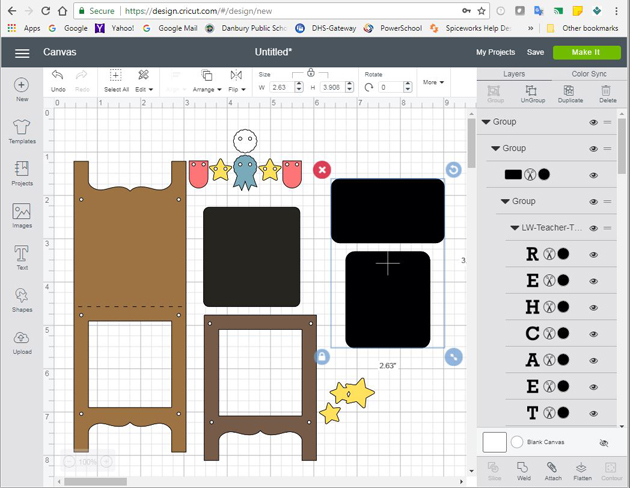
The A2 chalkboard teacher card I added one of the teacher thank you tags to the chalkboard piece. When I imported the tags they were black so I ungrouped, deleted the ones I wasn’t using, selected the top layer of the one I wanted, selected arrange at the top and moved to back and changed the color to white.

So now you can see everything on the tag.

I just wanted the thank you to print out on the chalkboard so I moved the apple and deleted the tag, selected the thank you and attached, and changed one of the letters on the thank you to white which changed all of the letters.

I ungrouped the chalkboard card, deleted what I didn’t want to use, resized and center aligned the thank you over the chalkboard leaving room for the apple. I selected both and flatten, now it will print n cut.

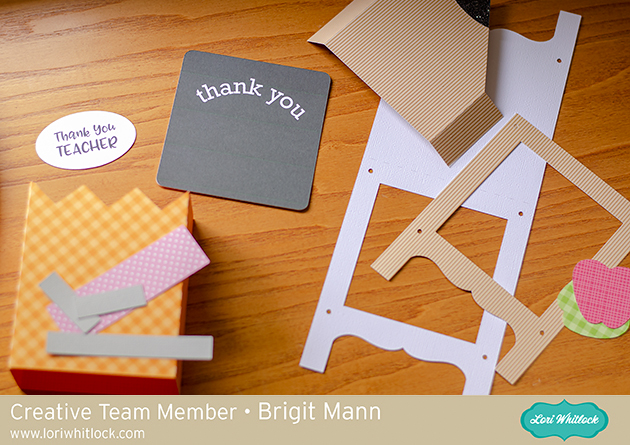
I cut out both projects together using my Cricut Maker, this way I could print both thank you sentiments at one time. You can see the two print n cuts below.

I love the ability to print n cut sentiments for my projects, you can create a nice custom fit and it’s super quick and easy.

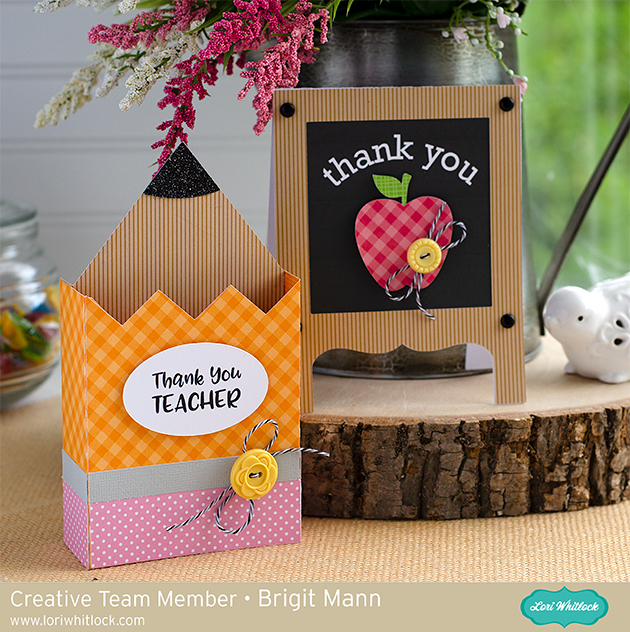
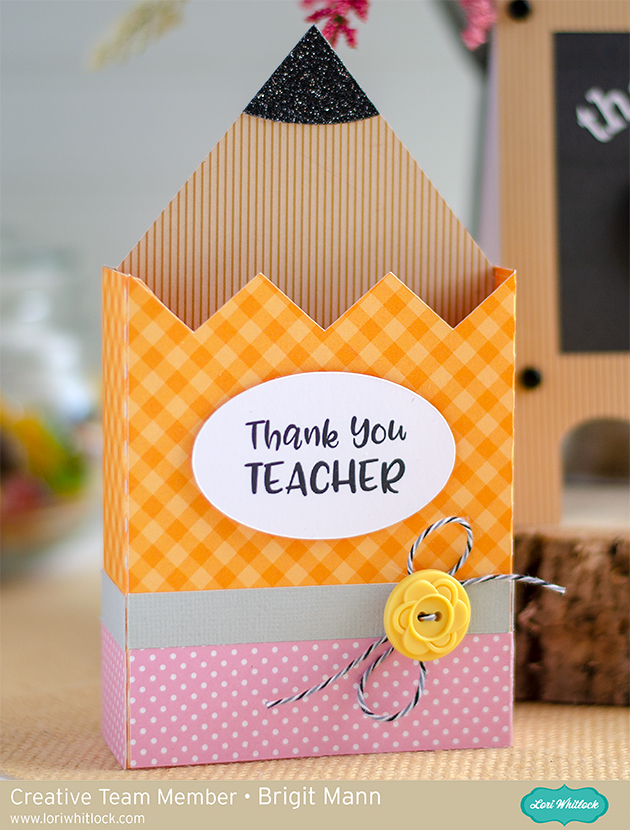
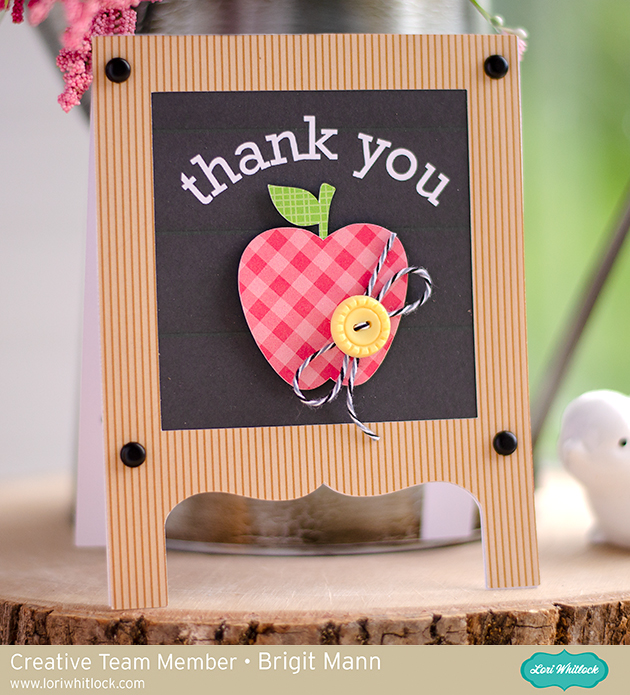
Here’s a closer look at both cards.

Get the A2 pencil shaped box card at the Silhouette Design Store.

Get the A2 teacher chalkboard easel card at the Silhouette Design Store.

Get the thank you teacher favor tags from the Silhouette Design Store.

Thanks for stopping by and have a wonderful day!


Apple Cards for Teacher by Aimee

Hello crafty friends! Aimee here with you today and I have a couple of year end apple shaped cards to let your child’s teacher know how special they are!

I combined a couple of Lori’s cuts to create these cards. For the card base I used the Gift Card Holder Apple (SVG or Silhouette) and sentiment is the new Big Heart Teach Little Minds (SVG or Silhouette).

A little tip for you…I centered the sentiment on the apple and then highlighted the two cuts and clicked on “make compound path” to get this cut below. Then I cut it out and laid it on top of my card to know exactly where to glue my letters down.

Thanks for stopping by today!

Aimee

Thanking the Best Teacher

When you literally have no time and HAVE to throw a card together, Lori Whitlock comes to the rescue with thousands of designs and design elements that can save the day and make you look like a PRO!

All this card took was some patterned paper with a school theme and one of Lori’s designs. I used Cricut Design Space to upload the images, flatten the elements and use the print then cut function to put together my card.

20160405-20160405_221245-Edit

For this card, I used Lori Whitlock’s Teacher Thank You Tags file set.

20160406-2016-04-05_21-38-44
After uploading my files, I flattened the images I wanted to print, then cut.
I did the same with the school house I used on the inside of the card.
This is how the images looked after they were flattened.
Design Space prepared the print then cut for me.
All I had to do was print the file.
Then I chose my printer and the settings I wanted to use.
After printing, my image was ready to cut.
After printing, my image was ready to cut with my Cricut Explore.
Perfect job.
Perfect job.
Ready to cut the front sentiment for the card.
It's just too easy.
It’s just too easy.
The front of my card.
With a little schoolhouse on the inside.

It’s a simple card, but it took no more than 15 minutes and I didn’t have to go out and buy one.

Thanks so much for stopping by.

Please visit my blog at ScrappyDIVAblog.com for many more projects, tutorials and ideas.