Pillow Box with Curved Handle Tutorial

Hi there friends! Today I am sharing a quick little treat idea for all the back to schoolers. I used the Pillow Box with Curved Handle (SVGSilhouette) and the School Stickers (SVGSilhouette).

Once I had everything uploaded to Cricut Design Space I resized the pillow box to 5.5×9.33. I wanted to be adle to fit two boxes on one sheet of 12×12 paper. I also flattened the sticker images and printed them out on plain white cardstock. For the tag I used one out of Cricut Design Space, but here is one from Lori’s site if you need one (SVGSilhouette). I used papers from the School Rules collection by Echo Park Paper Co.


I cut four pillow boxes and two sets of the stickers. I also punched some tiny hearts. I layered up some of the stickers on the tags leaving room at the top for the recipient’s name. I used a liquid glue to attach everything because I didn’t use a sticker paper. For the box I pre folded the score lines as mountain folds. I then added glue to the inside of the box on just the handle.


After the glue was dry I folded in all of the side tabs.
I then used some bakers twine to attach the tags. I filled my boxes with a rice crispy treat and a little note for each kiddo.
This little pillow box is so versatile and great for any occasion all you need to do is change up the papers. Definitely worth having a few in the file library. Thanks for stopping by today and happy back to school!

Brandie

A2 Easel Card Easter 2 Bunnies

Hi! I’m dreaming of spring, planting season, and sunshine so I made an Easter card with bunnies because they make me happy! Originally this is a card (SVG, Silhouette) but I wanted to add to my decor so I trimmed down the base and instead of creating the print and cut, I used some stickers to create the stopper. I used cardstock and Lori’s All About A Girl Echo Park collection.

So here’s to spring and happy sunny weather!

Teri

Valentine Sticker Tutorial for Cricut Design Space

Today I’m sharing a tutorial for stickers in Cricut Design Space.  Lori has many sticker files in her shop.  I’m showcasing the Valentine Cute Stickers (SVGSilhouette).

Valentine Cute Stickers

To begin, download and upzip your sticker file to your computer.

Open Design Space.

Click on upload on the Canvas screen.

Upload the file under the Image tab.

Then open the file onto your canvas.

The file comes in at this size.  Notice the 7.07″ x 9.94″ size.


Make sure your file is selected and select Flatten.


At this point, you will notice a warning exclamation mark.


This is because of the size of the project.

Select the stickers and resize them until it is smaller than 6.75″ x 9.25″.

This is what the stickers look like on the make screen.  Select Continue.

I like to select printer settings on the Use System Dialogue screen.  Select that option. Select print settings and paper settings for your printer.  And print.

Now it’s time to cut.  I’m using the Cricut Explore 2.  If you have Cricut Sticker paper, making sure to select Custom on the dial and select Sticker Paper for the material.

I have some Avery Project Sticker paper.  It isn’t as thick as the Cricut Sticker paper.  My first sheet of stickers cut all the way through the paper with the Sticker Paper material selection.  So I selected Iron on to get the kiss cut for my second sheet.

This is the kiss cut.

These are my first stickers.

If you want smaller stickers, resize your project to the desired size.

Here I duplicated the sticker sheet and resized it smaller.  Select both sheets and select attach.  This will cut the stickers on one page rather than separating the 2 smaller sheets on 2 pages.

Now you are ready to cut all sorts of stickers.  Pick some up during the sale this week.

Ashley


Chipboard Village Easter Add-on

Did you create Lori’s Chipboard Village for Christmas?  Now we have an Easter add-on (SVG, Silhouette(coming soon)).  Find the Christmas Village in the Shop and Silhouette Store (Farmhouse, Manor, Church, Cottage, General Store).

The add-on is a one page print and cut file.  I printed on Sticker paper and I also cut out each shape from cardstock.  I added the sticker to the cardstock shape and glued onto the cardstock stand that is also included in the file.  They look great with the village houses, and are perfect for spring!

Have a great day!

Ashley

Print and Cut Valentine Gnomes

Hi Everyone:

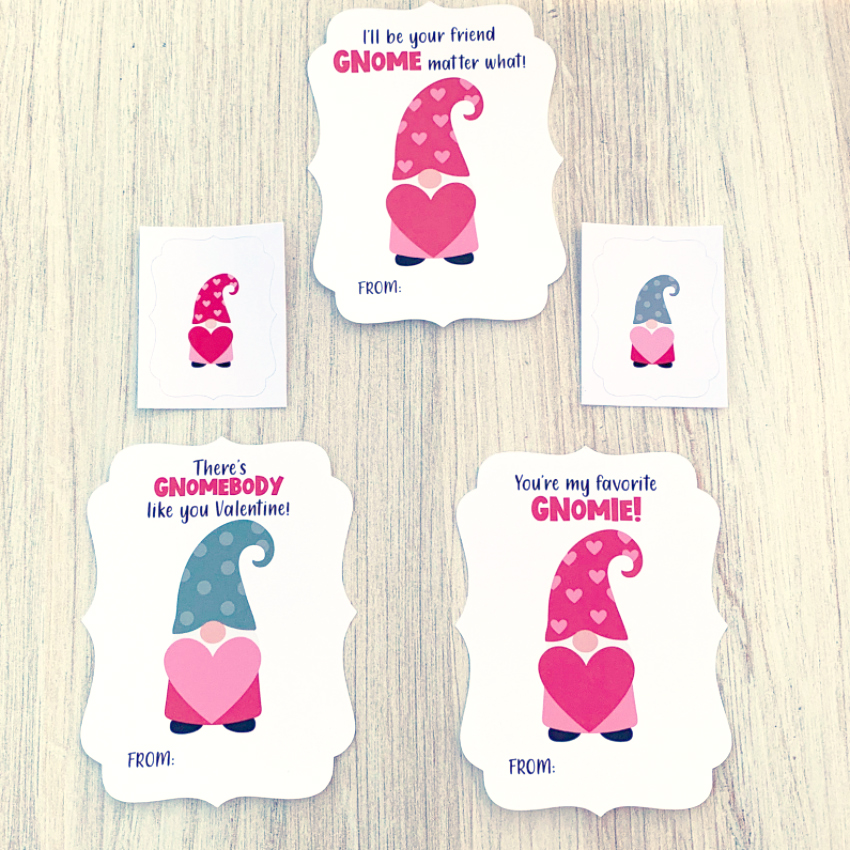
  1. Anita here with a fun and cute print and cut Valentine set I made for a dear friend of mine.  I used Lori’s Print & Cut Valentine Gnomes SVG file which you can find here in her SVG store and here in the Silhouette store.  I ungrouped the Valentines and used sticker paper to make the matching stickers which she can use to seal the envelopes.  This set will be a great gift and would be great for classroom Valentine’s as well.  Below you can see the three Valentines that are included in the file and the two different sticker types that I made.  I used Silhouette sticker paper but there are many other brands out there.

That’s it for me today.  Have a great day.

Hugs,

Anita