Center Box Card with Michelle

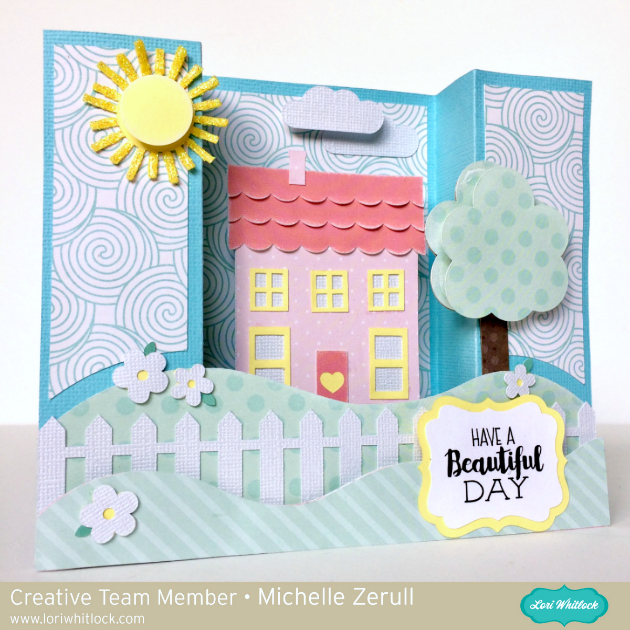
One of my favorite reasons to send a card is for no reason at all. An unexpected card is certain to bring a smile. I, Michelle, would like to share a Center Box Card that I made with my Silhouette Cameo and SVG files from the Lori Whitlock SVG Shop. You can also find the Beautiful Day file at the Silhouette Design Store.

Center Box Card Beautiful Day

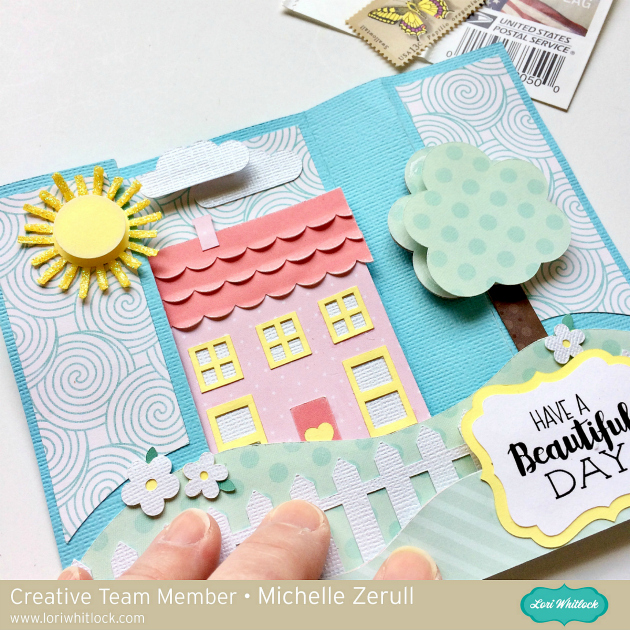
Although it wasn’t needed, I made a few slight variations to the design using my Silhouette Designer Edition Software. (which can also be found here at Lori’s shop) This was the first time that I had made one of these cards and I thoroughly enjoyed it. Lori has a YouTube Video that shows how to assemble these cards step by step. So easy! I also love that this card is 3-D, yet it lays flat for mailing. I even made my own coordinating envelope, which is a FREE file at the Lori Whitlock SVG Shop.

Lori Whitlock Center Card Folds Flat for Mailing


Thanks for letting me share and I hope that you have a beautiful day!

~Michelle

For Peeps Sake with Lezlye

Happy Spring! Lezlye here today! When I start seeing” Peeps” at the store I know that Spring is here. Now if the weather would cooperate and be as bright and cheery as this card I would be a very happy girl!


I modified Lori’s row of peeps, by cutting them apart. I wanted to be able to make several of these cards to send out to some of my crafty friends. I chose to use Lori’s  Echo Park collection Celebrate Easter for my papers. I love to layer pretty patterns and solids. So bright and fun! I added some iridescent cording behind my popped up peep and also some iridescent shreds for sparkle.


Hope you enjoy!
That’s it for me today!
Products I used:
Easter Candy Set Silhouette here
Simple Borders Sillhouette here
Echo Park by Lori Whitlock Celebrate Easter Collection

//

Card and Chick by Christine

Today we have Christine showcasing her talents with us…
I love making Easter projects and as soon as I saw the Chick Candy Dispenser, I knew that I just had to cut it out.
I followed Lori’s instructions here on her YouTube Channel to put it together and then added a few of my own embellishments.  Don’t you just love googly eyes?  I think that they add so much personality to my little chick.
The front of the box opens up to reveal your treat of choice.  I had just picked up these yummy Hershey’s Kisses in Easter colors. The front will close and then you carry the box around by the handle at the top.
I added the feathers on the back of the box.  I had to use some really good glue to get them to stick but once they were dry everything was fine. I used orange glitter paper on the beak and the feet.  Sometimes, those little details can really make a project pop!
You can’t have a treat box without a card, can you?  So I looked through Lori’s card files and found this one which I think is perfect.  It gave me a way to incorporate the cardstock that I used on the chick into the card so everything is matching!!  I love how simple it is too.

And since it was so easy to cut out this card, I decided to make a matching envelope.  Again, I used the same yellow cardstock to cut it out.   What fun to have a bright yellow envelope.  I used the fancy envelope.  I love the beautiful flap.  Because I wanted to dress it up even more, I cut out a mat for my flap.  If you want to learn how I did that, please stop by my blog and I will show you how.  It’s really easy!

Supplies used:
Card Kit Happy Easter- Silhouette Store, Design Id #8564
5-Card Kit Elegant Envelope- Silhouette Store, Design Id #7680
Other Supplies:
Bo Bunny Double Dot Cardstock
Stampin Up! White Cardstock
Glitter Cardstock Die Cut With A View
Hershey Kisses  🙂

Easter Card by Christine and Spring Frame by Natalie

I LOVE Spring/Easter decor. It is a great reminder that this cold, ugly snow will go away someday. Christine is first to share the joy today, she says…
Easter comes early this year so I wanted to get a head start on my Easter cards.  This pretty little basket filled with eggs is just the perfect focal point for my round card.  Check out the envelope too.  It’s so fancy with a matching rounded flap.
Files I used:
Easter Basket in the Silhouette store  #7909
Elegant String Tied Envelope in the Silhouette store #6239
Next up is Natalie with an adorable Easter Frame…
Hello everyone, I am starting to think spring might be around the corner.  We had a glorious weekend here, and we are actually starting to see patches of grass around.  So I guess that means it is ok to start decorating for spring.  I love spring, I love the flowers it brings and the colors of all the decorations.  So I decided to make a cute little shadow box with this cute little bunny I found in Lori’s shop.
To make this, I used Lori’s 5×7 shadow box frame found here, which also includes a tutorial with it, that came in handy when assembling it.  I also used her bunny silhouette found here, and her Hello Summer collection from Echo Park.
Once the frame was all built, I added the bunny with a little foam adhesive and added a little cotton to the tale.  I think it turned out great, clean and simple and ready to make my house happy with spring!


New Files at Jessica Sprague and Layouts by Lisa Barrie

Today at Jessica Sprague Lori has a few kits available, Four Season Layouts Winter, Spring, Summer, and Fall, as well as the entire collection. These kits will be on sale at Jessica Sprague throughout the weekend, so be sure and grab them while they are 25% off, which makes them $1.87.  You can buy each one individually or as the entire collection.

FOUR SEASON LAYOUT WINTER

FOUR SEASON LAYOUT SPRING

FOUR SEASON LAYOUT SUMMER

FOUR SEASON LAYOUT FALL

FOUR SEASON LAYOUT COLLECTION

Lisa also created a few adorable layouts using these kits.  
be sure to check out her blog for more info about her projects.