Layered Heat Transfer Vinyl Tutorial

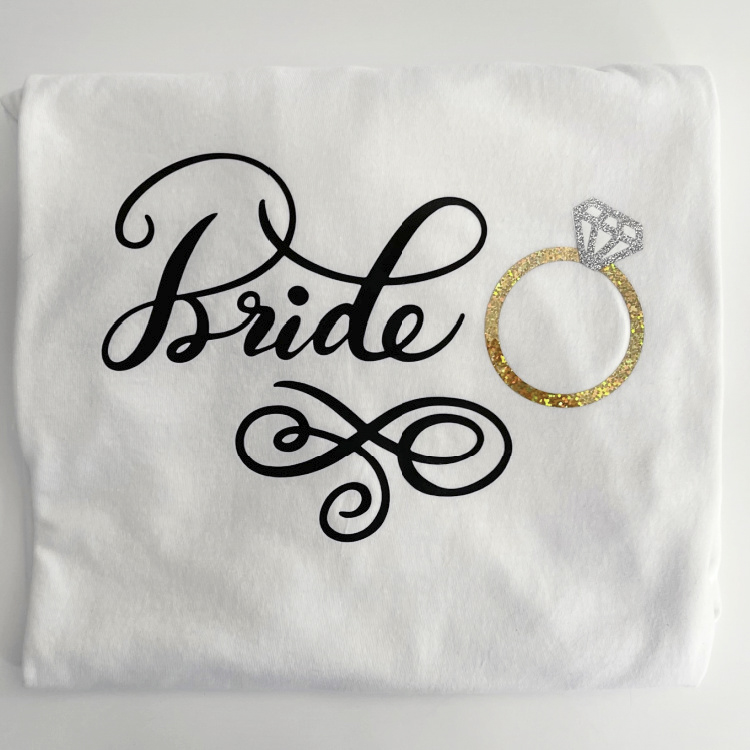
Anita here with a fun and easy tutorial on how to apply layered heat transfer vinyl to your projects.  My daughter got engaged recently and I wanted to make her a fun t shirt to wear.  I used Lori’s SVG including Hand Lettered Bride and Groom (SVG, Silhouette) and Wedding Rings Card (SVG, Silhouette).  I prewashed the shirt first and gave it a good press.

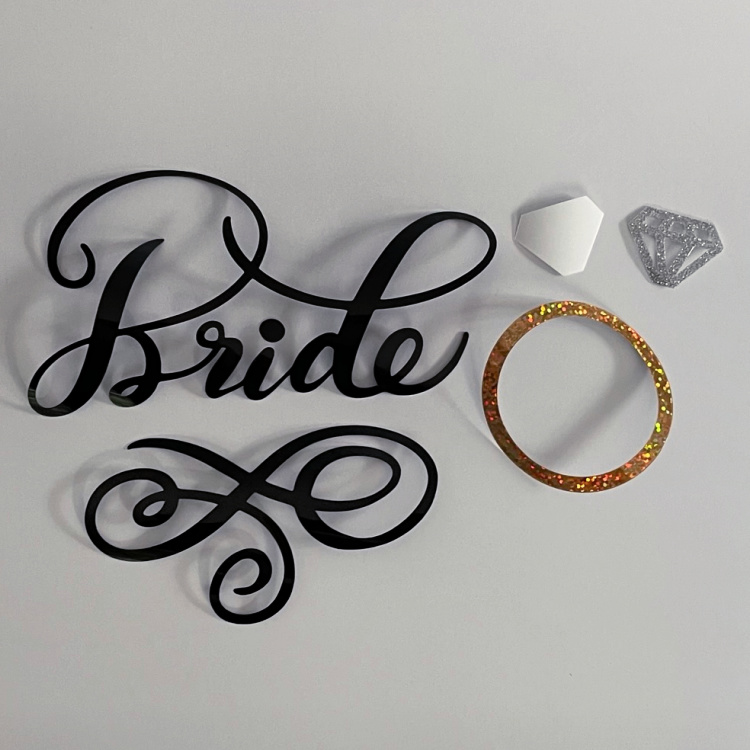
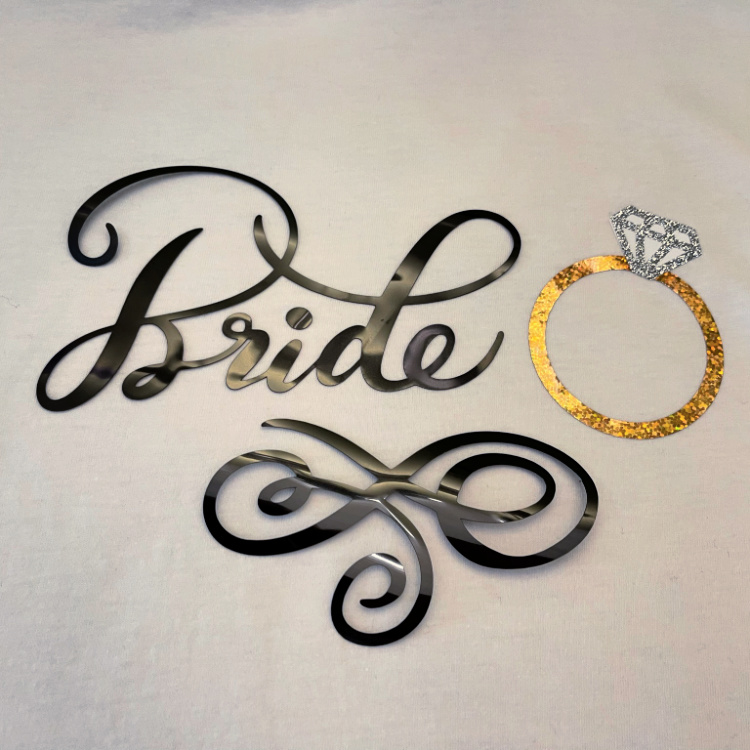
Here are the pieces that I cut out of Vinyl.

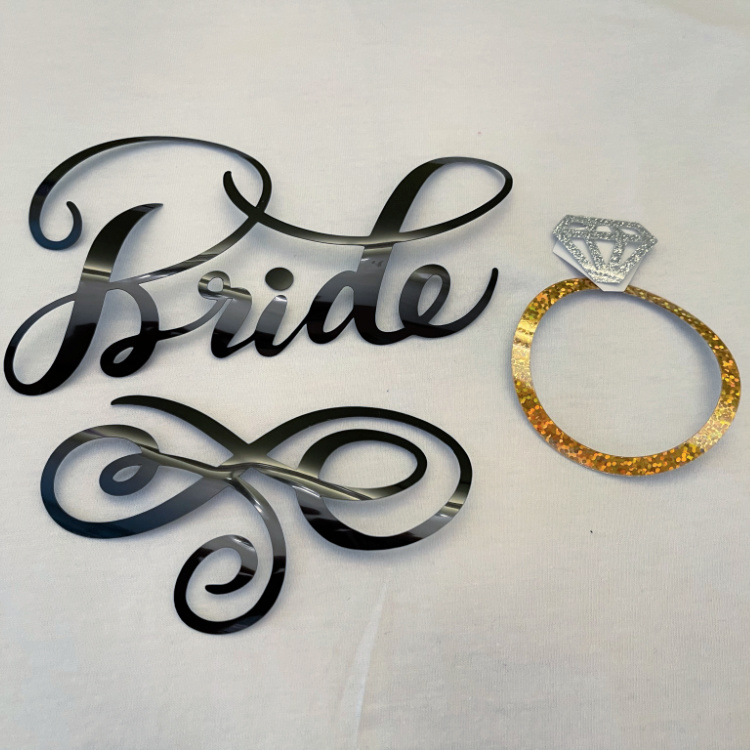
Here are the pieces laid out on the t shirt for placement.

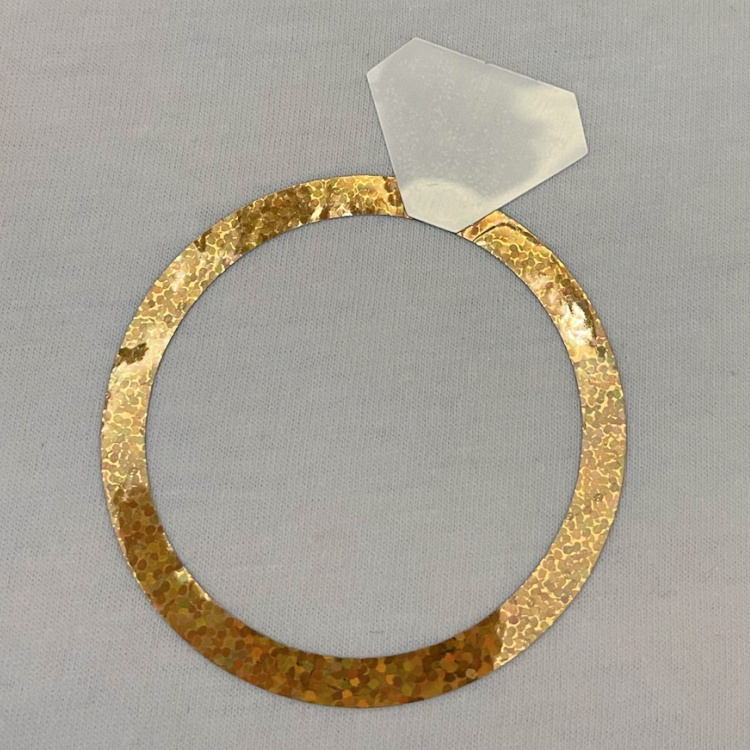
I removed all the pieces from the t shirt except for the gold ring.  I lightly pressed that down at 315 degrees for 30 seconds.  You have to work from the bottom most design piece and build your way up.  I have a Cricut Easy Press and if you don’t have one you can use a regular iron.  The wool, silk and polyester settings on a standard iron are at around 300 degrees so if using a regular iron I would just increase the time a little bit.

Once the item was cool to the touch, I peeled off the protective plastic over the design.  Next, I put on the white layer which is the background for the stone.  I  pressed that down at 315 degrees for 30 seconds.  I  removed the plastic layer from that piece once it was cool to the touch.

Lastly, I applied the top of the diamond stone and adhered that in the same manner.  Once it had cooled to the touch I removed the plastic topping from the stone.

Next, I laid out the bride word and the decorative swirl.  I like to put it where I think I want it to be and lightly press one edge to make sure that it did not move when I adhered the last two pieces.  I pressed the bride and swirl for 30 seconds at 315 degrees and there was some overlap with the ring and it did not cause any issues.  After waiting for it to cool, I peeled the last two plastic protective layers off, flipped the shirt over and pressed the back for 15 seconds.

I find that these t shirts are best cleaned and dried inside out and that they design holds up well.

And don’t forget, that there’s a sale in the Lori Whitlock SVG shop through Saturday.  Get 30% off all SVGs, Fonts, Pattern Fills and Commercial Licenses when you use code JUL2022 at checkout.

That’s it for me today.  Have a great day.

Hugs,

Anita

Box Card Toaster

Hi Everyone:

Anita here with an adorable box card from Lori’s wonderful assortment of cards in her store.  It is called Box Card Toaster (SVG, Silhouette).  I’ll bet you have at least one person in your life who you would be toast without.  I made two cards and sent them off to two special ladies.  I added a layer for peanut butter and jelly.  The card folds flat for mailing and is just so cute.


Thanks for looking and have a great day.

Hugs,

Anita

French Door Easel Card Spring

Happy Spring Everyone:

Anita here with a new style card that Lori created recently that is just so lovely and perfect to use to send some spring cheer.  It is called French Door Easel Card Spring (SVG, Silhouette).  She has many different styles so be sure to check them all out.  I used two of her newest Echo Park Paper collections including Our Little Princess and Endless Summer to piece my card together.  This card folds flat for mailing and has a nice space inside for written sentiments.

Here it is folded flat for mailing.

Above you can see the card open with a large space to write a lovely note.  Thanks for looking and have a great day.

Hugs,

Anita

Easter Bunny Crate Box Card

Hello crafty friends, I have an Easter card to share with you today, the Box Card Crate Easter Bunny, (SVG, Silhouette). I love the little bunny he is so cute, I added a printed sentiment from the Easter Stickers 2, (SVG, Silhouette) print and cut file. I also used the eggs from this set instead of the eggs in the file, I thought they were perfect for this card. I added the little chick from another Easter Stickers set, (SVG, Silhouette), I like having these stickers cut out already in case I need a little something extra or I need to make a card quickly.

Everything was cut out on my Silhouette Cameo 4.  Thanks for stopping by and have a wonderful day!

Bunny Head Box Tutorial

Anita here with a tutorial to make Lori’s Bunny Head Box (SVG, Silhouette).  I used some of Lori’s Echo Park Paper collections for this box including Wish Upon a Star and Celebrate Spring.  I am going to make these to give to each person who comes for Easter dinner! They will look so cute on my table and will be filled with yummy sweets.

Here is a photo of the pieces that you need to cut out for this box.

The next photo shows the face and ear pieces glued on as well as the direction the score lines need to be folded.

This photo shows the sides of the box glued together which was the first step in putting the box together.

After the sides are glued together the bottom hexagon piece gets folded up and glued in to cover up the tabs.

Lastly you can see how cute the box looks with a little Easter grass in it and some chocolate.

To close the box, fold in the short sides first, then gather the ears together and secure with some ribbon or twine.  You could even add a bute little pom pom for a tail!   This went together quickly and easily.  Hope that you have a chance to try this one out.  Be sure to look at all of Lori’s SVG files for your Spring celebration needs.  That’s it for me today.

Hugs,

Anita