Office Update: 4 Drawer Organizer Tutorial

Hi there paper crafting friends!  It’s Michelle Starcher, aka the Bookish Designer, hopping onto the blog to walk you through the steps to create Lori’s 4 Drawer Organizer (SVGSilhouette).  This organizer is perfect if you need extra organization for your office.  There are several sizes available including a 6 Drawer (SVG, Silhouette) and 8 Drawer Organizer (SVG, Silhouette).  The assemble is the same for all sizes, so you can use this tutorial when putting together all of your drawer organizers.

In this photo tutorial, I will break down the steps to create this 4 Drawer Organizer.  I wanted my box to match the Disney inspired organizers I made at the beginning of the school year, so I used Lori’s new collection, A Magical Place, from Echo Park Paper Co.  When I opened the file in Cricut Design Space, I had a note telling me to make four copies of the drawer and base file, so I made extra copies of those and sent the project to my machine.

My next step was to assemble the drawers for the organizer.  I folded the drawers along the score lines and added adhesive tape as shown on the backside of my red cardstock.  Next, fold in the top and bottom portions as show in the top right image.  Be sure to remove the paper from your adhesive if needed.  Fold in the flaps next to the drawer front (the one with the circle cut-out) and adhere those to the tabs. You should have the start of box as shown in the bottom left image.  Then, remove any paper from your adhesive strips and fold in the left and right flaps.  There are tabs on each side that fold inside the box to hold everything together.  Repeat this process for all four drawers.

Now, you are ready to assemble the box.  Before you get started, fold along all of the score lines and add adhesive as shown in the top left image.  Next, remove adhesive paper and fold each of the bottom flaps up as shown in the top right image.  Fold the four panels to form a box shape and close using the tab (bottom left image).  Then, close the box by folding the remaining piece up and close using the three tabs.  You should have an open side, which will hold one of the drawers you made earlier.  Repeat this process for all four of the base pieces.

Next you will assemble the four base pieces to create the organizer.  Stack the pieces to create a 2×2 square with all four openings facing you.  Add adhesive to the connecting sides of each cube.  Combine organizers bases two at a time and stack. 

For your final step, you will attach the large square and four rectangles to the case of your organizer to hide seems.  The square will go on the back of your organizer and the four rectangles will go on the top, bottom, and sides of the organizer.  The four rectangles are the same size, so unless you used a pattern paper, it doesn’t matter where you place them (top, bottom, or sides).  Next, add the pattern paper to your organizer and drawer fronts.  Same rules apply as when you adhered the cardstock pieces.  Finally, insert your drawers into the organizer.  If you want, you can add embellishments to the front of your drawers.

Don’t forget you can make this organizer in a variety of sizes including 4 Drawer (SVGSilhouette), 6 Drawer (SVG, Silhouette), and 8 Drawer Organizer (SVG, Silhouette). It is perfect for holding paperclips and other office supplies.

Until next time,

Michelle

Eye Candy by Amanda and Corri

Amanda is also here today to share a really fun technique with us for some adorable organizational tag embellishments. She says…
I used the 5 charms file 
Other supplies:
Distress ink
cardstock
gold and clear embossing powders
Versamark inkpad
Heat tool
Typewriter or computer to print the label names
I used the 5 charms file to create some faux-metal tags to label some of my crafty storage jars.
 
Step 1: I cut the charms out with my Silhouette from smooth white cardstock.
Step 2: I typed out the labels I needed and trimmed them to fit my tags. I distressed them a little with some brushed corduroy distress ink.
Step 3: I inked the charms with versamark ink and embossed with gold powder. I repeated this 3 times to get a very thick coat of enamel.
Step 4: Whilst the powder was still melted, I pressed the printed label into the enamel, so that it sunk in.
Step 5: I added another embossed layer over the top of the whole charm, this time using clear embossing powder. This sealed in the cardstock labels and gave the whole charm a nice glossy sheen. It also had a bit of a reaction with the gold powder and gave the charms a nice antiqued appearance.

Next I have a cute treat box and card by Corri…

I have a cute Spring project today using the Echo Park – Sweet Girl collection that was desgined by Lori Whitlock.  This collection will definitely get your in mood for Spring….the colors and patterns are so beautiful!

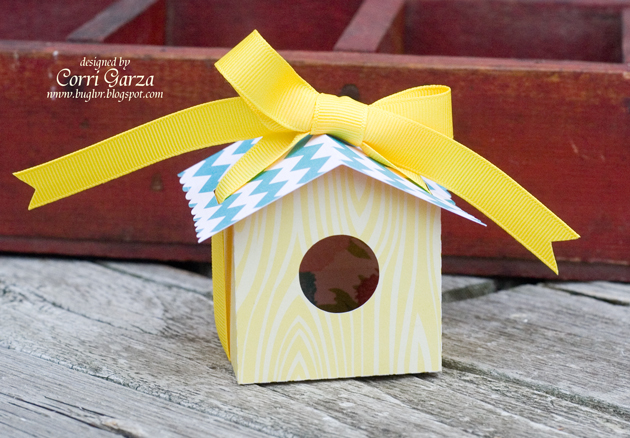
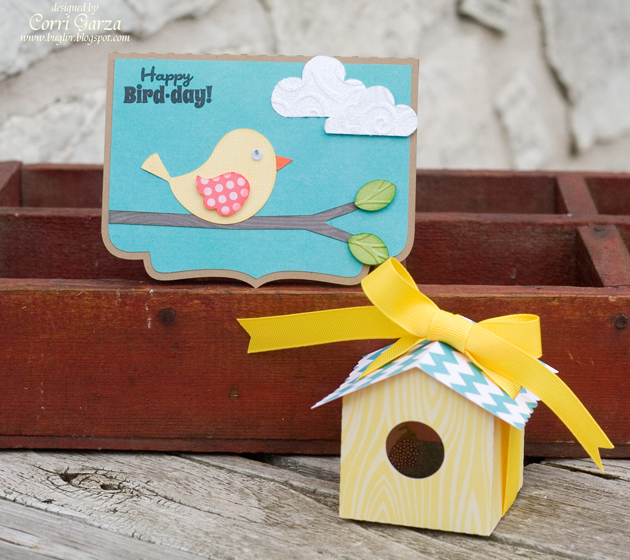
Lori recently added this adorable Bird House Treat Box to the shop.  It’s so adorable and perfect for Spring! 

I used the yellow wood grain paper from the collection for the base and the turquoise chevron for the roof.  The roof is secured with ribbon that threads through the base of the box….so cute!

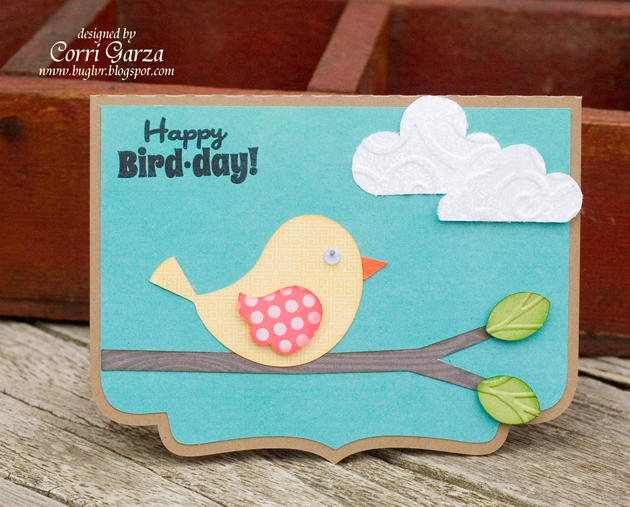
Of course, I had to make a card to match….

The files I used on my card are
Bird on Branch 2
Clouds
Card Base


Creative Team Member Corri and Lisa Bell

I LOVE how Corri created a card and a box to go with it. This is such a cute project and would be such a fun gift to receive. SO CUTE! Corrie used the “Acorn Box” along with the “Scalloped Squares” for the card base. The leaves on both the card and box come from the box file. Corri’s blog has lots of great projects and info. You can go here to get there.

The next project I have to share with you is boring in comparison to this beauty. Last week I spent HOURS moving my office/craft room to a different room in the house. I was too lazy to repaint so my current colors are blue, black and white. I used Lori’s “5 Bracket Labels” to tie in all my storage products.

I have a few different plastic drawers to house the different craft products I have and they change often so I wanted something that could change. I bought some chalkboard vinyl and cut it using the green and orange shapes in the preview.

This cabinet lives in the closet (partially because it isn’t white, black or blue) but it also fits best on a shelf in there. I have this divided into colors for embellishments other than stickers and rub-ons. I didn’t want a huge label because I wanted to see what was inside, so I cut the orange label in preview.

I also do a lot with fabric so I have some deeper drawers to house larger pieces I have purchased for an ongoing project. The little label looked funny on these drawers so I chose the green label for these drawers. Some hold fabric, photos and other supplies. I LOVE how these look in my ‘new’ room. It helps tie everything together and look finished.

I have many more pictures and information on my blog if you would like to hop over there. Click here.

Thanks for visiting us today, have a great weekend!