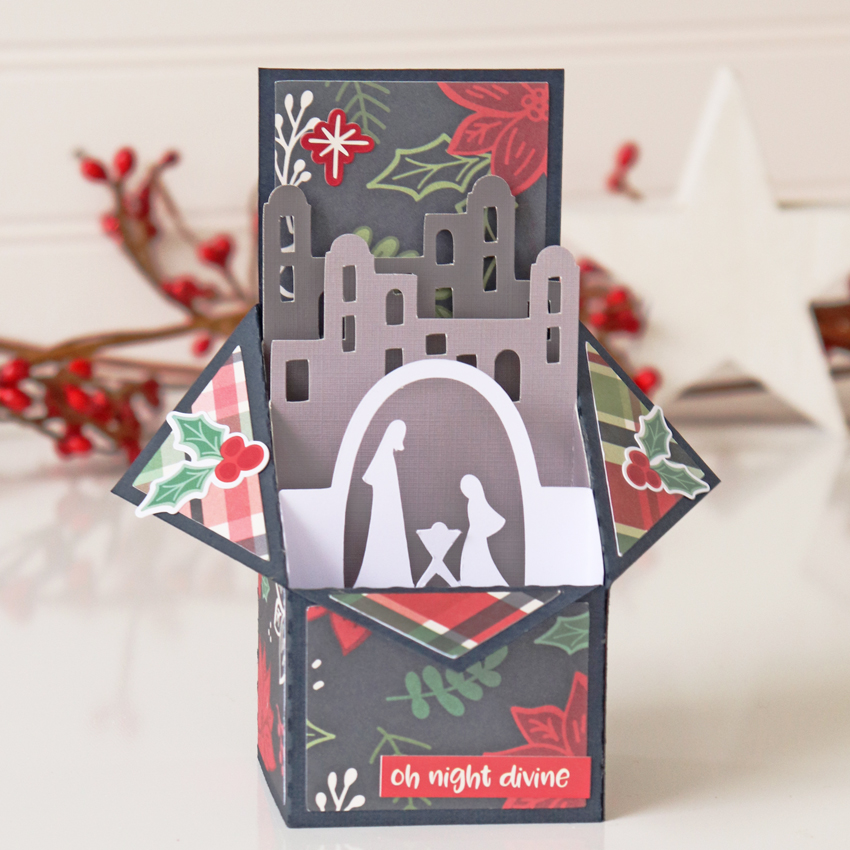
NEW! Layered Christmas Cards 25% Off!

It’s time to start thinking about making Christmas Cards. This NEW collection of Layered Christmas Cards are really gorgeous. The intricately cut designs layer so beautifully when accordion folded. The best part of this style of SVG files is that the machine does all the work for you. There is absolutely no gluing which makes them super easy.  They measure 4×7 when complete so they fit into an A7 envelope easily. These new SVG files are available in the Lori Whitlock SVG Shop and they’re on sale 25% OFF this week. They are available in a bundle and individually. Check them out….

Thanks for checking out the NEW FILES! Be sure to grab the weekly freebie with a $1.99 purchase and the FREE kit of the month SVG files for November with your $20 purchase.

I hope that you all have a wonderful day! Have fun crafting!

Lori

Last Day to Save 30% & Christmas Scene Nativity

Today is the last day to save on SVGs, Fonts, Pattern Fills and Commercial Licenses in the Lori Whitlock SVG Shop!  Get 30% off when you use code OCT2022 at checkout, but don’t wait, sale ends at midnight (MST).

It’s the perfect time to pick up this beautiful Christmas Scene Décor Nativity Bundle!  This 3 panel set would be a lovely way to decorate for the Christmas season!  It’s made up of 3 panels, each also available individually in my SVG shop and in my gallery in the Silhouette Design Store.  Take a peek…

Christmas Scene Décor Nativity Bundle

Christmas Scene Décor Nativity (SVG, Silhouette – coming soon)
Measures approx. 11.5″h x 20″w

Christmas Scene Décor Nativity Animals (SVG, Silhouette – coming soon)
Measures approx. 7.8″h x 20″w

Christmas Scene Décor Nativity Wisemen (SVG, Silhouette – coming soon)
Measures approx. 7.8″h x 20″w

These panels are assembled in the same manner as the panel in this tutorial.  It would look amazing on your mantel, in front of your fireplace or even as a table decoration!

Have a great day!

Luminary Tutorial

Growing up, there was a Cul-de-Sac near our home where all the houses had luminaries lining their sidewalks. They were the electronic sort of luminary.  I loved the 100 percent participation on that street, it always looked lovely.

This year my neighborhood had an activity where all the neighbors were invited to place paper bag luminaries with tea lights out on a designated night. Neighbors could decorate their bags, or just leave them plain.  I decided I needed to try cutting designs with an electronic cutter.  I chose a variety of Lori’s Christmas files. I’ll share each link with the pictures.

First, to cut the bags, you need to open the bags and flatten the sides like this picture:

flat bag picture

I placed the bag one inch down, so that I could see the inch marks on the mat.  Using the mat grid, figure out where your design should go on the bag. Then select and resize your design and move it to the correct location on your mat in the software. You can do this in Silhouette Studio or Cricut Design Space. I sized each of my designs just less than 4 inches wide and centered the design on my mat.

You may need to try a couple of cut settings depending on the bag thickness and the sharpness of your blade.  In Silhouette Studio, I started with the Vellum setting–which is Blade 1, Force 19, Speed 6.  I think bringing the force down a to 15 will work well too.

Since the bag is paper, I found that the back side of the back always had cut lines, but with less force, the cuts didn’t cut through the whole design.  My first bags were cut through on both sides, and I think they still looked great.

Tree Luminary

Tree from the A2 Christmas Tree Card (SVG, Silhouette )
This Tree Luminary is a great one to start with because of the simple design.  Fine tune cut settings with this one.

Angel Luminary

Angel from the Full Nativity a Child is Born (SVG, Silhouette).  You could use all the individual pieces for luminaries.

 Star from the Nativity Circle Jesus (SVG, Silhouette)  The star from the Nativity above will also work.

Wisemen

Wisemen from the Nativity Circle Wisemen (SVG, Silhouette)

For these next circle designs, you will need to some editing. If you don’t edit, the entire design will pop out of the bag, and you will be left with just a circle.  I’ve outlined the steps to edit in both Silhouette and Cricut below.

In Silhouette Studio

1. Release Compound Path
2. Move and delete the outer most circle
3. Group the remaining pieces and resize.

4. Move design on the screen to match your bag placement on your physical mat.
5. Select Cut Settings (Vellum; reduce force to 15)
6. Send

In Cricut Design Space

1. Select Image
2. Select Contour
3. Click on the largest circle.

4. Resize your image.
5. Click Make It.
6. Move the design on your screen mat to match the bag placement on your physical mat.
7. Select cut settings and cut.

shepherd

Shepherd from Nativity Circles (SVG, Silhouette )

Nativity from Nativity Circles (SVG, Silhouette)

You may need to use scissors just a bit on the seam part of the bag.  I think it would be so fun to get your street to put out luminaries on Christmas Eve.  For the luminaries, place a bit of sand or dirt at the bottom of the bag and  place your tea light candle (or electric versi0n) with the wick straight up.  Then light them for the evening.

I hope you all have a wonderful Christmas

Ashley

Nativity Tiered Box Card

Hello crafty friends! Aimee here sharing the beautiful Nativity Tiered Box Card (Lori’s Shop, Silhouette) with you today. I love this card so much! I love all of the bright reds, Santas, Rudolphs, and Christmas trees but I wanted something sitting on my desk to remind me of the true meaning of Christmas. This beautifully tiered card was the perfect thing.

This card also folds flat so you could sent one out to a family member or a friend to share with them the true meaning of Christmas. Hope everyone is staying safe and healthy this Christmas season.

Aimee

O Holy Night Card With Mitsyana

Hello, Friends! Design Team Member, Mitsyana Wright, here and I’m back to bring you a quick, easy, and absolutely stunning Christmas card. If you’re anything like me you are nowhere near the end of your Christmas card list. And, if you’re stunted for time and need something easy to put together and don’t want to skimp on the “WOW” factor, you are in the right place, I have just the card for you!

For this card, I used Lori Whitlock’s #10 Nativity Block Card file. (here in the Silhouette Store)

To create this card I downloaded the file and extracted it zip before uploading it into my Ecal software.

Once the file was opened into my software, I noticed that it was too big to fit onto my 12″ x 12″ mat. So I “ungrouped” the images.

I also like to change the colors of each image to match the colors I plan to use.  This way I don’t get confused on what paper goes to what piece. Sometimes shapes look very similar in size and shape. Changing the colors on screen gives me a map of what goes where later.

Another reason to do this is that it will give me an idea of what my finished project will look like. I can see what colors work well with each other before I start cutting up my precious papers.

I ultimately decided to change the card base to a deep blue, the silhouette gold foil, a white mat, and a blue one.

I inserted my paper into my Sizzix eclips and cut all my pieces at the original/default sizes.

Notice instead of cutting a white and a blue mat, I cut two instead. Well, that’s because only one mat will remain white. The other I decided I wanted to use to create a night sky with.

I used my Distress Oxide inks to create a blended night sky.

Once I the blended colors to my liking, I dipped a paintbrush in clean water and flicked drops of water onto the card. The inks reacted to the water and created the stars in my night sky.

I layered the pieces onto each other and attached them onto my card front.

And here is my finished card…

I absolutely love how this card turned out!

I hope it inspires you to create some of these gorgeous cards yourself!

Thanks for stopping by!

~Mitsyan Wright