Money Roll Gift Bag Tutorial

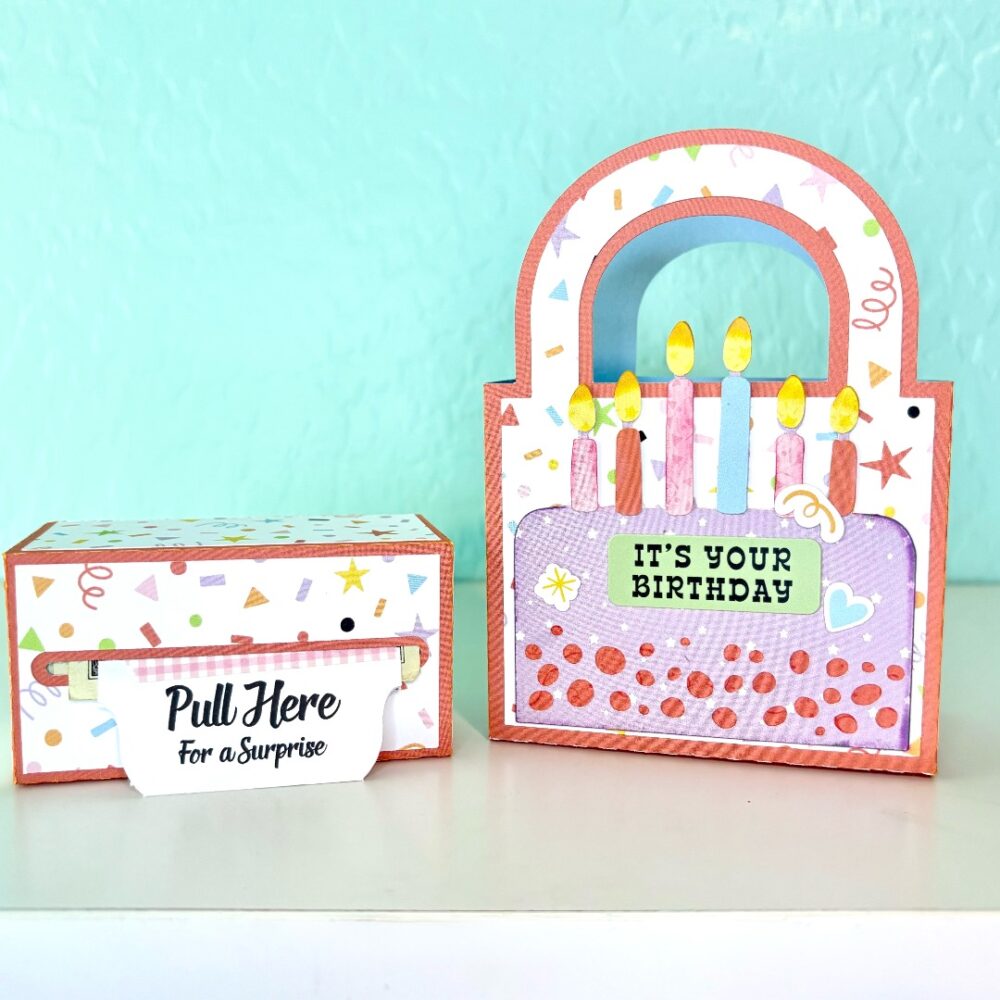
Hello there! Today I am sharing a tutorial for the Money Roll Gift Bag Birthday file (SVG, Silhouette). For this project I also used the Party Animal collection by Echo Park Paper Co. This little gift idea is perfect for a last-minute gift idea or that hard to shop loved one.

After cutting everything out, I inked the edges of my bag, box, cake, and candles. I glued the decorative panels in place, assembled the cake, and folded all the score lines into mountain folds. Since I used patterned paper for the cake, I couldn’t use the print and cut feature, so I added a few stickers from the collection for the sentiment.


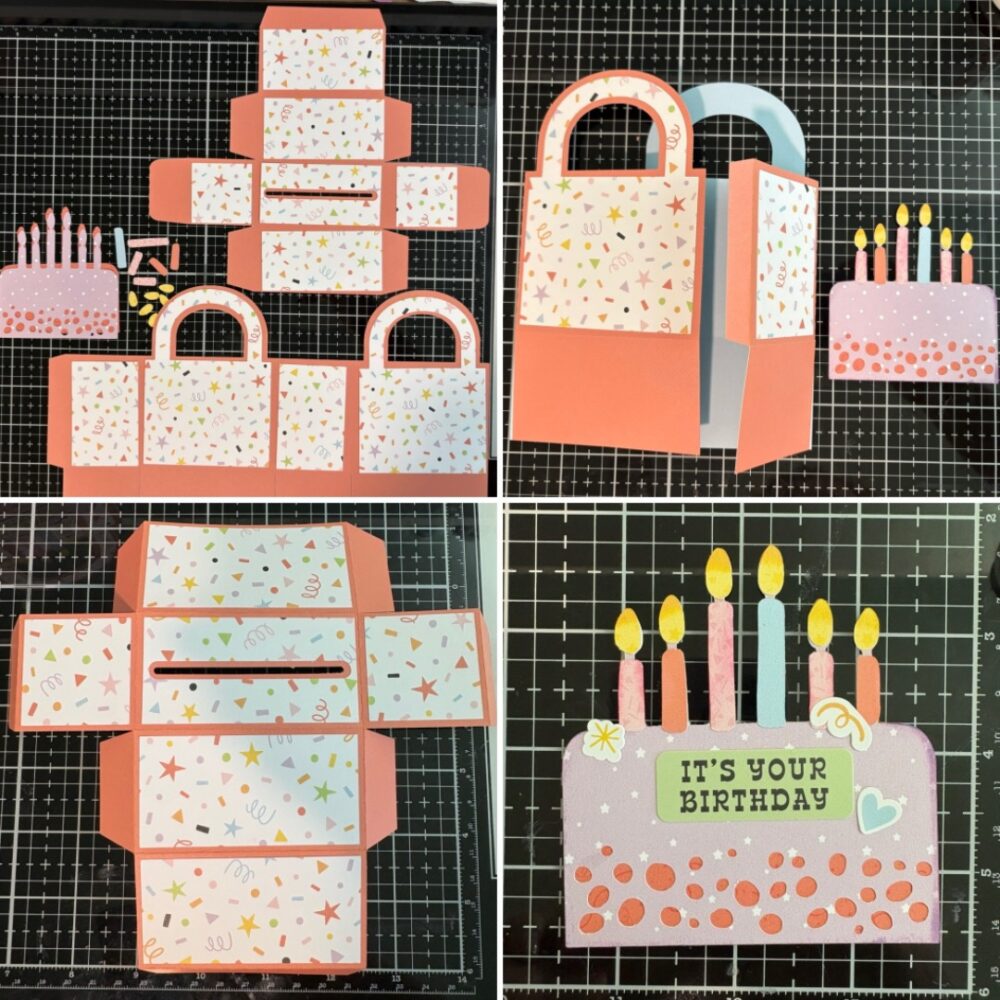
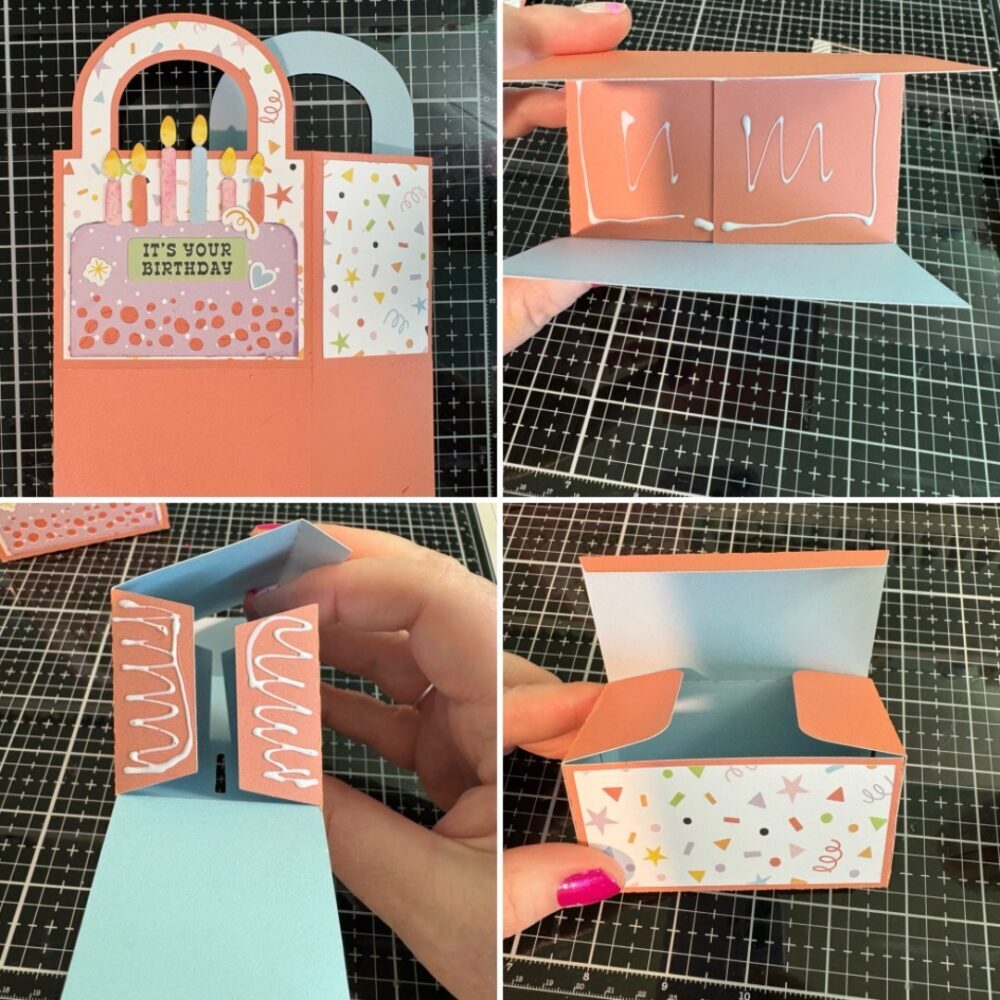
Once the cake was assembled, I glued the back and attached it to the front of the bag. I folded down the bottom tabs and glued each layer to hold it in place. For the money roll box, I glued the smallest tabs and secured each side. The back of the box stays open and will fold shut once the money roll is tucked inside.

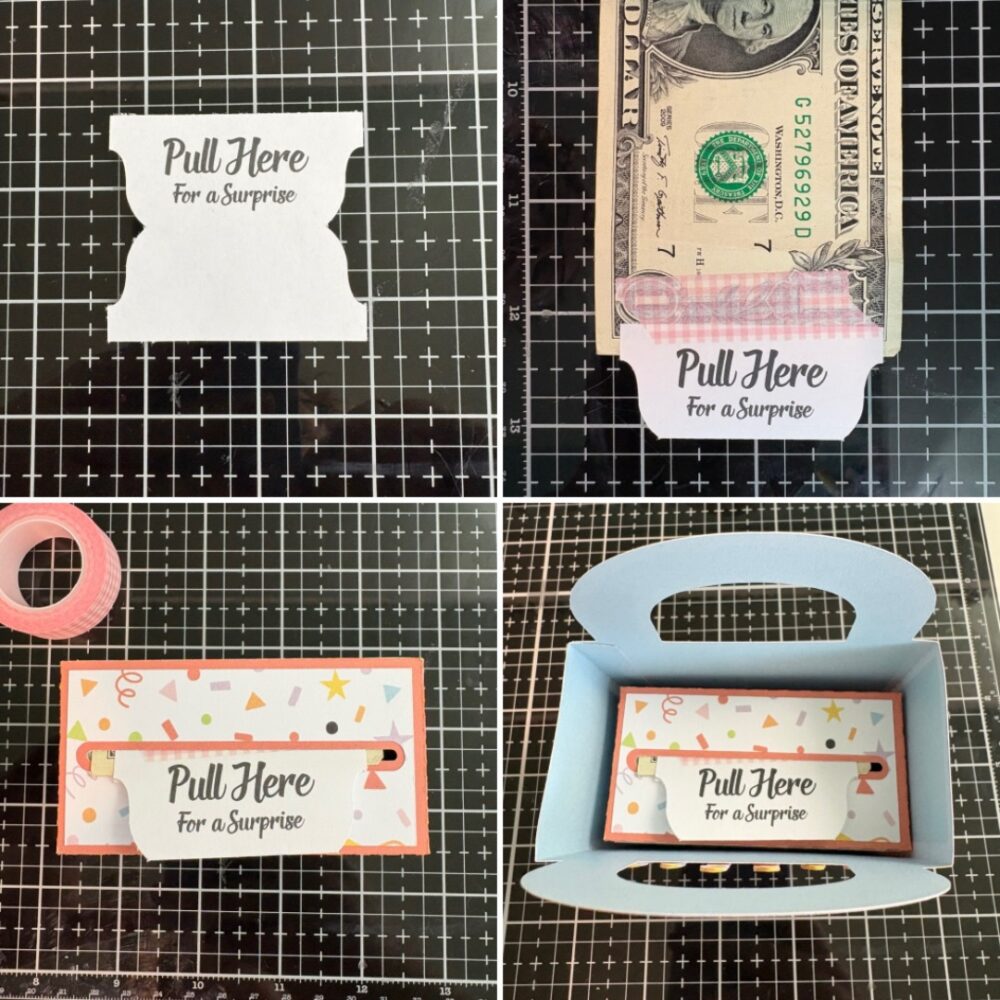
The file includes a print-and-cut tab to attach to the end of the money. I used low-tack washi tape to secure the tab and connect the money end to end. Starting from the end without the tab, I rolled up the bills, fed the tab through the slot in the money roll box, and then closed the box. The money roll box fits perfectly into the bag.

This money roll gift set is sure to be a hit with the recipient and will make gifting money exciting as the tab is pulled. Thanks for stopping by today, and happy crafting!
Brandie

Money Roll Gift Bag Set Tutorial

Happy Thursday everyone! I’m here today to show you how I made this cute birthday money roll gift bag set (SVGSilhouette).

I always start by making sure I have all my pieces cut

Then I start by assembling the bag by placing the decorative paper on the cardstock. I also put adhesive on the 3 flaps as shown below.

The last flap gets adhered to to the 3rd flap as shown.

I then add the decorative paper to the money roll portion of the project. Adding adhesive as shown.
Make sure not to remove all adhesive strips or you will have a money box with no money. Complete the box by leaving the back side open to get your roll money into it. I taped my bills together using washi tape. Once your money is in the box and the tab is through the slot, fold the ret of the box together and adhere it closed.

The money roll fits perfectly in the little gift bag.

You can decorate the bag however you like. I had this little Doodlepop that looks kinda like our birthday girl so I added a black circle and the little pops. Also tied the bag together with matching ribbon.

What a fun little birthday gift and perfect for a kiddo turning 18. We filled it with $2.00 bills for a little added fun.

Hope you will give this fun project a try. Happy Crafting!
Chelsea