Money Roll Gift Bag Tutorial

I usually gift money during the Holiday season for the teens and other hard to shop for loved ones in my life. How about you?  The thing about gifting money, is that it isn’t all that personal and it’s not all that easy to dress up!  Well, that’s until I found Lori’s super cute Money Roll Gift Bag (SVGSilhouette).  I’m making several of these this year for all the teens on my Christmas List.  I think they’ll get a kick out of it and make the gift giving a little more special.

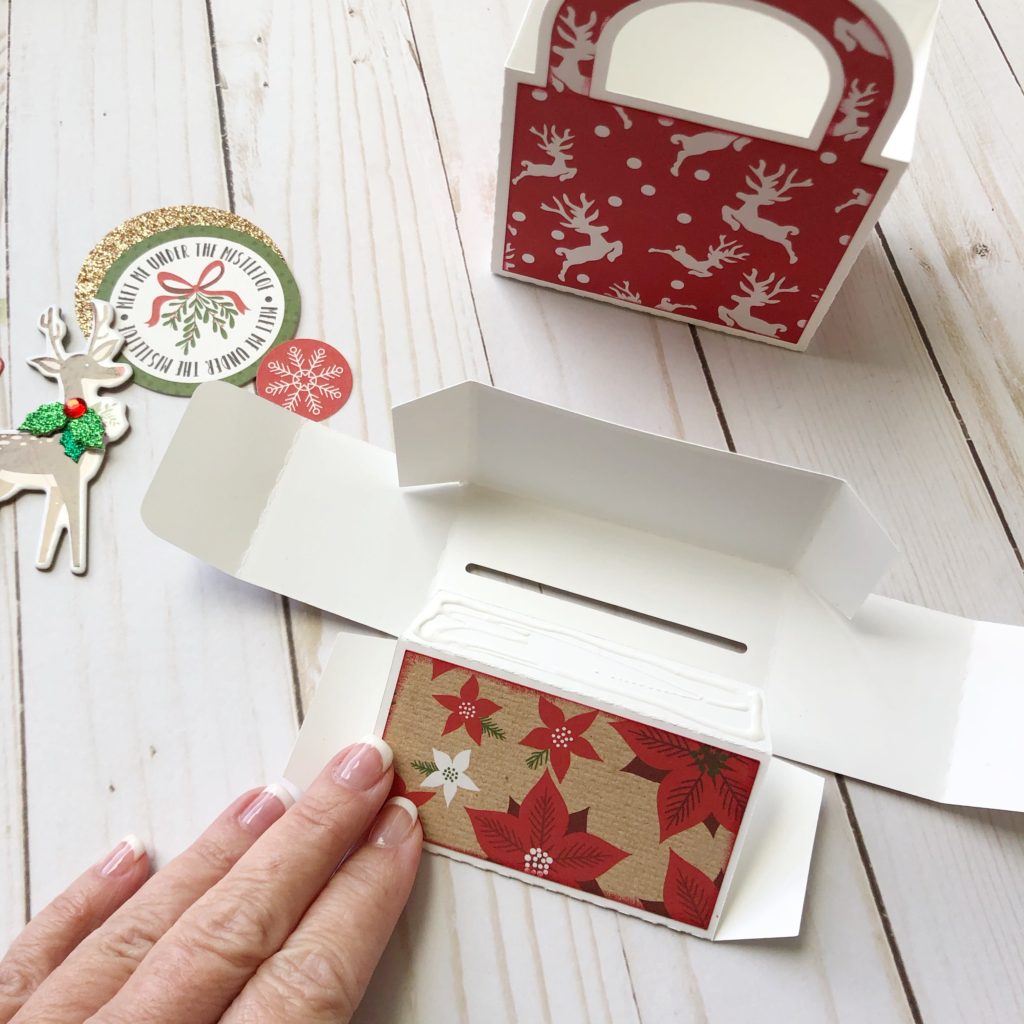
I used Lori’s My Favorite Christmas Paper Collection when cutting out the pieces, as well as some plain white cardstock .

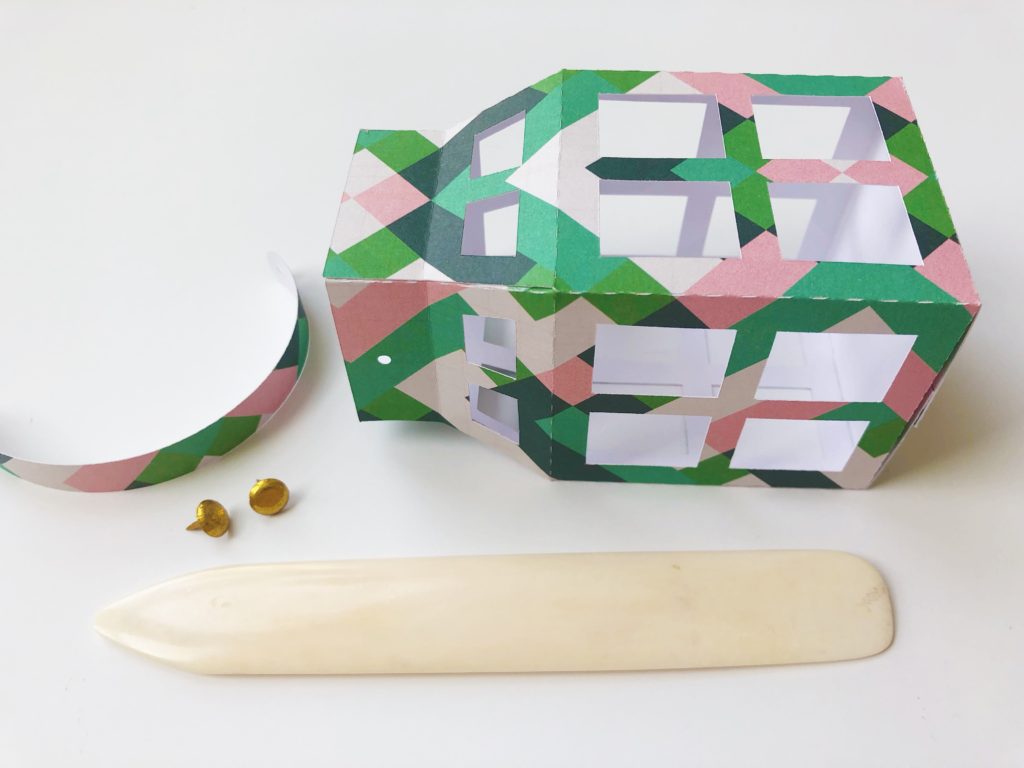
To begin, you can ink the edges of the designer paper to add some depth to the project. Feel free to skip this step if you’d like.

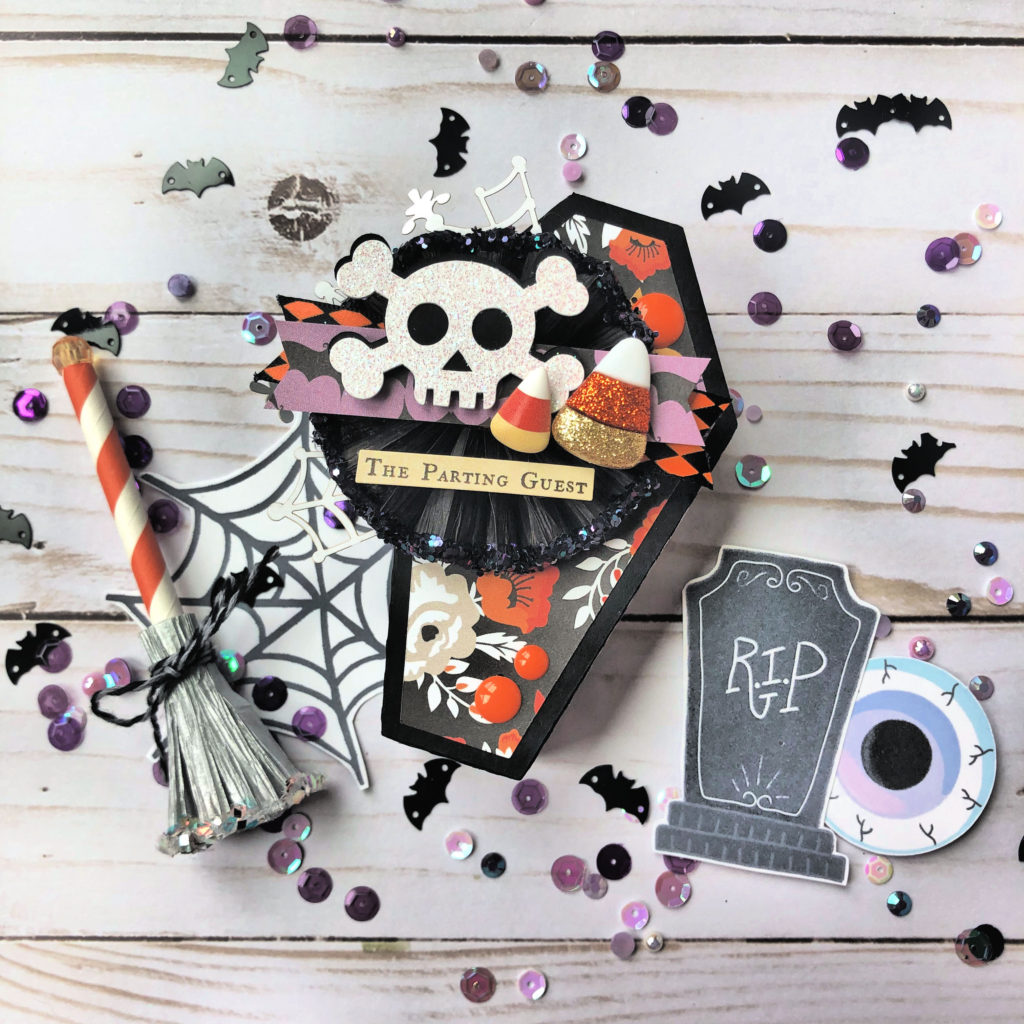
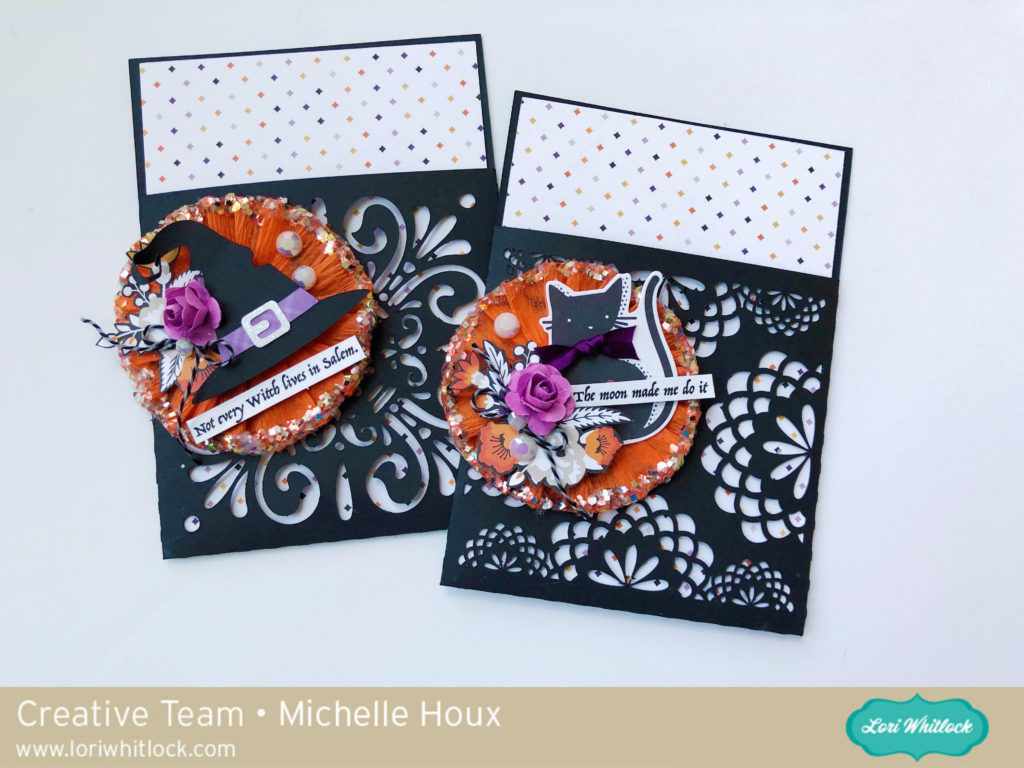
Next, glue down the designer paper panels to both boxes and gather some ephemera, stickers and ribbon to embellish both boxes.

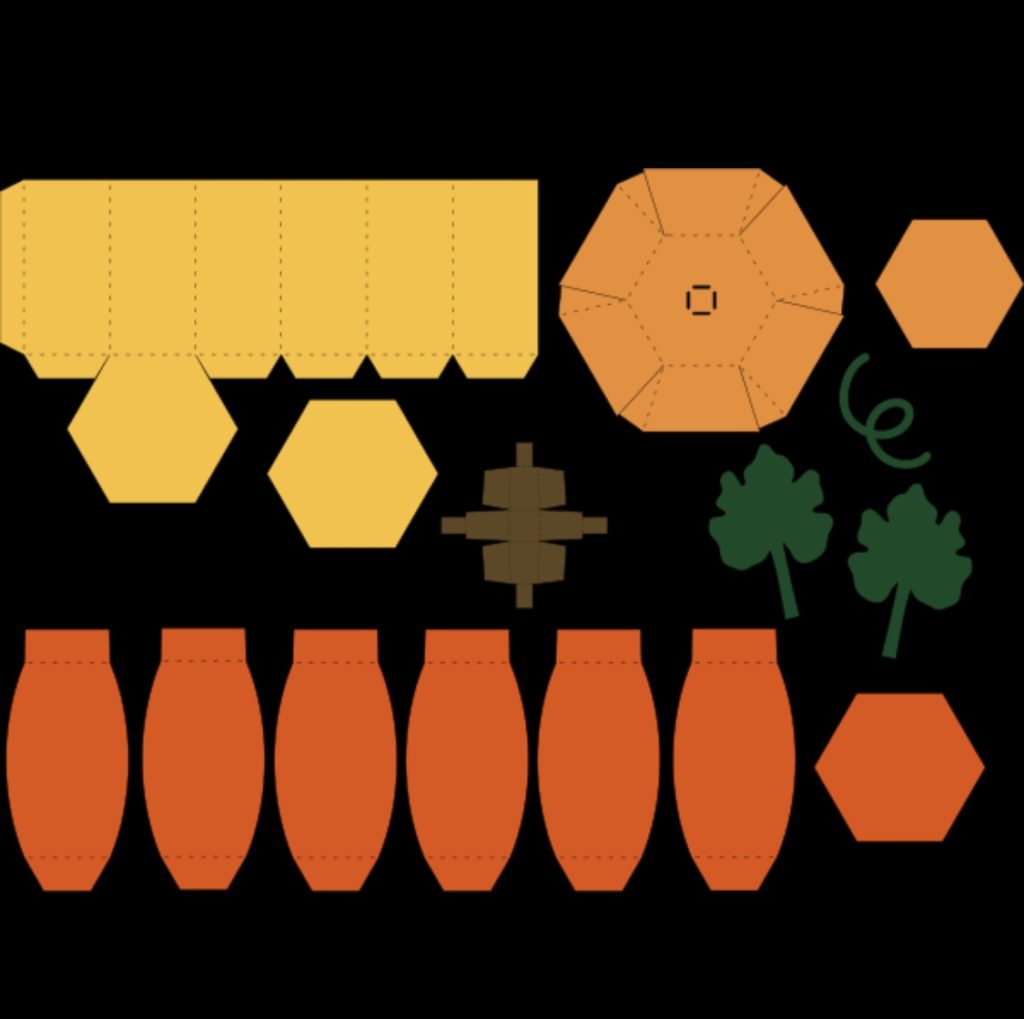
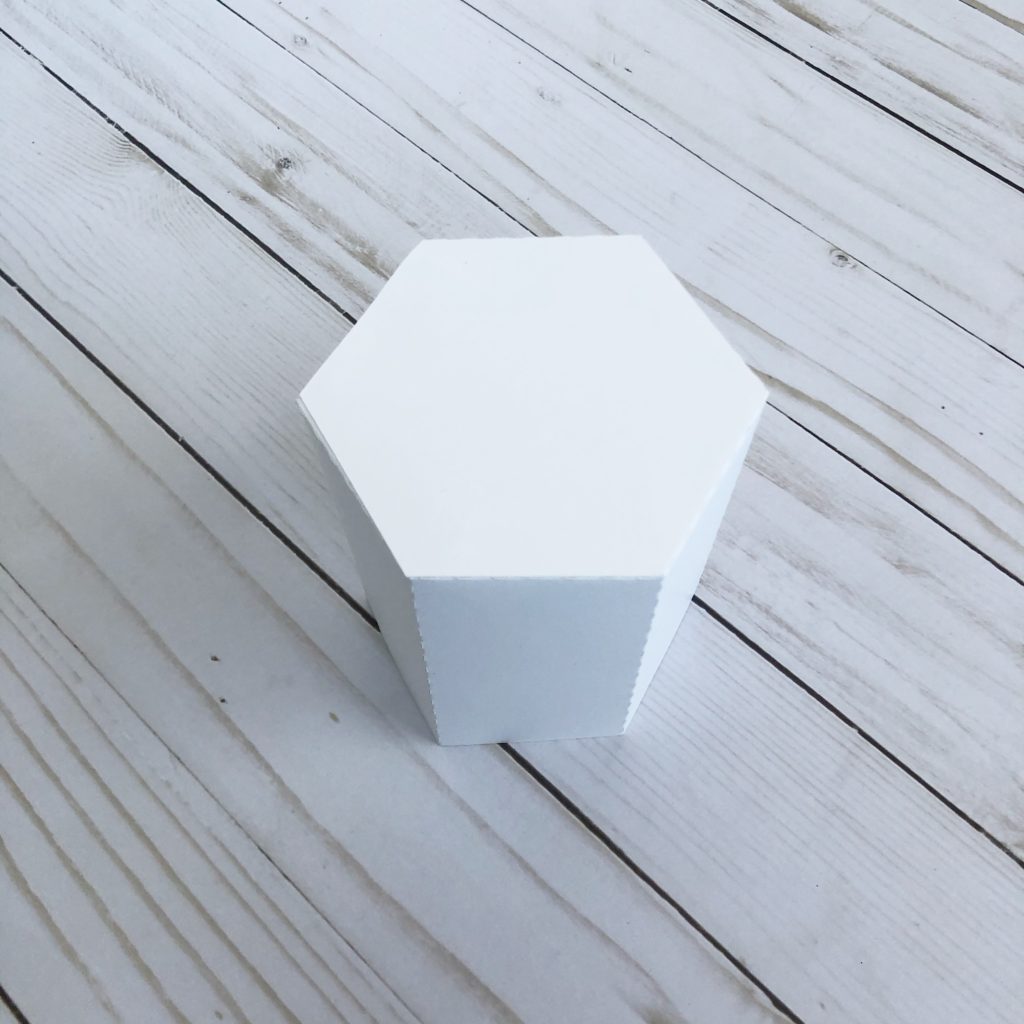
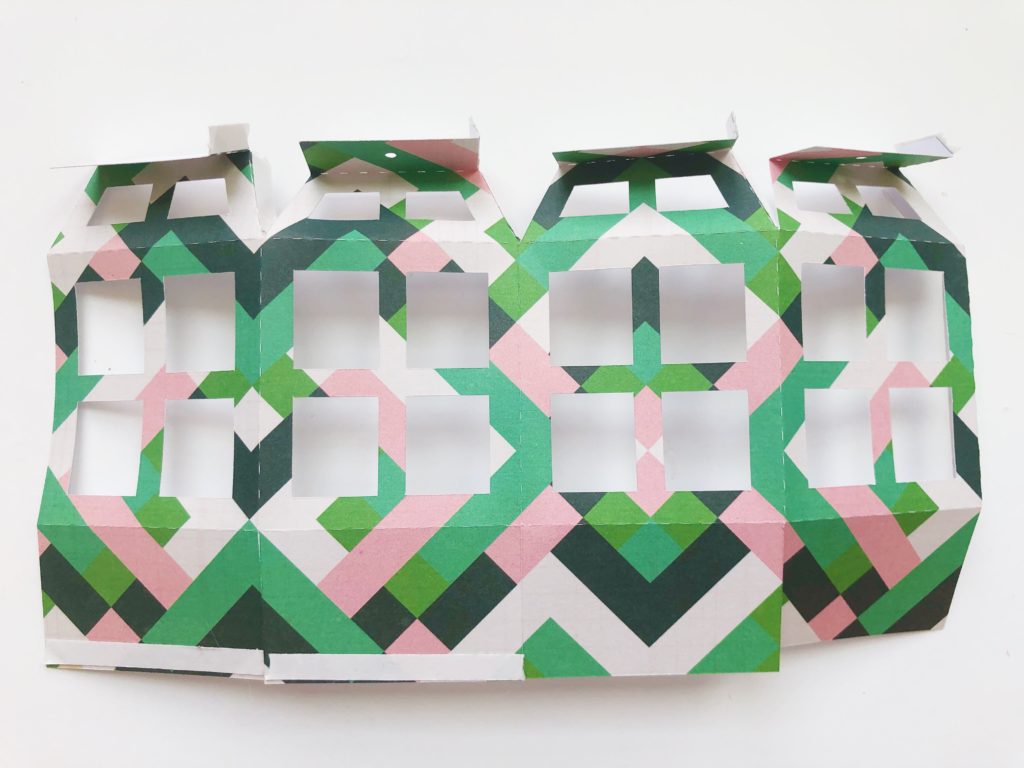
Then, fold all score lines in, as shown.

The Gift Bag goes together pretty easy.  Add glue to the side tab and fold other side over to join the sides of the box.

Then fold the bottom of the box in and glue down.

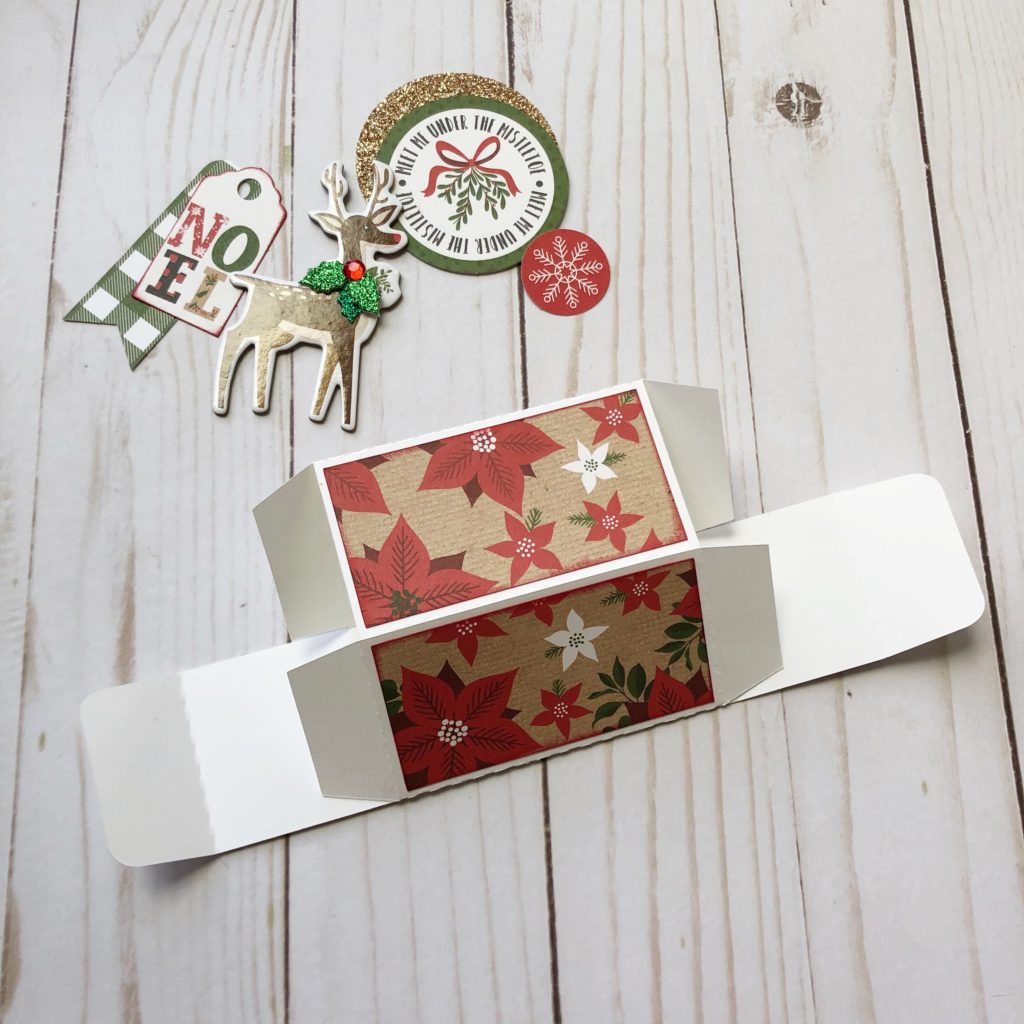
To assemble the money roll box, glue the side tab to the opposite side panel.

Fold side tabs on one end of the box to close it. Tape your money together, end to end and add the pull tab.  I find Scotch tape works best for this part… it can be peeled off of the bills with out tearing them. Also, it’s really fun to use a bunch of $1 or $5 bills so the money just keeps coming and coming when you pull the tab.

Next, roll your money up as shown…insert it into the box with the tab coming out of the opening at the top of the box.

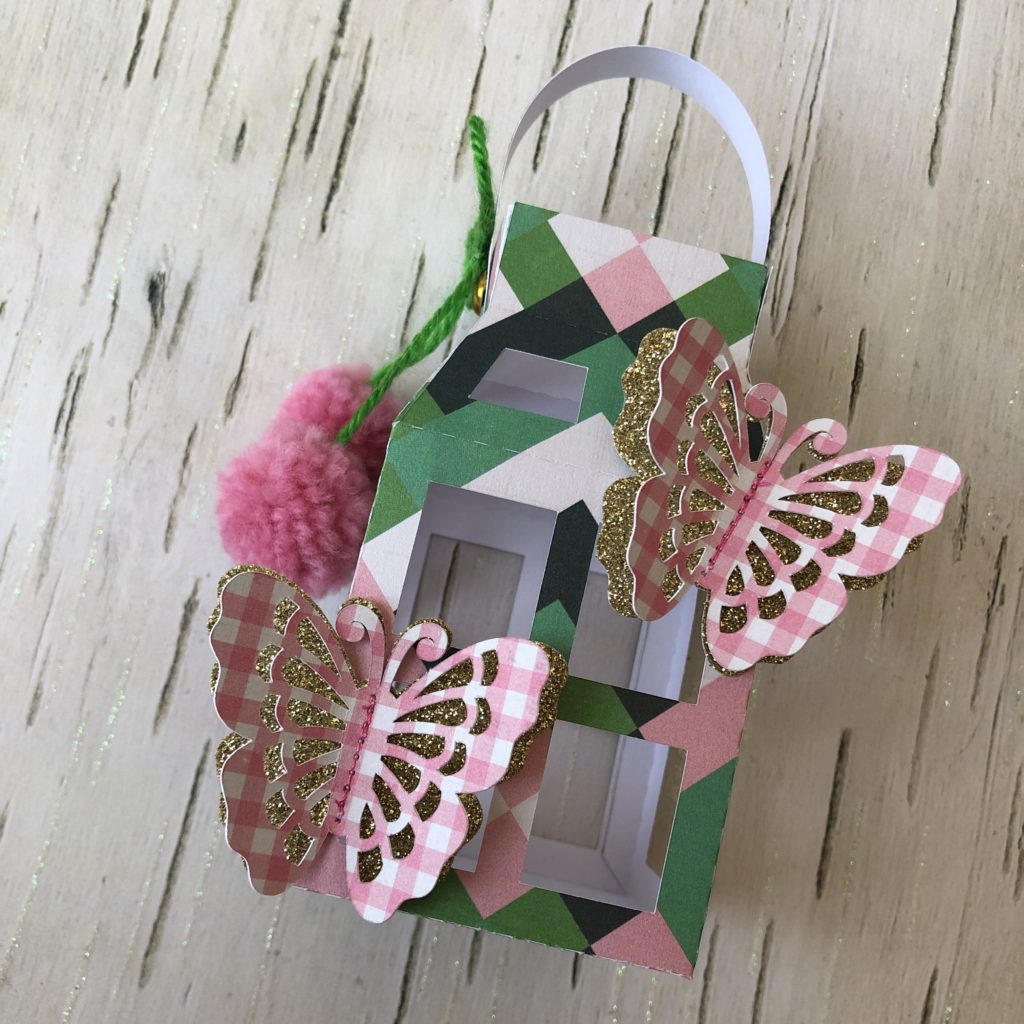
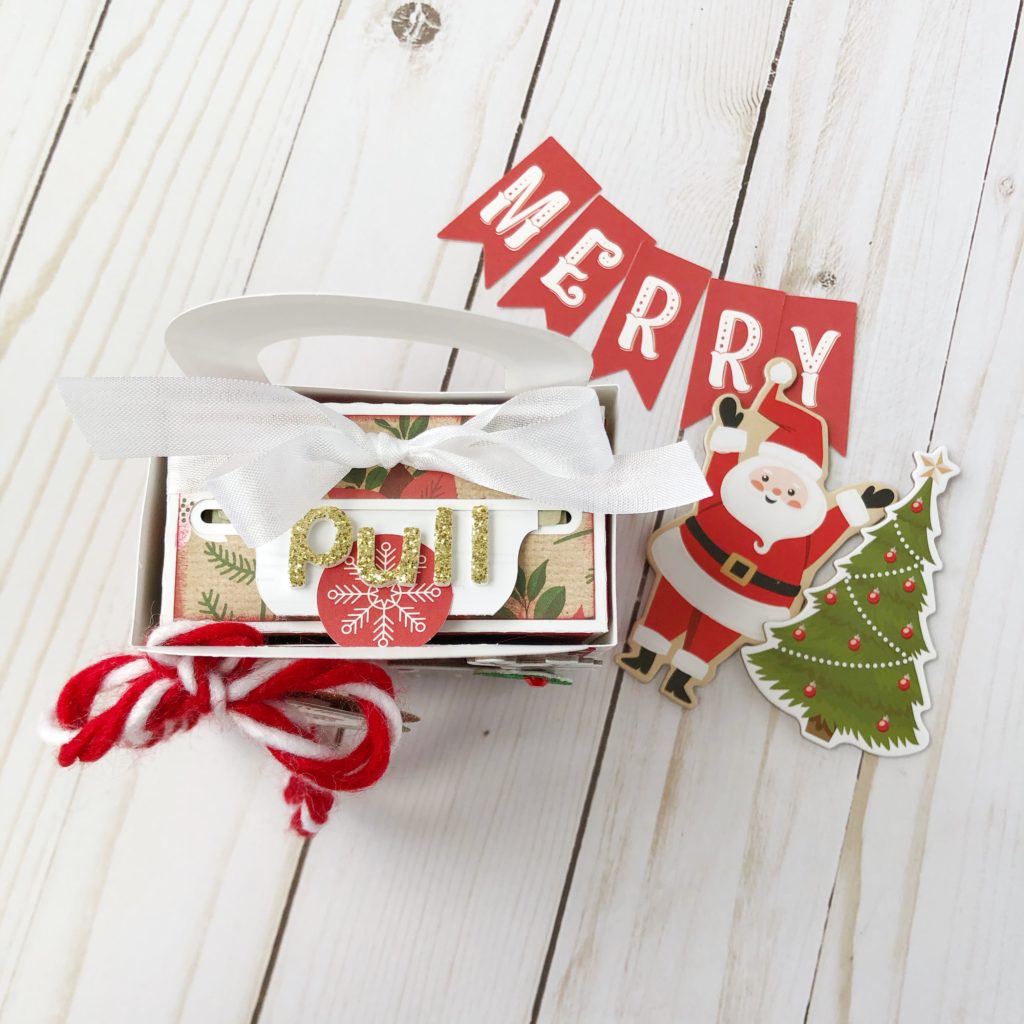
Decorate the money roll box as well as the gift box however you’d like.

I found several fun pieces of ephemera and chip board from Lori’s My Favorite Christmas Collection to embellish my boxes, as well as some ribbon from my stash.

And that’s it!! You can add a little shred to the bottom of the box and your gift is done!

Who’s the lucky one in your life that will get to pull that tab and find an awesome surprise inside?

Thank you for stopping by!

xo,

Michelle H.

3D Pumpkin Tutorial

If you’re like me, you like to decorate your house for ALL THE HOLIDAYS!  Lori’s 3D Pumpkins would be so fun placed throughout your home or group several on your table for a fun centerpiece. They come in three sizes, Short (SVGSilhouette), Medium (SVGSilhouette), and Tall (SVGSilhouette). These are boxes as well, so they would make a great hostess gift with some candy inside.  I used Lori’s My Favorite Fall Paper Collection to make these pumpkins. I just love all the colors and patterns in this paper! Shown here are the 3D Pumpkin Medium and 3D Pumpkin Tall.  How fun are these?!

I’m using the 3D Pumpkin Medium for this tutorial.  First cut out all the pieces as shown.

To begin, assemble the base of the pumpkin by folding all score lines in.

Glue side tab to opposite side of base.

Add glue to bottom tabs…

and fold bottom of base onto tabs as shown.

Use your bone folder to curve the side panels of the pumpkin.  This will help give your pumpkin its curved shape.  For added interest, I sewed tulle to three of the side panels, added sequins and then sewed the bottom shut.

Next, glue the square end of the panels to the top of the pumpkin box.

Then glue the beveled tabs to the bottom of the pumpkin box.

Glue the hexagon piece to the pumpkin bottom to finish it off.

Next, fold all tabs on the pumpkin lid in, and adhere each tab to the panel next to it until the lid is formed.  Also, the leaves are very pretty as is, but for added interest you can drawn in or sew leaf veins.

Next, fold all tabs on stem inward and glue the tabs on the right to the middle tabs…

and repeat on the left side.

Add leaves and stem through the holes in the top of the lid…

and glue the vine to the top.

Turn lid over, fold leaves and stem tabs and glue down.

Next glue hexagon panel to inside of the lid to finish it off.

And we’re done!!!  Isn’t this beautiful?!

I had so much fun making these for my table centerpiece.  I filled them with caramels and they will be given out at the end of Thanksgiving as parting gifts for my friends and family. I hope you give this a try.

Thank you for stopping by!


xo,

Michelle H.

Halloween Coffin Party Favor

Hi friends and welcome!  Eeek! I’ve been wanting to show you these Halloween Coffin Party Favor Boxes for weeks now and today is the day!  Can you tell how excited I am?  The cut file is under Halloween Favor Box Coffin (SVGSilhouette), and you are going to love making these for all the friends, neighbors, teachers and kids in your life.

I love how Lori created the cut file with side panels for the lid of the box.  You can cut them out in coordinating designer paper to change up the look.  This file even comes with that adorable double layered skull and cross bones.

You can see the inside of the box holds several pieces of candy or other small gift.

I hope you have fun making and gifting these Halloween Coffin Party Favor Boxes. Can’t wait to see what you create!

xo,

Michelle H.

Halloween 5X7 Pocket Flourish Cards

Hi friends and welcome!  September is my favorite time of year to craft! The kids are back in school and I’m not yet busy with all the frenzy of the holidays.  How about you?  Today I want to share these super versatile 5X7 Pocket Flourish Cards (SVG, Silhouette) which can be embellished in so many ways.

Lori offers these in her shop as a set of three designs, and Silhouette offers each design separately.  I can say from experience…you’re definitely  going to want to get all three! I thought it would be fun to cut these out in black card stock for Halloween and keep the embellishments simple to let the intricate flourish detail shine.

The Witch hat can be found here (SVGSilhouette). Side note: I reduced the hat down to approx. 2 1/2 x 2 3/8 to fit the rosette and rolled the tip of the hat to give it more dimension. Isn’t it cute!!

Here are two I made for a friend with a summer theme. I used a corner rounder on the top of the pocket and card to change things up.

I AM IN LOVE with these 5×7 Pocket Flourish Cards! I’d love for you to give it a try!


xo,

Michelle H.

Butterfly Lantern Tutorial

This week I discovered Lori’s fun Lantern projects in the Lori Whitlock SVG & Silhouette Shops! There are so many to choose from! I decided to make the Butterfly Lantern (SVGSilhouette), which cuts two on one piece of 12×12 paper.  This makes it really easy to make a bunch for a fun celebration or party favor.

Start by cutting all of the pieces for the lantern…

Add score tape or adhesive to all flaps of the lantern as shown here…

The lantern assembles similar to a box.  First fold all score lines inward with exception to the top, that will fold outward as shown…

Remove tape backing and assemble lantern as you would a box…

Next, use your bone folder to curve the lantern handle and attach with decorative brads…

Complete the lantern by adhering the butterfly layers together and gluing to the front of the lantern.  For additional dimension, I sewed my butterfly layers together and added a fun cherry pom pom to the side that I received from a friend.

I had so much fun making these and I hope I inspired you to give it a try.  Thank you for stopping by!

xo,

Michelle H.