Cards with Mendi

Hello there!  It’s Mendi here and today I have a set of cards to share that I created using Lori’s super cute new Fine and Dandy collection by Echo Park.
This collection has a darling line of stamps and dies to compliment the papers and I couldn’t resist playing with them for today’s share.  All my cards today were also created using only the 6×6 pad.
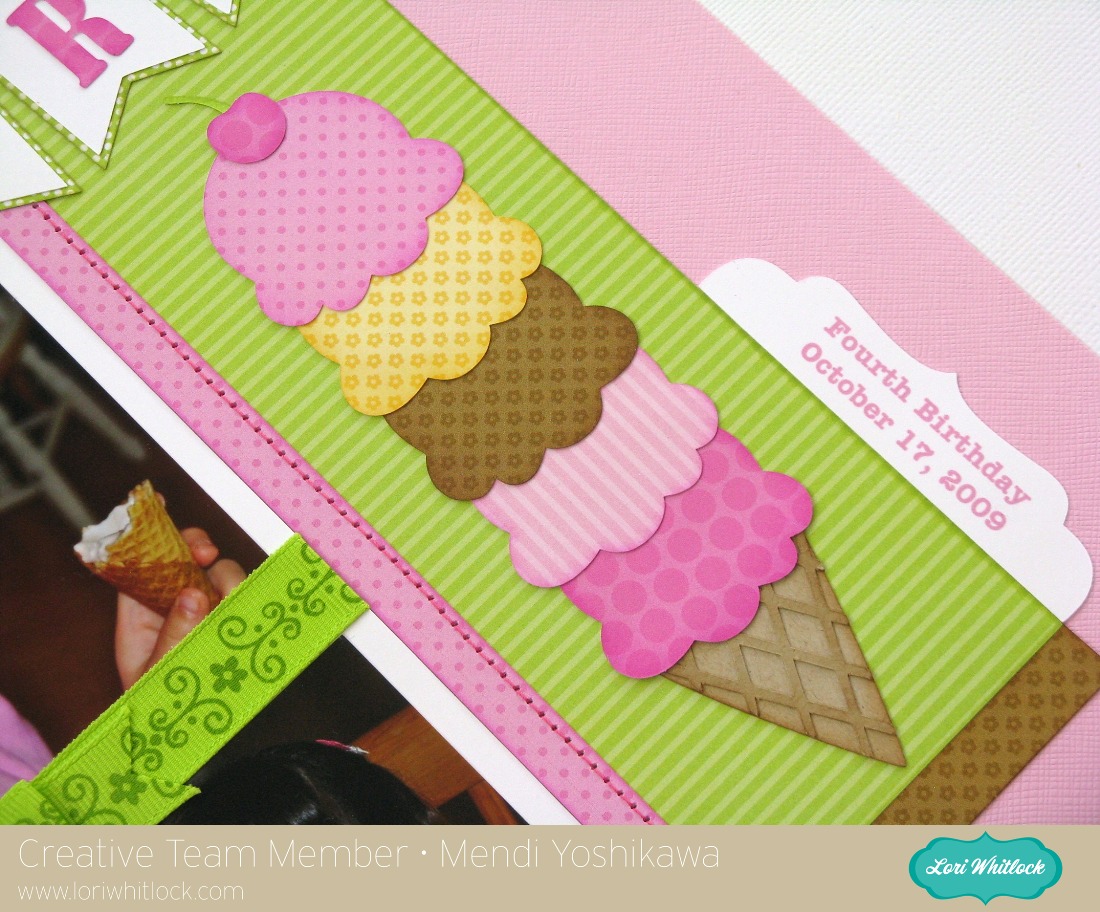
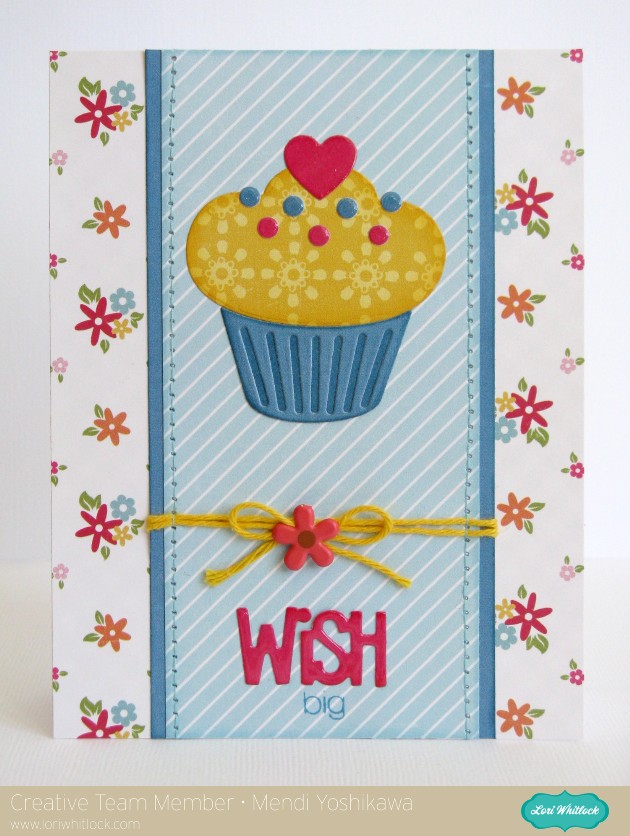
For my first card I cut my cupcake wrapper from the solid blue and then hand cut a second one from that same blue to line the back side.  To make it stand out against the die-cut version, I took my chalk ink and swiped it across it.  I had some leftover flower centers so I decided to use them as sprinkles–With a little glossy accents they became homemade enamel dots!
For my next card I used on of Lori’s 8.5×11 Backgrounds as my card mat.  I stamped the sentiment and 4 butterflies using the Happy Little Moments Stamps and then stamped them a second time onto scratch paper.  I fussy cut the ones on scratch paper and layered them over the others with foam tape.  I love the subtle detail that adds in person.  To tie my colors together, I layered coordinating strips of patterned paper from the collection.
Up next I mixed both the flower die sets for a simple border on a colorful notecard.
My last card is my personal favorite.  I used the Jar Die, cutting the lid from silver metallic cardstock and hand cut a “fabric” cover from gingham paper.  I finished it off with a little baker’s twine and some glossy accents on the heart.  For my card I cut one of  Lori’s A2 card bases on my Silhouette which just happened to be a perfect match for the curved sentiment stamp from that same stamp set.
To complete my cards I used the following SVG cutting files from Lori’s Shop:
I also used the following new Fine & Dandy products by Echo Park:
Isn’t this an irresistible collection Lori has designed?!  I had so much fun and I hope I’ve inspired you to pull out some paper and play along this summer.  🙂

Birthday Set with Mendi + Creative Team Call

It’s Mendi here and I’m so excited to be sharing a fun Birthday card and gift bag set that I made using several of Lori’s darling shapes!
This set came about because I was wanting to create a “Sweet 16” milestone birthday card.  I was thrilled to see that Lori already had the work done for me with her cute phrase (and even more thrilled to realize I had a “happy” stamp that matched perfectly from Avery Elle’s Oh Yeah set).  I chose to turn the number 16 into candles with the help of a little embroidery floss and a flame cutting file from another candle by Lori.
For my cupcake I used some Glossy Accents on the sprinkles and flames and a paper piercer with a ruler to form holes so that I could hand-stitch the ribs in my cupcake wrapper (after ungrouping and removing other cutouts).
When I was done I thought it would be really fun to make a matching gift bag, but I didn’t have any of Lori’s newest cupcake boxes on hand so I tried to get creative.  I took her apple favor box file (keeping the base the same size and discarding the apple portion) and enlarged that same cupcake to create a front and back for my little box.  I was able to sandwich some ribbon between the layers to form my handles and it worked perfectly.

To create my little Birthday ensemble I used the following cutting files which are available for purchase in Lori’s Shop:
I hope I’ve inspired you to take some time to play today.  😉

Are you interested in being part of our Creative Team? Well now is your chance.

We currently have openings on our Digital AND Paper team and would love to have you join us. You will need to submit 3 samples of your work using any of Lori’s files, tell us just a big about yourself and provide a link to your blog or Facebook page. Be sure to have all of this emailed to info@loriwhitlock.com by July 18, 2014 at midnight in order to be considered for a position. We will make an announcement on the blog the next week introducing our newest team members! Good luck to you all!

Ice Cream Cones with Mendi

It’s Mendi here and I am super excited to share a new layout with you today!  I’ve always had a thing for cute ice cream cones so I was happy to finally be scrapbooking my daughter’s 4th Birthday when she decided to forgo the typical cake or cupcakes and just have ice cream.

For my title I paired Lori’s Perfect Type font with her Happy Birthday Banner.  I was tickled to discover I could spell out the word “party” instead by using just select letters from the “Happy Birthday” phrase.


For my ice cream embellishment I used the ice cream cone from Lori’s Patriotic Icons set with a cherry borrowed from her Cupcake Banner Set.  To finish off my layout I created a date tab from the 7 Tabs set.

On a side note, I used darling papers from Doodlebug’s Sugar and Spice collection.  I hope I’ve inspired you to look at your shapes in a new way and play a bit.  😉


Silhouette Tutorial with Mendi: Thickening Delicate Pieces

It’s Mendi here and I’m so excited to be sharing a simple little Silhouette tip with you today.  I don’t know about you, but I’ve found when I’m shrinking cutting files down in size there are many times when the shapes become too thin to cut from cardstock without shredding the design.  To get around this I have found some easy tricks for thickening my fonts and shapes.  This is also a super handy trick for creating a “bold” font when that option is not available in the Silhouette software.  😉
 
To illustrate my tutorial I created this little Birdie Birthday card using several thin shapes and fonts (along with the adorable Echo Park Hello Summer collection) designed by Lori Whitlock.
I have created a video tutorial below sharing how you too can solve this common Silhouette cutting dilemma.
To create my card I used the following shapes available in Lori Whitlock’s shop:
I hope if you’re not already using this trick, you’ll give it a try!  🙂


Silhouette Tutorial: Card Making with Mendi

Hi there!  It’s Mendi here and I’m super excited to be sharing a Silhouette technique that I’ve been having a lot of fun using lately on all sorts of cards and layouts:  Creating journaling and sentiments around the edge of a circle using Silhouette’s print and cut features!

Unfortunately when preparing for today, I realized the hard way that this print and cut technique really works best when using circles that fit within the registration marks so for those of you that have a 12×12 printer, that means your circles can be up to 10.5″ wide and sadly for me (whose wide format printer recently bit the dust) that meant I was limited to a circle 7.2″ wide.  I had planned a layout using a 11.5″ circle but as hard as I was trying to find a way around it, I decided I needed to set that aside for another day and come up with a new project that would be easier to share with all of you.
As an alternative I settled on a fun spinner style birthday card for my nephew which can double as a rainy day activity spinner (or with the addition of numbers can be a great game piece for any game a child can dream up).  I think this would also be darling idea for chores too (although I’m not sure children would agree).  😉
My papers are from Lori’s fun new 6×6 “That’s My Boy” paper pad which she designed for Echo Park.
Without further ado, here’s my video tutorial sharing how I created it:
On a side note, I layered and glued 3 of the black arrows together to give it extra stiffness and make it easier to flick for spinning.  I also enlarged the center holes a bit and made sure to not tighten my brad too much so that it can still spin freely.
To complete my card and tie my theme together,  I decided to run the back of my card through my printer for a quick sentiment (using temporary adhesive on a piece of printer paper).
For my project I used the following cutting files available in Lori’s shop:
I have a link to another example using this same technique at my blog today.  I hope you’ll give it a try!  🙂

Silhouette has some great deals starting today running through the end of the month:

  • 1 CAMEO, 1 stamping starter kit, 1 light hold cutting mat, 1 teal CAMEO dust cover for $269.99 (MSRP $351.96)
  • 1 Portrait, 1 stamping starter kit, 1 light hold cutting mat, 1 grey Portrait dust cover for $129.99 (MSRP $229.96)
  • Stamping starter kit 25% off
  • Almost everything at silhouetteamerica.com is 20% OFF! (Excludes Silhouette CAMEO®, Silhouette Portrait®, downloads, download cards, subscriptions, and gift cards.)
  • PLUS: all orders over $25 SHIP FREE (that includes the machine bundles)(Reminder: FREE shipping only applies to the lower 48 states)

To get these prices use code: LORI at checkout and shop through this link: www.silhouetteamerica.com/stamp