Reindeer Christmas Present Box Card

Hello everyone! Marcia here today. I have a holiday card to share with you today. I love to send holiday cards to friends and family as well as receive them. I especially love a box card that can sit on a tabletop or counter and doubles as home décor. This 5×7 Box Card Christmas Present Reindeer (SVGSilhouette) cut file can be found in Lori’s Store along with many other varieties of holiday cards. I used the new Echo Park Paper The Magic Of Christmas collection.

This card folds flat to fit into a standard A7 (5.25″ x 7.25″) envelope.  For assembly help, see the Shaped box card tutorial here.  Thanks so much for stopping by. Be sure to check out Lori’s Store for more holiday card ideas.
~Marcia

Mitten Gift Card Holder Tutorial

Hello everyone! Marcia here today. I have a holiday gift card tutorial to share with you today. I love to give gift cards to friends and family so they can buy whatever they want. When gifted in such a pretty package, handmade by you, it’s not the easy last minute gift so many people say they are. This Mitten Gift Card Holder (SVG, Silhouette) cut file can be found in Lori’s Store along with many other varieties of gift card holders. I used the new The Magic Of Christmas collection and also a pink pattern paper from the Our Little Princess collection.

Want to find out how to make them yourself?

1. Choose your papers and cut out all the pieces. I then like to ink the edges of the pattern papers to give the shapes dimension.

2. I wanted to add some sparkle to my snowflakes so I ran them through my sticker maker machine upside-down. This puts the adhesive on the top of the cut file. Then place it adhesive down on top of some glitter.

3. You could glue the sides and bottom of the mitten shut, but I prefer the look of machine stitching. Unlike adhesives that might give way over time, I know the mitten won’t fall apart when stitched.

4. Next, glue the white mitten edge to the upper front and back pieces of the mitten. Use a brad to attach the snowflake to the heart then adhere to the front of the mitten with foam tape.

5. Decorate as you wish. I loved using the puffy stickers and brads from the Magic of Christmas collection. They were just the right size!

6. Then repeat! They are so fun to make you won’t be able to stop. This green plaid mitten with a black heart is perfect for the guys on your list.


Thanks so much for stopping by. Be sure to check out Lori’s Store for more holiday ideas.

Rectangle Pop Up Baby Elephant Box Card

Hello everyone! Marcia here today. My niece is expecting a baby girl in November and recently had a baby shower. She has a jungle animal theme going for her nursery so when I saw this Rectangle Pop Up Baby Elephant Box Card (SVG, Silhouette) in Lori’s shop I knew it would be the perfect card for her. I used Lori’s All About A Girl collection and even created a coordinating envelope from pattern paper.

For an an assembly tutorial, see Lori’s video here.  Lori has lots of baby card ideas in her shop. Go check them all out and have some fun making your own cards!

Thanks so much for stopping by.
~Marcia

30% Off Sale on SVGs & 3D Witch Lantern Tutorial

Hello everyone! Marcia here today. Since Halloween is just around the corner, I thought I would get a jump on making some fun décor items.  I found this spooktacular 3D Witch Lantern (SVGSilhouette) in the shop and had to make it!  There are similar lanterns with pumpkins, bats, haunted house, etc… so you could make a variety to set up all over your home. They are designed with an opening in the bottom so that you can place a tealight there to light the lantern up!

Let me show you how easy they are to make.

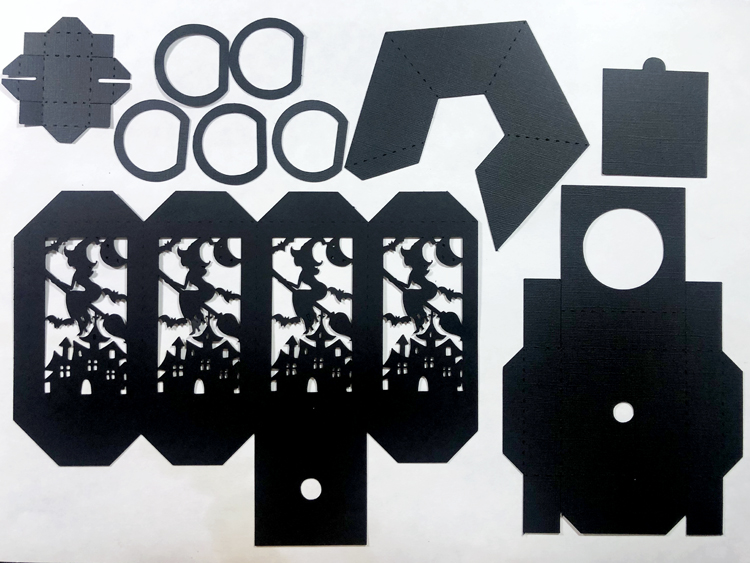
  1. Select a cardstock color and cut out all the lantern pieces. You will need 2 pieces of 12×12 cardstock.

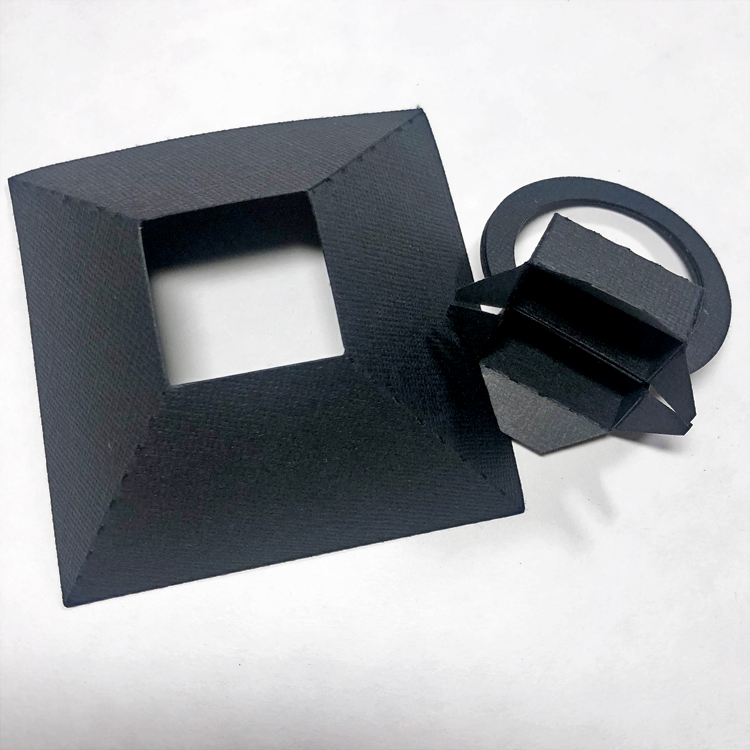
2.  I like to assemble this from the top down. Glue the 5 D-Rings together. Then create a box with the square top piece to the left of the D-Rings in the above photo. The flat side of the D-Ring fits in the slot in the box. Bend the tabs out. Glue the side of the angled lantern top. Fit the tabs from the box top into the square opening. Flip the top over and glue the tabs one at a time to the inside of the slanted lantern top.

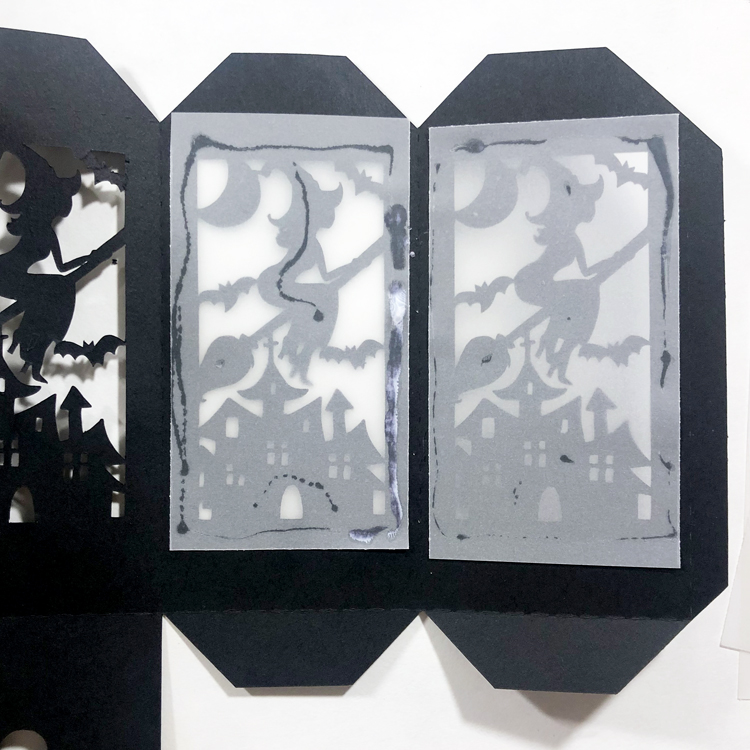
3.  I cut 4 pieces of vellum to place on the back side of the lantern design. Just be sure to apply the glue where it will not be seen. Glue the side of the lantern.

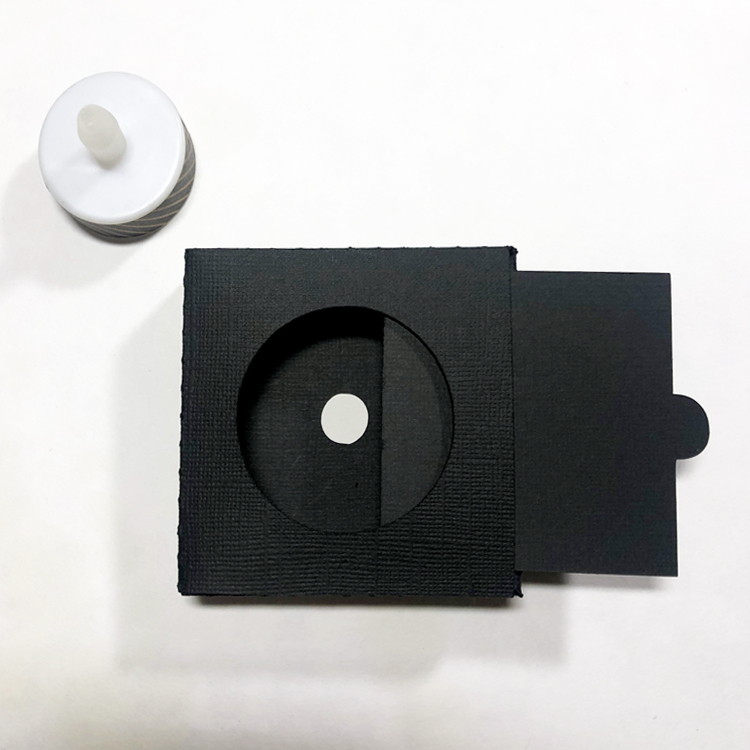
4.  Assemble the base. The small hole is for the tealight to poke through. Glue the sides of the base only, leaving a slot for the bottom panel to slide in and out allowing access to the tealight.

5.  Adhere the slanted lantern top to the tabs at the top of the middle design piece. I did this by applying glue to all 4 tabs at once and then setting the lantern top on over the glue. You can reach inside from the bottom of the middle section to make sure the two pieces adhere nicely. If your hand does not fit, use a bone folder or pencil to reach inside. Glue the bottom of the middle design piece shut. When it is dry, apply glue to the bottom of the middle design piece and fit the hole over the top of the hole in the lantern base. I found this easy to do with a tealight in place so I could be sure I wasn’t covering up too much of the tealight opening. Apply a small bit of pressure to get a good seal. I use a quick dry adhesive when creating 3D projects to reduce the time needed to hold things together until the glue dries.

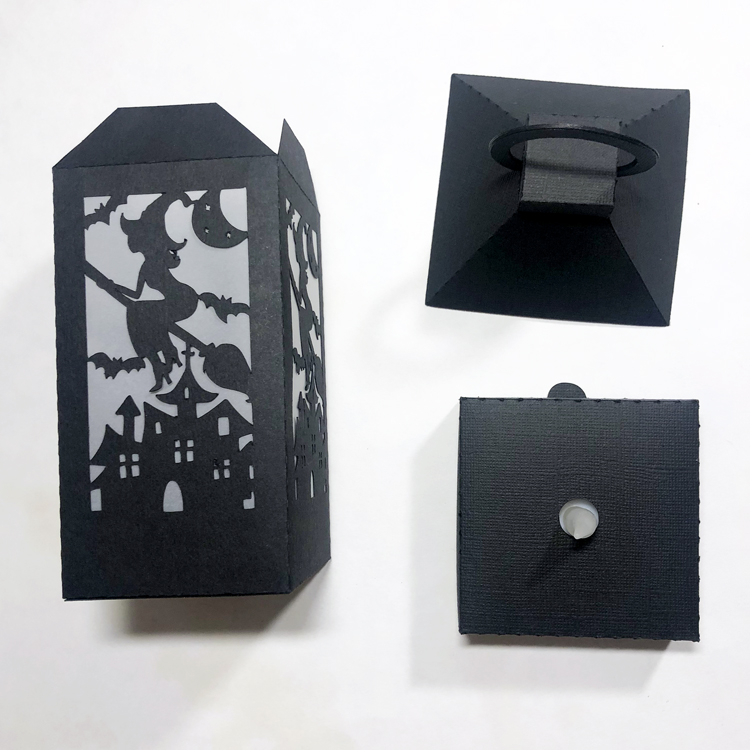
Allow the adhesive to dry completely before you attempt to pick up the lantern by the D-Rings. I love how this turned out! My photo does not do it justice. I placed a color changing tealight inside … so cool in the dark! I think I will have to make more now. Go check out all the designs in the Lori Whitlock store.

And don’t forget, all SVG files are on sale in the Lori Whitlock SVG shop through Saturday, September 17th when you use code SEP2022 at checkout!


Thanks so much for stopping by.
~Marcia

Fish Tackle Box Card

Hello everyone! Marcia here today.  Well, summer is winding down here in Minnesota but the fish are still biting at the lake!  When I saw this Fishing Tackle Box Card with (SVGSilhouette) I knew it would be the perfect card for my fisherman. It was originally intended as a Father’s Day card, but by just changing the sentiment to “Have a Reel’y Great Birthday”, I have a great birthday card.

Lori has lots of Summer card ideas in her shop. Go check them all out and have some fun making your own cards!

Thanks so much for stopping by.
~Marcia