Box Card Barn Flowers

Hi friends, I hope you’re having a great week! Can you believe this month is almost over?! Leslie here, sharing a tutorial for making a Fall themed barn box card. If you love box cards as much as I do, be sure to check out Lori’s shop because she has some really awesome ones. I used the Box Card Barn Flowers SVG cut file (Silhouette)(from the A2 Box Card Autumn Bundle) along with papers from the Pattern Fill Set Autumn Joy for the flowers. So let’s make a box card!
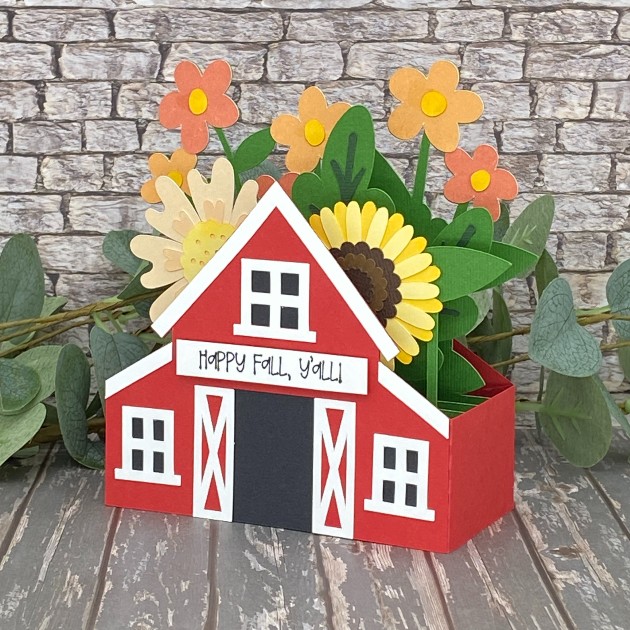
Cut The Pieces

Using your choice of cardstock and patterned paper, cut all the pieces. I used a variety of cardstock in my stash for most of the pieces along with designer papers from Lori’s Pattern Fill Set Autumn Joy for some of the flowers.
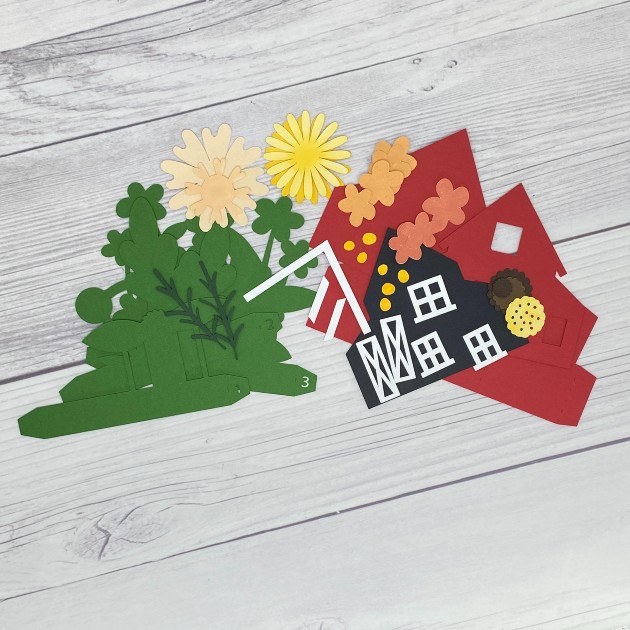
Build Front, Back and Inside Panels

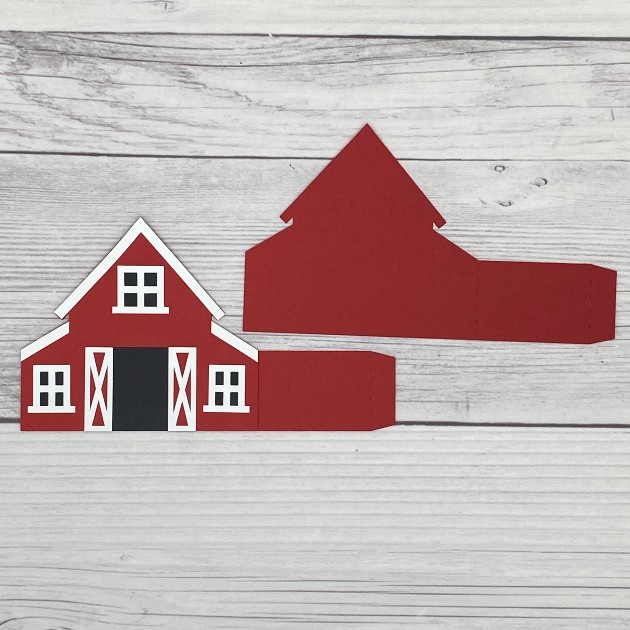
Using your choice of adhesive, build all the panels. I prefer wet glue for the ‘wiggle room’ factor. These are the front and back panels:
First insert:
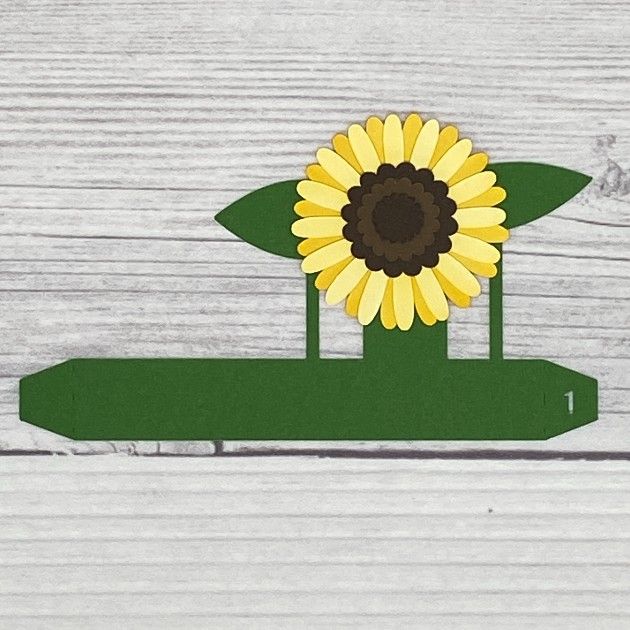
Second (middle) insert:
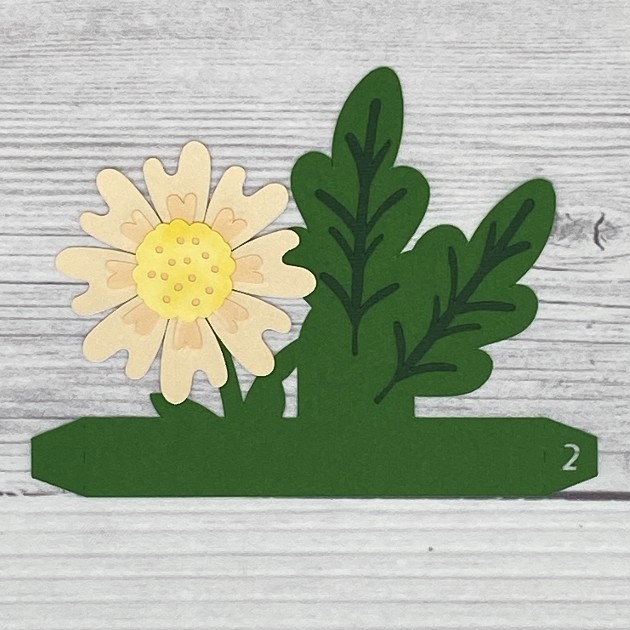
Third (last) insert:
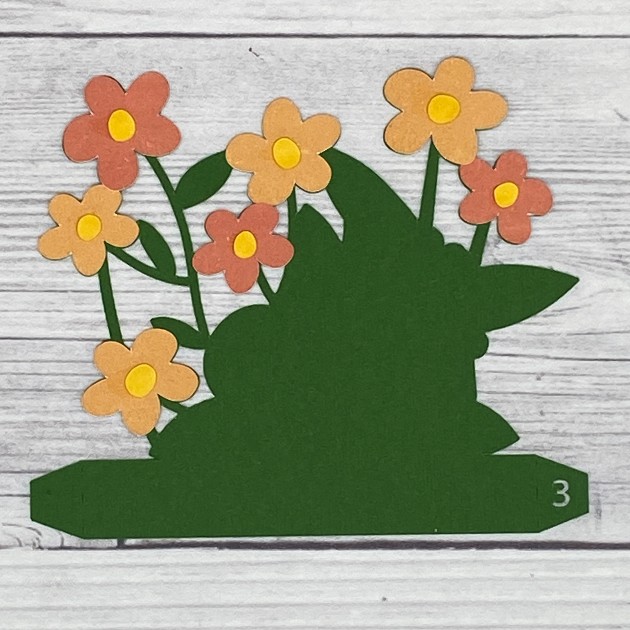
Assemble The Card

Mountain fold the score lines and adhere the tab on the right side of the front panel to the inside of the back panel.
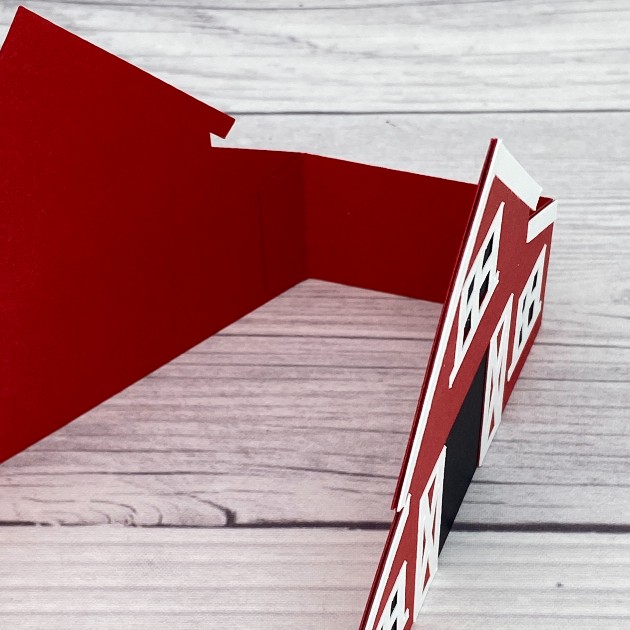
Starting with the third (last) insert, bend the right-hand tab backwards and adhere it to the inside of the card base just to the right of the score line where you adhered the tab in the last step.
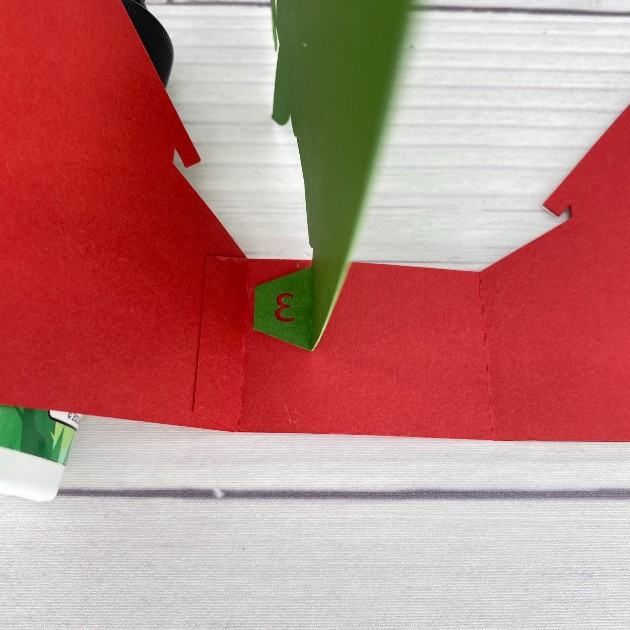
Now come in with the second (middle) insert and glue it just to the right of the third insert. So sorry but I forgot to take a photo of the first insert glued in place (ughhhh), but glue it just to the right of the second insert. They’ll be numbered 3 – 2 – 1 from left to right. The back panel is still on the left and the front panel is still on the right.
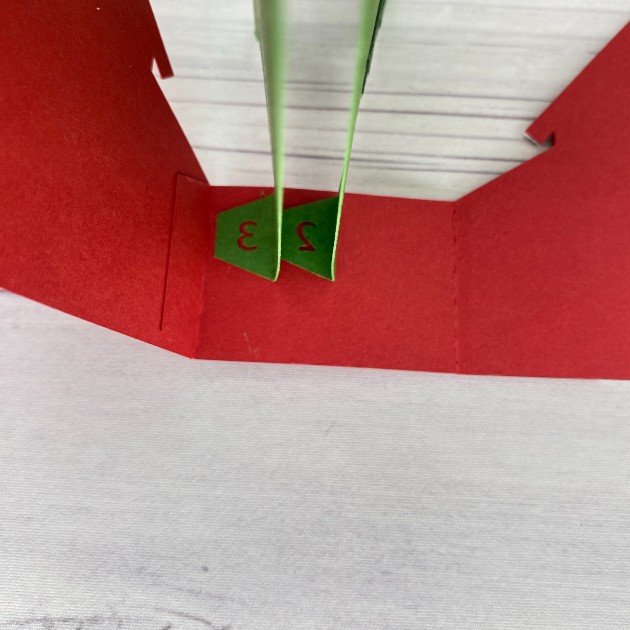
Straighten the back panel and fold all three inserts over toward the left. Be sure the bottom edges line up and apply glue to all three left-hand tabs.
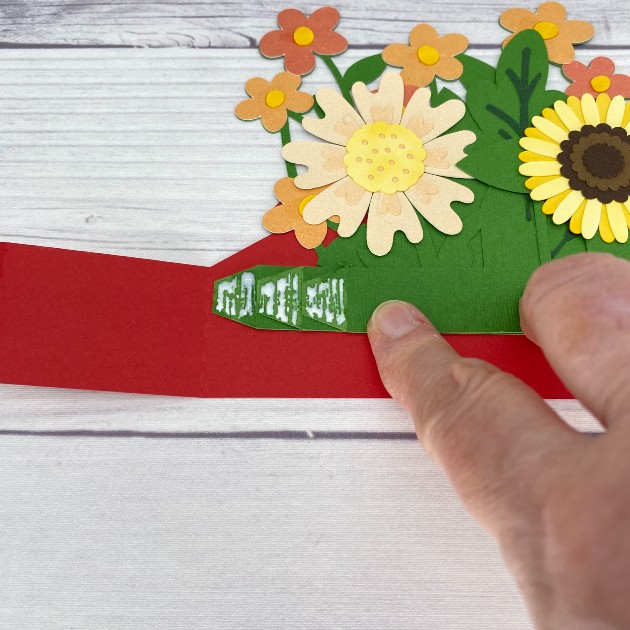
Now fold the side portion of the back panel over toward the left, catching the left-hand tabs on the inserts with the glue on them. Next, apply glue to the tab on the side portion and fold the front panel over toward the right to secure.
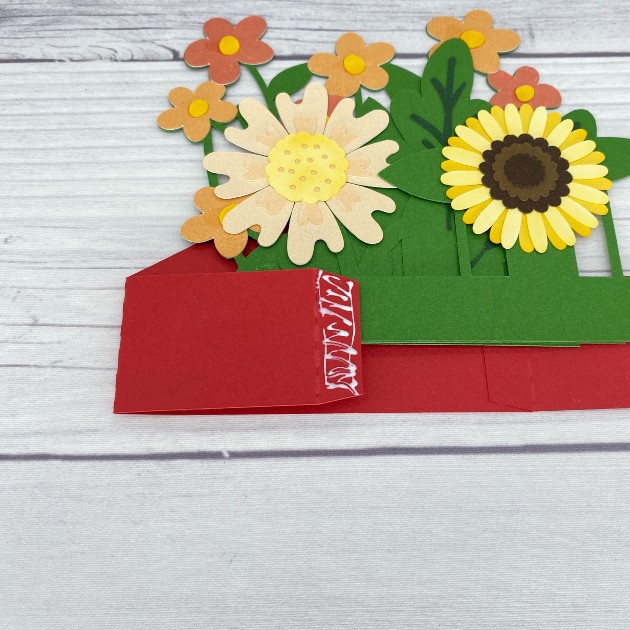
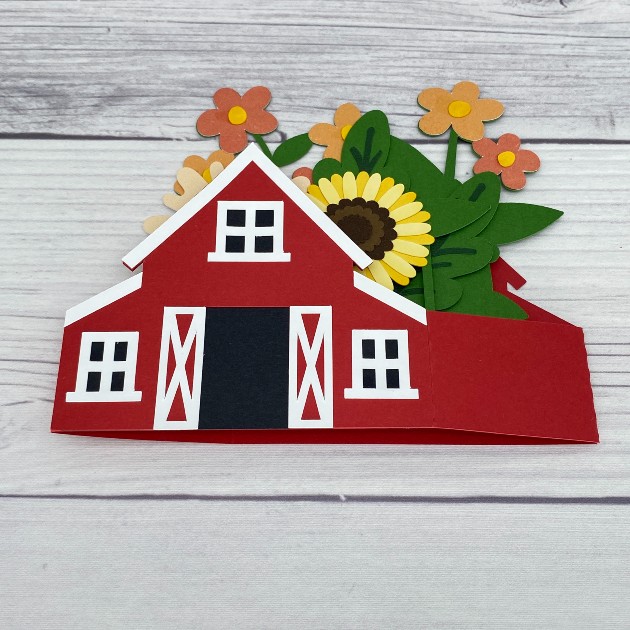
The card will now look like this.
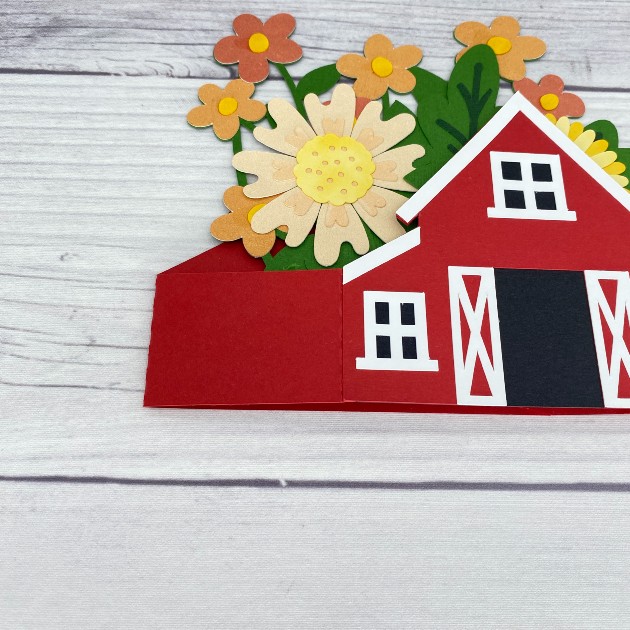
Now push the folds toward the left to help ‘train’ them to fold in either direction.
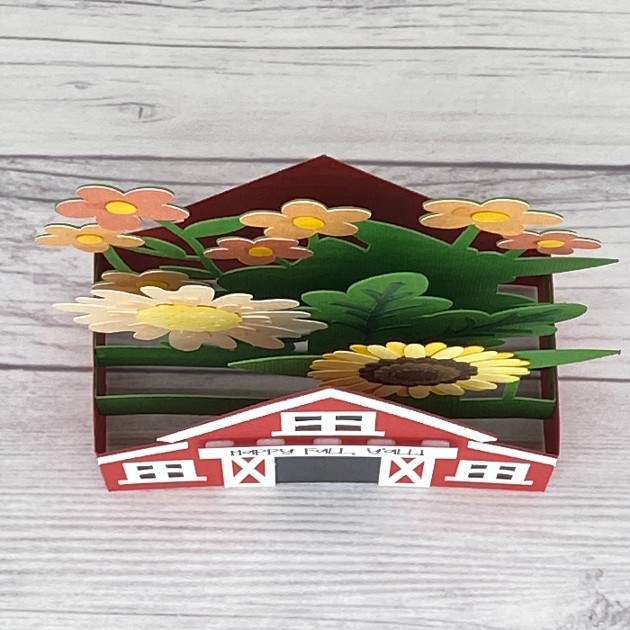
This is an overhead view of the assembled card with all three inserts.
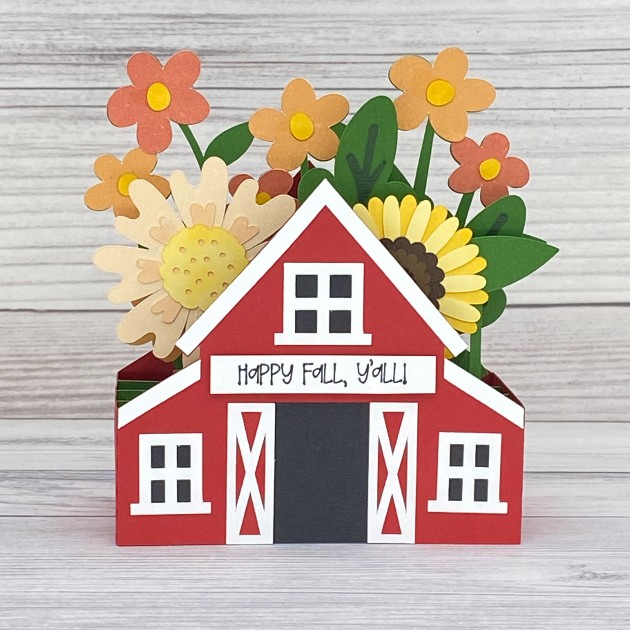
And here’s a finished frontal view. I used the draw function on my Cricut to create a fun sentiment which I popped up on foam squares.
Thanks so much for stopping by today! I hope you’ve enjoyed seeing this awesome Fall themed barn box card and you’ve been inspired to make one. They are so much fun!

Scrappy hugs,
Leslie

New Home Mini Album

Today we have a special post for you! We’re so excited to introduce the newest member of the Lori Whitlock Creative Team, Leslie Turner! 🎉

You may already know Leslie and her wonderful work with CutCardStock, Keep It Simple, ScrapbookingStore, Scrapbook Adhesives by 3L, and Cut It Up Challenges. She’s incredibly creative, and we’re thrilled to have her joining our team!

If you haven’t met Leslie yet, here’s a little bit about her—in her own words:

“I’m absolutely delighted to be the newest member of the Lori Whitlock creative team! I’m married to Ed, and we have four grown kids and six grandkids. I’m affectionately known as the crazy cat lady and crafting junkie! We are paw-rents to ten feline rescues and a Forkie (Frenchie + Yorkie) pup! I’m addicted to stamping and love making cards, ATCs, and 3-D projects (especially paper shoes, paper purses, and mini albums). I also dabble in mixed media, art journaling, altered art, and custom jewelry. If you’re looking for me, I’ll either be in my studio or getting some kitty or puppy lovins!”

We’re so happy to have you, Leslie, and can’t wait to see all the wonderful projects you create! Please join us in giving her a warm welcome to the Lori Whitlock Creative Team! ❤️✂️🎨


Here is her first post with us:

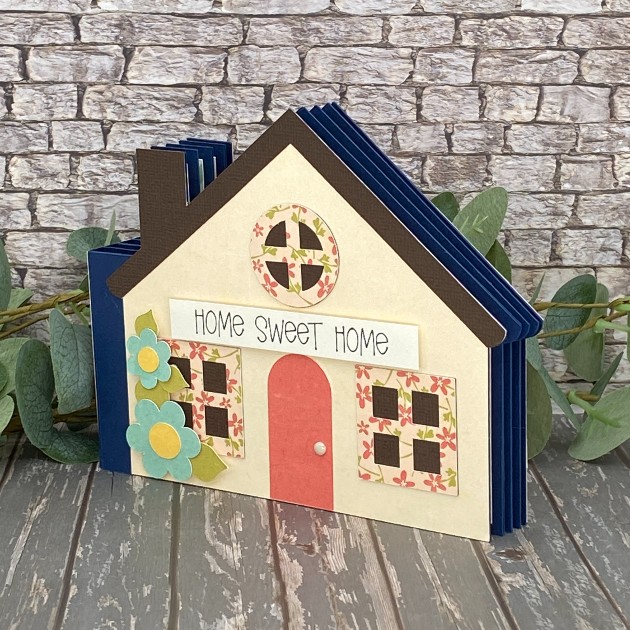
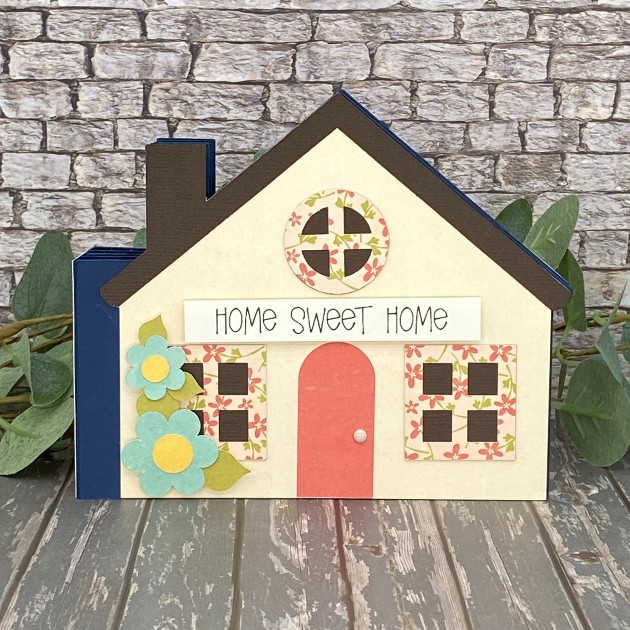
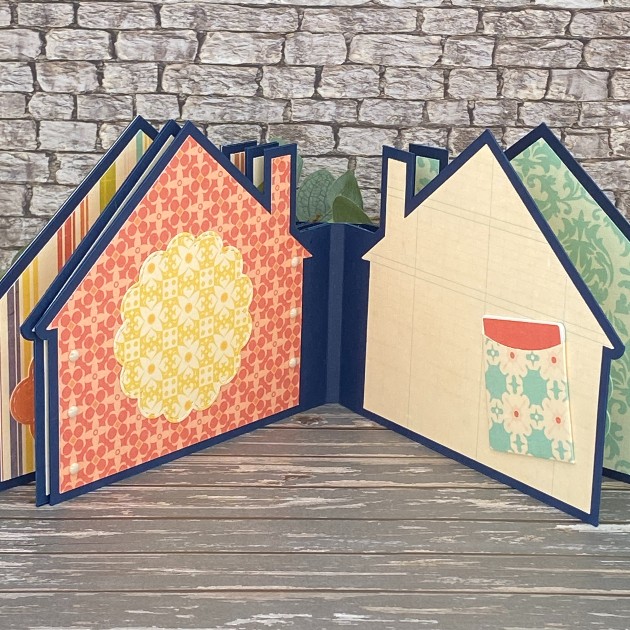
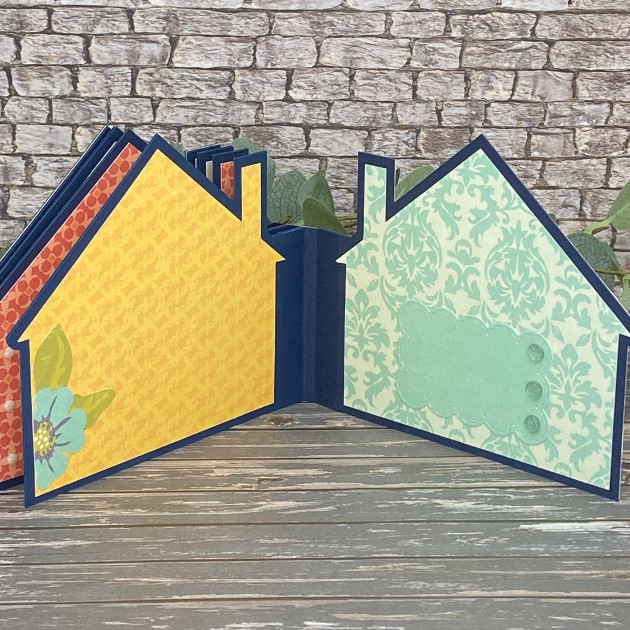
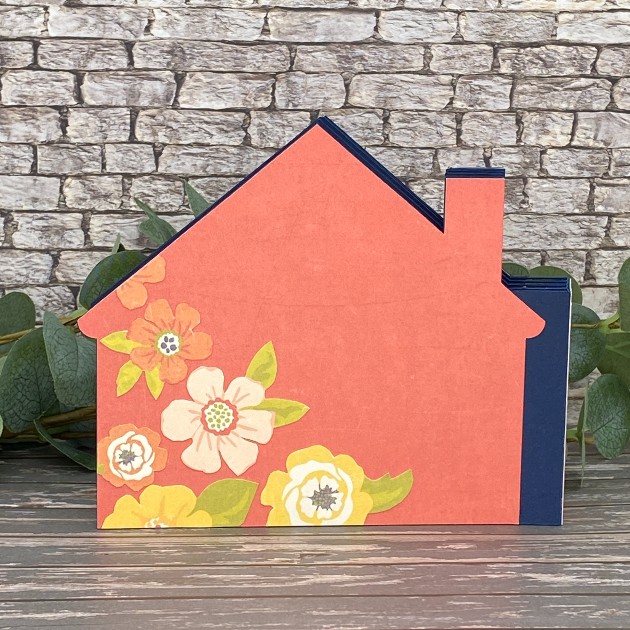
Hey everybody, happy Monday! I hope your week is off to a nice start! Leslie here, sharing my debut project as a new creative team member, and I couldn’t be more thrilled! I’ve been a huge fan of Lori Whitlock for many years and this opportunity is a dream come true for this old gal! I’m sharing THE cutest new home mini album that I created using Hidden Binding Mini Album House SVG cut file (Silhouette) (from the Hidden Binding Mini Album Bundle 2) and the Library Pocket SVG cut file. Also used papers from the Pattern Fill Set Fresh Air. I’m a mini album fanatic and a huge fan of Lori’s hidden binding mini albums, so you’ll be seeing more of them in future posts. Let me show you this one in more detail!

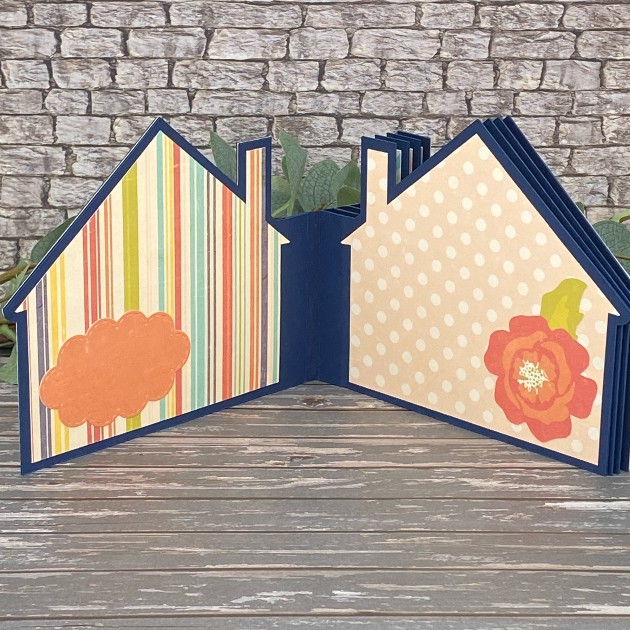
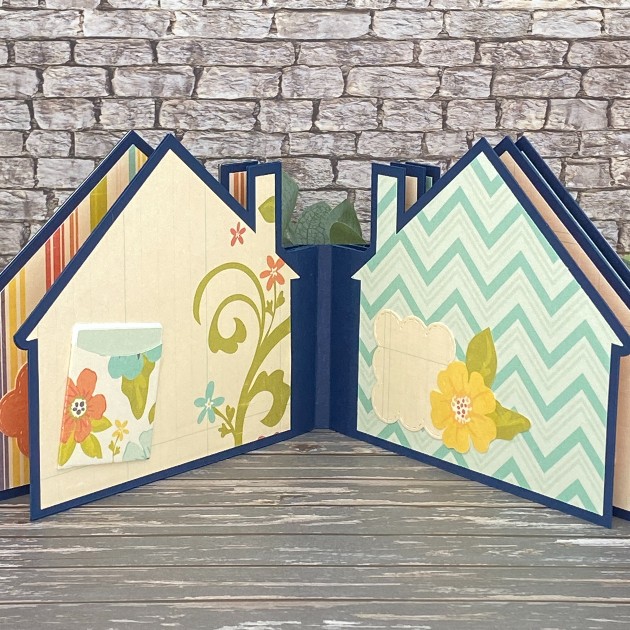
This album features a variety of designer papers from the Fresh Air Pattern Fill Set and a front sentiment created with the draw function on my Cricut. I’ve also included elements such as die cuts, library pockets, and fussy cut florals on the inside pages and the back.

Thanks so much for stopping by today! I hope you’ve enjoyed seeing this project and you’re inspired to make a hidden binding mini album. They are so much fun!

Scrappy hugs,
Leslie

DIY Darling Bag Toppers-Which One Will You Make?

Take a look at these darling DIY bag toppers using designs from Lori Whitlock. See how easy it is to create custom packaging. In this video, I am sharing a fun project focused on creating DIY bag toppers. I personally love using Lori Whitlock designs because they offer such a huge variety of options for every possible occasion or holiday you might be crafting for. For these bag toppers I’m using Lori Whitlock’s NEW paper collection “Strawberry Fields”. Links below:

Strawberry Fields Paper Collection (AMAZON LINK)

Whether you are a beginner or an experienced crafter, these DIY bag toppers are a great addition to your creative toolkit. I have included links to all the specific designs I used in the description below so you can find them easily on the Lori Whitlock site.

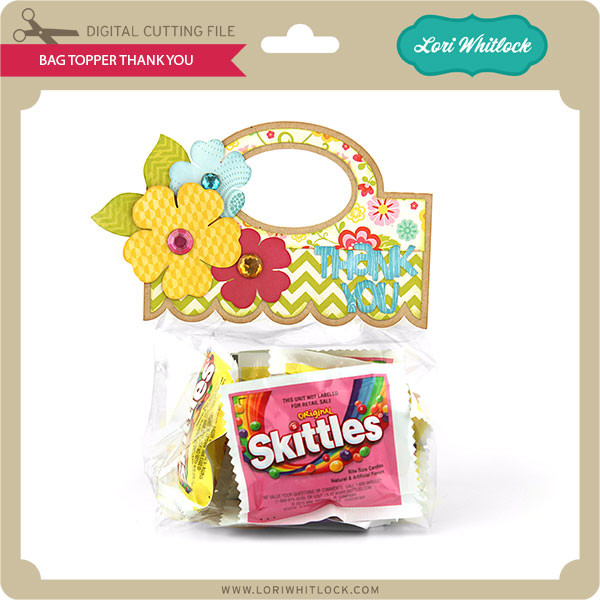
Lori’s Shop Bag Topper Thank You

Silhouette Design Store Treat Bag Topper: Thank You

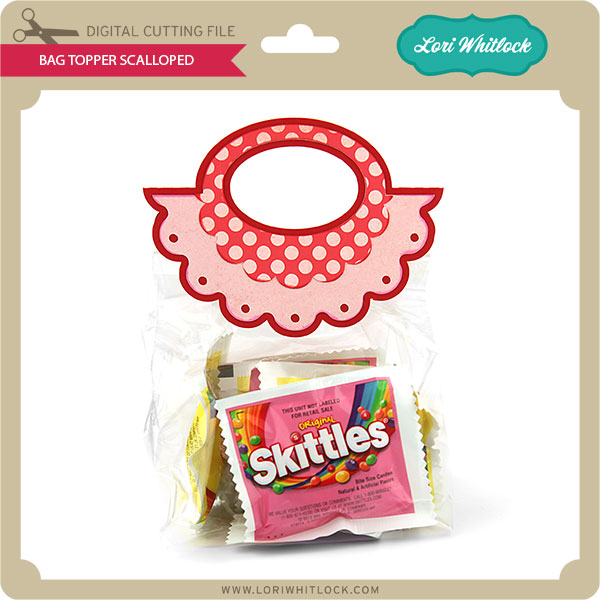
 Lori’s Shop Bag Topper Scalloped

Silhouette Design Store Treat Bag Topper: Scalloped Purse

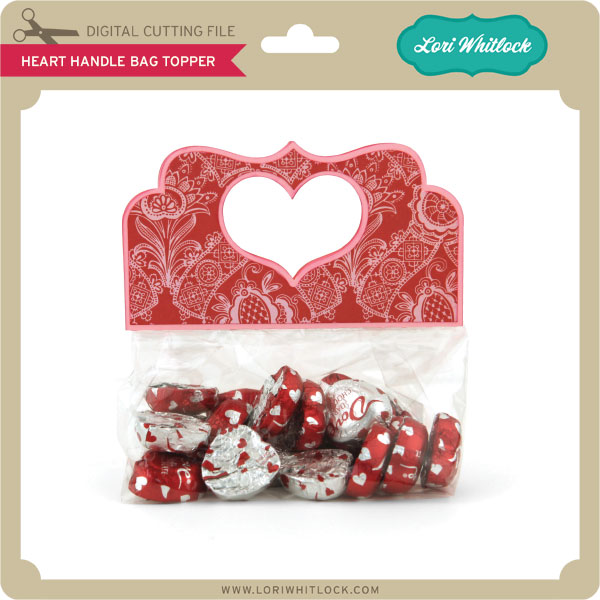
Lori’s Shop Heart Handle Bag Topper

Silhouette Design Store Heart Handle Treat Bag Topper

Happy crafting!

Holly


Pinwheel Penny Slider Card with Interactive Pinwheel Mechanism

Hi Crafty friends! I hope you are having an amazing summer.

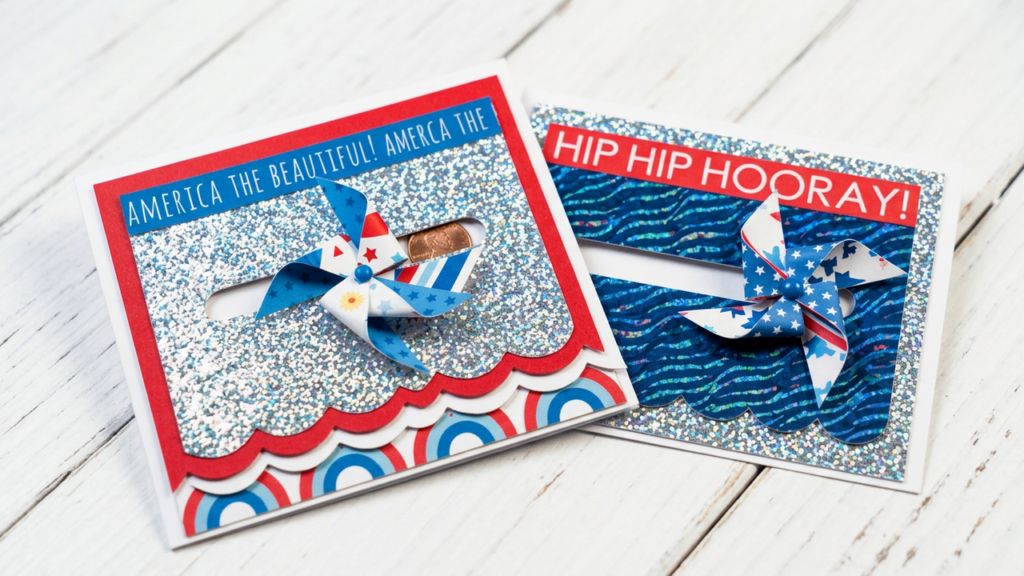
Today I will show you how to make a Pinwheel Penny Slider Card  with this easy paper crafting tutorial. See how the pinwheel spins down the track. In this demonstration, I show you how to assemble the Pinwheel Penny Slider Card file designed by Lori Whitlock. This project is perfect for paper crafters who want to add interactive elements to their handmade cards. I have chosen a patriotic theme for my design, but this card layout works beautifully for any occasion or color palette you prefer. Following these steps, you will understand how to construct the moving mechanism so your pinwheel slides smoothly. This is a great way to elevate your card making skills with simple materials and a cutting machine.

Happy crafting!

Holly

https://shop.loriwhitlock.com/penny-slider-card-pinwheel/?searchid=3263113&search_query=pinwheel https://www.silhouettedesignstore.com/pinwheel-penny-slider-card.html

DIY Patriotic Bouquet/Fun 4th of July Paper Craft

Hi everyone! I hope you are having a fun summer! Today I’m going to show you how to create a stunning 3D patriotic bouquet perfect for your 4th of July celebrations. I used the 3D Patriotic Bouquet from Lori Whitlock along with the Penny Slider Card Pinwheel for this project. I just love how the flower bouquet pops open for a darling 3D effect! I hope this 4th of July craft inspires you. Subscribe for weekly paper craft tutorials, and comment below to let me know which Lori Whitlock file is your favorite.

Happy crafting!

Holly

https://www.youtube.com/@SmilebyHolly

Lori’s Shop 3D Patriotic Bouquet (Silhouette)

Lori’s Shop Penny Slider Card Pinwheel (Silhouette)