Purse with Pocket

Hi Everyone!  I have a sneak peek of one of the new files in the shop this week!  This fun Purse with Pocket (SVG, Silhouette) is so cute!  It would make a perfect gift bag for a gift card or a small present!  Take a peek…

The purse is really simple to assemble.  The main body just folds up and glues in place, then add the pocket and straps.  I used some black cardstock and the checked paper is from the Forward in Faith 6×6 Pad from Echo Park Paper.  The straps are held together with some gray mini brads from my stash.  The flower is put together by stacking the pieces and gluing in place.  I love the finished file, it almost looks like something you could find in Nordstrom!  That’s it for me today, thanks for stopping by to peek!

BLOG * INSTAGRAM

Life’s a Beach!

I don’t know what it is about gnomes, but I just think they are adorable!  Add some sand and a beach ball and this cute little Box Card Beach Gnome (SVG, Silhouette -Coming soon)  is the perfect summer card!  Take a peek…

He even has bare feet… too cute!  This card is easy to assemble and  folds flat to fit in an A2 Envelope.  For help with assembly you can see this post.    I hope he has given you a reason to smile today!  That’s it for me, thanks for stopping by to peek!

BLOG * INSTAGRAM

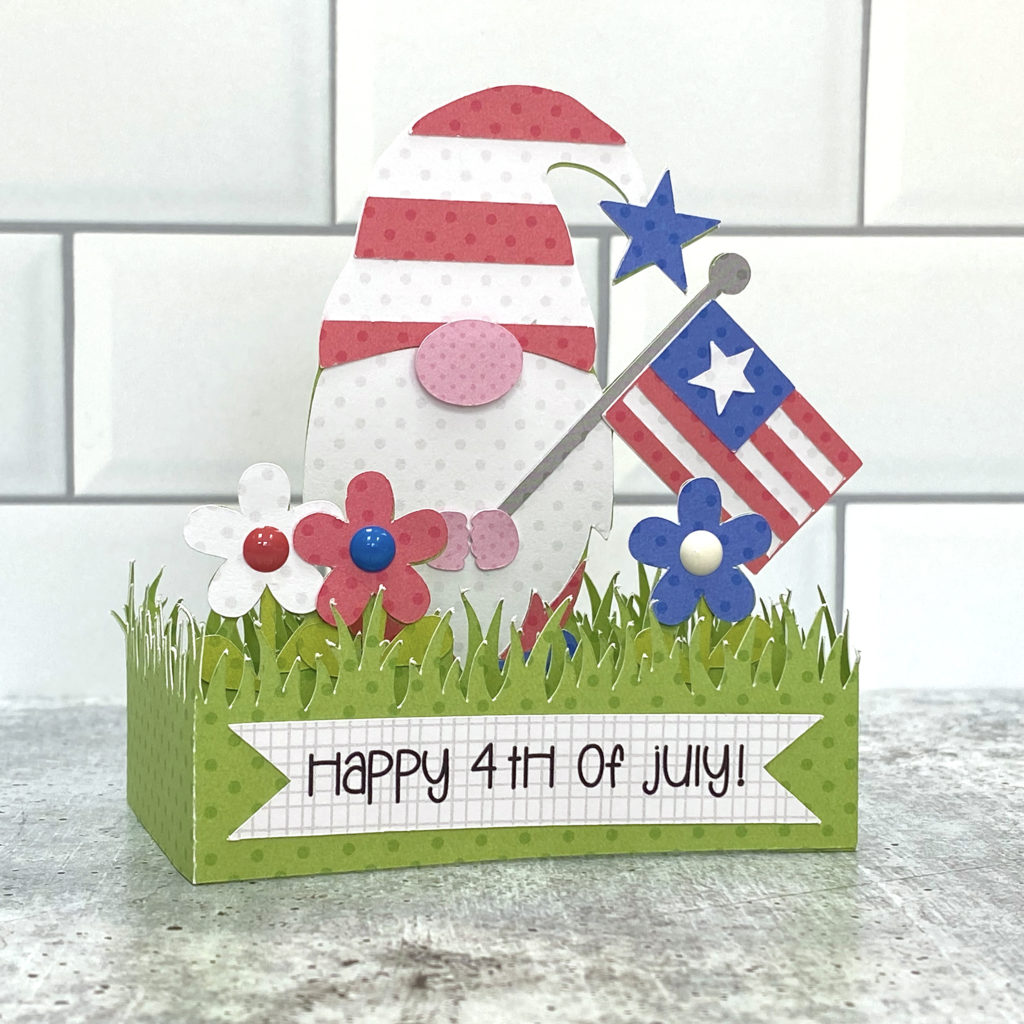
4th of July Gnome Box Card

Hi Everyone!  It’s Kathy today with a fun card … the Box Card Gnome 4th of July (SVG, Silhouette)  …take a peek…

How cute is this little gnome??  I just love him and he goes together easily.  (For help with shaped box cards, see this post)   I added some enamel dots to the flower centers for some dimension, and the sentiment was done using the print and cut feature of my cutting machine.  He folds flat to fit in a standard A2 Envelope.   Lori has one here (SVG, Silhouette).  He looks so cute sitting on my shelf, and it would be a great card to send to a loved one to celebrate the holiday.

I hope you all have a wonderful Fourth of July!

BLOG * INSTAGRAM

Lemonade Anyone?

Happy Memorial Day!  To me it always been the unofficial start to summer…  and summer makes me think of sitting on the patio or boat sipping lemonade!.  When I saw this adorable Lemonade Stand Box Card (SVG, Silhouette) I just had to make it!

This “sweet” card (pun totally intended…) is easy to assemble.  The sentiments are done using the print and cut function of your cutting machine, and if you need a little help, this general assembly tutorial for shaped box cards will get you pointed in the right direction.  It also folds flat for mailing and will fit in the free Center Box Card Envelope in Lori’s Shop.  It’s the perfect little card to send to someone to let them know you’re thinking of them!

That’s it for me today, thanks for stopping by to peek!

BLOG * INSTAGRAM

Hexagon Box with Dahlia Tutorial

Hi Everyone!  Have you seen the new Hexagon Box with Dahlia (SVG, Silhouette) ?  It’s the perfect size for a little treat or gift!  It would be a great way to package up a Mother’s Day gift or a little something for someone special!  Take a peek…
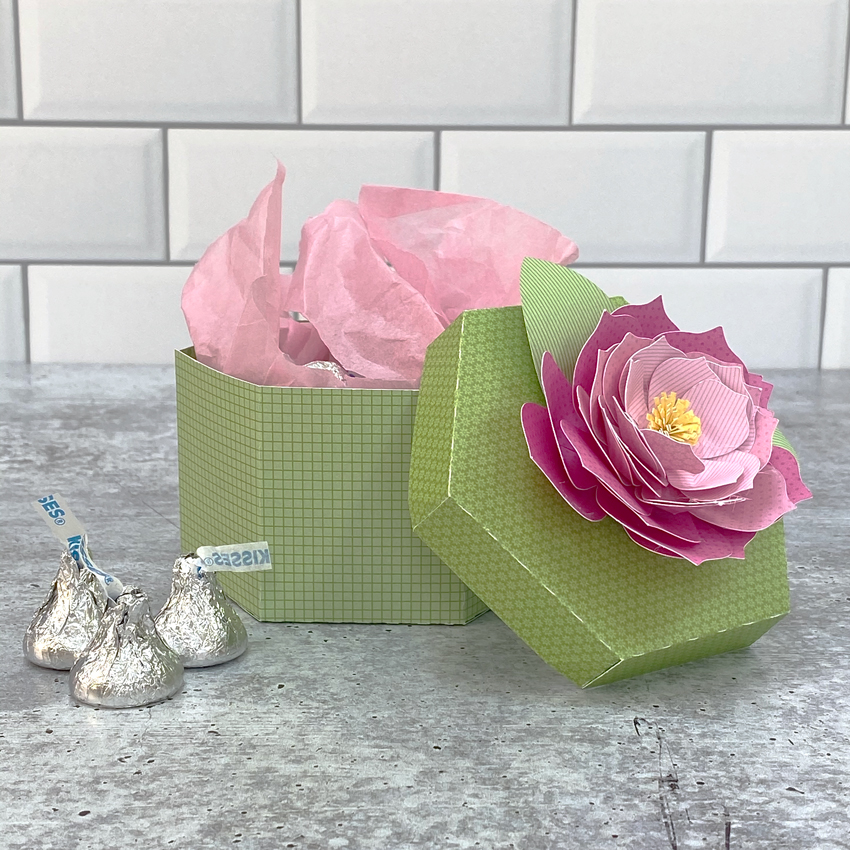
I put together a tutorial showing how to assemble the Dahlia flower.  It takes a little patience, but the results are well worth it!  You can also use this tutorial to assemble the flowers for the Rectangle Box Dahlia (SVG, Silhouette).

  1. The flowers are made up of 12 pieces (6 halves).  Start by curling the petals back on each of the halves.  I used the handle of my spatula, but you could use a pencil or dowel.
  2. There are splits at the bottom of each petal (3 total per half)  For each petal, cross the splits over eachother slighly and glue.  I used hot glue, it made the process go much faster.  You can use regular glue, just make sure to hold the splits in place until they dry.
  3. Overlap and glue the two sides of each flower layer together.  This does not need to be done perfectly, just try to make them relatively even.
  4. Do this for each of the flower layers (6 total).
  5. Stack the layers, largest on the bottom to smallest on top, gluing between the layers.
  6. For the flower center, roll the strip as shown.  Glue the end to hold it in a rolled shape.
  7. Using your fingers, “fluff” out the top strips.
  8. Glue into center of the stacked petals.
  9. Curl the leaves back using a dowel or pencil.  Overlap the split ends and glue.
  10. Glue leaves to bottom of the stacked flower.
  11. For the box base:  Fold all of the score lines in the same direction.  Form the hexagon box gluing the tabs to the bottom piece all around.  Glue the side tab to complete the box.
  12. For the cover, fold the score lines all in the same direction.  Connect the sides of the cover by gluing the triangular tabs as shown.

Finish the box by gluing the dahlia to the top of the box.
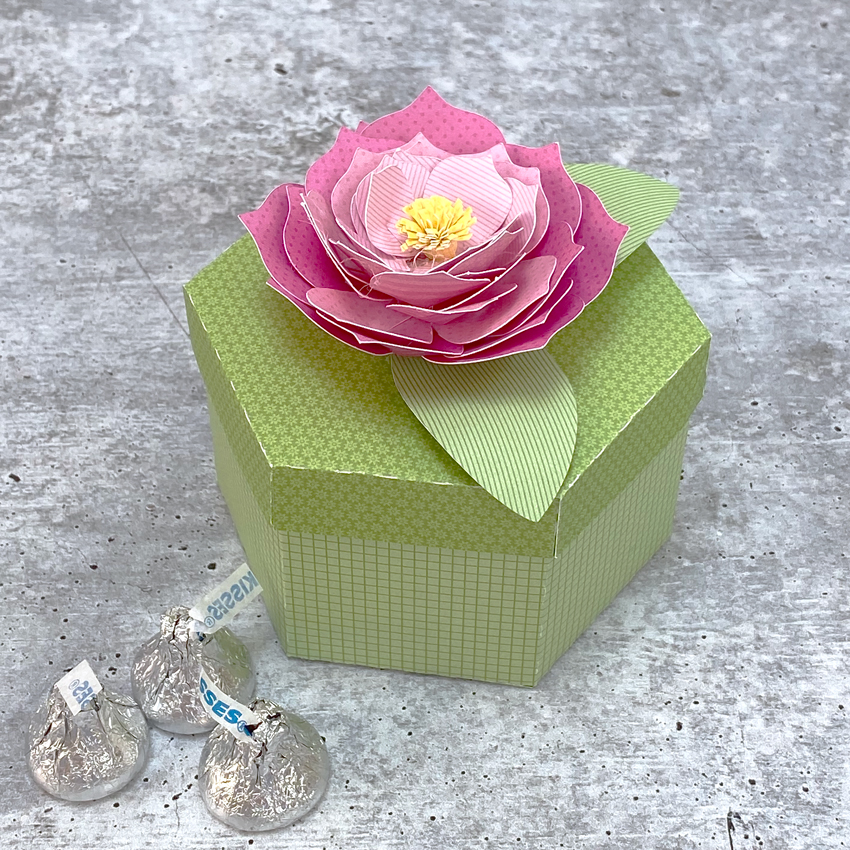
All that is left is to fill the box with a little something! The dahlia does take a little patience, but the results are SO worth it!  That’s it for me today, thanks for stopping by to peek!

BLOG * INSTAGRAM