Christmas Countdown Step Card Tutorial

Christmas will be here before we know it.  To help count the days, I created this fun little Christmas Countdown Step Card (SVG, Silhouette ) for Lori, and it was released this week!  It’s such a fun card… you can make one for yourself, or mail one off (I recommend a 5×7 padded envelope) to someone special!  I pieced this one together using A Lumberjack Christmas from Echo Park Paper.  I put together an assembly tutorial below.

For the base of this card, you want to make sure you are using a good at least 80lb cardstock so it will retain it’s shape.

  1.  Start by cutting out your pieces.  The numbers and “days” until were done using the print and cut function of my cutter.  If you need help with that, we have a tutorial for Silhouette here and Cricut here.  I pieced together the Santa, Tree, presents and mouse.  I added some enamel dots to my tree for “ornaments.”  In addition to the file pieces you will need a mini clothespin.
  2. Fold the card base into the step card.  This picture shows the folds.
  3. Add the decorative panels to the card as shown, then the “days until” piece.
  4. Fold the pocket piece and glue.  Adhere to the back of the card.  This pocket holds the extra day numbers when not in use.
  5. Glue the Santa and tree to their steps as shown.  Be sure to only add adhesive to the parts that will be glued to the steps, nothing above the step “peak.”
  6. Add the Christmas word and mouse with present to the bottom front.
  7. Add the mini clothespin to the top center of the “days until” piece.  Make sure it doesn’t stick up higher than the peak.
  8. To clip the numbers, overlap them a bit, and secure in the clip

Now you’re ready for the countdown!  If you make one of these, please be sure to tag Lori Whitlock on Facebook and Instagram.  We always love to see your creations!  That’s it for me today, thanks for stopping by to peek!

BLOG * INSTAGRAM

Cat Explosion Box

Hi Everyone!  Lori has some fun new files coming this week, and I was lucky enough to be able to get a sneak peek!  Being a crazy cat lady, I simply could not resist the new Explosion Box Cat (SVGSilhouette Store-coming soon)!  Take a peek….

The box starts out closed with an adorable kitty on the box top.  Lift up the lid and surprise!

You get a fun little kitty house, along with pockets along the sides.  You could add photos to the pockets, a little note or even a gift card!  Even more fun… the top of the kitty house comes off, to reveal a space where you can put a little something for the recipient.

What a fun way to give a gift to your favorite cat person!  This box and others will be available in Lori’s SVG Shop and the Silhouette Store this week!  That’s it for me today, thanks for stopping by to peek!

BLOG * INSTAGRAM

Floating Easel Cards Tutorial

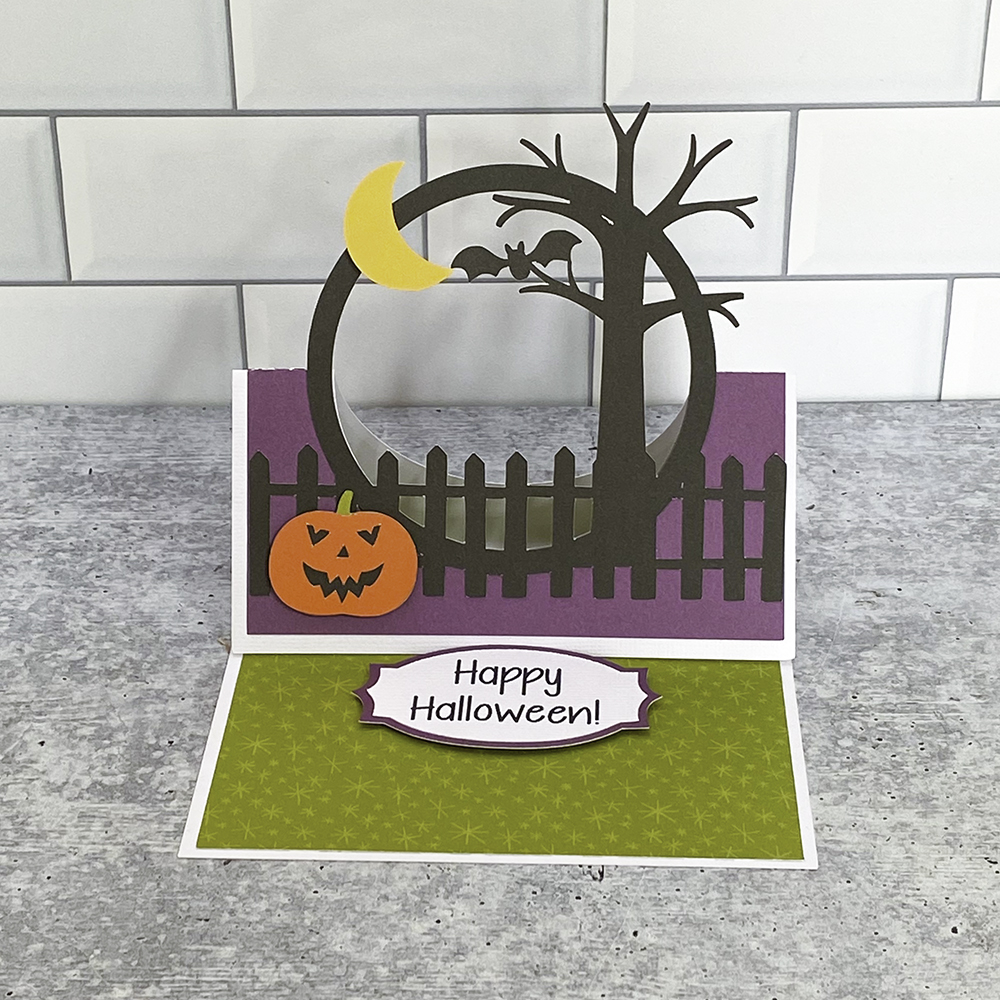
I love Halloween… When my daughter was little, I loved having parties with the kids, and of course who can resist the candy?  Halloween will surely look different this year, but we can still send some spooky-fun cards!  The new Halloween Floating Easel cards are the perfect solution.  There are two new versions, the Floating Easel Card Spider Web (SVG, Silhouette) and the Floating Easel Card Haunted House (SVG, Silhouette).  Take a peek…

I put together a quick tutorial for the floating easel cards using the Haunted House version.  It’s really pretty simple.

Start by cutting the pieces and piecing together the ghost face and the pumpkin. I also glued the solid square into the inside of the card as shown. The sentiment is done using the print and cut feature of your cutting machine.  To assemble you will also need a piece of fishing wire or clear jewelry thread.

  1.  Add strong adhesive ( I used score tape) to the blank ghost piece.  Lay the piece of fishing line over the center.
  2. Cover with the ghost “face” piece.
  3. On the haunted house frame without the fence (call this the back frame)  Add some score tape or strong adhesive to the center of the top and the center of the bottom.   Center the ghost inside the frame and pull the fishing line tight and stick the ends to the tape on the frame.  Cover with the top frame (the one with the fence, not shown)
  4. I secured the fishing line a bit more by folding it over the back of the frame and securing with some washi tape.  I then trimmed the extra fishing line.
  5. Fold the card base closed.  Add the decorative panel to the outside, making sure to align the openings.
  6. Fold the top in half along the score lines.  Attach the frame to the bottom half of the card only.  Make sure you do not add adhesive to the top half of the house.
  7. Add the little pumpkin to the front.
  8. Using some foam tape or pop dots, add the sentiment to the inside of the card about 2/3 up the card so that when the card top rests against it the house stands up.

One more note… if you wish, you can add a second string going horizontally to secure the ghost further and make sure it does not twist.

When you fold the top of the card and stand it against the sentiment, it looks like the ghost is floating in the house!

The card also folds flat and will fit into Lori’s Center Box Card Envelope here.  That’s it for me today, thanks for stopping by to peek!

BLOG * INSTAGRAM


Impossible Card Birthday Cat

I just love the new impossible cards in Lori’s Shop.  They are so simple to assemble and they are really cute!  She has a new card in the shop this week… the Impossible Card Birthday Cat (SVG, Silhouette – coming soon).  Being a crazy cat lady, I just couldn’t resist!  Take a peek…

I just love the kitty’s happy little face!  The impossible cards come with envelopes, so they are ready to send as soon as you make them!  If you need help assembling, Lori has a tutorial here.  Check out all of the Impossible Cards here in Lori’s Shop. They are also available in the Silhouette Store.  That’s it for me today, thanks for stopping by to peek!

BLOG * INSTAGRAM