3D Flowers Tutorial with Kathy

Hi Everyone!  It’s Kathy today with a quick tutorial showing how to assemble some of the new 3D Flowers!  Lori has a lot of Flowers and recently released a few more…

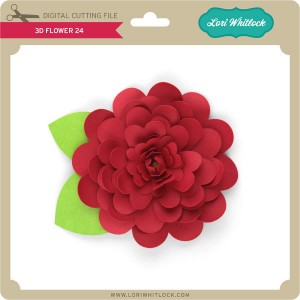
They are really very simple to assemble, and I just want to show you a couple of tricks to make them look more like a real flower.  I chose 3D Flower 24  (here in Silhouette)for this purpose.

First, you want to cut your pieces, and find a brad that is a good size for the size you’ve made your flower.  Remember, all of these flowers can be sized in your cutting software to meet the needs of your project.

Next, to get more volume in your flowers, you want to curl the petals.  I use the handle of my Silhouette Spatula to do this, but you could use a pencil, or some other round tool.  You can also ink the edges of the flowers to give them a more variegated look.

Once your petals and leaves are curled, you can start assembling your flower.  I start by stacking my petal layers by size.  You want to start with the smallest petals.  Thread them onto the brad, making sure to alternate the petals to fill in the spaces and make your flower look fuller.

For my flower, I threaded the first 4 sizes of petals on with the flowers curled up.  I flipped the last 2 layers so they curled down.  This gave my flower a little more of a dome shape.

After all your petals are threaded onto the brad, add your leaves, and open the tines of the brad to secure it.

To finish the flower, use your fingers to “fluff” up the petals, and fold the very center petals up and around the brad.  The flower is now ready to add to your project!  These flowers can be added to frames, cards, scrapbook layouts… the possibilities are endless!

That’s it for me today, thank you for stopping by to peek!

Flowers shown:

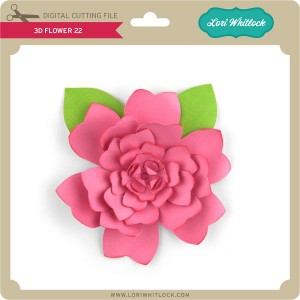
3D Flower 22 (here in Silhouette)
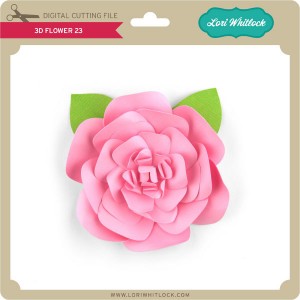
3D Flower 23 (here in Silhouette)
3D Flower 24 (here in Silhouette)
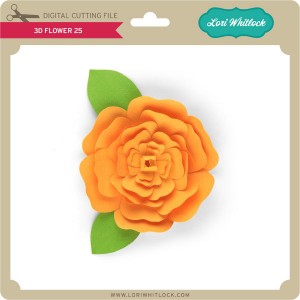
3D Flower 25 (here in Silhouette)

Sneak Peek with Kathy

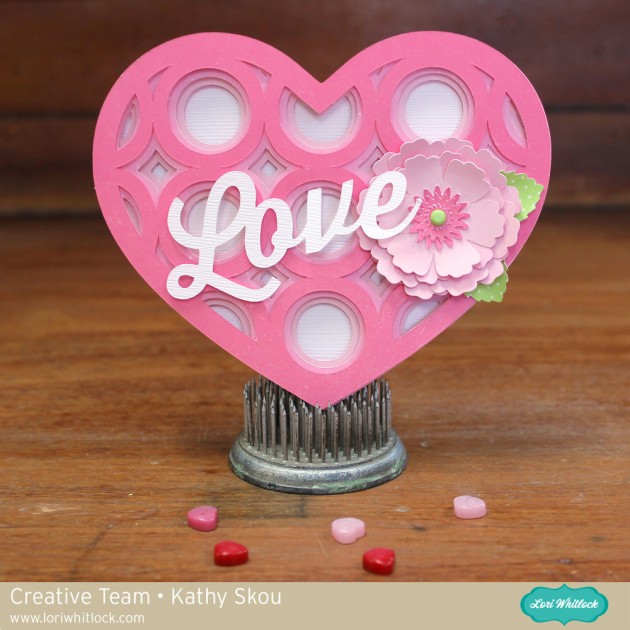
Hi Everyone!  It’s Kathy today with a sneak peek of a new card that will be available tomorrow!  It’s another of the Stacking Base Cards, this one Valentine-themed.  Take a peek…

This is the Heart Shaped Card Stacking Card Base.  I assembled the card using some of the solid papers from the Celebrate Easter and Happiness is Homemade Collections from Echo Park Paper.  I embellished it with the LOVE word from the Mason Jar Bouquet Box Card (here in Silhouette) and the 3D Flower 17 (here in Silhouette.) I just love how you can customize the bases to suit almost any occasion!  You could use this one for Valentine’s Day, a wedding or just Love!   The Heart Shaped Stacking Base Card Base will be available this week in the Lori Whitlock SVG shop and The Silhouette Store!  That’s it for me today, thanks for stopping by to peek!
Valentine Kisses Heart Box Tutorial with Kathy

Hi Everyone,  it’s Kathy today with a tutorial showing how to assemble the new Valentine Kisses Heart Boxes!  As soon as I saw this box, I had to make it, it’s such a cute little gift for someone special!  I made the Small box which holds four kisses, but it also comes in a larger size.  I’ve added links to both at the end of this post.

The boxes are really pretty simple to assemble.  These are the pieces that come with the small box.

I started by assembling the box pieces that are attached to each of the hearts to form the bottom box and cover.  The bottom box has slightly higher sides when glued together.

For both the top and bottom, layer the hearts and glue together.

You will notice on each of the scalloped hearts small notches have been cut.  These are there to help guide the placement of the triangle boxes.  The two scalloped hearts are different, one has a slightly larger area designated by the notches.  This is the piece for the cover.  Glue the box with the shorter sides to this heart, and the taller sides to the other heart.

The next step is to assemble the insert pieces that will hold the kisses.  Glue these strips into little triangles.  I glued the tab on the outside.

Glue the little triangle pieces together so that the form the shape of the box bottom, then slide them into the box bottom.

All that is left is to add some kisses!

You can customize the top of your box with stickers, and other embellishments to make a one of a kind treat for someone special!

Here are the links to all of the Valentine’s Heart Boxes.  There is also a Valentine’s Nugget Box which I’ve included below.  The assembly is very similar, the difference is that the box pieces and inserts are square to fit a Nugget Candy.  The guiding notches on the scalloped hearts form a square.

Valentine Kisses Heart Box Small (In Silhouette Store here)  Holds 4 Kisses
Valentine Kisses Heart Box Large (In Silhouette Store here)  Holds 9 Kisses
Valentine Nuggets Heart Box (In Silhouette Store here)  Holds 3 Nuggets

That’s it for me today, thank you for stopping by to peek!


A2 X-Card Dinosaur with Kathy

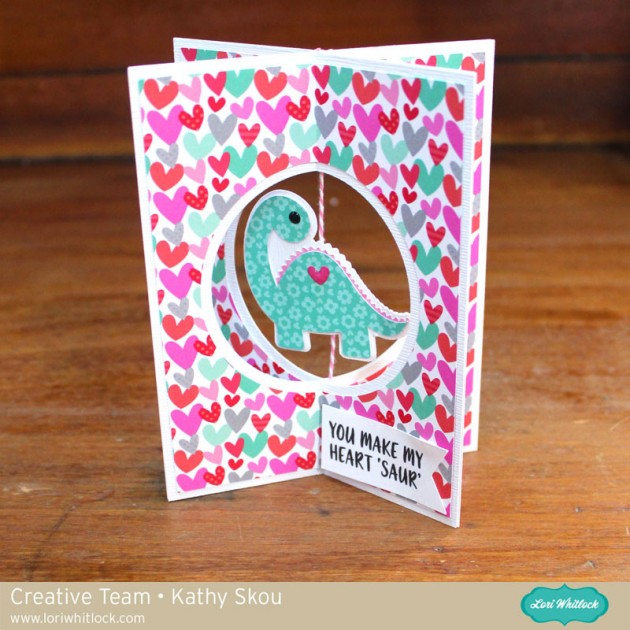
Hi Everyone, and Happy New Year!  It’s Kathy today with one of Lori’s new A2 X-Cards!  These cards are just adorable!  I fell in love with the A2 X-Card Dinosaur (here in the Silhouette Store) as soon as I saw it!  Take a peek:

How cute is that little dinosaur??  There are plenty of other A2 X-Cards  in Lori’s SVG Shop, including a Valentine’s themed Bundle!   That’s it for me today, thanks for stopping by to peek!

A2 Snow Globe Shaker Card Tutorial with Kathy

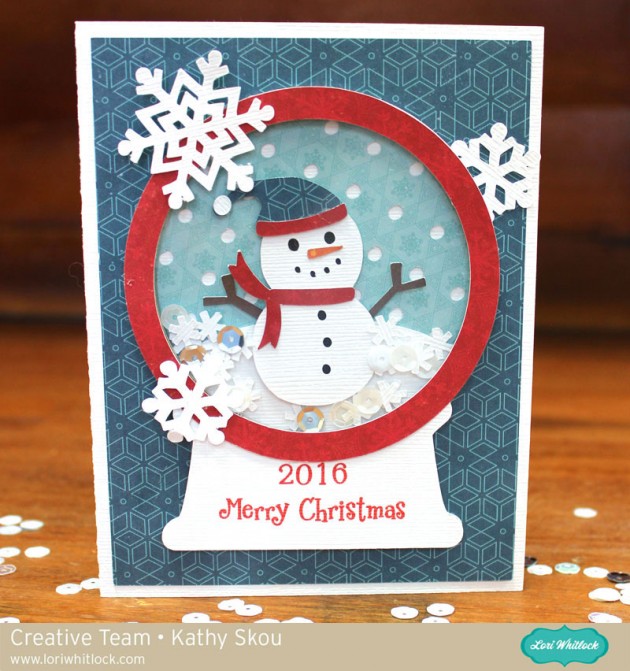
Hi Everyone!  It’s Kathy today with a tutorial showing how to assemble the new A2 Snow Globe Shaker Cards. (in Silhouette here)  I made the adorable Snow Globe Shaker Snowman Card  take a peek…

A lot of people get nervous when they see a print and cut piece on the card, but it really is easy.  I’ll show you how I did it using my Silhouette, but you can also see a print and cut tutorial for Cricut here.

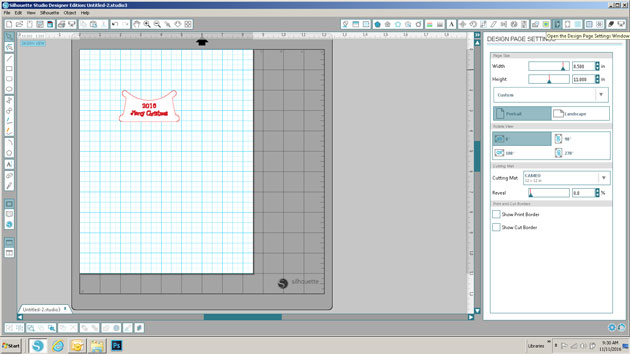
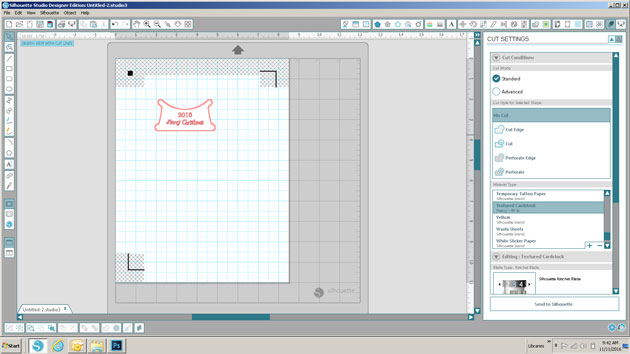
First you want to go into Design Page Settings and set your paper size to 8.5″x 11″.  This tells Silhouette you’ll be printing and cutting a regular letter sized paper.  Add the Snow Globe Base piece with the sentiment to your mat.

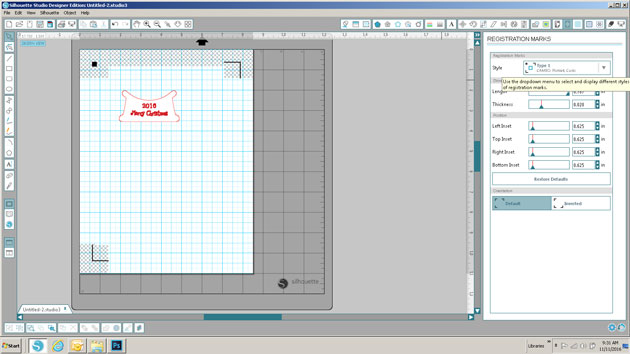
Next, click on the Registration Marks button and select type 1 registration marks for Cameo or Portrait.  You’ll see the black lines and grids show up on your mat.  Make sure your design is inside the darker marks on your mat.

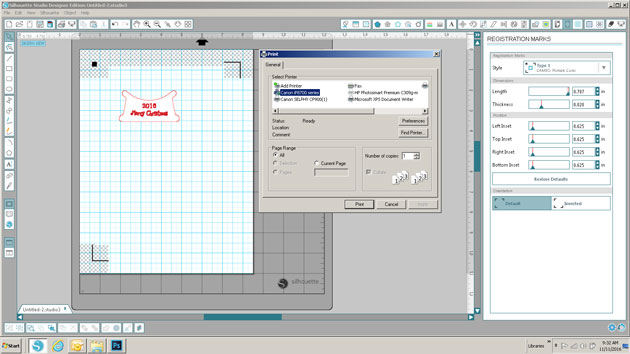
Once things are set up, click on the printer icon and send the design to your printer.

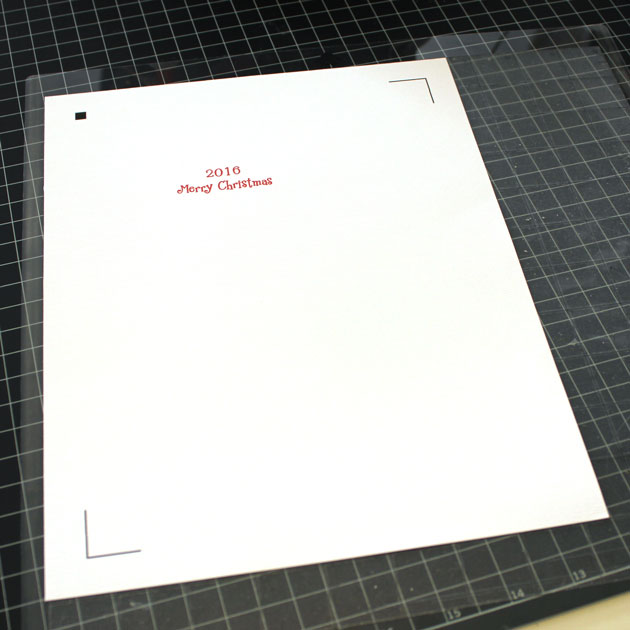
This is what the page will look like with the registration marks.  Place the paper on your cutting mat.

Once the design is on your cutting mat, load it into your Silhouette, and go back to the software and select send to Silhouette.  Make sure the cut settings are set for the type of paper you are cutting.

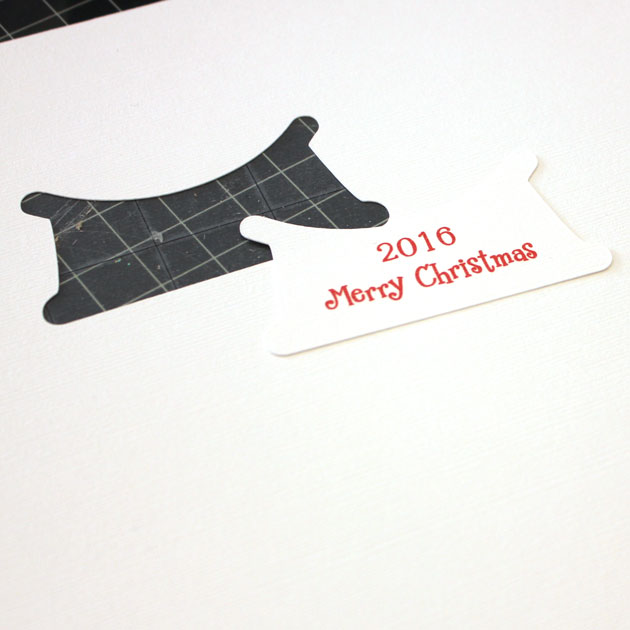
Your Silhouette will read the registration marks then cut the design around your printed sentiment.

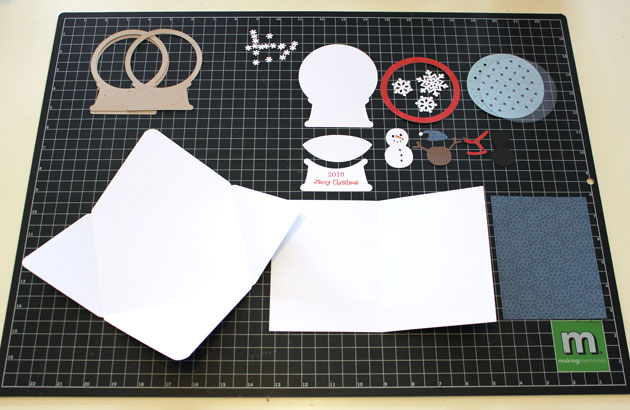
Now to assemble your card!  Start by cutting all of your pieces.  The design calls for cutting 3 of the snow globe outlines from chipboard.  I used Silhouette Chipboard for this, but if you did not have chipboard, you could cut six pieces from a thicker cardstock.

You want to start by assembling your snow globe.

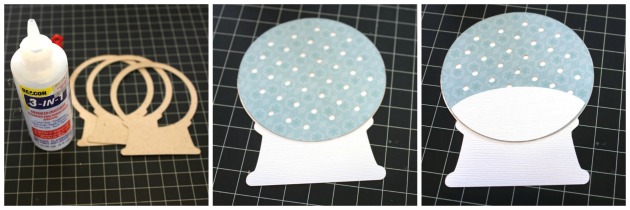
First glue the layers of chipboard together.  Set those aside to dry.  Next, add the blue background piece (with the holes) to the Snow Globe Base.  Add the Snow “mound” piece, making sure the bottom is aligned with the bottom of the blue background.

Add the chipboard layers over the whole base.  Next, add the print and cut Snow globe base piece.  While this is drying, assemble your snowman.  Just a hint, the black piece of the snowman is sandwiched between the white body and the brown arms piece.  Add your snowman to your shaker card as shown.  Let the pieces dry completely.  You don’t want your confetti pieces sticking to any leftover wet glue.

Once your base is dry, add in the confetti snowflakes.  I also added in a few white and silver sequins, but be careful not to add too much, you want things to be able to “shake!”  Once your confetti is added, glue the piece of acetate over the globe. ( I used overhead transparencies purchased at my local office supply store)  Don’t overdo with the glue, it will squeeze out and stick to your confetti pieces.  Add the red ring over the transparency piece and your globe is done!  Add the background piece to your card, and then add the snow globe to the background.

It really is pretty easy to put together,  and the results are so cute!  That’s it for me today, thanks for stopping by to peek!