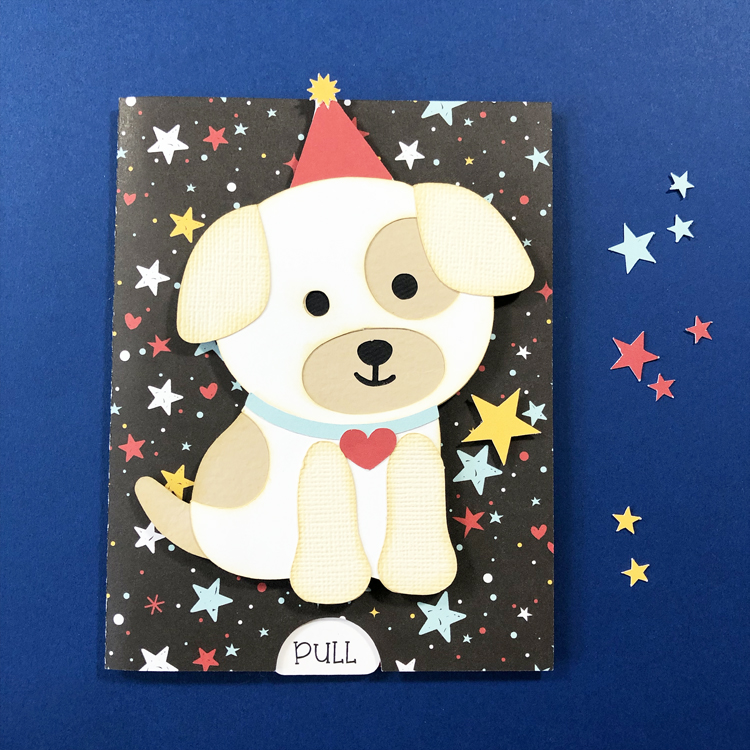
Hello friends, Marcia here today. I have a fun interactive double slider card tutorial for you today. These are super fun to make as well as receive. There are lots of double slider card designs in the store. I made the Birthday Dog card (SVG, Silhouette) which I thought would appeal to the one year old who received it.

When the “PULL” tab is pulled, the dog’s birthday hat lifts off his head revealing the Happy Birthday sentiment. So cute!

Let me show you how to make one yourself.
1. Choose your cardstock or pattern papers and cut out all the pieces. I used the Silhouette print and cut feature to print “Happy Birthday” and “PULL” before cutting out these pieces. Assemble the dog, backing the eyes and nose with the black circle, then add the white head and body over the top of the base dog. Top with the dog ears and front paws. Finally add the collar and the heart tag.

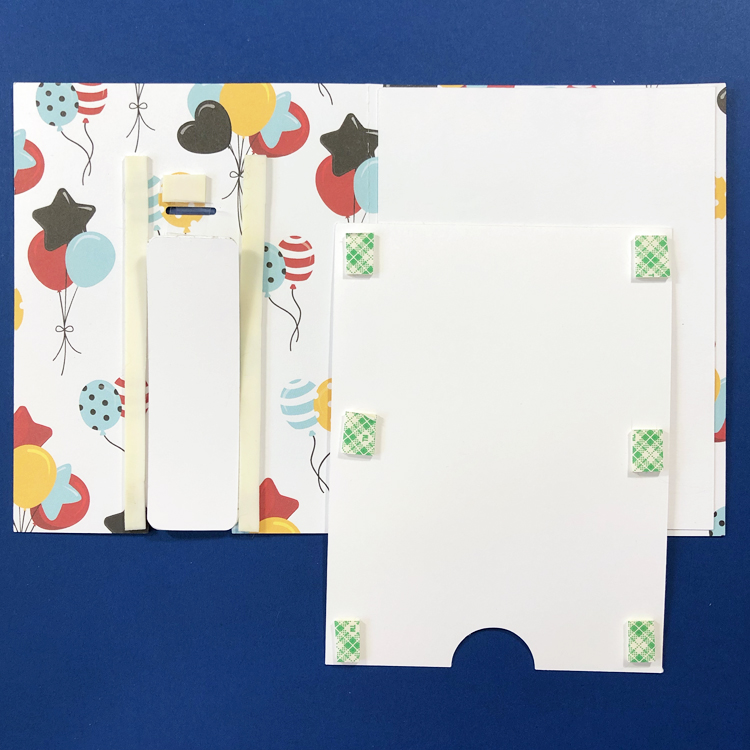
2. Cut 2 of the Pull tabs. Only one needs to have the printed PULL on it. These will be glued together to make the tab stronger. I also printed two white inserts to allow me to sign the inside of the card since the pattern paper is quite busy. Adhere one of the white inserts to the right inside portion of the card.

3. You will need to cut a strip of plastic packaging and insert it into the two slits as shown on the inside front of the card.
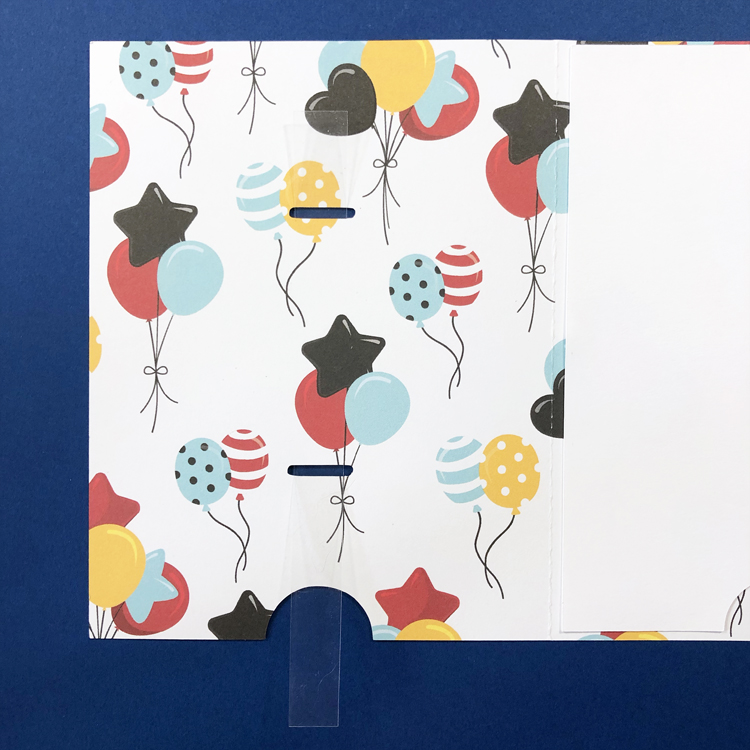
4. Use a piece of double sided tape to adhere the two ends together. The pull tab is attached to the other side of the double sided tape. Make sure the PULL text faces the front of the card. The plastic strip should be loose enough to slide easily. Test the mechanism.
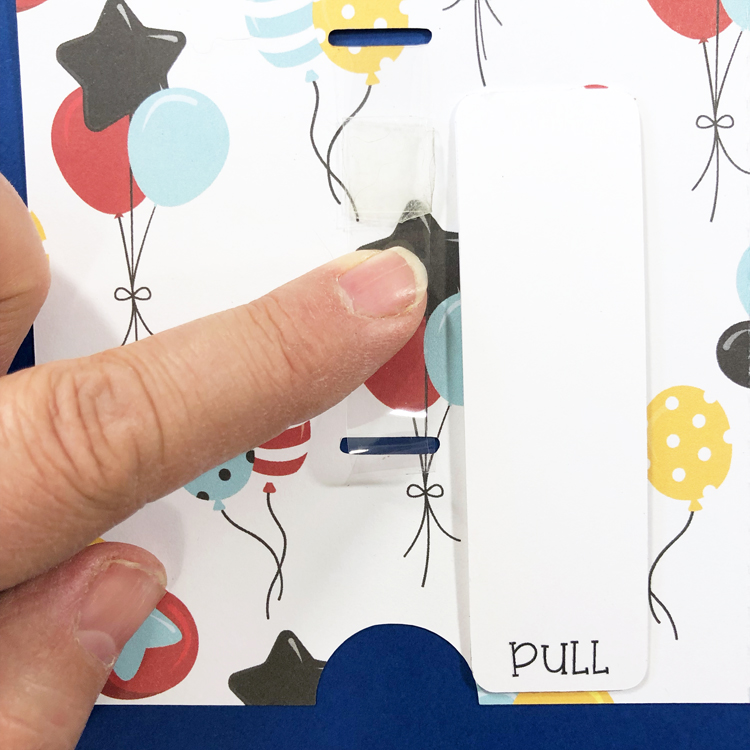
The front of the card now has a sliding plastic strip between the two slits.
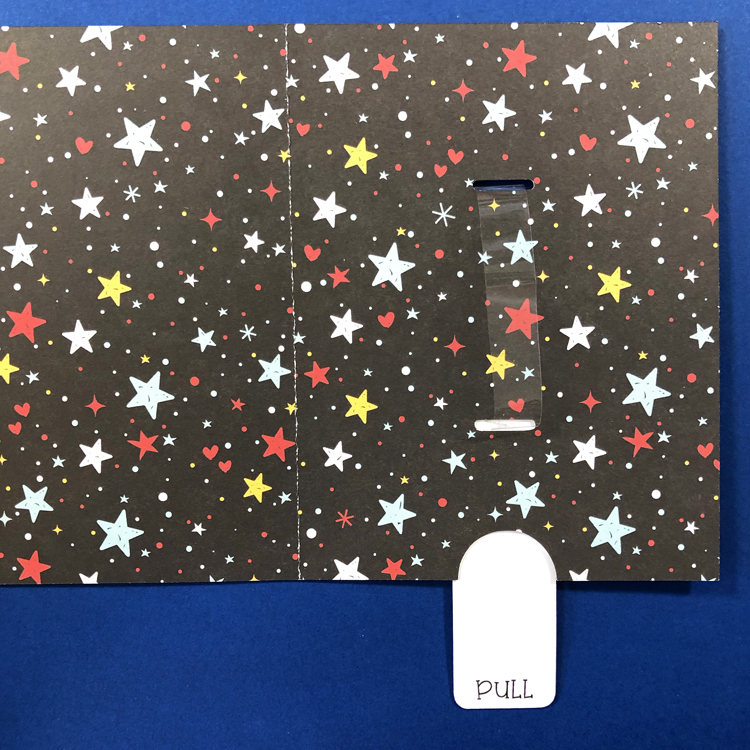
5. To keep the pull tab from wobbling, add foam tape strips on both sides. Mount the white insert to hide the sliding mechanism using more foam tape.
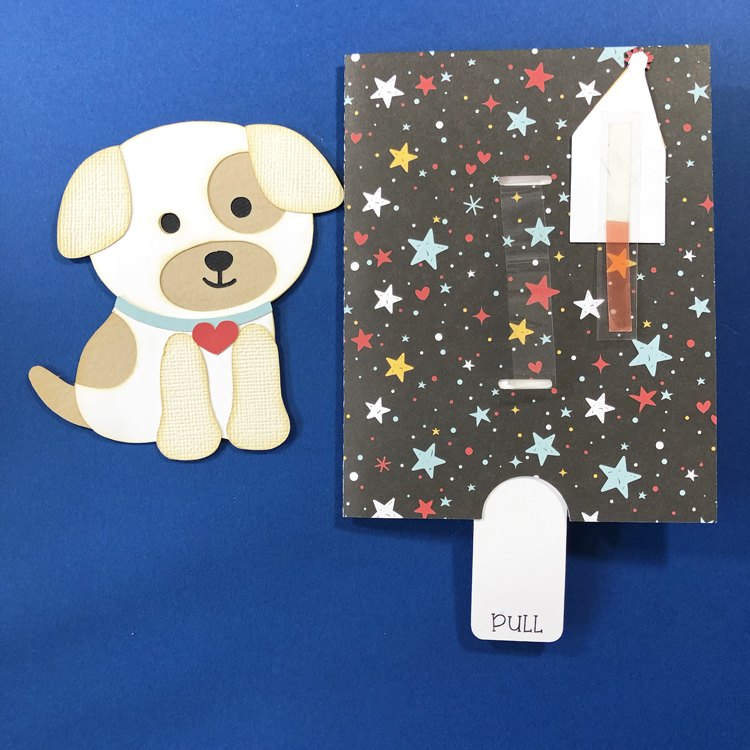
6. Attach the Happy Birthday sentiment to a strip of stiff clear plastic. With the pull tab pulled all the way out, use double sided tape to attach the hat with the sentiment to the top of the sliding strip. Mount the dog over the top using foam tape. Test the mechanism again to make sure it doesn’t catch on anything.
7. Add the cut out stars to the front of the card.
If you get stuck along the way, there is also a YouTube tutorial here.
Check out all the other Double slider cards in the store. Thanks so much for stopping by.
~Marcia