Pillow Box with Curved Handle Tutorial

Hi there friends! Today I am sharing a quick little treat idea for all the back to schoolers. I used the Pillow Box with Curved Handle (SVGSilhouette) and the School Stickers (SVGSilhouette).

Once I had everything uploaded to Cricut Design Space I resized the pillow box to 5.5×9.33. I wanted to be adle to fit two boxes on one sheet of 12×12 paper. I also flattened the sticker images and printed them out on plain white cardstock. For the tag I used one out of Cricut Design Space, but here is one from Lori’s site if you need one (SVGSilhouette). I used papers from the School Rules collection by Echo Park Paper Co.


I cut four pillow boxes and two sets of the stickers. I also punched some tiny hearts. I layered up some of the stickers on the tags leaving room at the top for the recipient’s name. I used a liquid glue to attach everything because I didn’t use a sticker paper. For the box I pre folded the score lines as mountain folds. I then added glue to the inside of the box on just the handle.


After the glue was dry I folded in all of the side tabs.
I then used some bakers twine to attach the tags. I filled my boxes with a rice crispy treat and a little note for each kiddo.
This little pillow box is so versatile and great for any occasion all you need to do is change up the papers. Definitely worth having a few in the file library. Thanks for stopping by today and happy back to school!

Brandie

Gift Card Tag Santa Tutorial

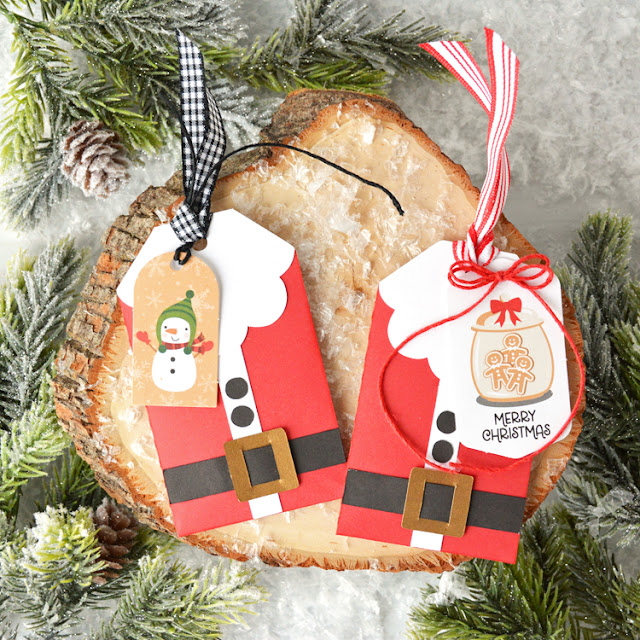
Hello everyone, Marcia here.  Christmas is creeping up. I am a big fan of giving gift cards so my recipients can pick out their own gift but I like to make gift card holders to put them in. I selected the Gift Card Tag Santa (SVGSilhouette) to make for my gift cards this year.  There is a pocket on the back side of this tag that holds the gift card. I used Lori’s Have a Holly Jolly Christmas collection to create my tags.

These are really easy to assemble. Let me show you how.

1. Cut out the pieces from the desired pattern paper or cardstock.

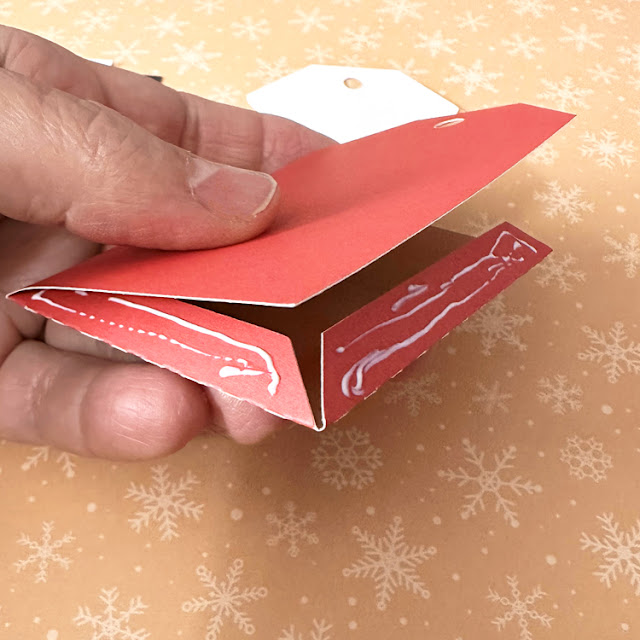
2. Fold the tag along the score lines folding the flaps up. Apply glue to the flaps and adhere to the back of the tag to form the pocket.

3. Adhere the white beard and Santa suit trim to the top of the tag.

4. Slip the black belt through the belt buckle and adhere to the bottom of the tag. Add the two black buttons above the belt on the white trim.

5. Add ribbon or other embellishments as you wish.


Check out Lori’s other gift card holder designs in the store and make some of your own. Thanks so much for stopping by.
~Marcia