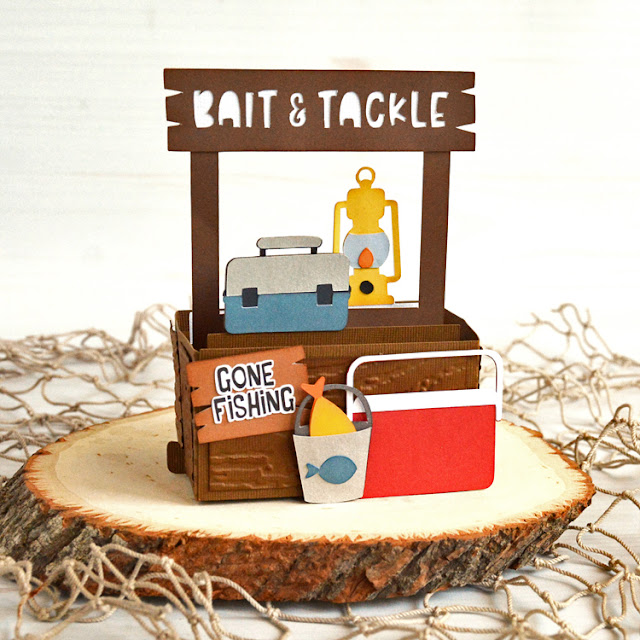
Hello everyone, Marcia here today. I made this fun masculine pop-up card for my son. This Fishing Stand Pop-Up Card is perfect for your fishing enthusiasts and is available here (SVG, Silhouette).
This card has a lot of pieces but is not that difficult to assemble, let me show you how…
1. Cut out all the pieces from the desired color cardstock and pattern papers. I like to use cardstock for the base to ensure stability and lighter weight pattern/solid papers for layering. To give your shapes some dimension, ink the edges. We are going to proceed to assemble the card doing the inside inserts first.
2. Use the photo below as a guide for which piece goes where. Take care not to throw away the inside pieces of your sign’s letters if you want to add them back. I forgot to save mine and decided it was ok to leave them out.
3. Next we are going to ink and assemble the icons for the front of the fishing stand.
I used the Print and Cut feature in Silhouette for the Gone Fishing sign.
Be sure to adhere the larger fish in the bucket before adding the front of the pail.
4. I decided to emboss the panels for the card base with a woodgrain embossing folder from Sizzix.
5. I applied some distress ink to the top of the panels to bring out the woodgrain texture even more and then adhered them to the long base strip.
6. Let’s assemble the base next. Fold on all score lines and glue the center piece together as shown below.
7. Find the card insert labeled “2” and insert it through the middle slit face down. Adhere the tab to the middle of the base.
8. Find the card insert labeled “3” and insert it face down through the tab closest to you. Fold the tab up and apply glue to bottom of the tab. Adhere to card base just above the tab at the bottom.
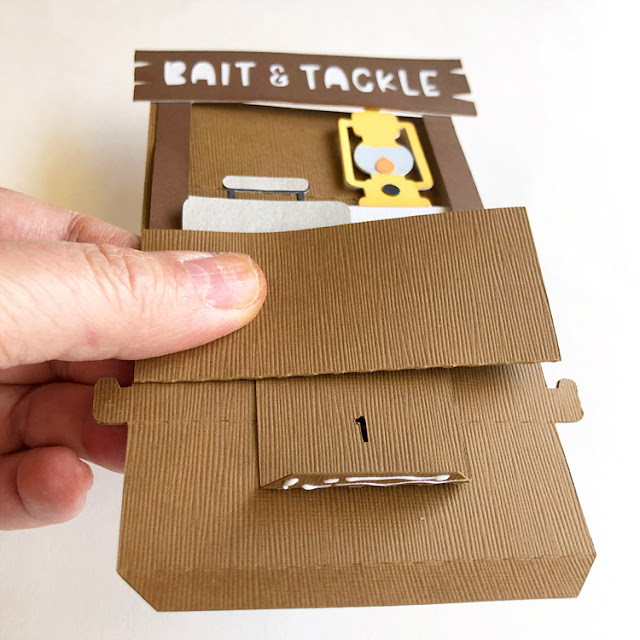
9. Flip the card over. Find the insert labeled “1” and insert it face up through the slit in the base. Fold the tab up and apply glue to the bottom of the tab. Adhere it to the card base.
10. Your card inserts should be adhered as shown below.
11. Glue the bottom tabs to the front and back of the card base.
12. Fold the panel strip creasing the cardstock at all the perforations. We are going to adhere the panel strip lining the edge of the strip up with the edge of the card. Leave the edge unglued about 1/4″ so we can tuck the other end of the panel strip underneath later. Wrap the sides closely around the base sliding the panel into the tab sticking out from the bottom. It helps to fold the card flat by pushing the inserts down into the base so you can ensure a good adhesion when gluing the front and back panel strip to the base.
13. Adhere the back of the card to the panel strip and continue to wrap it around the other side of the card coming back to the front. Apply glue to both sides of the tab and slide the tab between the front panel strip and the card base.
14. Add the fishing icons to the front of the stand. You can use foam tape to pop some of the icons out from the base.
Lori has lots of other fun pop-up cards in her shop. Go check them all out.
Thanks so much for stopping by
~Marcia


